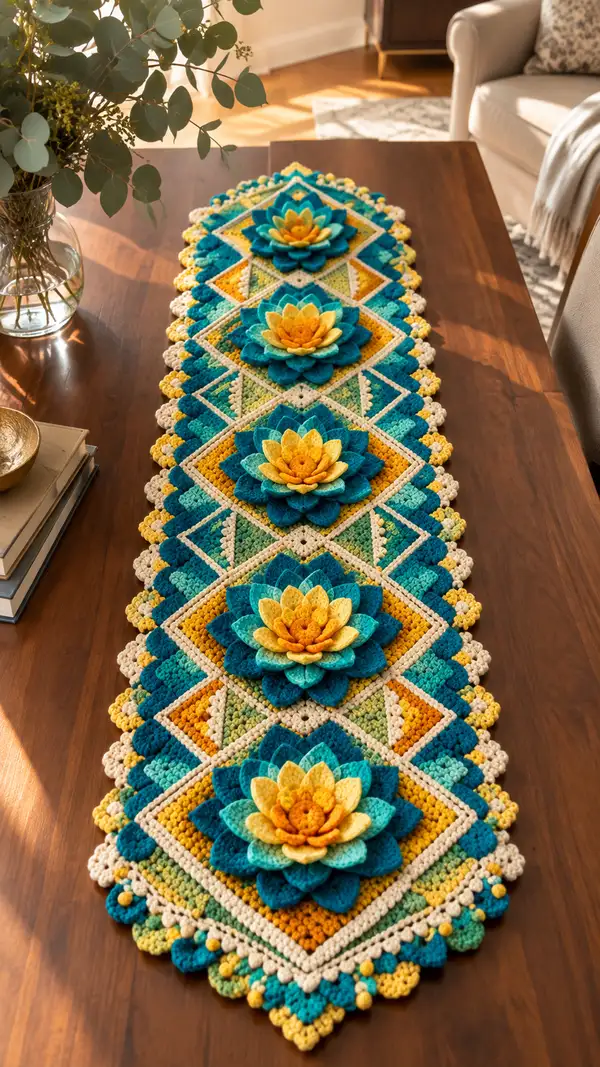
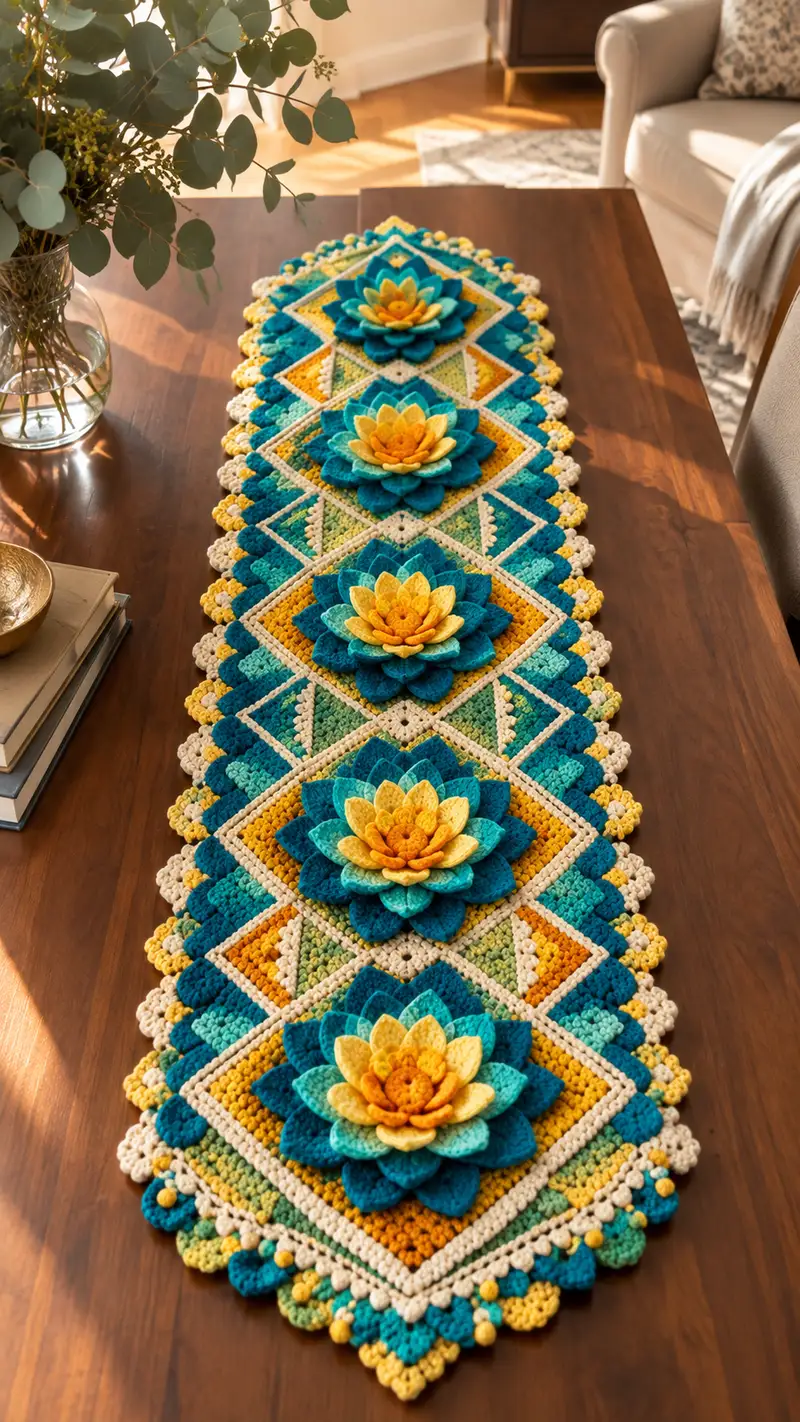
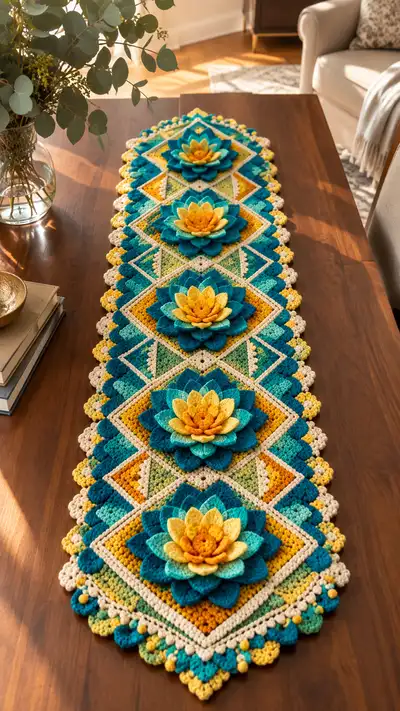
A bright, layered table runner featuring five diamond motifs topped with plush layered lotus flowers. This runner showcases teal, aqua, golden yellow and cream yarns with scalloped borders and bobble accents. Each diamond is worked in color blocks with textured stitches to create visual depth and the detachable lotus flowers add a three-dimensional focal point. Perfect for brightening a dining table or as a striking centerpiece for any season.
Progress Tracker
0% Complete
— Notes & Overview :
Info :
This runner is made from modular diamond motifs arranged in a straight line and finished with a scalloped bobble border. Each diamond motif is worked flat in the round as a square rotated 45 degrees (diamond orientation). A layered lotus flower is constructed separately and sewn to the centre of each diamond. The pattern instructs how to make one diamond and one lotus, then repeat as many times as needed. Gauge is not critical but affects final size; the finished pictured runner with five diamonds measures approximately 52-56in (132-142cm) long and 11-13in (28-33cm) wide. Use the same weight yarn throughout for cohesive drape.
Info :
Understanding corner increases for a square is essential: corners are worked as (2 sc, ch2, 2 sc) clusters to create 90-degree points when square; when working in diamond orientation these corners become the points at top, bottom and sides. Use stitch markers at each corner to keep increases and color changes aligned.
— Diamond Motif (Make 5 or desired number) :
Round 1 :
6 sc in magic ring (6)
Round 3 :
(1 sc, 1 inc) x 6 (18)
Round 4 :
(2 sc, 1 inc) x 6 (24)
Round 5 :
(3 sc, 1 inc) x 6 (30)
Round 6 :
(4 sc, 1 inc) x 6 (36)
Info :
We have now established a round circle; to create a square/diamond shape we will begin forming corners. Place stitch markers at four evenly spaced points: after rounds to mark corner anchors (every 9 stitches for 36 sts). These markers will be moved each round to the new corner position.
Round 7 :
*Sc 8, (2 sc, ch2, 2 sc) in next st* around placing corner clusters in marker positions (36 plus 4 ch2 corner spaces). Work first round of corner clusters carefully to maintain symmetry.
Info :
After forming the first set of corner clusters, you'll begin to work rows that create the diamond shape. Each side between corners will be built out with sc rounds; to control the angle increase evenly, add 1 sc at the midpoint of each side every other round.
Round 8 :
Work 1 sc in each sc around and work 2 sc into each ch2 corner space (this builds the corner). Count: sides expand slightly; total approx (36 + 4) = 40 effective stitch points (work evenly)
Round 9 :
1 sc in each st (40)
Round 10 :
*(Sc 9, inc) across side to distribute increase evenly, 2 sc in ch2 corner* repeat 4 times (approx 44)
Info :
This is a good point to change to your first motif color block for the inner triangle/diamond section. Fasten off previous yarn and join new color in any corner cluster to work triangular color panels on each side. Carrying yarn inside is optional if not visible.
Round 11 :
Change to color A (golden yellow). Work 1 sc in each st across an entire round, placing 2 sc in each corner cluster (44)
Round 12 :
1 sc in each st (44)
Round 13 :
Change to variegated aqua/green yarn. *Work 1 sc in next 10 sts, 2 sc in corner* repeat 4 times (48)
Round 14 :
1 sc in each st (48)
Round 15 :
Change to teal main color. Work 1 sc in each st BLO for a subtle ridge (48)
Info :
Working in BLO will create a ridge that reads as a diagonal line on the diamond surface—this helps delineate the triangular color panels. Keep stitch markers at the four corner clusters so you can clearly identify where to make increases for shaping and where to place decorative stitches later.
Round 16 :
1 sc in each st (48)
Round 17 :
(6 sc, inc) x 6 (54)
Round 18 :
1 sc in each st (54)
Round 19 :
*(7 sc, inc) x 6* (60)
Info :
At this stage the diamond is broadening into a full square shape. If you prefer a slightly smaller diamond, omit round 19 and continue even rounds until you reach the desired dimension. The pictured runner uses larger diamonds for a bold look.
Round 20 :
1 sc in each st (60)
Round 21 :
Change to cream border color. Work 1 sc in each st (60)
Round 22 :
Work 1 hdc in each st for slightly raised texture (60)
Round 23 :
1 sc in each st (60)
Round 24 :
Edge shaping: *(Sc 8, sc2tog) across side, 2 sc in ch2 corner* repeat (reduces minorly to maintain diamond point shape) (approx 56)
Info :
Fasten off and weave in ends neatly or leave long tails for joining. Block each diamond lightly to square up and flatten the piece before joining. Blocking ensures the corners align and the centre hole is the right proportion for sewing the lotus base later.
— Lotus Flower Base (Make 5) :
Round 1 :
6 sc in magic ring with mustard/golden yarn (6)
Round 3 :
(1 sc, 1 inc) x 6 (18)
Round 4 :
(2 sc, 1 inc) x 6 (24)
Round 5 :
1 sc in each st (24)
Info :
This small, flat disc is the structural base for the layered petals. Keep it flat; do not stuff. You may apply a small felt disc or fusible fleece cut to 2.5in diameter to the back for extra stability before sewing the lotus to the diamond centre.
Round 6 :
Change to light aqua for the first petal joining round. *Ch3, skip next st, sl st in next, repeat around to make 12 loops* (12 loops)
Round 7 :
Work in each loop: (sc, hdc, 2 dc, hdc, sc) around to form 12 small petals. Fasten off and weave tail toward the back (12 petals)
Info :
These first petals are the inner, small petals. Keep them slightly upright by sewing the base of each petal to the centre using short whip stitches to hold the petal's base close. Do not over-sew which flattens the petal shape.
— Lotus Petal Layer 2 (Make 8 medium petals) :
Round 1 :
With turq/teal yarn, ch6, join with sl st to form ring for a single petal; ch1 counts as first st (this petal module will be worked as a small motif repeated) (foundation loop)
Round 2 :
(sc in next 2 ch, hdc in next, dc in next 2 ch, hdc in last ch, sc in final) sl st into ring to close - finish petal shape. Fasten off leaving a tail for sewing. Make 8 petals (each petal approx 8 sts)
Info :
Make 8 medium petals of this size. When sewing petals to the base, overlap each medium petal between two inner petals to create a staggered layered look. Placement should be evenly spaced around the base (every 3 scarf points on the base = 12 inner, so place medium petals between them).
— Lotus Petal Layer 3 (Make 8 large petals) :
Round 1 :
With deep teal, ch8, join to ring; ch1 (foundation)
Round 2 :
(sc2, hdc2, dc3, hdc2, sc2) sl st to close petal. Fasten off leaving tail. Make 8 petals (each petal wider than layer 2)
Info :
Large petals give the flower its silhouette. Slightly curve each petal by sewing the base tighter than the tip so the petal stands up at an angle. Use the yarn tail to stitch the base of each petal around the outer ring of the flower disc, securing evenly and staggering relative to the smaller petals.
— Optional Extra Petal Layer (Make 8 extra-small contrast petals) :
Round 1 :
With mustard, ch5 join; (sc, hdc, dc, hdc, sc) sl st and fasten. Make 8 and sew between the smallest inner petals near the centre for pops of color (8)
Info :
This tiny accent layer is optional but creates the warm golden centers seen in the photo. Trim tails close on the back and use small applique stitches to secure. If you prefer a flatter flower, skip this layer.
— Flower Assembly :
Round 1 :
Arrange the inner disc, small petals, medium and large petals in order. Start by tack-stitching the small inner petals to the disc at evenly spaced intervals (12 small petals). Use a matching thread color for invisible stitches.
Round 2 :
Place medium petals between small petals and stitch only at the base, allowing the petal tips to overlap the small petals. Maintain consistent spacing so the flower reads symmetrical when viewed from above (8 medium petals sewn between smalls).
Round 3 :
Sew large petals around the medium layer, staggering placement so they sit above and offset from medium petals. Use small running stitches to cinch the base for a curved petal shape. Secure all tails and hide ends between layers (8 large petals).
Info :
When all petals are sewn, gently shape petals with fingers and steam-block lightly from the front to help petals keep a soft curve. Do not over-steam; a quick steam puff is sufficient. Attach a small felt disc to the flower back for a flat, secure sewing surface before attaching to the diamond motif.
— Motif Joining (Assemble motifs into runner) :
Round 1 :
Lay motifs right side up in a straight line. Align corners so the points touch. Mark corresponding stitches where corners meet (usually 1 point-to-point junction for each adjacent pair).
Round 2 :
Using cream yarn, join motifs by whip stitch or single crochet join: With motifs overlapping at corner points, insert hook through both edges and work sc through both loops along the adjoining sides. Work from one seam to the next corner, then join next motif, keeping tension even.
Round 3 :
When joining five motifs, you will make four joins. Each join should have approximately the same number of sc depending on motif size; expect approx 30-32 sc along each join seam when motifs are at full expansion. Adjust stitch spacing as needed.
Info :
Block the entire joined strip after sewing all motifs together to correct minor distortions. Pin the runner flat and steam or wet block according to yarn fiber instructions. Blocking helps the border sit evenly and eases the addition of the scalloped edging.
— Border Round 1 (Even Round to Prepare Edge) :
Round 1 :
Join cream yarn anywhere along the outer edge; 1 sc in each st around the entire joined runner, working 3 sc in each corner point to maintain shape (counts vary based on motifs joined; expected approx 300-320 sc total around runner)
Round 2 :
Work 1 hdc in each st around to add body to the border (same stitch count) (approx 300-320)
Info :
Place a stitch marker at the midpoint of each long side to help place symmetrical scallops later. Count stitches between markers to ensure scallops will align between motif junctions and corners.
— Border Round 2 (Scallop Setup) :
Round 1 :
*(Sc 3 in next st, skip 2, sc 1 in next, skip 2) repeat to create a small scallop pattern along sides. At corner points work (sc 5 evenly spaced) to create a rounder corner (maintain approx spacing to consume full perimeter)
Round 2 :
Change to teal/accent color for bobble motif rows. *In the center of each scallop, work bobble stitch: yo, insert in st, yo pull up 5 loops, yo pull through 2 loops repeatedly to build bobble; finish by closing as bobble and secure with sl st* Place bobbles in every second scallop for a staggered rhythm.
Info :
Bobble stitch instructions: (yo, insert, yo pull up loop) x 5, yo and pull through all loops on hook, ch1 to secure. If your bobbles are too large for the scallop, reduce the number of loops per bobble to 4. Keep bobbles uniform by practicing on a scrap before adding to runner.
— Border Round 3 (Final Shell and Picot Edge) :
Round 1 :
With cream, work *5 dc in next scallop top, sl st in next st* around to create shell texture (shells in every scallop peak). At each corner work 7 dc to maintain fullness (counts depend on motif spacing).
Round 2 :
Picot round: *Ch3, sl st in 3rd ch from hook (picot), sl st into next dc; repeat across the top of each shell to add an accented picot edging. Fasten off and weave in ends carefully.
Info :
For a decorative, dotted finish, add a contrasting bobble drop under each shell using yellow yarn tied into the base of the shell using a tapestry needle. A small knot pulled to the back and trimmed makes a tiny pom-dot that echoes the floral centers.
— Attaching Lotus Flowers to Motifs :
Round 1 :
Position a finished lotus flower in the centre of a blocked diamond motif. Use a removable pin to test placement—centre the flower so petals sit evenly on all four sides of the diamond.
Round 2 :
From the back, stitch through the felt disc (if used) and the motif center using a tapestry needle and matching yarn. Use small whip stitches spaced every 0.25in around the base, pulling snug but not puckering the motif fabric. Make 6-8 secure passes.
Round 3 :
Weave tails to the back and knot securely. Trim ends and tuck them between the diamond and the felt disc. Repeat for each motif; attach all five flowers along the runner center at the midpoint of each diamond motif's surface.
Info :
Optional: sew a few stitches between petal layers to secure the top petals if you expect the runner to be handled frequently. For a removable flower, sew through the felt base with a few long stitches that can be cut to remove the flower for washing; mark the stubs for reattachment later.
— Finishing Touches & Blocking :
Round 1 :
Gently steam-block the entire runner pinned to proper outlines. Use blocking wires if available along the long edges to keep them straight. Allow to dry fully before removing pins.
Round 2 :
Trim any long ends and weave in all tails at least 1in into the body using a yarn needle. Re-check bobbles and shell edges for loose loops and secure them with small stitches as needed.
Info :
For long-term care, hand-wash or spot-clean only. If machine washing is desired, remove lotus flowers first and place the runner in a garment bag on a gentle cycle with cold water; lay flat to dry to avoid stretching.
— Optional Size Adjustments :
Info :
To lengthen: add additional diamond motifs using the same join method. To shorten: remove motifs before attaching border. To widen: make larger diamond motifs by adding extra rounds of sc before the final border rounds and adjust petal sizes proportionally. Changing to a lighter or heavier yarn will change overall dimensions; swatch a single motif to check sizing before making the full run.
Info :
If you want a reversible runner, make two rows of motifs and join them back-to-back, then attach flowers only on one side or make removable flowers. Keep in mind bobbles and shell edges will read differently on the reverse side.
This table runner pattern combines bold color blocking, tactile texture and layered floral details to create a centerpiece you’ll enjoy making and showing off. Each motif and lotus flower comes together to form a lively, handmade accent full of depth and personality. Whether for a gift or your own home, the process of making each petal and shell is meditative and deeply satisfying—plus the colorful result brightens any table instantly. 🧶🌼✨