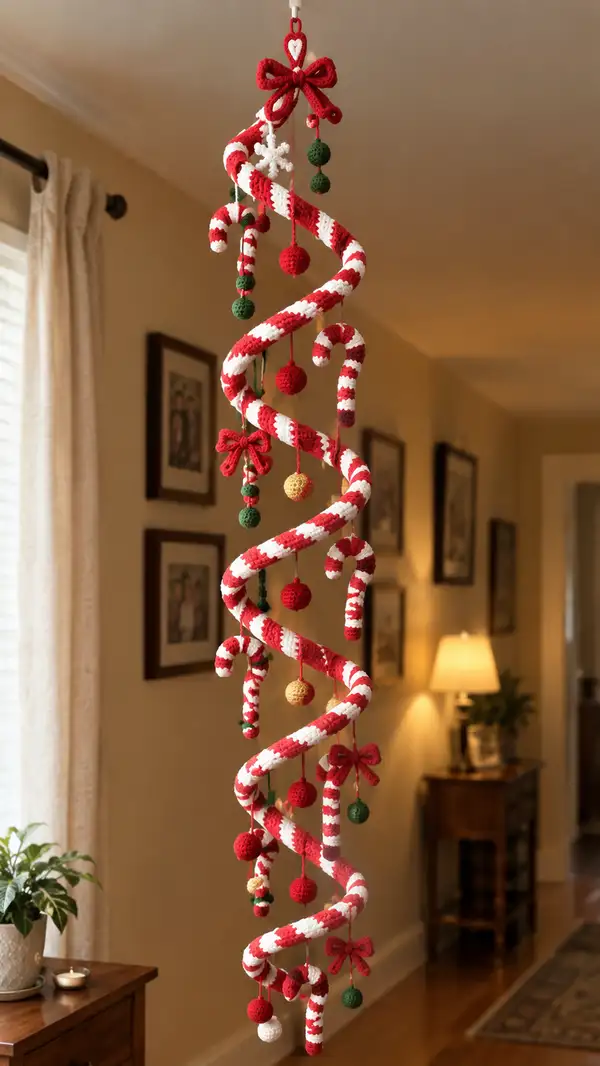
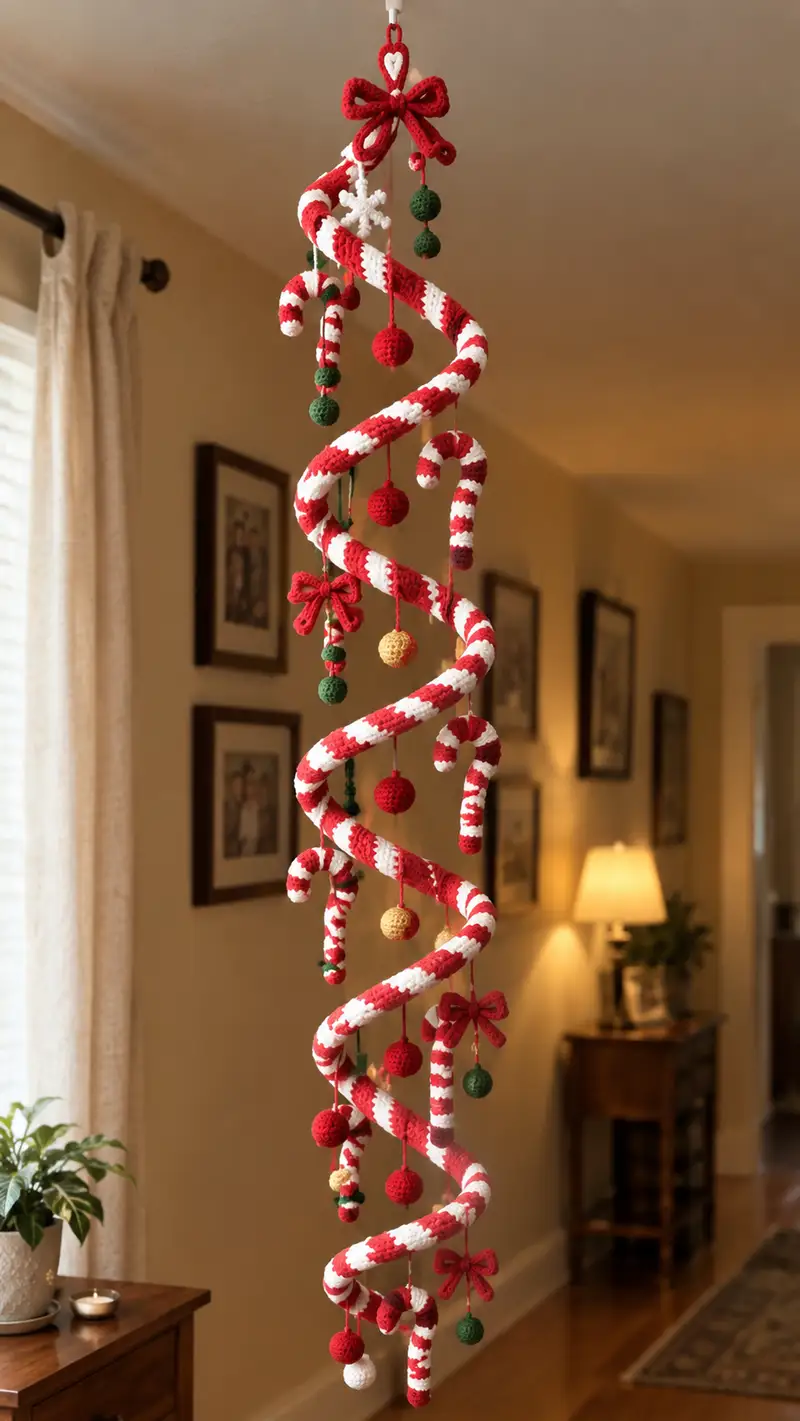
Create a whimsical hanging spiral inspired by classic candy-cane stripes and vintage tree ornaments. This long spiral mobile features alternating red and white crocheted tubing, candy cane dangles, spherical ornaments, bows and a delicate snowflake — all crocheted and assembled into a graceful corkscrew that hangs from the ceiling. The pattern includes options for a wire core or foam core for structure, and step-by-step instructions for every component and assembly detail.
Progress Tracker
0% Complete
— Materials & Prep :
Info :
Decide which core to use before beginning the tubular cover. Two main options: 1) Flexible floral wire core (poseable spiral) wrapped with batting, or 2) Foam pool noodle/PVC pipe core (rigid spiral). The crocheted tube will slide over and be stitched closed along the seam to encase the core. Make a hanging loop at top from yarn or a short metal ring.
Info :
Gauge note: With worsted weight and 3.5mm hook, the tube finished circumference will be 42 sc and the tube height per round is approximately 0.5 cm. Adjust rounds to make the spiral longer or shorter to suit your space. This pattern uses 42-st circumference as the baseline.
— Main Spiral Tube :
Round 1 :
6 sc in magic ring (6)
Round 3 :
(1 sc, 1 inc) x 6 (18)
Round 4 :
(2 sc, 1 inc) x 6 (24)
Round 5 :
(3 sc, 1 inc) x 6 (30)
Round 6 :
(4 sc, 1 inc) x 6 (36)
Round 7 :
(5 sc, 1 inc) x 6 (42)
Info :
You now have a 42-st circumference tube. This will be the standard round count for the remainder of the tube. If you prefer a slightly thinner tube, stop increasing at 36 sts, adapting subsequent counts accordingly. From Round 8 onward maintain consistent stitch count of 42 per round.
Round 8-11 :
1 sc in each st (42)
Info :
Change color at the end of Round 11 to create a thick stripe. For clean transitions, finish the last stitch of the round with the new color and carry the old yarn inside the tube, or leave a 6–8 cm tail to weave in later if covering a core.
Round 12-15 :
1 sc in each st (42)
Round 16-19 :
1 sc in each st (42)
Info :
The pictured spiral has alternating wide red and white stripes. Work 4 rounds per stripe for a bold banded look (as written). To get slightly thicker bands, use 6 rounds per stripe instead. Maintain the same rounds per stripe throughout for an even pattern.
Round 20-23 :
1 sc in each st (42)
Round 24-27 :
1 sc in each st (42)
Round 28-31 :
1 sc in each st (42)
Info :
For the full mobile length pictured (approx 120-140 cm), you will work roughly 150-170 body rounds after the increases. The exact number depends on stripe width and desired spiral height. Below the rounds are enumerated as 'Round 8-167' in grouped blocks to avoid repetition but assume continuous rounds with the same stitch count and stripe change every 4 rounds.
Round 32-35 :
1 sc in each st (42)
Round 36-39 :
1 sc in each st (42)
Round 40-43 :
1 sc in each st (42)
Round 44-47 :
1 sc in each st (42)
Info :
At this stage decide where you will place ornament attachment points. The pictured design has six or seven sets of ornaments staggered down the spiral. Use stitch markers to mark those rounds and position stitches where you will pierce the tube to anchor the ornament cords (typically every 12–18 rounds).
Round 48-51 :
1 sc in each st (42)
Round 52-55 :
1 sc in each st (42)
Round 56-59 :
1 sc in each st (42)
Info :
If you are using a foam noodle core: cut the noodle to desired length and wrap it with a thin layer of batting to fill gaps. Slide the finished crocheted tube onto the noodle. If using wire: braid two wires together for extra strength and wrap with duct tape; insert into tube after partially sewing the seam closed (instructions below).
Round 60-63 :
1 sc in each st (42)
Round 64-67 :
1 sc in each st (42)
Round 68-71 :
1 sc in each st (42)
Info :
When you have crocheted approximately 60–80 cm of tube (or half the final desired length), check your work by sliding on the core if available. This lets you confirm diameter, stripe placement and ease of sliding. If it’s tight, block slightly or use larger hook; if loose, consider frogking and reworking with a smaller hook.
Round 72-75 :
1 sc in each st (42)
Round 76-79 :
1 sc in each st (42)
Round 80-83 :
1 sc in each st (42)
Info :
To create a continuous spiral effect when the tube is hung, you will intentionally twist the tube around the core in a corkscrew. The tube should be slightly longer than the core (10–20% extra length) so the fabric compresses slightly and creates the spiral ridge. This is normal and desired for a neat spiral form.
Round 84-87 :
1 sc in each st (42)
Round 88-91 :
1 sc in each st (42)
Round 92-95 :
1 sc in each st (42)
Info :
Mark attachment rounds for ornaments now: use stitch markers at the front-most stitch on the round where each ornament will hang. Typically pick 6–8 evenly spaced attachment rounds along the tube. Each attachment will be a small anchored loop or sewn-in knot to hang chains of ornaments.
Round 96-99 :
1 sc in each st (42)
Round 100-103 :
1 sc in each st (42)
Round 104-107 :
1 sc in each st (42)
Info :
When you reach your desired length (we suggest 120–160 rounds total depending on spiral height), fasten off leaving a 30–40 cm tail for seaming. If you used stripes, finish the last stripe cleanly by completing the final stitch in the new color before fastening off.
Round 108-111 :
1 sc in each st (42)
Round 112-115 :
1 sc in each st (42)
Round 116-119 :
1 sc in each st (42)
Info :
Seam the tube closed along the seam: fold tube edge-to-edge and use whip stitch or mattress stitch with the long tail to create an almost invisible seam. If you plan to slide the tube onto a foam core, leave a 20–25 cm opening at one end, insert the core, then finish seam and close ends securely.
Round 120-123 :
1 sc in each st (42)
Round 124-127 :
1 sc in each st (42)
Round 128-131 :
1 sc in each st (42)
Info :
Top finishing: Create a hanging loop by making a short chain (about 12–18 ch, depending on how low you want the mobile to hang) from the topmost round's outermost stitch and secure with sl st. Reinforce with extra whip stitches around the base of the loop into several rounds for strength.
Round 132-135 :
1 sc in each st (42)
Round 136-139 :
1 sc in each st (42)
Round 140-143 :
1 sc in each st (42)
Info :
Bottom finishing: To create a neat bottom, fold in 4–6 rounds at the bottom edge and slip stitch through both layers to form a small gathered end. Alternatively, make a small tassel or attach a larger ornament at the bottom center for weight.
Round 144-147 :
1 sc in each st (42)
Round 148-151 :
1 sc in each st (42)
Round 152-155 :
1 sc in each st (42)
Info :
Stitch counts: all even rounds maintain 42 sc. If you used a different target circumference, maintain consistent stitch count each round to preserve tube shape. Count often and use markers every 10th stitch to avoid miscounts on long sections.
— Crochet Ornament Balls (Make 8–10 of mixed sizes) :
Round 1 :
6 sc in magic ring (6)
Round 3 :
(1 sc, 1 inc) x 6 (18)
Round 4 :
(2 sc, 1 inc) x 6 (24)
Round 5 :
(3 sc, 1 inc) x 6 (30)
Round 6-9 :
1 sc in each st (30)
Info :
Stuff lightly beginning on Round 7 and continue stuffing as you work higher. Use safety eyes or a small knot if you want a face on some ornaments, but plain stitched balls are the classic look.
Round 10 :
(3 sc, 1 dec) x 6 (24)
Round 11 :
(2 sc, 1 dec) x 6 (18)
Round 12 :
(1 sc, 1 dec) x 6 (12)
Round 13 :
6 dec (6) - fasten off leaving long tail for sewing
Info :
For larger balls, continue increases to 36 sc circumference (add rounds accordingly) and increase the number of even rounds before starting decreases. Add decorative color bands by changing color every 2–3 rounds.
— Mini Candy Cane Dangles (Make 6–8) :
Round 1 :
6 sc in magic ring (6)
Round 3 :
(1 sc, 1 inc) x 6 (18)
Round 4-8 :
1 sc in each st (18)
Info :
Work the straight segment of the candy cane for 8 rounds or until desired length (about 4–5 cm). Change colors to alternate red/white stripes: switch color every 2 rounds for narrow stripes or every 3–4 rounds for wider bands.
Round 9 :
(2 sc, 1 dec) x 6 (12)
Round 10-11 :
1 sc in each st (12)
Round 12 :
Turn: Work 6 sc along the first 6 sts to make the curved tip, sl st across to join to the adjacent round to lock curve (12)
Info :
To shape the hook, bend the crocheted tube gently while stitch tension is still new. If using a wire core within the candy cane, insert thin wire and shape into a hook before closing. Sew the end securely so the cane maintains its curve.
Round 13 :
(1 sc, 1 dec) x 4 (8) - fasten off leaving tail for sewing
Info :
Weave in ends; leave a 15–20 cm yarn tail to use as the hanging cord or tuck a short chain to create an internal hanging loop.
— Little Bows (Make 4–6) :
Round 1 :
Ch 11, sc in 2nd ch from hook and across (10)
Round 2 :
Ch 1, turn, sc across (10)
Round 3 :
Ch 1, turn, sc across (10)
Round 4 :
Fold the rectangle in half and sc through both layers across first and last 2 sts to form bow shape, then wrap a short length of yarn tightly around center and secure with knot
Info :
For a neater look, slip stitch around the bow edges once after wrapping the center. Use a small stitched loop on the back to attach to the spiral with a few whip stitches for security.
— Snowflake Motif (Make 1) :
Round 1 :
Ch 6, join with sl st to form ring
Round 2 :
(Ch 3, dc, ch 3, sl st) x 6 into ring to form six points
Round 3 :
Into each ch-3 loop: (sc, hdc, 2 dc, hdc, sc) - repeat 6 times
Round 4 :
Optional picots: In each outer dc cluster work (sl st, ch 3, sl st) to create tiny points. Fasten off and weave ends.
Info :
Work the snowflake with white cotton or worsted for crisp points. Block on a foam mat if needed to open the points and maintain shape, then attach with a short yarn loop to the spiral.
— Small Bead Stack Pendant (Make 6) :
Round 1 :
6 sc in magic ring (6)
Round 3-5 :
1 sc in each st (12)
Round 6 :
(1 sc, 1 dec) x 4 (8)
Round 7 :
4 dec (4) - fasten off leaving long tail for stacking and sewing
Info :
Make these in green and red and stack two or three beads separated by short chain loops into a vertical pendant. Sew through centers with the long tails to secure the beads to the hanging cord.
— Hanging Cord & Attachment Loops :
Round 1 :
Ch 40 (or desired length for drop) - fasten off and make as many cords as ornament groups you have marked on the tube
Info :
Use single strand for delicate look or triple strands for strength. To hide tails, thread cord through the tube and knot inside the tube then pull the knot snug against the inner wall so it doesn’t slip out.
Round 2 :
Optional: Wrap a short length of metallic thread around the top of each cord for a festive accent; secure with a few tiny stitches on the back of the tube.
Info :
For safety and longevity, double-knot each cord at the base of the ornament and secure with a dab of fabric glue or a few whip stitches through adjacent tube rounds to anchor the weight.
— Candy Cane Tip Detailing (Optional) :
Round 1 :
With burgundy or brown, sc around the last 2–3 rounds of the candy cane ends to create the darker tip effect
Info :
This small contrast adds visual interest and mimics painted wooden candy-can tips as seen in the photo. Use 2–3 rounds of darker yarn and weave in ends securely.
— Final Finishing for All Small Ornaments :
Info :
Weave in all ends, and lightly steam-block pieces that need flattening (bows, snowflake). Stuff balls and small ornaments firmly but not overstuffed so they remain slightly soft.
Info :
Use a long yarn tail to sew each ornament’s top to the hanging cord. Reinforce each attachment by sewing through the tube wall from inside (if accessible) or sew around the outside and stitch into the seam allowance of the tube.
— Assembly & Shaping of the Spiral :
Info :
If using wire core: Insert the prepared wire into the center of the crocheted tube. Secure the wire at top with a few whip stitches through multiple rounds to anchor it; wrap the top end in tape so it is smooth and doesn’t poke through yarn. Shape wire into a loose spiral starting from the top, spacing coils as shown (about 8–12 cm between layers depending on tube length).
Info :
If using foam core: Slide the tube over the pool noodle or pipe. Screw or glue a small dowel into the top of the wood ring/hanger and secure the noodle core with hot glue if necessary. Use pins to adjust the tube so stripes line up as you want and the spiral coils evenly.
Info :
Attach ornament cords at the pre-marked attachment points: bring the cord through the tube wall (use a yarn needle to pierce if needed) so the knot sits inside the tube and won’t show. For stronger hold, pass the long tail back through several rounds and knot again.
Info :
Balance the mobile by alternating heavier ornaments (stacked beads, balls) with lighter ones (bows, candy canes) around the spiral. Stand back frequently during assembly and adjust lengths so ornaments hang mid-air and do not collide with neighboring coils.
Info :
Hang the mobile from a ceiling hook or a decorative ring, and test stability for several hours. If coils droop, adjust wire tighter or add a small weight at the very bottom center to pull the spiral taut.
This spiral holiday mobile turns basic stitches into a show-stopping, sculptural decoration — perfect for hallways or entryways! The pattern blends simple amigurumi techniques and tubular crochet to produce durable, customizable ornaments that hang in a graceful corkscrew. I hope you enjoy stitching the stripes, assembling the ornaments, and shaping the spiral; it’s a rewarding project that looks gorgeous from every angle. 🎄🧶✨