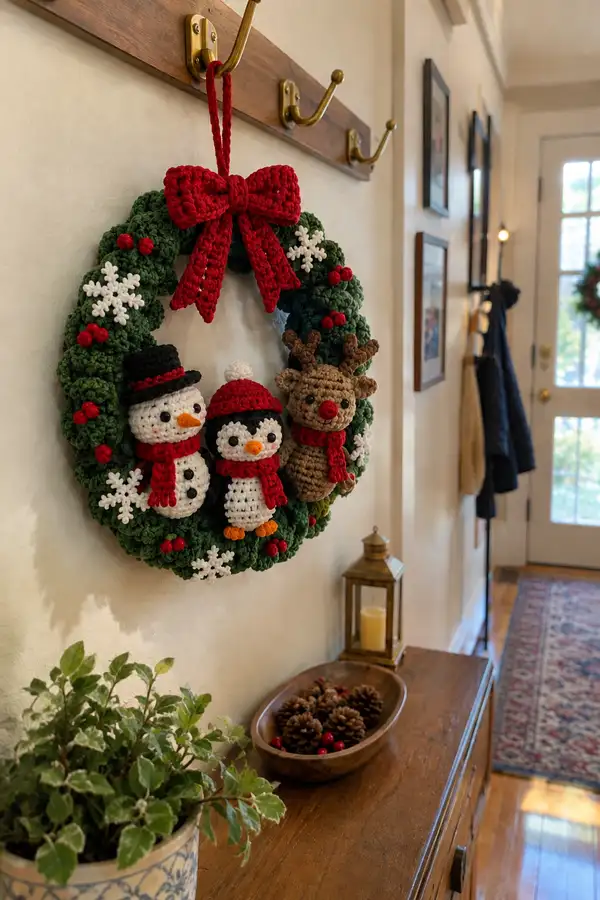
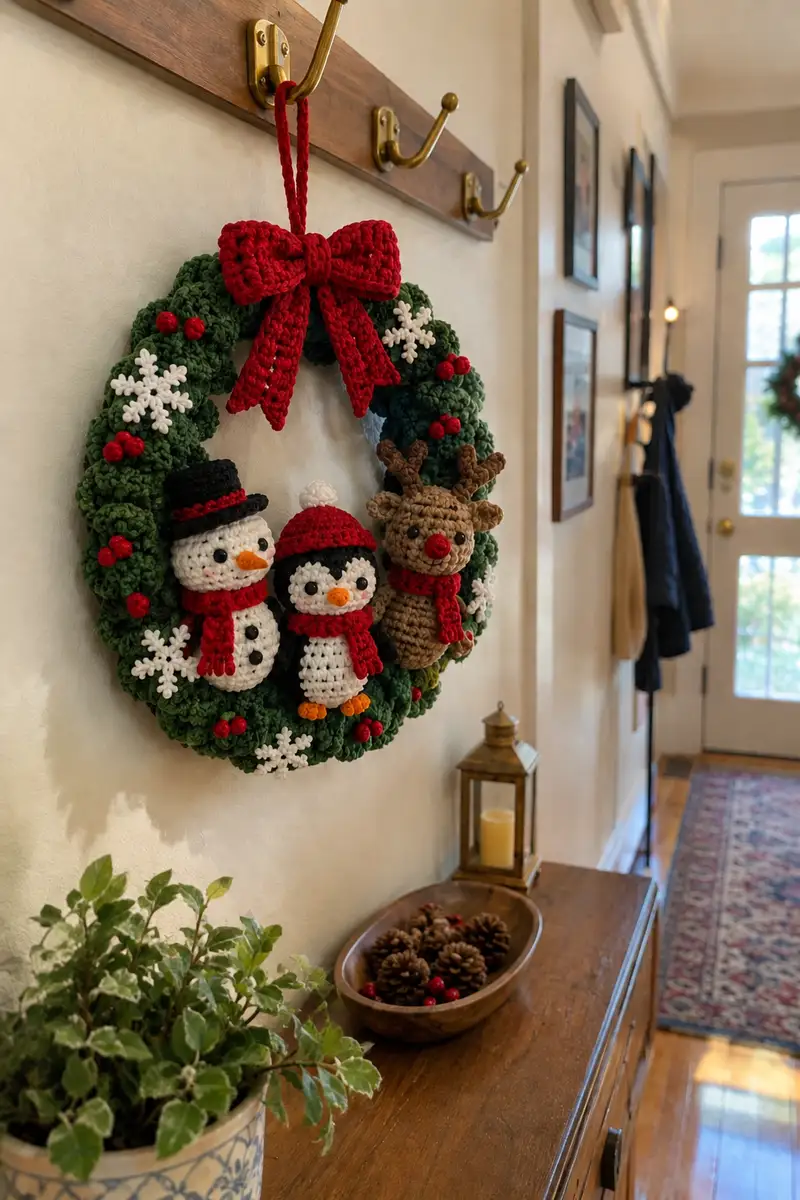
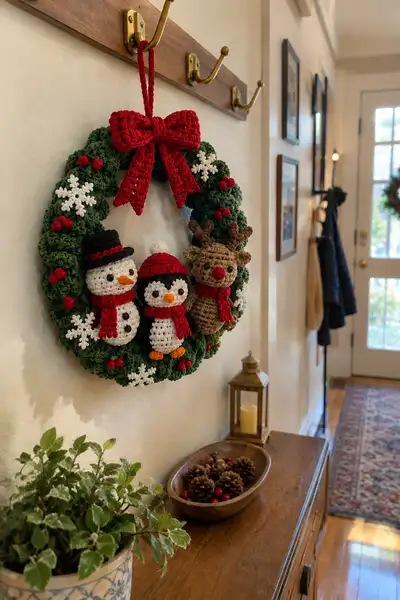
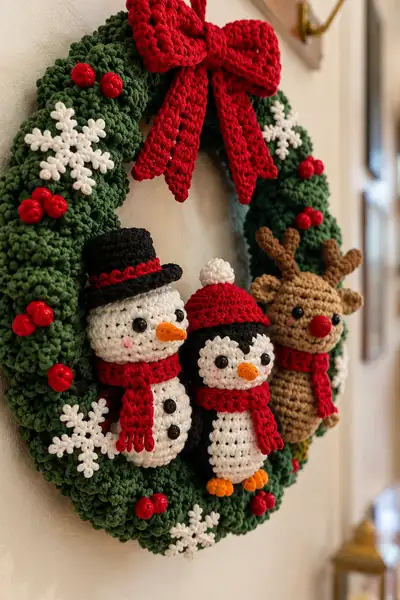
Create a festive crochet wreath decorated with three adorable amigurumi characters: a snowman, a penguin, and a reindeer. This pattern includes a textured green wreath base, a large red bow, small snowflakes and berries, and fully formed plush characters with hats, scarves and antlers. The finished piece is perfect for a door or wall display and uses bright holiday colors for a cheerful seasonal accent.
Progress Tracker
0% Complete
— Wreath Base :
Round 1 :
Make a ring of 12 sc around a 25cm diameter foam ring OR start with a magic ring and 12 sc to form a small circle to later attach to a ring (12)
Round 2 :
Work 2 sc in each st around (24)
Info :
If you are covering a foam wreath, work rounds flat, sewing each round to the foam as you go. If making a crochet-only wreath, continue forming a deep tube with rounds to create a 3-4 cm thick wreath shape
Round 3 :
(1 sc, inc) x 12 (36)
Round 4 :
(2 sc, inc) x 12 (48)
Round 5 :
1 sc in each st (48)
Round 6 :
1 sc in each st BLO (48)
Info :
Working in the BLO creates a subtle ridge inside the wreath that helps the bobble clusters sit outward. This also creates a seam to align later pieces
Round 7 :
1 sc in each st (48)
Round 8 :
(6 sc, inc) x 6 (54)
Round 9 :
1 sc in each st (54)
Round 10 :
(7 sc, inc) x 6 (60)
Round 11-14 :
1 sc in each st (60)
Info :
Now we will begin the textured clustered greenery. You will make puff clusters or 3-loop popcorns working into the same stitch to simulate evergreen sprigs. Decide which cluster technique you prefer before starting
Round 15 :
*work 5-dc puff into next st, sl st into next st; sc in next 2 sts* rep around (approx 20 puffs, remaining sc as needed to keep round even)
Round 16 :
sc in each st and sl st into top of each puff to secure (60)
Round 17 :
*in next st make (ch1, (yo, insert, pull up loop) x3, yo, pull through all loops) to make a 3-loop puff, sl st next st; sc next 2 sts* rep around
Round 18 :
sc in each st (60)
Info :
Alternate puff clusters with regular sc rows to build height and fullness. For a thick wreath, repeat texture rounds until wreath reaches 4-5 cm depth.
Round 19-24 :
Repeat Rounds 15-18 alternately (approx 6 rounds of texture total). End with a sc round to even stitches (60)
Round 25 :
Insert a second tube if making a double-thickness wreath: ch 1, join to inner edge and work sc evenly around inner edge to join tubes, or overlap and whipstitch to foam
Info :
Pin the tube to a foam ring and sew through the foam every few stitches if using foam to keep it secure. If crocheting a free-standing wreath, using two tubes joined together gives the rounded profile shown in the photos
Round 26 :
Fasten off leaving a long tail. Weave in later after attaching additions (long tail can be used to help sew on bow and characters)
— Large Bow :
Round 1 :
With red yarn ch 31, join with sl st to form a ring without twisting
Round 2 :
ch1, sc in each ch around (31)
Round 3 :
1 sc in each st FLO (31)
Info :
Work several rows to create a long rectangular band which will be gathered to form the bow. The photos show a wide bow approximately 10cm tall so build height accordingly
Round 4-12 :
1 sc in each st (31) (work 9 rows total)
Round 13 :
Fasten off leaving long tail. Fold rectangle in center and gather tightly with tail to create the bow shape. Wrap a short length of yarn around center and secure
Bow Tails :
Make 2 tails: ch 25, sc back across chain, 8 rows tall, fasten off and shape by decreasing tip: last row hdc, sc, sl st to create point. Attach tails behind bow and sew to wreath top
Info :
Create a hanging loop by chaining 50 with red yarn and attaching to the top of the wreath, or use a pre-made hook
— Snowflake Motif (Make 6-8) :
Round 1 :
With white yarn, make mr, ch3 (counts as dc), 11 dc into mr, sl st to top of ch3, fasten off and pull tight (12)
Round 2 :
Join white into any dc, *(ch4, sl st into next dc) repeat from * around to make 12 picots. Fasten off and weave ends
Round 3 :
For a layered snowflake: join again and work sl st to a picot, ch6, sl st into picot 2 away, rep to create small spokes. Fasten off
Info :
Sew snowflakes flat to the wreath using matching yarn. Block lightly with steam if needed to open up the arms
— Berries (Make 18-24) :
Round 1 :
With red yarn make mr, 6 sc in mr (6)
Round 2 :
1 sc in each st (6). Fasten off leaving tail for sewing. Slightly stuff to keep round shape
Info :
Group berries in clusters of 2-3 and sew to wreath; use a dab of glue inside for extra security on decorative items
— Snowman Head :
Round 1 :
6 sc in magic ring (6)
Round 3 :
(1 sc, 1 inc) x 6 (18)
Round 4 :
(2 sc, 1 inc) x 6 (24)
Round 5 :
(3 sc, 1 inc) x 6 (30)
Round 6 :
(4 sc, 1 inc) x 6 (36)
Round 7 :
(5 sc, 1 inc) x 6 (42)
Round 8 :
(6 sc, 1 inc) x 6 (48)
Round 9-12 :
1 sc in each st (48)
Info :
Place 8mm safety eyes between rounds 10 and 11, spaced approximately 8-10 sts apart depending on desired expression. Mark center for nose placement
Round 13 :
(6 sc, 1 dec) x 6 (42)
Round 14 :
(5 sc, 1 dec) x 6 (36)
Info :
Begin stuffing head firmly now but do not overfill; face should remain slightly soft for sewing to body
Round 15 :
(4 sc, 1 dec) x 6 (30)
Round 16 :
(3 sc, 1 dec) x 6 (24)
Round 17 :
(2 sc, 1 dec) x 6 (18)
Round 18 :
(1 sc, 1 dec) x 6 (12)
Info :
Fasten off leaving long tail for sewing. Finish stuffing and close opening securely. Embroider small blush or sew felt cheeks as seen on the snowman
— Snowman Body (Stacked 3-Ball Body) :
Round 1 :
Make base ball A (bottom): 6 sc in magic ring (6)
Round 3 :
(1 sc, inc) x 6 (18)
Round 4 :
(2 sc, inc) x 6 (24)
Round 5 :
(3 sc, inc) x 6 (30)
Round 6-10 :
1 sc in each st (30)
Info :
Stuff bottom ball firmly so the wreath supports it; continue to form mid and top balls slightly smaller to stack snugly
Round 11 :
(3 sc, dec) x 6 (24)
Round 12 :
(2 sc, dec) x 6 (18)
Round 13 :
(1 sc, dec) x 6 (12)
Round 14 :
Fasten off leaving tail for sewing to middle ball
Middle Ball (torso) Round 1 :
6 sc in mr (6)
Round 3 :
(1 sc, inc) x 6 (18)
Round 4 :
(2 sc, inc) x 6 (24)
Round 5-8 :
1 sc in each st (24)
Round 9 :
(2 sc, dec) x 6 (18)
Round 10 :
(1 sc, dec) x 6 (12)
Round 11 :
Fasten off leaving tail for sewing. Stuff lightly and sew to bottom ball, then attach head to top of middle ball with whip stitch making sure alignment places eyes facing front
Info :
Buttons: use small black beads or tightly crocheted black circles (6 sc in mr, fasten off) and sew onto middle and bottom ball as shown
— Snowman Hat :
Round 1 :
With black yarn, 6 sc in mr (6)
Round 3 :
(1 sc, inc) x 6 (18)
Round 4-6 :
1 sc in each st (18)
Round 7 :
Switch to red: (3 sc, inc) x 4 + (2 sc) to make a decorative band and flat brim, total approx (18)
Round 8 :
Fold brim and sl st around base to create a rounded top. Fasten off and sew hat onto head between rounds 10-11
Info :
Use slight stuffing or a small felt disc to maintain hat shape if desired; align hat slightly to one side for personality
— Snowman Scarf :
Row piece :
With red yarn ch 30, sc in each ch across, work 6 rows. Add fringe by making 5 loops of ch3 at each tail edge and pulling through to create tassels. Wrap around neck and sew ends behind
Info :
Scarf can be made narrower (ch20) for a tidier look or longer for a loose drape. Use BLO on first row of scarf to create ridged texture if desired
— Penguin Head :
Round 1 :
6 sc in magic ring (6)
Round 3 :
(1 sc, inc) x 6 (18)
Round 4 :
(2 sc, inc) x 6 (24)
Round 5 :
(3 sc, inc) x 6 (30)
Round 6 :
(4 sc, inc) x 6 (36)
Round 7-11 :
1 sc in each st (36)
Info :
Penguin has a black head with white face front; place safety eyes between rounds 9 and 10, about 7-9 sts apart. For a rounded forehead, add 2 extra rows before face shaping
Round 12 :
Switch to white yarn: work 10 sc across front arc to form face, then rejoin black for remainder. (maintain total 36)
Round 13-15 :
1 sc in each st (36)
Round 16 :
(4 sc, dec) x 6 (30)
Round 17 :
(3 sc, dec) x 6 (24)
Round 18 :
(2 sc, dec) x 6 (18)
Round 19 :
(1 sc, dec) x 6 (12)
Round 20 :
6 dec (6). Fasten off leaving tail for sewing. Stuff lightly and close
Info :
Embroider a small V of black at the top of the white face to imitate the penguin's down curl if desired, and blush cheeks lightly with fabric paint
— Penguin Body :
Round 3 :
(1 sc, inc) x 6 (18)
Round 4 :
(2 sc, inc) x 6 (24)
Round 5 :
(3 sc, inc) x 6 (30)
Round 6-12 :
Work in black: 1 sc in each st for 7 rounds (30)
Round 13 :
Switch to white for belly: sc 12 across front, continue black for rest to keep 30 total
Round 14-18 :
1 sc in each st (30)
Round 19 :
(3 sc, dec) x 6 (24)
Round 20 :
(2 sc, dec) x 6 (18)
Round 21 :
(1 sc, dec) x 6 (12)
Round 22 :
6 dec (6). Fasten off leaving long tail for sewing. Stuff and close securely
Info :
Sew head to body aligning so face centers between wreath opening; add orange feet by crocheting 2 small semicircles (6 sc in mr, flatten, sc across one edge for 3 rows) and attach under body
— Penguin Beak & Feet :
Beak Round 1 :
With orange yarn 6 sc in mr (6)
Round 2 :
(1 sc, inc) x 3 (9)
Round 3 :
1 sc in each st (9). Fasten off leaving long tail. Fold and sew base to head between eyes
Feet :
Make 2: ch6, sc back across (5 sts), work 3 rows, add a finishing sc row in FLO to create toes, fasten off and sew to body bottom
— Penguin Hat with Pom Pom :
Round 1 :
With red yarn 6 sc in mr (6)
Round 3 :
(1 sc, inc) x 6 (18)
Round 4-7 :
1 sc in each st (18)
Round 8 :
Switch to white for brim: 1 sc in each st FLO for ridged brim (18)
Round 9 :
Make small pom pom from white yarn and sew to top. Fasten off and attach hat shifted slightly back on head
Info :
Hat should sit above the eyes; if too large, decrease one round of 18 before adding brim
— Reindeer Head :
Round 1 :
6 sc in magic ring (6)
Round 3 :
(1 sc, inc) x 6 (18)
Round 4 :
(2 sc, inc) x 6 (24)
Round 5 :
(3 sc, inc) x 6 (30)
Round 6-9 :
1 sc in each st (30)
Info :
Place safety eyes between rounds 8-9. For a round nose area, add a couple of short increase rows at the front center before decreases
Round 10 :
(3 sc, dec) x 6 (24)
Round 11 :
(2 sc, dec) x 6 (18)
Round 12 :
Stuff lightly and shape muzzle by a few embroidery stitches. Fasten off leaving tail for sewing
— Reindeer Antlers (Make 2) :
Stem Round 1 :
With tan yarn ch6, join to form short ring and work 6 sc in ring (6)
Round 2 :
1 sc in each st (6)
Info :
Antlers are sculpted by crocheting small branches off a central stem. Use floral wire inside if you want them poseable
Branch A :
Ch4, sc back along chain, sl st to stem base; repeat on opposite side for two branches. Add one small ch3 nub at tip and sl st to close
Branch B :
At a higher stem st do ch5 and sc back for second tier of prongs. Fasten off leaving long tail for sewing
Info :
Sew antlers to top of head between rounds 4-6. Use secure stitches and hide ends by weaving into head interior. If using wire, fold the wire ends back into yarn before sewing to hide sharp edges
— Reindeer Body :
Round 3 :
(1 sc, inc) x 6 (18)
Round 4 :
(2 sc, inc) x 6 (24)
Round 5 :
(3 sc, inc) x 6 (30)
Round 6-14 :
1 sc in each st (30)
Round 15 :
(3 sc, dec) x 6 (24)
Round 16 :
(2 sc, dec) x 6 (18)
Round 17 :
(1 sc, dec) x 6 (12)
Round 18 :
6 dec (6). Fasten off leaving tail for sewing. Stuff moderately to keep shape
Info :
Sew head to top of body aligning eyes and muzzle. Add small brown hooves by making 4 tiny semicircles and sew to the bottom as legs or attach short stuffed legs
— Reindeer Nose :
Round 1 :
With red yarn 6 sc in mr (6)
Round 2 :
1 sc in each st (6). Slightly stuff and sew to muzzle. Add small embroidery for nostrils if desired
— Small Arms & Legs (Make sets for each character) :
Arm Round 1 :
With matching body yarn 6 sc in mr (6)
Round 2-6 :
1 sc in each st (6) (work 5 rows for short stubby arms)
Round 7 :
Stuff lightly and fasten off leaving tail for sewing. For penguin wings use flat ovals: ch6, sc back across 4-6 rows
Leg Round 1 :
6 sc in mr (6)
Round 2-8 :
1 sc in each st (6) (lengthen to 8 rounds for reindeer legs if making full legs)
Info :
Stuff feet firmly and legs lightly. Sew legs to bottom of body spaced evenly and slightly forward to help the characters sit when mounted on the wreath
— Scarves (All Characters) :
Row piece :
With red yarn ch 26, sc in each ch across, work 8 rows. Create fringe by folding small loops and tying them off or add crochet tassel ends. Wrap around neck and sew ends behind body
Info :
Adjust scarf width to taste; penguin scarf in photos is shorter and snugger, snowman's is longer and tucked between stacked balls
— Assembly & Positioning :
Info :
Arrange the three characters on the inner lower quadrant of the wreath with even spacing. The snowman sits left, penguin center, reindeer right as in the photo. Use pins to hold in place before sewing
Step :
Use the long tails left from heads/bodies to whip stitch characters through the wreath tube from the inside so visible seams are minimized. Reinforce with extra stitches around the midline
Info :
Sew snowflakes and berries around the wreath in balanced clusters. Use small stitches to hide ends and avoid stretching the wreath fabric
Final Touch :
Attach bow at top center; weave in all ends and trim. Optionally glue tiny beads to snowflake centers for sparkle
Info :
For hanging, secure a sturdy chain or loop at the top and test weight balance before final placement
This festive wreath is such a joyful project to finish — each character adds personality and charm to your holiday decor! The textured evergreen clusters and bright red bow make a cheerful entrance piece for any home. Sewing the little snowman, penguin and reindeer into place is satisfying and makes the wreath feel like a tiny winter village. 🧶🎁 Hang it proudly and enjoy the compliments — this handmade wreath is sure to become a holiday favorite. Happy stitching! 🎄