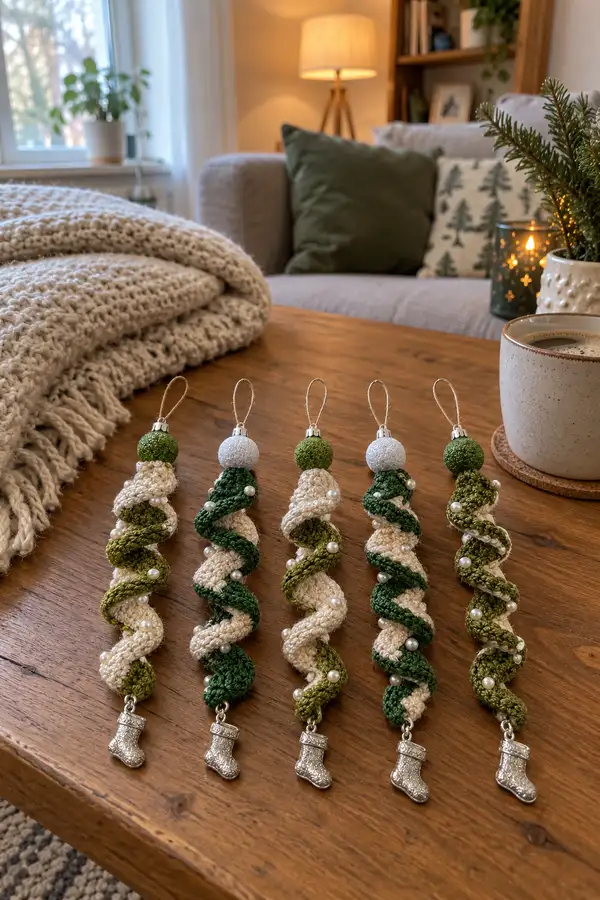
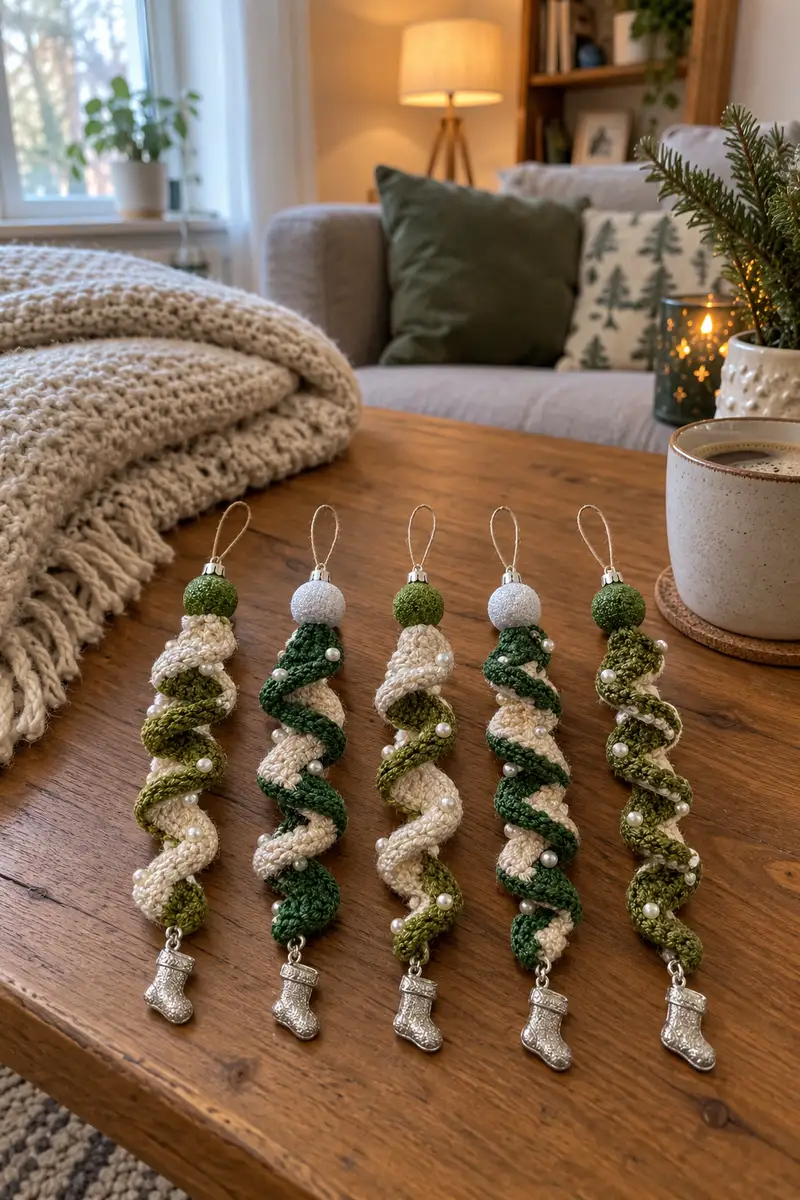
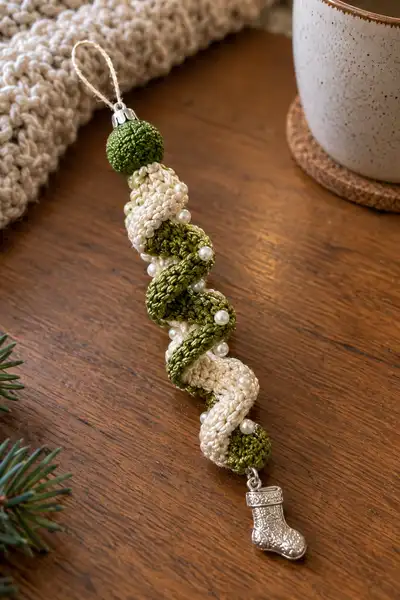
Create a set of elegant spiral hanging ornaments that combine twisted crochet ropes, pearl accents and tiny stocking charms. This pattern shows how to make alternating green and cream spirals topped with a small crocheted bead for hanging. Detailed instructions guide you through two matching spiral ropes, bead covers, pearl placement and attaching charms to form a charming mini garland or individual tree ornaments.
Progress Tracker
0% Complete
— Materials & Overview :
Info :
This pattern creates one spiral hanging ornament composed of two narrow crochet ropes (a cream rope and a green rope) twisted together, a crocheted bead cover at top and bottom, hand-sewn pearl beads for embellishment, and a small charm attached to the bottom. Work the two ropes separately, block/shape them, then twist and secure together before final embellishment. Use the recommended hook for tight fabric so stuffing or inner core does not show.
— Tension & Finished Size :
Info :
Using sport / fingering weight cotton and a 3.0mm hook, each finished ornament measures roughly 12-14 cm (4.5-5.5 in) from top of covered bead to bottom of charm, with the spiraled rope length approx. 9-10 cm. Adjust yarn weight and hook to change finished size proportionally.
— Spiral Rope (Make 2; one cream, one green) :
Info :
Each rope is worked in continuous rounds to form a narrow tube that remains flexible and can be gently twisted to form the spiral. We aim for a tube circumference of 24 stitches; this creates a firm, small-diameter rope perfect for twisting. Work tightly for neat fabric.
Round 1 :
6 sc in magic ring (6)
Round 3 :
(1 sc, 1 inc) x 6 (18)
Round 4 :
(2 sc, 1 inc) x 6 (24)
Round 5 :
1 sc in each st (24)
Round 6 :
1 sc in each st (24)
Info :
From this point the tube circumference remains 24 sts. If you prefer a slimmer rope, stop increasing one round earlier to reach 18 sts. If you need a wider rope increase one extra round of (3 sc, inc) before continuing even rounds.
Round 7 :
1 sc in each st (24)
Round 8 :
1 sc in each st (24)
Round 9 :
1 sc in each st (24)
Round 10 :
1 sc in each st (24)
Info :
Begin a long even section now. For a typical ornament, you will work 40 rounds total in this even section to create the rope length. Adjust length by adding or removing even rounds in multiples of 2-4 to keep symmetry of bead placement later.
Round 11-30 :
1 sc in each st (24)
Info :
Rounds 11-30 create the central length of the rope. If you want a longer spiral, extend rounds 11-30 to 11-40 (add 10 rounds). Count these rounds carefully for consistent placement of pearl beads later.
Round 31-38 :
1 sc in each st (24)
Round 39 :
(2 sc, 1 dec) x 6 (18)
Round 40 :
(1 sc, 1 dec) x 6 (12)
Info :
Stuff the tip lightly with a tiny pinch of fiberfill OR insert a 10-12mm wooden bead as a solid core before closing. If using a wooden bead, slip the bead onto the yarn tail and position it inside the final rounds prior to finishing.
Round 42 :
Fasten off leaving a long tail for joining (do not cut if adding to top bead cover immediately)
Info :
Repeat the entire Rope section to create the second rope in the second color (cream and green alternate in the pictured ornaments). Keep both ropes identical in round count for even twisting.
— Top Bead Cover (Make 1 per ornament) :
Info :
Covering a small wooden bead with crochet creates the neat top that hides joining and provides a place for a metal cap and loop. The bead cover is a small spherical amigurumi worked to fit a 10-12mm bead snugly. Use a slightly smaller hook for a tight finish.
Round 1 :
6 sc in magic ring (6)
Round 3 :
(1 sc, 1 inc) x 6 (18)
Round 4 :
(2 sc, 1 inc) x 6 (24)
Round 5 :
1 sc in each st (24)
Round 6 :
1 sc in each st (24)
Info :
Slip the wooden bead into the partially closed cover at this stage so it sits centered. You may instead work a slightly larger circumference (30 sts) for a larger bead; use that math in increases if needed.
Round 7 :
(2 sc, 1 dec) x 6 (18)
Round 8 :
(1 sc, 1 dec) x 6 (12)
Info :
Finish by closing the remaining small hole with the tail using tapestry needle. Leave a tail long enough to stitch the cover to the joined top of the twisted ropes and to thread through a jewelry cap if you plan to use one.
— Bottom Bead/Cap (Optional Solid Tip) :
Info :
The photographed ornaments sometimes show a slight rounded tip at the bottom of each rope where the charm is attached. You can create a small cover similar to top bead cover for the bottom, or simply use the closed rope end and a jump ring for charm attachment. This section shows the small bead cover version.
Round 1 :
6 sc in magic ring (6)
Round 3 :
(1 sc, 1 inc) x 6 (18)
Round 4 :
1 sc in each st (18)
Round 5 :
(1 sc, 1 dec) x 6 (12)
Info :
Insert a small bead or a tiny pinch of stuffing for a rounded bottom. Leave long tail for sewing the charm jump ring to the core. If not using a cover, leave the rope end as worked in Rope round 41 and secure a jump ring through several rounds at the tip.
— Preparing to Twist & Join :
Info :
Block both ropes lightly by pinning them straight and spraying with water, then shaping into a gentle spiral to set. While ropes are still slightly damp they will hold a nicer, uniform spiral when twisted together. Lay both ropes parallel and align the finished ends.
Info :
Determine which rope will sit on the outside of the twist at the top versus bottom to match the photos (cream often shows more prominently). Keep bead placement symmetry in mind — you will sew pearls to one rope only or both depending on your design choice.
— Twisting & Securing (Join the two ropes) :
Round 1 :
Lay cream and green ropes side by side and align their top ends. With the long tails and a yarn needle, sew the two rope tips together through the inner core for approx. 6-8 stitches, securing them so they will not separate during twisting.
Round 2 :
Twist the ropes together by rotating one end away from you repeatedly until a tight even spiral forms along the full length. Pin into place if desired to hold shape while securing.
Round 3 :
Using the long tail from the top bead cover, whipstitch the top bead cover over the joined rope ends. Take care to bring stitches through both rope cores so the join is invisible and strong (approx. 10-14 stitches around the bead seam).
Info :
If you used a wooden bead inside the top cover, glue a small metal bead cap onto the top, then add a small jewelry eye pin or wrap a loop with wire for the hanging cord. Alternatively, stitch the twine loop through the bead cover tail and knot securely on the inside.
Round 4 :
Sew through the ropes at 3-4 evenly spaced points along the length (inner seams) to keep twist from loosening. Use discreet mattress or whip stitch through both ropes but not through visible outer loops.
Round 5 :
Fasten all tails by weaving them into the rope cores for at least 5 cm to hide and secure. Trim close to work.
— Pearl Bead Embellishment :
Info :
Lay the twisted rope flat and mark approximate bead positions. In the sample photo there are 6-9 pearl beads spaced along each ornament, grouped roughly every 8-12 stitches along the visible outer spiral. Use a fine embroidery needle and strong nylon or silk thread to sew beads through the outer loops of the rope so they sit on the spiral ridges.
Round 1 :
Thread needle with doubled nylon thread. Starting near the top, insert the needle from the inside of the spiral to the outer face where you want the first pearl, pick up one pearl bead and sew through the rope outer stitch, then back to the inside, making 2-3 passes for security.
Round 2 :
Space the next bead roughly 8-12 crochet rounds (noting our rope counted rounds) down the length depending on rope length and desired density. Continue sewing beads in a staggered placement following the visible outer loop of the cream color to mirror the pictured design.
Info :
For extra security, after threading through a bead, make a tiny knot on the inside and secure with a dot of clear craft glue. Hide knots in the rope core. If you prefer, attach beads to only one of the two ropes before twisting for a different look.
— Bottom Charm Attachment :
Round 1 :
To attach a metal stocking charm: if you made a bottom bead cover, sew a small jump ring through the bottom cover tail leaving a loop for the charm's jump ring. If you closed the rope directly, open a small jump ring and pass it through several rounds of the inner core stitches at the tip then close tightly.
Round 2 :
Attach the stocking charm to the closed jump ring. Reinforce the ring by sewing through the inner core around the ring 3-4 times with the tail to ensure it will not pull free when hung.
Info :
If you like, place a small dot of jewelry glue on jump ring closure to inhibit opening over time. Hide any visible thread marks by stitching through the nearest rope groove and trimming excess thread.
— Final Finishing Touches :
Round 1 :
Trim any stray threads and weave in all ends into the rope core for at least 4-5 cm. If using metallic cord or twine for the hanging loop, tie a secure knot and apply a tiny dab of clear glue on the knot then tuck into the top bead cover seam for a tidy finish.
Round 2 :
Lightly steam-block the finished ornament if using cotton to help set the twist. Do not over-wet metal charms or pearls; protect with a towel when steaming.
Info :
Create a matching set by repeating the process, alternating which color forms the outer spiral at the top to give a varied but coordinated garland effect. For garlands string several finished ornaments onto a coordinating cord or ribbon spaced evenly for display.
— Alternate Techniques & Variations :
Info :
To make a thicker spiral, work the tube to 30 or 36 sts circumference by adding another increase round before continuing even rounds. For a delicate lace look, substitute hdc rows for a slightly more open texture. To make the ornament poseable, insert a short wire in one rope core before joining and wrap tightly around the inner core.
These spiral hanging ornaments are a delightful tiny project that elevate holiday decor with texture, shine and handcrafted charm. Each ornament comes together quickly but looks beautifully intricate thanks to the twisted ropes and pearl accents. Make a set for tree trim, use them as gift tie-ons, or hang a line to create a unique garland. 🎁✨ I hope you enjoy the mindful process of twisting, sewing and finishing — happy crafting! 🧶