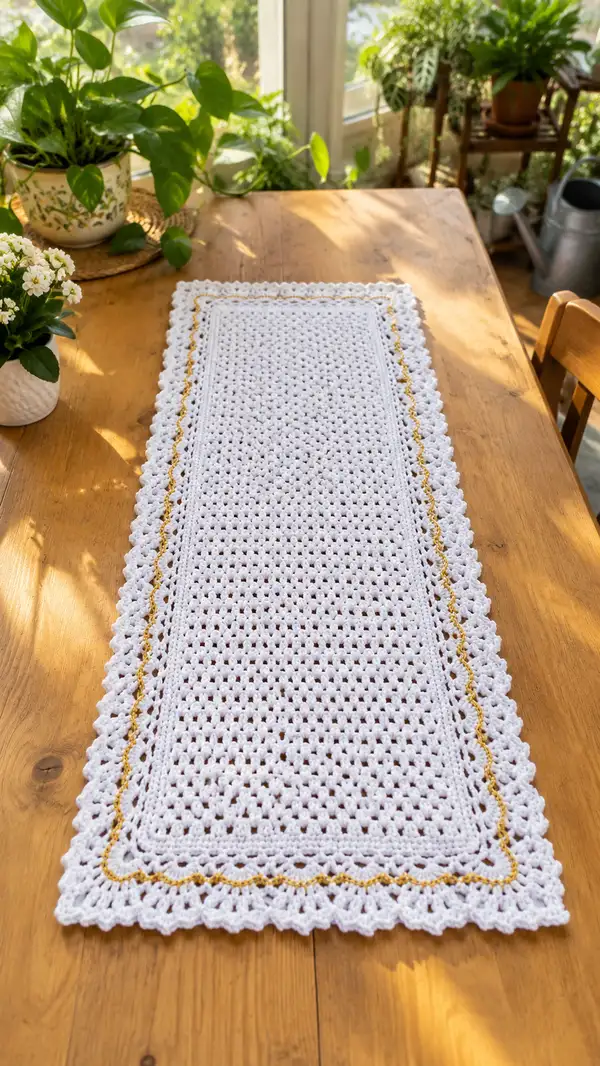
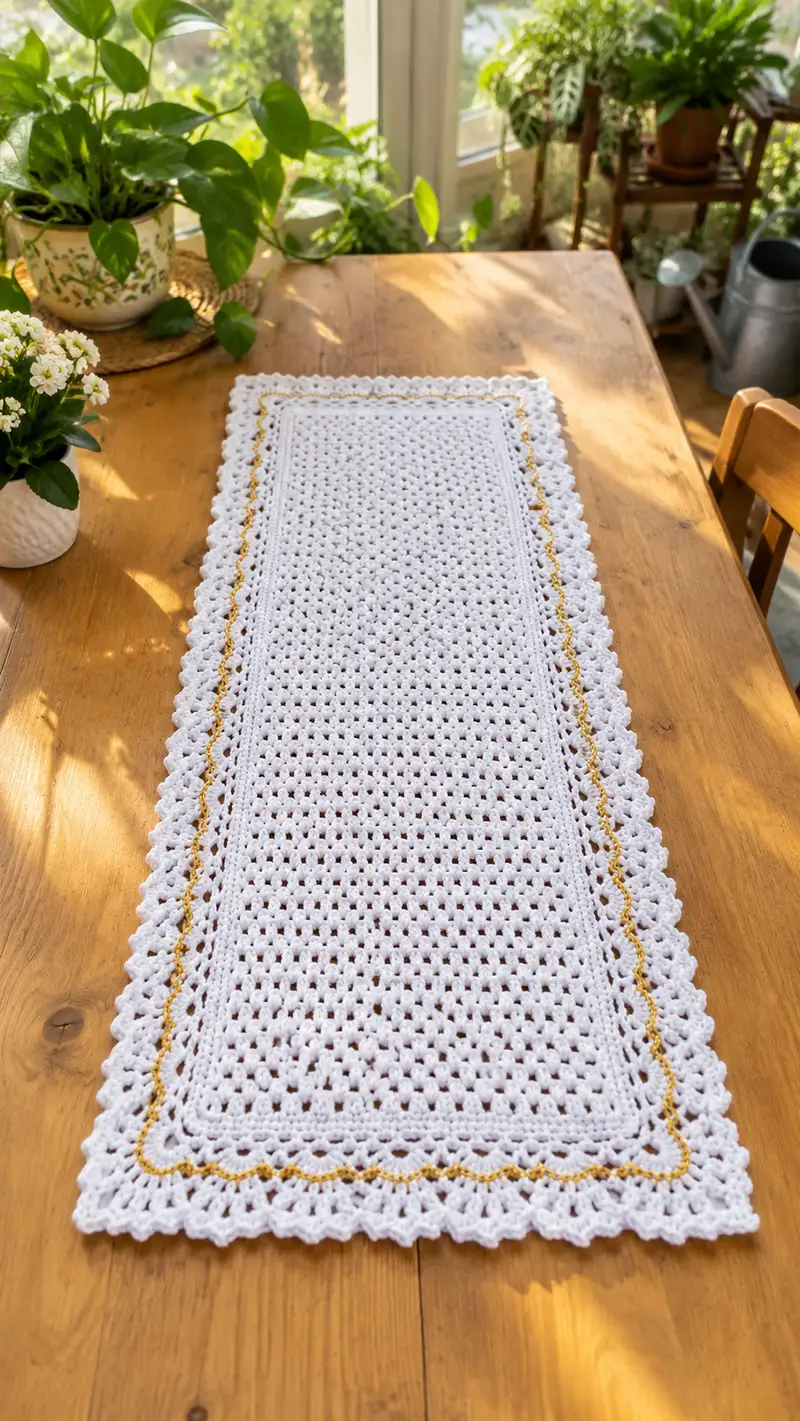
A long, elegant rectangular table runner worked in crisp white with a delicate metallic gold accent row and a scalloped lace border. This pattern features an airy, repeating lacy mesh for the central panel and a decorative scallop edging that frames the runner beautifully. Perfect for dining tables, sideboards, or window seats, the runner combines classic crochet stitches and a subtle metallic highlight for a timeless, handmade home accent.
Progress Tracker
0% Complete
— Notes & Gauge :
Info :
This runner is worked flat in rows for the center panel and then edged working in joined rounds around the rectangle to create the inner gold accent and scalloped shell border. Gauge is not critical for fit but will change finished dimensions. Sample gauge: 18 dc x 10 rows = 10 cm (4 in) in pattern using recommended yarn and 3.5mm hook.
Info :
Finished size (as photographed): approximately 110 cm x 30 cm (43 x 12 in). You can lengthen or shorten by adding or removing center repeat rows; adjust yarn amounts accordingly.
— Foundation Chain & Base Row :
Round 1 :
Foundation chain 121 (or desired odd multiple—this pattern uses 121 for photographed size) (121)
Round 2 :
Row 1 (RS): Working in 2nd ch from hook, sc across the chain to the end. Turn. 120 sc (120)
Info :
We are starting the base with a tidy sc row so the start edge is stable. Place stitch markers in the first and last sc of every row to keep straight sides; this is crucial for a long rectangular runner.
— Mesh Center Panel (Rows 2–61) :
Round 3 :
Row 2 (WS): Ch3 (counts as dc), *sk 1 sc, dc in next sc; rep from * across to last sc, dc in last sc. Turn. 60 dc + turning ch (60 dc)
Info :
The mesh pattern alternates a dc row and a chained V-row. For clarity in stitch counting we track the functional double crochet counts; turning chains are counted as the first dc when noted.
Round 4 :
Row 3 (RS): Ch1, sc in same st as last dc, *ch3, sk next dc, sc in next dc; rep from * across until last st, sc in top of turning ch. Turn. 60 sc + 59 ch3 sps
Round 5 :
Row 4 (WS): Ch3 (counts as dc), *in next ch3 sp work (dc, ch1, dc) to form a V-stitch, sk next sc, rep from * across, ending with dc in top of last sc. Turn. 60 V-sts (120 dc counted as 60 V pairs)
Info :
To keep edges straight, always begin a V-row with ch3 = first dc and finish the row with a dc worked into the turning chain or final stitch as shown above. If you prefer a more open mesh, use ch4 instead of ch1 in the V; adjust total rows for the same length.
Round 6 :
Row 5 (RS): Ch1, sc in first st, *ch3, sc in center of next V-st (between the V's two dcs); rep from * across, end sc in last st. Turn. 60 sc
Round 7 :
Row 6 (WS): Repeat Row 4: Ch3, *(dc, ch1, dc) in each ch3 sp, sk sc, rep across, ending dc in turning ch. Turn. 60 V-sts
Round 8 :
Row 7 (RS): Ch1, sc in first st, *ch3, sc in center ch1 of each V from previous row; rep across, end sc in last st. Turn. 60 sc
Info :
Rows 4–7 form a four-row repeat that produces the airy mesh you see in the runner's center. Each repeat adds approximately 1.1 cm of length depending on yarn and tension. For the photographed runner, work 30 repeats of the four-row mesh (120 rows counting all rows and repeats combined as written below).
Round 9-52 :
Continue repeating Rounds 4–7: work 12 four-row repeats, or until center panel measures approximately 92 cm length from the first sc edge. Each four-row repeat = Rows 4,5,6,7. Repeat count shown: 12 repeats (48 rows). After completion at Row 52 you will have a stable mesh rectangle. (Refer to project photo sizing for exact repeat count)
Info :
Place a marker at the midpoint of your runner after every 12 repeats to double-check symmetry. If you lengthen the runner, add repeats in multiples of 4 rows to maintain the pattern alignment.
Round 53 :
Row 49 (WS): Ch3, dc in each V-st and across as per Row 4 pattern, finishing with dc in turning ch. Turn. 60 V-sts
Round 54 :
Row 50 (RS): Ch1, sc in first st, *ch3, sc in center of each V-st, rep across, sc in final st. Turn. 60 sc
Info :
When the center panel reaches your desired length it is time to add the border. Leave the final row as a tidy sc row (Row 50 style) so the inner border sews in evenly. For photographed size we finished the mesh with 50 sc rows total (including the very first sc row) and 48 intermediate lacy rows; adjust accordingly for length customization.
— Preparing for the Inner Border and Gold Accent :
Round 55 :
Row 51 (WS): Ch1, sc evenly around the entire rectangle working 1 sc in each sc and 2–3 sc into corner sts to maintain square corners. Work across long sides keeping counts even; total sc around measured will be approximately 408 sc (est. for 121 chain width and 50 rows length) — exact count depends on your gauge; place 3 sc in each corner. Join with sl st to first sc. (Approx 408 sc)
Info :
This joined sc round creates the stable base for the decorative gold round and the outer edging. Count your total sc around and record it — this number will determine the scallop repeat for the outer shell edge so keep it divisible by the shell repeat (see next section). If needed, add or remove a few sc evenly along one long side to get a multiple of 5 for shell spacing.
— Gold Accent Round :
Round 56 :
Round G1 (RS): Join the fine metallic gold thread with a sl st to any sc on the right-hand long side. Ch1, *sk 1 sc, sc in next sc; rep from * across the long side placing sc into each alternate stitch to create a delicate dashed line. When you reach a corner, work 1 sc in the corner sc then continue alternating along the next side. Join with sl st to first sc. (Approximately half the sc count: est 204 sc placements)
Info :
Use a single strand of fine metallic thread held alongside the white if you prefer a subtler shimmer. Carry the metallic loosely along the wrong side and secure every few inches with a small tie-in knot, or detach and rejoin at corners to avoid bulk under the edged scallop. If you are working with thicker metallic yarn, you may opt to hold it with the main yarn for a stronger highlight.
Round 57 :
Round G2 (RS): Remove metallic thread and join white yarn with sl st to the same place you started the gold row. Ch1 and sc around again placing 1 sc into each sc of the gold dashed row and into remaining sc on the short sides to rebuild a uniform edge for the scallop. Join with sl st. (Approx 408 sc — match previous sc round count)
Info :
We reestablish the full sc round to ensure the later shell edge has an even base. If your gold accent was worked with metallic only in alternating sc, ensure you fill all gaps by working sc into every sc now so the shell spacing is regular.
— Shell Border Setup (Rounds 58–63) :
Round 58 :
Edge Round 1: Ch3 (counts as dc), dc in next 2 sc, *sk 2 sc, (3 dc, ch2, 3 dc) in next sc to form a corner shell, sk 2 sc, dc in next 3 sc; rep this pattern around the entire rectangle. In each corner work (3 dc, ch2, 3 dc) to maintain square corners. Join with sl st to top of ch3. (Shell clusters placed every 8 sc approximately; total shells = approx 51 shells around based on your sc count — adjust spacing to make shells even and symmetrical)
Info :
If your total sc count around does not divide evenly by the shell repeat, adjust by adding 1 or 2 sc evenly along one long side during the previous sc round so shells will fall evenly. The corner shells must always occupy ch2 spaces to sit flat.
Round 59 :
Edge Round 2: Ch1, sc in each dc and sc across, and work 1 sc into each ch2 corner sp. Join with sl st. (Approx same sc count as previous sc round — record exact number for your project)
Round 60 :
Edge Round 3: Ch3 (counts as dc), *in each shell sp work (2 dc, ch1, 2 dc) to create a layered shell, then dc in next 3 sc; rep around, working layered shells into every shell sp and dc groups on straight edges. Join with sl st. (Maintain overall stitch sequence; total dc clusters correspond to initial shell count)
Info :
This first shell layer creates the lacy scalloped silhouette you see in the photo. Work the second shell layer lightly so shells remain soft rather than stiff; use a slightly looser tension for shell stitches if you normally crochet tight.
Round 61 :
Edge Round 4: Ch1, sc around all shells and posts, placing 1 sc at the top of every layered shell, and 1 sc in each intervening dc. Join with sl st. (This even sc round helps the final picot/trim sit evenly.)
Info :
Check shell placement visually; if any shells pull or pucker lightly tug the shell open and add or remove a small sc in the preceding round to balance tension.
— Final Picot Trim and Scallop Definition (Rounds 62–70) :
Round 62 :
Round Trim 1: Ch3, *in the top of the next shell work (sc, ch3, sc) to form a picot at each shell peak, then sc in the top of the next layered shell; rep around. Join with sl st. (One picot per shell, total picots matches shell count, approx 51)
Info :
The picot adds small, decorative points which catch the light and give the scallop a refined look. Keep picots even by using the same ch length (ch3) for each one. If you prefer smaller points, use ch2.
Round 63 :
Round Trim 2: Ch1, sc in each picot base and sc across, place 1 sc in each ch3 sp to anchor, join with sl st. (Even sc count as previous rounds)
Round 64 :
Round Trim 3 (Optional extra scallop depth): Ch1, *in each picot base work (sc, ch4, sc) to create a taller pointing scallop, sc in the top of the next shell; rep around. Join with sl st. (Maintains number of scallops equal to shell count)
Info :
This optional round gives a deeper scallop. I used ch3 for a moderate point in the photographed runner; ch4 creates a more pronounced effect. If you choose this round, tuck any additional loops to the WS between stitches to avoid bulk.
Round 65-70 :
Final Rounds: Work two finishing sc rounds in white across the scallops to neaten edges, weaving in ends as you go. Fasten off and weave all ends neatly to the wrong side. (Sc counts will match the earlier anchor sc round totals.)
Info :
After the final round trim, gently block the runner to the desired dimensions. Pin scallops individually and steam lightly or spray-block until dry for a crisp, professional finish.
— Customization Tips & Length Adjustments :
Info :
To lengthen: add additional four-row mesh repeats in multiples of 4 until desired length is reached. For extra width: increase foundation chain by multiples of the mesh repeat used (adjust by 4 stitches per repeat as needed to maintain side pattern balance). Always finish the center with an even sc round before joining for the border.
Info :
To add heavier weight or drape, substitute cotton-linen blend yarn and increase hook size by 0.5–1 mm. This will produce a looser, softer look but reduce crisp scallop definition. For a stiffer, vintage-style runner use mercerized cotton and steam-block firmly.
Info :
If you prefer no metallic accent, simply skip the gold round and continue with sc round reestablishment before the shell rounds. Alternatively, replace the metallic with a subtle colored strand to match seasonal decor.
This classic lace table runner adds an instant elegant touch to any table with its soft white mesh center and delicate gold accent. The scalloped edge frames the runner beautifully, making it perfect for holidays, special dinners, or everyday charm. I love how peaceful the mesh rows feel to crochet and how satisfying the scalloped finishing rounds are — it’s a project that rewards patience with a heirloom-quality result. Roll it, pin it, block it, and enjoy showing off your handmade centerpiece! 🧶✨