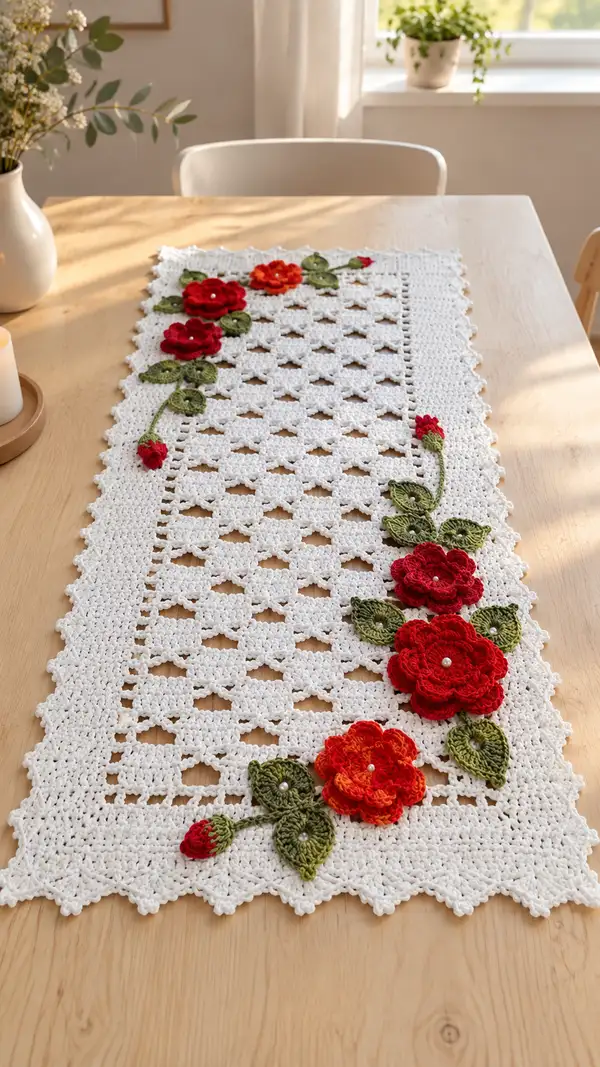
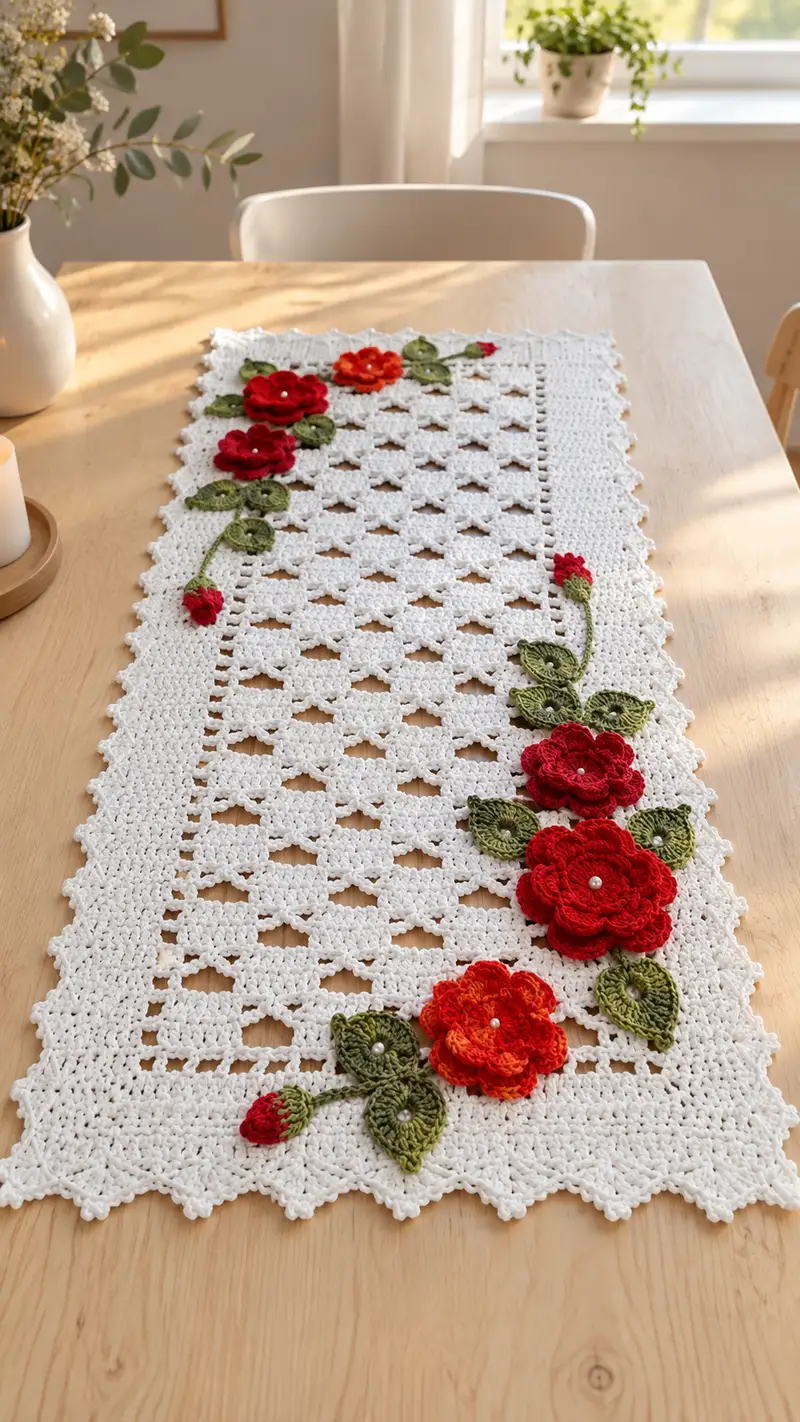
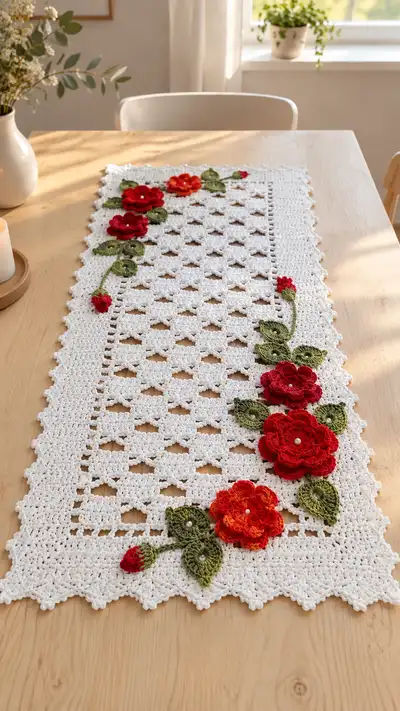
A delicate lace table runner featuring a repeating openwork grid and ornate scalloped border, decorated with dimensional red and orange crochet flowers, green leaves and curving vines. The neutral white runner creates a crisp backdrop for the vibrant floral appliques and pearl centers. This pattern uses simple clusters and chain spaces to create the airy mesh and layered motifs for a romantic, vintage-inspired look.
Progress Tracker
0% Complete
— Gauge & Finished Size :
Info :
Gauge is not critical for this lace runner, but for reference: 12 dc x 8 rows = 3" x 3" measured in the openwork pattern using worsted cotton and 3.5mm hook. The sample runner measures approximately 13" wide x 40" long with the appliques. Adjust the foundation chain and repeat counts to lengthen or shorten.
— Notes Before You Start :
Info :
This pattern is worked flat in rows for the central mesh panel, then a multi-row border is worked around the entire rectangle. Flowers, leaves and buds are crocheted separately and sewn on after blocking. Keep stitch markers handy and block the main panel before attaching appliques for best results.
— Materials Summary :
Info :
Use a smooth worsted weight cotton for crisp stitch definition. The pattern gives repeats; choose a foundation chain length that is a multiple of 6 plus 3 (6n + 3) to match the mesh repeat. For the shown runner a good working width is 75 chains (6 x 12 = 72 + 3 = 75).
— Main Panel (Mesh) :
Foundation :
Ch 75 (multiple of 6 + 3). This yields an approximate finished width of 13"; to change width add or subtract full 6-stitch repeats.
Row 1 :
Dc in 4th ch from hook (counts as dc + ch1), *ch2, sk 2 ch, 3 dc in next ch; rep from * across to last 2 ch, ch1, dc in last ch. End row turning (12 shell repeats across, plus edge stitches)
Row 2 :
Ch 3 (counts as dc), turn, *ch2, sk 3 sts, 3 dc in top of next 3-dc cluster (work 3 dc cluster in the center dc of previous row's cluster), rep from * across ending with dc in top of turning ch. This row begins the diamond openings (repeat across).
Row 3 :
Ch 1, sc in first st (to create firm edge), *ch3, sk 2 dc, sc in space between clusters (the ch2 opening), rep from * across to last st, sc in last st, turn. This anchors and narrows row for the mesh.
Row 4 :
Ch 3, turn, dc in first sc (counts as dc), *ch2, sk 1 sc + next 2-dc area, 3 dc into next center of triple dc to re-establish cluster, rep from * across, ending with dc in last turning sc.
Row 5 :
Repeat Row 2 pattern across (dc row forming top of diamond). Maintain turning ch3 as dc above clusters; work 12 cluster repeats across for 75-ch foundation).
Info :
Work these five foundational rows until you have built the mesh length you desire. The motif is a 4-row repeat (Rows 2-5) after the initial Row 1 establishment. For the sample runner work 64 Mesh Rows (this produces about 36" length before border). Continue repeating Rows 2–5 in sequence with occasional anchoring sc rows (Row 3 style) to maintain straight edges.
Row 6-9 :
Repeat Rows 2-5 (this counts as two full pattern repeats). Keep a consistent number of cluster repeats across (12 clusters). Maintain edge sc at the ends of the sc rows for a sturdy edge to pick up border later.
Row 10 :
Work Row 3 anchor (ch1, sc first st, ch3 across anchor points, sc last st). This keeps edges straight. Count note: each 'diamond' across counts as 6 stitches in the foundation repeat. Continue until you reach a total of 64 mesh rows (including foundation Row 1 and all repeats) or your desired length. In the sample, Rows 1–64 form the center panel.
Info :
Check your work every 8–12 rows for edge alignment. The sc anchor rows (Row 3 type) are your best friend to keep the sides from drifting. Use stitch markers at the beginning of each row and at the edges of the cluster repeats if needed.
Mesh Repeat Summary :
Establish Row 1, then repeat Rows 2-5 continuously. After every 8 rows insert a Row 3 anchor if your edges begin to ripple. Aim for the total mesh height to be even so border placements fall symmetrically.
— Edge Preparations & Border Pickup :
Info :
Fasten off center panel when complete and block flat to desired measurements. Once blocked, join yarn at a corner to begin the border. The border is worked around all four sides; instructions assume working along the short edge first and continuing clockwise.
Border Round 1 :
With right side up, join white yarn at any corner with sl st, ch1, sc evenly around the entire runner placing 2 sc in each corner (worked in the end-row sc or row end). Work 1 sc in each stitch along sides and along chain spaces where necessary, distributing 1 sc per row-turn and 1 sc per dc/cluster top as needed to keep spacing. (Edge count will vary depending on length; maintain even spacing). Sl st to first sc to join.
Info :
Sc round provides a stable base for the scalloped edging. Aim for a balanced number of sc on long edges by placing sc in chain spaces as needed. Use blocking pins to hold the runner straight while you work this round.
Border Round 2 :
Ch3 (counts as dc), *skip 1 sc, 3 dc in next sc, skip 1 sc, dc in next sc; rep around to create gentle texture. In corners work (3 dc, ch2, 3 dc) to allow turning and maintain square corners. Sl st to top of ch3 to join.
Border Round 3 :
Ch1, sc in each dc around for one round to flatten the texture (sc in the ch2 corner space twice). Join with sl st. This creates a uniform edge for the decorative scallop.
Border Round 4 :
Ch4 (counts as tr), *sk 2 sc, 5 tr cluster in next sc, sk 2 sc, tr in next sc; rep around. This gives height to the scallop base. In corners work 7 tr into corner to maintain curve.
Border Round 5 :
Ch1, sc in each tr and between clusters to prepare picot points; join with sl st. Fasten off and rejoin if necessary to maintain tension in corners.
Border Round 6 (Picot Scallop) :
Join yarn at a scallop peak, *sc in next 3 sts, (ch3, sl st into first ch to form small picot), sc in next 3 sts, sk to next peak, rep around. Work 3 small picot points along each scallop if desired for a more textured edge. Join, fasten off and weave ends. Block again briefly to set scallops.
Info :
If you prefer a subtler edge, skip the picots and instead work a simple shell (5 dc) pattern in Border Round 4. The picots provide the delicate points seen in the sample photograph.
— Appliques: Large Layered Flower (Make 3) :
Info :
Flowers are worked in rounds in deep red and bright orange yarn. The finished large flower measures approximately 2.5"–3" across and uses a layered petal construction for depth. Each finished flower in the photo has a small pearl bead sewn to the center.
Flower Round 1 :
Using red yarn, make a magic ring, ch1, 10 sc into ring. Pull tight (10)
Flower Round 2 :
(Inc) x 10 — 20 sc. Work evenly. Place a stitch marker at the start of the round to track progress.
Flower Round 3 :
*Ch2, skip next st, sc in next st; rep around to create spacing for petal base. You will have 10 ch-2 loops around (10 loops). Join with sl st to first sc.
Flower Round 4 (First petal round) :
*In next ch2 loop: (sc, hdc, 3 dc, hdc, sc) - full petal; rep in each loop around to make 10 petals. Fasten off color or continue to contrast layer. Petal count: 10 large petals.
Info :
Block or flatten petals slightly with your fingers to help them lay aesthetically; sew a single pearl bead in the center after layering all rounds.
Flower Round 5 (Layered center) :
Join a contrasting shade (e.g., slightly lighter red or orange) at back of any petal base, ch1, sc in same place, *(ch2, sl st in next ch-space between petals) x 10 to create a small gathered ring. Pull closed slightly to create a dome. This forms the raised inner layer. Fasten off and weave tail through the center to adjust shape.
Flower Round 6 (Optional extra ruffle) :
Using a smaller hook (3.0mm) and the same yarn, join at base and work *sc in base, ch3, 5 dc in same loop, ch3, sc in next base; rep to create a ruffled outer row for more drama. Fasten off and weave ends. Secure a 6mm pearl bead in the center with short stitches; apply a tiny drop of fabric glue to the knot if you want extra security.
Info :
Make three large flowers: two in deep red, one in variegated orange (made by switching color mid-round or using variegated yarn). The slight color differences give depth similar to the image. Use a contrasting center bead to catch light.
— Medium Flower (Make 2) :
Round 1 :
Magic ring, ch1, 8 sc into ring (8). Pull tight. (8)
Round 3 :
*Ch2, skip next st, sc in next st; rep around (8 loops).
Round 4 :
*In each ch2 loop work (sc, hdc, 3 dc, hdc, sc) to create 8 fuller petals. Fasten off and sew a pearl in center. These will be placed between larger flowers to mimic the staggered clustering seen in the photo.
Info :
For the orange flower create the same structure but use a variegated orange yarn or change color after Round 2 to create two-toned petals.
— Small Rosebud (Make 4) :
Round 1 :
With red yarn ch 6, sl st in 1st ch to form a small ring, ch1.
Round 2 :
Work along the chain edge: sc in next 3 ch, hdc in next ch, 2 dc in next ch, hdc in next ch, sc in next ch. This curves the chain into a small bud shape. Fasten off leaving long tail for sewing. If desired, add a tiny dot of stuffing before closing to give a plump bud.
Info :
Buds are sewn to vine ends to create the tapered tips visible on the runner. Use matching green yarn to create a small cupped leaf under each bud for realism (see Leaves section).
— Leaves (Make 12–16) :
Leaf Round 1 :
Using olive green, ch 12. Work 1 sc in 2nd ch from hook, 1 hdc in next, 3 dc in next 3 ch, 1 hdc next, 1 sc next, sl st in next; then work along opposite side of foundation chain: sl st next 2, sc next, hdc next, 3 dc in next 3 ch, hdc, sc. Fasten off (leaf will be about 1.75" long). This is a pointed double-sided leaf.
Leaf Round 2 (Optional vein) :
With a contrasting pale green, embroider a mid-vein by running a strand from base to tip with a long whip stitch or surface slip stitch, securing at both ends. This adds visual depth like the sample photo.
Info :
Create a variety of leaf sizes by starting with ch 10 for small leaves and ch 14 for a slightly larger leaf. The photo shows several medium leaves grouped beneath flowers and along the vine - plan for approximately 12–16 leaves total depending on your arrangement.
— Vine / Stem (Make 3 long vines) :
Vine Round 1 :
Using olive green, ch 80 (or desired vine length), sl st in 2nd ch from hook and each ch across to form a flat chain cord (or work i-cord style by pulling back loops and sl st through back loop only). Fasten off. This creates a flat vine that is easy to sew on and lies smoothly across the mesh.
Vine Round 2 (Textured vine option) :
Alternatively, ch 80 and work foundation single crochet for a sturdier vine: sc in 2nd ch from hook across, fasten off leaving a long tail for sewing. Bend and curve the vine into placement loops and attach by sewing at intervals to the mesh with small invisible stitches.
Info :
The photo shows two long vines curving from the bottom corner toward the center top. Plan placement before sewing; pin vines to the blocked runner to check curves and spacing. Sew only at anchor points under leaves and flower bases to keep the vine movable and natural-looking.
— Assembly Prep :
Info :
Block your main panel flat to final dimensions using pins. Block flowers and leaves gently by pressing them into shape with steam or a damp cloth and pin to shape on a mat, then allow to dry. Lay out applique arrangement on the blocked runner before sewing to ensure composition mirrors the photograph or your own preference.
— Detailed Sewing Order & Positions :
Info :
In the pictured runner the floral cluster sits along one long side with three large flowers staggered and one orange flower near the center bottom, connected by vines and leaves. Use the mesh diamond rows as guides: place the largest flower centers approximately at Mesh Row 12 (from bottom), Mesh Row 28 and Mesh Row 44 along the same column of cluster repeats. The sample uses one column of cluster repeats placed one repeat in from the long edge.
Sewing Step 1 :
Position the lower large red flower so its center aligns with the second diamond from the corner. Pin in place and tack down in 6–8 evenly spaced stitches through the flower base into the mesh. Tie off and weave tail to the back.
Sewing Step 2 :
Arrange medium leaves around the flower base: two leaves tucked behind at an angle and one small leaf layered above. Sew leaves by passing the yarn needle from the front of the leaf underside through the mesh, back through leaf base a few times to secure. Keep stitches hidden under petal edges.
Sewing Step 3 :
Attach vine by laying it from the lower flower toward the next flower, pinning curves to the mesh between cluster repeats. Sew vine every 2–3 inches using small invisible stitches; anchor vine under leaves and at flower bases for stability.
Sewing Step 4 :
Layer the second large flower overlapping slightly the first vine curve and repeat leaf placement. Add a small bud at the tip of a trailing vine by tacking the bud directly to the vine and securing the tiny cupped leaf beneath it. Repeat for the top cluster of flowers, leaving one small cluster near the top of the runner.
Info :
Use a few tiny stitches to secure pearl centers through the flower center and into the mesh, anchoring each bead with a few passes of thread and a small knot on the underside. A tiny drop of fabric glue can secure the knot if you prefer extra security.
— Final Touches :
Info :
After all appliques are sewn on, lightly steam the runner from the back to settle stitches and make petals sit naturally. Trim any visible ends and weave into the fabric at least 8–10 stitches deep. If desired, add a few seed beads sporadically to leaf centers to mimic dew drops.
— Alternative Construction Notes & Sizing :
Info :
To lengthen: add multiples of 6 chains to foundation and repeat mesh rows until desired length. To widen: add repeats across using 6-stitch multiples. Border instructions remain the same but you may need to adjust stitch placements on Round 1 to distribute sc evenly. If using sport or DK yarn, switch to 3.25mm hook and expect a smaller, denser runner.
— Stitch Count & Mathematical Notes :
Info :
Foundation: 6n + 3 formula. Each mesh repeat across consumes 6 foundation chains (the visual 'diamond' unit). In the sample ch 75 = (6 x 12) + 3 giving 12 diamond repeats across. Each mesh repeat maintains a consistent cluster and chain rhythm so that Row repeats do not change the count across a straight edge.
— Troubleshooting & Tips While Working :
Info :
If edges begin to pull in, add an anchor Row 3-style sc row to stabilize. If edges flare, block more aggressively or add an extra sc round before the decorative border to tighten the edge. Work with a light on your chest to count cluster repeats and avoid miscounting rows — errors are often located at the edges where counts change.
Completing this Floral Lace Table Runner is so rewarding — the airy white lace and bold blooms come together into an elegant centerpiece that makes any table feel special. The pearl accents and scalloped edging are small details that pack a big visual punch. Enjoy the process of building the mesh, shaping the flowers, and arranging the vines; each step invites creative choices. 🧶🌸✨