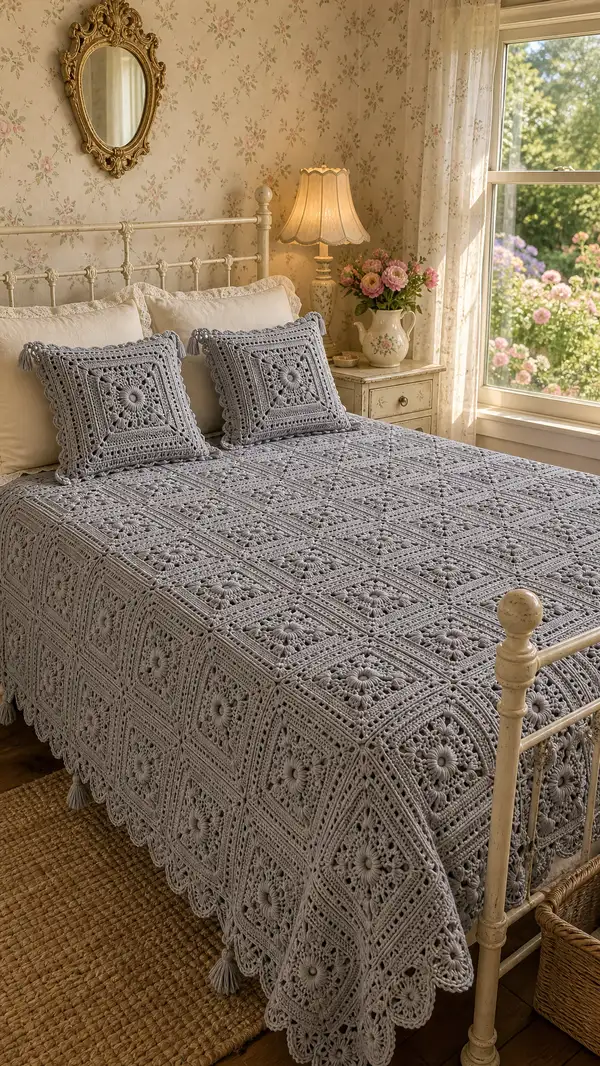
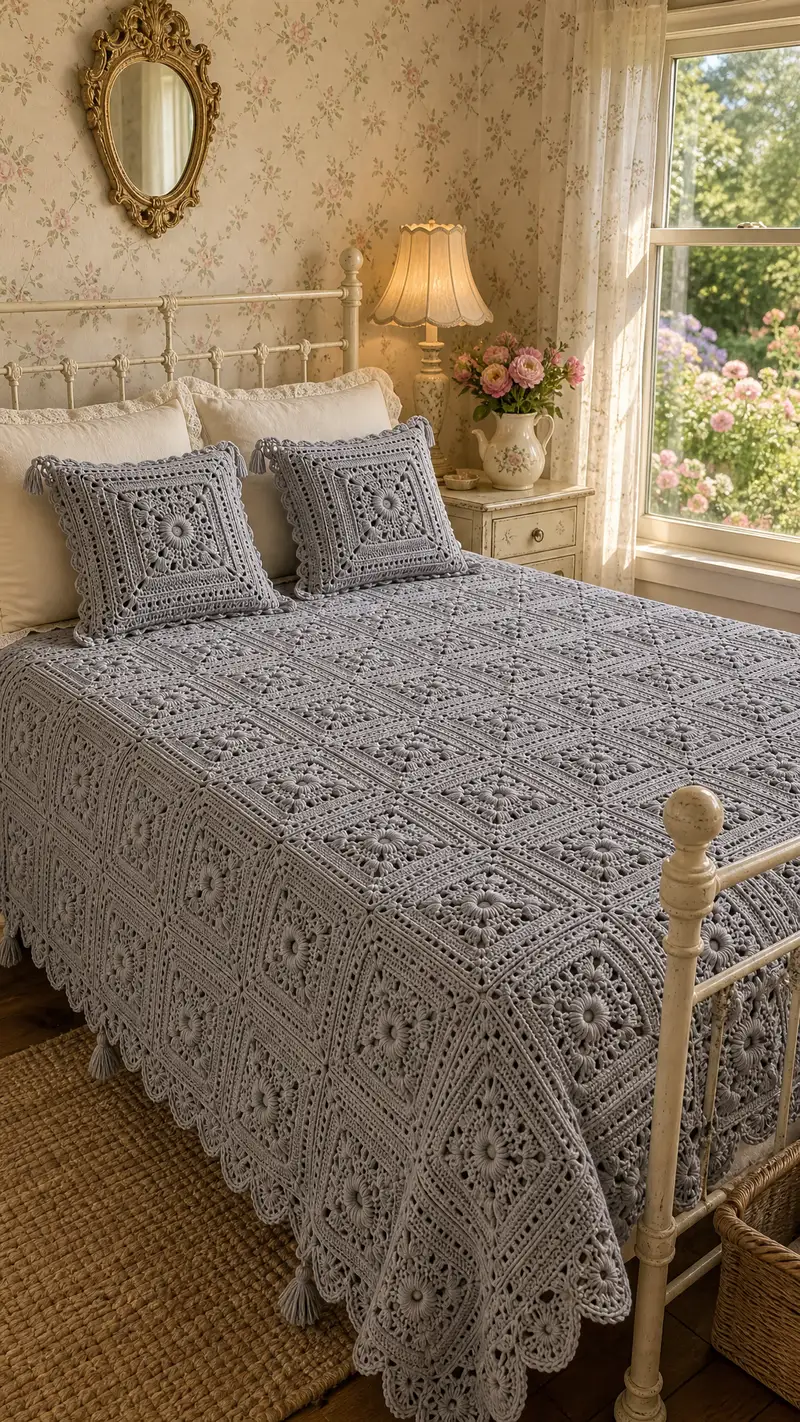
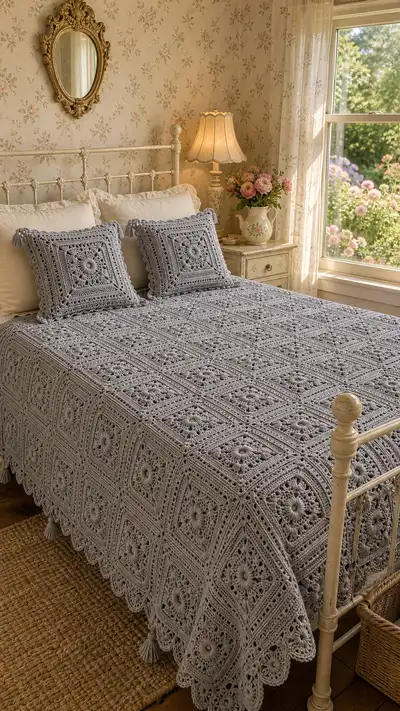
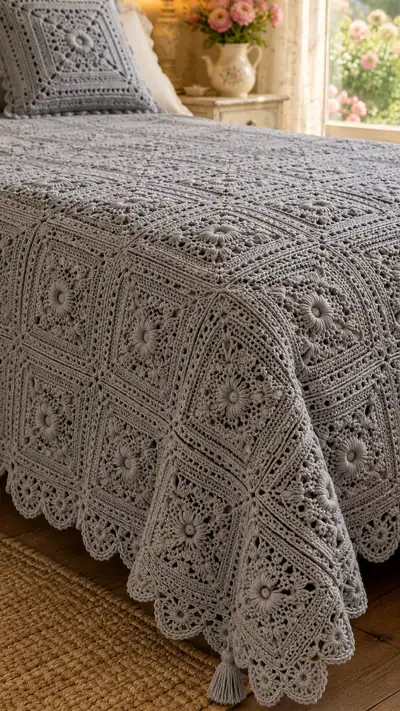
A vintage-inspired dove grey bedspread worked entirely from large floral granny squares, joined to form a stunning full-size coverlet. Features raised flower centers, layered textured rounds, scalloped edging and corner tassels for a classic romantic finish. Clear, step-by-step motif, joining and border instructions let you create a tactile heirloom bedspread and matching pillow shams.
Progress Tracker
0% Complete
— Motif (Large Floral Square) :
Info :
This motif produces a substantial square roughly 14-16 inches blocked using worsted weight yarn and a 4.0mm hook. The motif uses a puff-centre, layered petal rounds, and square-forming framing rounds. Maintain consistent tension; block each motif to size before joining. Puff stitch technique: yarn over, insert hook, yarn over pull through (repeat 3-4 times as instructed), yarn over and pull through all loops on hook, ch1 to secure.
Round 1 :
Start with mr. Ch3 (counts as dc), 15 dc into magic ring, sl st to top of ch3 to join (16)
Round 2 :
Ch3, dc in same st, 2 dc in each st around; sl st to join (32)
Round 3 :
Ch1, sc in same st, ch3, skip 1 st, *sc in next st, ch3, skip 1 st; rep from * around; sl st to first sc (16 ch-3 spaces)
Info :
This round creates a ring of chain spaces to anchor the puff petal round. Ensure all chain spaces are even. Place a marker in the first sc to count rounds easily.
Round 4 :
In each ch-3 space: (yarn over, insert into ch-3, yarn over pull through) 4 times to form a 4-loop puff, yarn over pull through all loops, ch1 to close puff, ch1 between puff and next puff; rep around for 16 puffs; sl st to join (16 puffs)
Round 5 :
Ch3, dc in same sp, *ch2, skip next sc, 2 dc around next puff post (work 2 dc loosely around puff), ch2; rep from * around; sl st to join. The round frames puffs with small dc pairs (32 dc total counted as 2 dc clusters separated by ch2 spaces)
Round 6 :
Ch1, sc in same st, *ch4, sc between the two-dc groups that wrap each puff; rep from * around; sl st to join (16 ch-4 loop spaces)
Info :
These ch-4 loops will create a lacey ring and will be used as base for the first decorative corner-forming rounds. Keep loops even by blocking later.
Round 7 :
Work into each ch-4 loop: (dc, ch2, dc) in loop to begin corner clusters; between loops along the curve work 3 dc in the small gaps to start expanding (This yields 16 small corner markers and 48 dc in between; total forming a circular frame that will become square in later rounds)
Round 8 :
Change to ch-spaced square shaping: *Ch1, sc between two-dc groups, ch1, 3 dc in next ch-2 corner space, ch2, 3 dc in same ch-2; rep from * around to form 16 corner clusters and side dc groups (count depends on spacing but aim for 4 dc clusters per side)
Round 9 :
Info :
Begin defining the sides — place markers roughly at four even points that will become corners. This helps maintain true square shape in subsequent rounds. If your motif appears rounded, you will accentuate corners in the next rounds by working additional clusters into corner ch-2 spaces.
Round 9 :
Ch3, dc in same st, *(2 dc, ch2, 2 dc) in each ch-2 corner space, dc in each side dc stitch or space to fill sides; rep from * around; sl st to join. This round creates defined square corners (count will vary; typical total 8 corner clusters + 4x side stitches per side resulting approx 64 dc)
Round 10 :
Ch1, sc in same st, *ch3, sc into center of each side cluster between corner clusters (this will form 4 ch-3 spaces per side), rep around; sl st to join (approx 16 ch-3 spaces)
Info :
These side ch-3 spaces will be used for later textured bands; place markers at corner ch-2 intersections to ensure each corner maintains the intended number of stitches.
Round 11 :
In each ch-3 side space: work (puff stitch made of 3 loops) — yarn over, insert, pull through; repeat to create 3-loop puff, close, ch1 between puffs; work (2 dc, ch2, 2 dc) in each corner ch-2; sl st to join (16 side puffs + 4 corner clusters)
Round 12 :
Ch3, dc in same st, 1 dc in each puff and dc around, working (2 dc, ch2, 2 dc) in each corner to maintain square; sl st to join (approx 80 dc depending on side counts)
Round 13 :
Ch1, sc in same stitch, *work (ch5, skip 2 dc, sc in next dc) across each side; in corner work sc, ch5, sc in ch-2 space to maintain corner opening; rep around; sl st to join (creates elongated chain loops for lacy framing)
Info :
At this stage the motif is a large floral medallion beginning to square off. If you prefer a smaller motif, stop here and work fewer outer rounds; for a bedspread as pictured continue to round 26 to create a large square.
Round 14 :
Into each ch-5 loop: work (sc, hdc, 3 dc, hdc, sc) to create a shell; in corners work (sc, ch3, sc) in ch-2 corner spaces to maintain square; sl st to join (4 shells per side, 16 shells total)
Round 15 :
Ch3, dc in same st, dc in each stitch across shells and side stitches, in each corner work (2 dc, ch2, 2 dc) to reinforce corner; sl st to join (total dc count typically 120-140 depending on shell counts)
Round 16 :
Ch1, sc in same st, *ch4, sc in the center stitch between two shells on the side; in corners work sc, ch4, sc in ch-2; rep around; sl st to join (creates ch-4 loops along each side)
Info :
Work tightly around corner clusters to define a crisp right angle; use stitch markers if necessary. If a side seems short, add an extra sc between shells next round to even the length.
Round 17 :
Into each ch-4 loop along side: work (2 dc, ch2, 2 dc) to turn them into mini-corners every few stitches which will square the round up; in each corner work (3 dc, ch2, 3 dc). This expands the motif while keeping corners sharp (total clusters across will scale proportionally)
Round 18 :
Ch3, dc in each st and dc around to create a solid textured band; in corners maintain ch2 space as marker (this produces a stable frame for later joining) (typical dc count 160-200)
Round 19 :
Ch1, sc in same st, *fpdc around next 3 sts, ch3, bpdc around next 3 sts, sc in next st; rep across each side; in corners sc, ch3, sc in ch-2 corner spaces to maintain right angles; sl st to join (this creates a band of raised posts that give the motif the ribbed effect seen in the photos)
Round 20 :
Ch3, dc in each stitch and into post stitches where appropriate, smoothing the ribbed band; in corners keep (2 dc, ch2, 2 dc) to preserve shape (total dc approx 200-240)
Info :
Check measurement now — blocked motif should be roughly consistent with other motifs. If your motif is slightly smaller or larger, adjust future rounds to reach the desired motif width by adding or omitting a dc band.
Round 21 :
Ch1, sc in same st, *ch3, skip 3 dc, sc in next dc across sides; in corners sc, ch5, sc in ch-2 corner; sl st to join (creates larger chain arches for the decorative frame)
Round 22 :
Into each ch-3 arch: work (sc, hdc, 3 dc, hdc, sc) as a larger shell; in corners (sc, ch3, sc) in the ch-5 spaces; sl st to join
Round 23 :
Ch3, dc in each stitch and around shells, maintaining corner clusters (this round evens the shell work into the square surface) (typical dc count 240-280)
Round 24 :
Ch1, sc in same st, *ch4, sc between dc groups to create an outer lace ring; in corners sc, ch4, sc; sl st to join (approx 16 ch-4 loops)
Info :
If you prefer more texture mimic the bedspread by adding an extra puff round now: in every second side loop work puff stitches to create raised dots across the panel surface. Ensure puffs remain even height so blocking flattens them uniformly.
Round 25 :
Into each ch-4 loop: work (sc, hdc, 3 dc, hdc, sc) to make scalloped lace shells; maintain corners with (sc, ch3, sc) in ch-4 corner openings; sl st to join (4 shells per side, 16 shells total)
Round 26 :
Change to edging foundation: ch2, hdc in same, hdc in each st around but when you reach a corner work (hdc, ch2, hdc) to preserve the corner turn; sl st to join. Fasten off and weave ends. Motif completed (final stitch count will vary depending on rounds but aim for a balanced square of approximately 14-16 inches blocked)
Info :
Block each motif immediately after finishing. Stretch to the exact square measurement using pins on a blocking board and spritz lightly with water or use a steam iron at a distance. Allow to dry completely before joining to ensure uniformity across the bedspread.
— Joining Motifs (Assemble Bedspread Layout) :
Info :
Plan your bedspread layout. The pictured spread is built from 6 x 8 motifs for an approximate queen/king drape (48 motifs). You can scale up or down. Lay out motifs face down blocked and arranged before joining. Alternate skeins to reduce dye lot striping.
Round 27 :
Joining Preparation: With motifs blocked, decide joining method: whip stitch for invisible seams, or join-as-you-go for fewer seams. The following rounds describe a slip-stitch join-as-you-go variation that creates a lined seam visible in photos.
Round 28 :
Info :
Join-as-you-go version uses the last round of a new motif to connect to two adjacent completed motifs by replacing corner ch-2 spaces with sl st into corresponding ch-2s of neighbouring motifs. Work slowly to ensure alignment.
Round 29 :
Place two blocked motifs right sides together aligning edges. On the last round of the fresh motif, when you come to the corner ch-2 space where the motifs will meet, ch2 then sl st into the ch-2 space of the completed motif, ch2, continue across the side working sl st into each matching stitch or chain space at intervals (approx every shell center) to create a flat seam. Repeat for adjacent side before finishing the last side open for adding next motif. Repeat until full assembly completed.
Info :
If using whip stitch method instead: place motifs side-by-side right sides up. Using length of yarn and yarn needle, whip stitch through back loops only of corresponding stitches along the motif edge for a nearly invisible join. For stronger seams, work through both loops then mattress stitch across seams to hide yarn.
Round 30 :
When three motifs meet (four-corner intersection), weave yarn through corner ch-2 spaces of all four motifs using a small ladder stitch to lock the intersection; ensure the seam is flat and not puckered. Continue joining motifs in rows, then join rows together. Finished bedspread panel should lay flat; reblock if necessary.
Info :
Work joins on a large flat surface to keep motifs straight. Use blocking pins to hold motifs in position while stitching joins. This ensures perfect alignment and even edges for the border.
— Edge Finishing & Scalloped Border :
Round 31 :
Once all motifs are joined and seams hidden, begin border rounds around the entire assembled panel. Round 1 of border (Border Round 1): With right side facing, attach yarn in any corner ch-2 space. Ch1, sc in same ch-2, work 1 sc in each stitch and 3 sc in each corner ch-2 space around to create a uniform square edge. Sl st to join (sc count approx perimeter stitch count)
Round 32 :
Ch3, dc in same st, dc in each st around, working (2 dc, ch2, 2 dc) in each corner to maintain square shape; sl st to join (this forms a continuous dc band around the spread)
Info :
Check drape after a couple of dc rounds. If the spread pulls inward at corners, add an extra dc cluster in each corner next round. If it flares, decrease few stitches evenly across the sides.
Round 33 :
Ch1, sc in same st, *ch3, skip 3 dc, sc in next dc across the side; in corners work sc, ch5, sc in the corner ch-2; sl st to join (creates scallop foundation loops)
Round 34 :
Into each ch-3 loop work (sc, hdc, 3 dc, hdc, sc) shell; into each ch-5 corner work (sc, hdc, 5 dc, hdc, sc) for a larger corner shell; sl st to join
Round 35 :
Ch3, dc around each shell and dc across bands to even the scalloped edge; in corners work (2 dc, ch2, 2 dc) to keep corner prominence; sl st to join
Info :
This produces the scalloped edging seen in the photos. For a deeper scallop, repeat the shell round (Round 34) once more before finishing. Keep border symmetric by counting shells per side.
Round 36 :
Edging Picot Round: Ch1, sc in same st, *ch3, sc in top of each shell to create small picot points across scallops; in corners work sc, ch3, sc to mirror the corner shell; sl st to join. Fasten off and weave in ends.
Round 37 :
Add tassels: Attach tassels at each main corner and at intervals along the side as pictured (see Tassel Section). Evenly space tassels by measuring spread edges and attaching 6-8 tassels per long side for the hung drape effect. Securely knot and hide tails within seam before trimming tassels to uniform length.
Info :
If you prefer no tassels, finish after Round 36 with a neat woven-in edge. Tassels provide weight to help the spread drape; use more tassels for additional weight.
— Pillow Sham (Make 2) :
Info :
Pillow shams in the image are single-square covers with an additional inner border and tassel corners. Use the same motif but stop at Round 26 and finish with a smaller scalloped border to fit a 18-inch pillow. The following rounds adapt the motif into a sham cover.
Round 1 :
Make a motif as per Motif Rounds 1-26 but reduce outer texturing by stopping at Motif Round 20 if you want a slightly smaller square. Block to 18 inches square.
Round 2 :
With right side facing, join yarn around edge and work 2 rounds of 1 sc in each st to create a sturdy edge for pillow insertion. Sl st and fasten off.
Round 3 :
Scalloped trim: work (sc, hdc, 3 dc, hdc, sc) every 6 stitches around to create the scalloped trim; in each corner place an extra small shell. Attach tassel at each corner with 3-4 tassel loops to mimic the photo look.
Info :
To create an envelope backing for the sham: cut two rectangles of linen or crochet two panels in sc to fit the back with 2 inches overlap. Sew to the inside of the sham edge or crochet a joining round to attach the backing. Insert pillow form and close.
— Tassels :
Round 1 :
Make tassels by winding yarn around a 3.5 inch card 30-40 times (adjust for desired fullness). Cut one end and tie a short length tightly around the top to form the head.
Round 2 :
Fold tassel and wrap a 6-8 inch length of yarn around 1/2 inch below the head many times forming the neck. Secure with a knot and hide tail through the head. Trim ends to even length roughly 4-5 inches for the bedspread pictured.
Round 3 :
Attach tassel to spread by threading the long tying tail through the corner ch-2 space and tying tightly on the reverse side. Weave ends into the seam for security. Repeat for each desired tassel placement (pic shows tassel on every corner and every 1.5 motif spacing along the scalloped edge).
Info :
Secure tassels well; they add weight and will be handled. For extra durability knot the tassel twice and add a small dab of fabric glue into the knot (optional).
— Finishing, Weaving & Blocking :
Round 1 :
Weave in ends with a yarn needle by running the tail through several stitches on the wrong side, then trim close. For long ends at joins weave through seams and knot internally to prevent unraveling.
Round 2 :
Block the entire assembled bedspread on a large blocking surface. Start by pinning corners then sides, adjusting until the scallops sit evenly. Spritz with water or use a steam iron at a distance. Allow to dry fully before unpinning.
Round 3 :
Final check: ensure all seams are flat, tassels secure, and border scallops even. If any motif sits high or low reblock or re-sew that seam. Store folded loosely to avoid crushing scallops when not in use.
Info :
For a particularly crisp look, press with steam from the wrong side while motifs are pinned to blocking mats. Never place iron directly on yarn; keep 1-2 inches distance and use steam only.
— Optional Variations & Tips :
Round 1 :
Color Variation: Change color in Motif Round 12 to a slightly lighter grey for a faint floral halo. When changing color, carry yarn across the back or fasten off and weave ends; if carrying, ensure floats are no longer than 6 inches and are secured through nearby stitches.
Round 2 :
Size Variation: Make motifs larger by adding extra dc rounds before the final edging rounds; make smaller motifs by stopping earlier and using finer yarn/hook.
Round 3 :
Fabric Weight: For a softer drape, use a lighter DK yarn and 3.5mm hook and increase motif count. For heavier coverlet use bulky yarn and a larger hook but expect fewer motifs per bed.
Info :
Keep a test motif for reference as you progress. Measure motif after full blocking and calculate how many motifs you need across and down for your desired bed dimensions (account for border width and tassels when computing final coverage).
Completing this dove grey floral granny square bedspread is a true labor of love — every square is a little piece of handiwork that, when joined, becomes a beautiful heirloom. The textured flower centers, soft scalloped edges and tassel finishes create a romantic, layered look that elevates any bedroom. Enjoy the rhythmic process of making each motif, and treat yourself when you drape the finished spread across your bed. 🧶✨ Your handmade coverlet will be cherished for years to come!