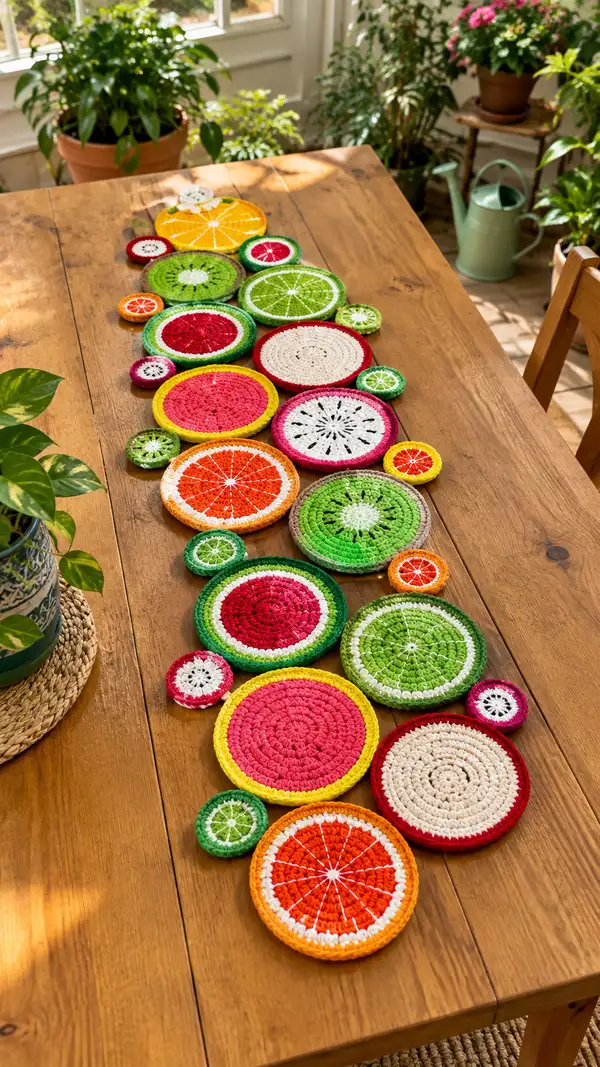
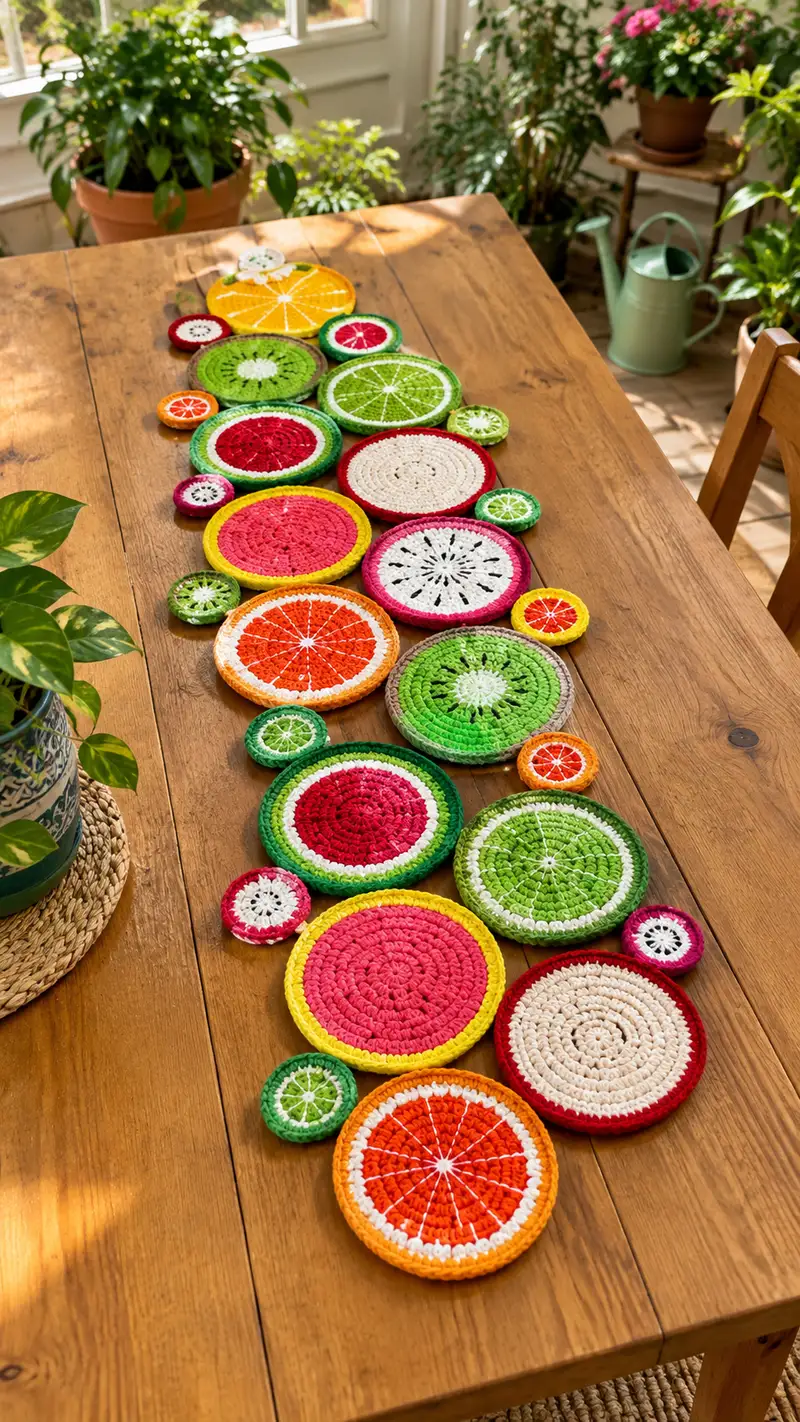
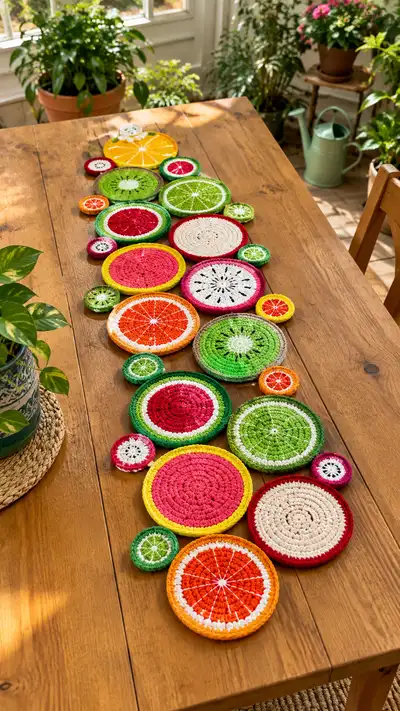
Bright, summery table runner made from a playful collection of crocheted circular fruit motifs. Each round medallion mimics citrus slices and seeds in bold greens, pinks, oranges and creams. The motifs are joined into a flowing runner that lays beautifully down the center of a dining table. This pattern guides you through making each motif, embroidery details, and the assembly for a polished, durable finish.
Progress Tracker
0% Complete
— Notes before you begin :
Info :
All motifs are worked in continuous rounds unless otherwise noted. Use a stitch marker to mark the first stitch of each round (move marker each round). Gauge will vary by yarn — motifs in the photos are made with a bulky cotton yarn and 5.0mm hook. If using lighter yarn, choose a smaller hook and expect more rounds for the same diameter.
Info :
When changing colors, finish the last stitch of the round with the new color to create a clean change. Carry unused yarn loosely along the back of the work when colors are adjacent, or fasten off and weave ends if the color will not reappear shortly.
— Large Orange Slice Motif (Make 2) :
Round 1 :
6 sc in magic ring (6)
Round 3 :
(1 sc, inc) x 6 (18)
Round 4 :
(2 sc, inc) x 6 (24)
Round 5 :
(3 sc, inc) x 6 (30)
Info :
Switch to orange yarn now if creating an orange slice. Keep tension even — these first rounds form a firm center for the wedge embroidery.
Round 6 :
(4 sc, inc) x 6 (36)
Round 7 :
(5 sc, inc) x 6 (42)
Round 8 :
1 sc in each st around (42)
Round 9 :
(6 sc, inc) x 6 (48)
Info :
At this stage your circle should measure approx 16-18 cm across in bulky cotton. If using lighter yarn, continue increasing 1 extra round to reach similar diameter.
Round 10 :
1 sc in each st around (48)
Round 11 :
(7 sc, inc) x 6 (54)
Round 12 :
1 sc in each st around (54)
Round 13 :
(8 sc, inc) x 6 (60)
Info :
Begin to create subtle texture for the fruit flesh by working alternating hdc and sc stitches in the next rounds, this helps the embroidery sit neatly on the surface.
Round 14 :
(1 sc, 1 hdc) around alternately so pattern sits smooth (60)
Round 15 :
1 sc in each st around (60)
Round 16 :
(9 sc, inc) x 6 (66)
Round 17 :
1 sc in each st around (66)
Info :
Work the outer flesh rounds in the main orange color. Count and mark six evenly spaced stitches on round 17 — these will align to the segment spokes for embroidery later.
Round 18 :
(10 sc, inc) x 6 (72)
Round 19 :
1 sc in each st around (72)
Round 20 :
(11 sc, inc) x 6 (78)
Info :
Change to cream/white for the very outer rind highlight: finish round 20, join cream yarn with sl st to the last stitch and carry on.
Round 21 :
1 sc in each st with cream yarn (78)
Round 22 :
1 sc in each st BLO to create a subtle ridge for the rind (78)
Round 23 :
Change to bright yellow for the outer rim. (Use a standing sc if preferred) 1 sc in each st (78)
Round 24 :
1 sc in each st (78)
Round 25 :
1 sc in each st BLO to firm the edge and help the motif sit flat (78)
Info :
Fasten off and weave in ends. Block gently by pinning flat on a blocking mat and misting lightly with water. Let dry fully before embroidery.
Round 26-36 :
Optional: If you want a thicker rim, add 2-3 additional rounds of sc in yellow or contrast color, finishing with 1 sc in BLO on the final round to create definition (78 each round)
Info :
Embroider the segment spokes with white or light cream thread using a stranded yarn or embroidery thread. Bring the needle up at the center and stitch outwards along every sixth marked stitch to create six neat wedges. Secure on the back and weave in ends.
— Large Lime Slice Motif (Make 3) :
Round 1 :
6 sc in magic ring (6)
Round 3 :
(1 sc, inc) x 6 (18)
Round 4 :
(2 sc, inc) x 6 (24)
Round 5 :
(3 sc, inc) x 6 (30)
Info :
Switch to bright green yarn now. For some lime styles you may want an inner cream star — reserve a small strand of cream to create a seed cluster later using surface embroidery.
Round 6 :
(4 sc, inc) x 6 (36)
Round 7 :
1 sc in each st around (36)
Round 8 :
(5 sc, inc) x 6 (42)
Round 9 :
1 sc in each st around (42)
Round 10 :
(6 sc, inc) x 6 (48)
Info :
To make textured segments, work round 11 in alternating dc and hdc stitches: (1 dc, 1 hdc) across each st to create a slightly raised flesh surface (48).
Round 11 :
1 dc,1 hdc alternating across (48)
Round 12 :
1 sc in each st (48)
Round 13 :
(7 sc, inc) x 6 (54)
Round 14 :
1 sc in each st (54)
Info :
Mark six even points on round 14 to align wedge embroidery later. Use removable stitch markers or contrasting yarn for temporary markers.
Round 15 :
(8 sc, inc) x 6 (60)
Round 16 :
1 sc in each st (60)
Round 17 :
Change to cream for the inner peel highlight: 1 sc in each st (60)
Round 18 :
Join darker green and work 1 sc in each st BLO to create defined outer ring (60)
Round 19-34 :
Optional 2-5 more rounds of sc in outer rim color to reach desired diameter. Keep final round in BLO for a crisp rim (60 each round)
Info :
Embroider segments with light cream yarn using simple straight stitches radiating from the center to the marked points. Add small French knots or a tiny seed cluster at the center if desired.
— Medium Watermelon/Red Center Motif (Make 3) :
Round 1 :
6 sc in magic ring (6)
Round 3 :
(1 sc, inc) x 6 (18)
Round 4 :
(2 sc, inc) x 6 (24)
Round 5 :
(3 sc, inc) x 6 (30)
Info :
Use bright pink or red for the center. To suggest watermelon flesh, alternate rows of sc and hdc for a soft ridged look.
Round 6 :
(4 sc, inc) x 6 (36)
Round 7 :
1 sc in each st (36)
Round 8 :
(5 sc, inc) x 6 (42)
Round 9 :
1 sc in each st (42)
Round 10 :
(6 sc, inc) x 6 (48)
Round 11 :
1 hdc in each st around to add texture (48)
Round 12 :
1 sc in each st (48)
Round 13 :
Change to white/cream for a thin rind accent: 1 sc in each st (48)
Round 14 :
Change to dark green and work 1 sc in each st BLO to finish outer rind (48)
Round 15-30 :
Optional: Add 2-4 extra rounds of rim color for more width, ending with 1 sc BLO on final round (48 each round)
Info :
Stitch small black seed embroidery randomly in the pink flesh with single strand black embroidery thread to mimic seeds. Space them naturally rather than evenly for a realistic look.
— Medium Pink Grapefruit Motif (Make 2) :
Round 1 :
6 sc in magic ring (6)
Round 3 :
(1 sc, inc) x 6 (18)
Round 4 :
(2 sc, inc) x 6 (24)
Round 5 :
(3 sc, inc) x 6 (30)
Info :
Use a vivid pink for flesh and a contrasting rim color such as magenta or deep red. Consider working the last two rounds in FLO to create a ribbed inner edge that will hold center embroidery neatly.
Round 6 :
(4 sc, inc) x 6 (36)
Round 7 :
1 sc in each st (36)
Round 8 :
(5 sc, inc) x 6 (42)
Round 9 :
1 hdc in each st (42)
Round 10 :
Change to cream for segmentation highlight: 1 sc in each st (42)
Round 11 :
Change to magenta for rim and work 1 sc in each st BLO (42)
Round 12-28 :
Add 2-4 additional rounds of rim in magenta or alternate colors to reach desired diameter; final round 1 sc in BLO (42 each round)
Info :
Use cream embroidery to stitch the wedge separators from center to rim. For a soft textured look, use a single strand of yarn and couch it down with tiny stitches rather than a single straight stitch.
— Small Coin Motif (Make 10-12) :
Round 1 :
6 sc in magic ring (6)
Round 3 :
(1 sc, inc) x 6 (18)
Round 4 :
(2 sc, inc) x 6 (24)
Round 5 :
1 sc in each st (24)
Round 6 :
Change to contrast color for rim: 1 sc in each st (24)
Round 7 :
1 sc in each st BLO to firm edge (24)
Round 8-12 :
Optional 2-4 more rounds for slightly larger coins, keeping final round in BLO (24 each round)
Info :
Small coins make excellent fillers between larger motifs. Try a variety of color combos to mimic mini limes or berries. Embroider tiny spokes or seeds depending on chosen look.
— Tiny Accent Slice / Seed Disc (Make 10-14) :
Round 1 :
6 sc in magic ring (6)
Round 3 :
1 sc in each st (12)
Round 4 :
Change to contrast rim color: 1 sc in each st (12)
Round 5-10 :
Optional: add up to 5 more rounds to increase diameter, finish final round in BLO for neat edge (12 each round)
Info :
These tiny discs are quick and effective. Use them as seeds, slice halves, or playful dots. Embroidery can be a simple X or single central French knot.
— Neutral Cream Disc (Make 2) :
Round 1 :
6 sc in magic ring (6)
Round 3 :
(1 sc, inc) x 6 (18)
Round 4 :
(2 sc, inc) x 6 (24)
Round 5 :
(3 sc, inc) x 6 (30)
Round 6 :
1 sc in each st (30)
Round 7 :
Change to neutral rim color and work 1 sc in each st BLO (30)
Round 8-14 :
Add 2-4 more rounds for desired diameter; final round 1 sc in BLO to crisp edge (30 each round)
Info :
These discs act as calm centerpieces to break up intense color. Keep embroidery minimal — a single spiral or center knot is enough.
— Surface Embroidery and Segment Details :
Info :
For all slice motifs, surface embroidery defines the fruit wedges. Use a yarn or stranded embroidery thread about half the thickness of your working yarn. Mark wedge points with removable markers first, then stitch from center to rim. Use straight stitches for clean lines, couching for thicker yarn and a tapered look.
Info :
White or cream spokes look crisp on citrus and can be reinforced with a tiny running stitch along each side of the main spoke to create a raised segment divider. Secure thread ends on the back and weave several inches to avoid slipping.
— Blocking and Finishing Motifs :
Info :
Block each motif flat on a blocking mat using pins to shape a perfect circle. Mist gently and allow to dry completely. Blocking evens stitches and makes joining easier. Trim all tails and tidy the backs before assembly.
Info :
If a motif cups slightly, steam-block while pressing with moderate heat and pin flat until cooled. Cotton yarn responds well to gentle steam shaping.
— Joining Motifs into the Runner :
Info :
Lay out all motifs on a large surface and experiment with arrangement until satisfied. The pictured runner uses an offset, flowing composition with large motifs alternating with small coins to create organic negative space. Photograph your final layout before sewing so you can reassemble if a pin shifts.
Round 1 :
To join two motifs directly: place wrong sides together. Using yarn in the rim color, sl st through both rims through each st around to join; if using sl st join, ensure tension is loose enough to avoid puckering.
Round 2 :
For a nearly invisible join, use the mattress stitch: sew through both rims' bars (not over top loops) aligning stitches and pulling gently to close. Work a few stitches and check alignment; adjust as needed.
Info :
Join motifs gradually, pinning each new motif to the assembled portion before sewing. This keeps spacing consistent and reduces distortion of the runner's line.
Round 3 :
If you prefer a crocheted join, work a 3-round joining strip by crocheting 1 sc across the rim edge of both motifs simultaneously (1 sc in motif A, 1 sc in motif B) around their touching edges, then add 1-2 rounds of sc around the connecting strip for reinforcement.
Info :
Finish assembly by weaving in all ends securely at the back. Use small whip stitches to tack any vulnerable points for additional strength if the runner will receive heavy use.
This cheerful citrus runner brings sunshine to the center of your table with playful colour and texture. Each medallion is a small celebration of stitches and embroidery, coming together into an eye-catching, tactile piece. Enjoy playing with layouts and color combinations — every variation feels like a new summer table. 🧶🍊 Brighten your home and share your finished runner with friends for instant delight!