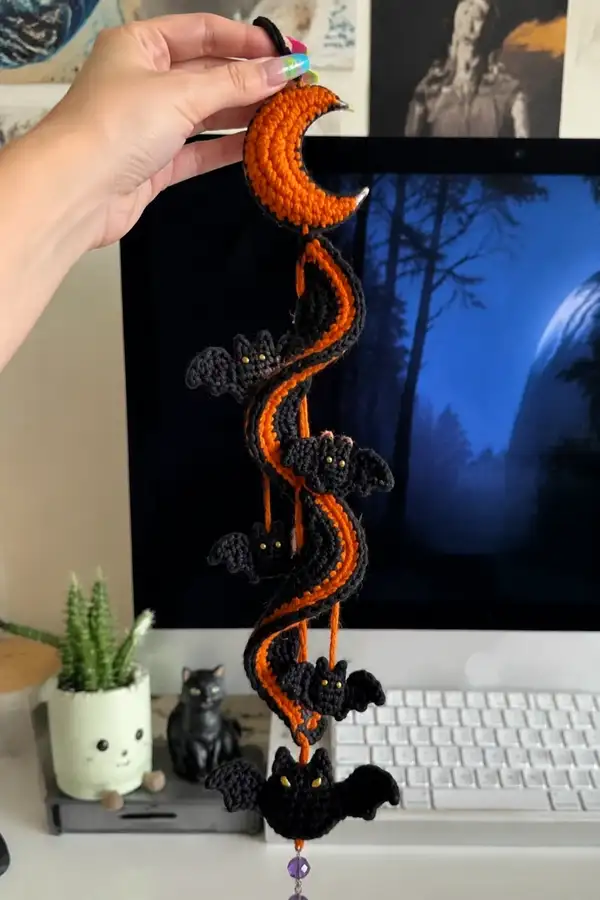
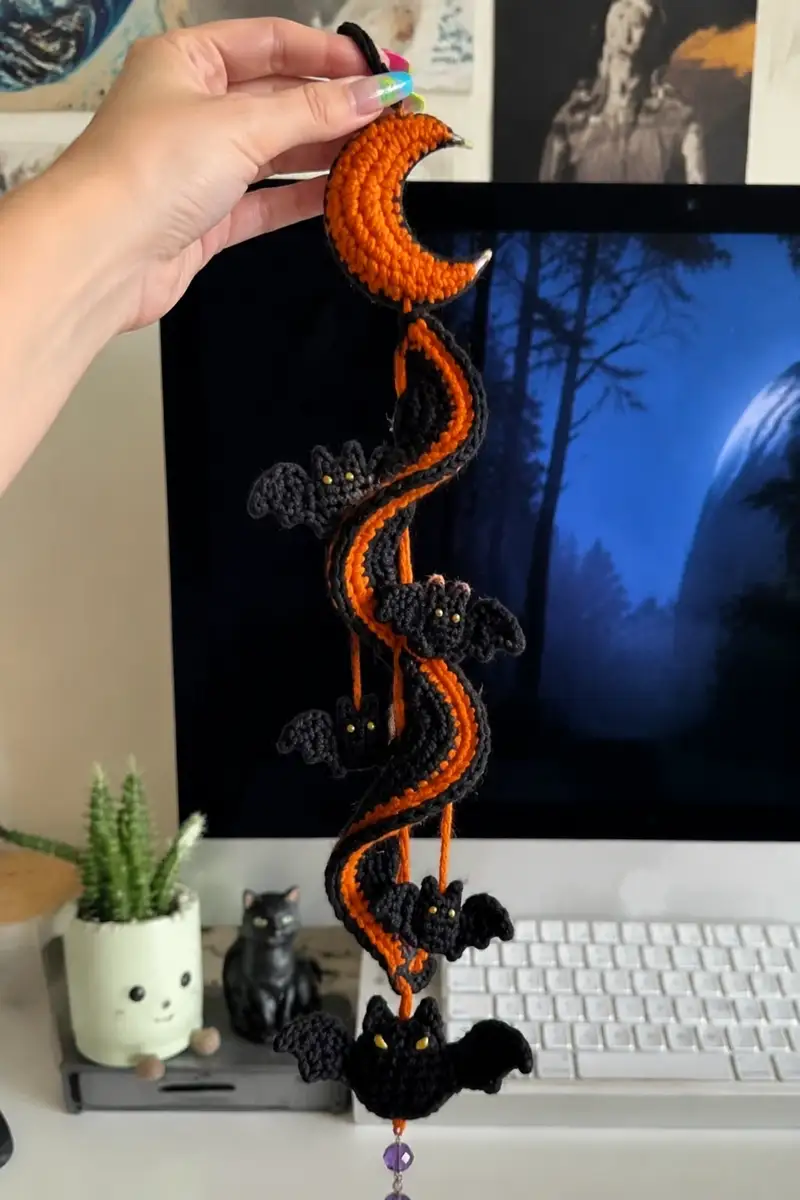
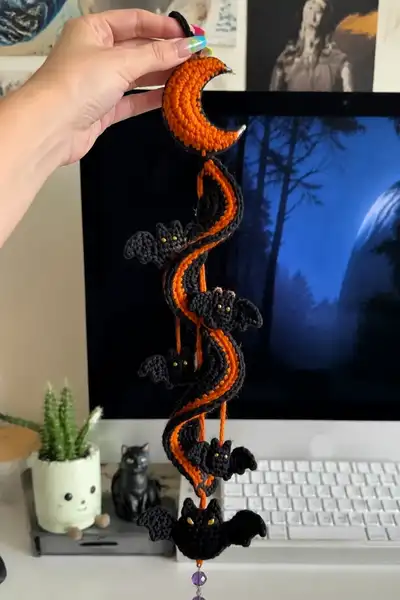
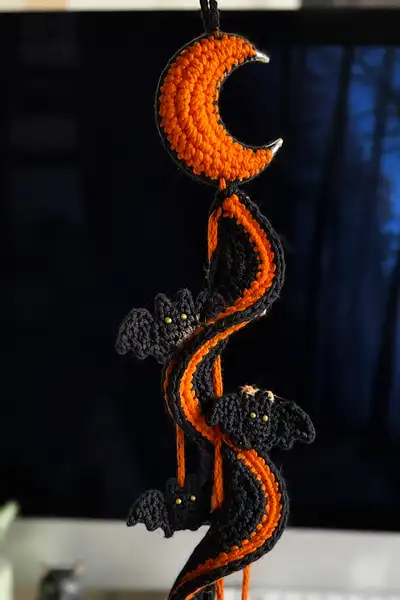
Create a spooky-handsome hanging garland featuring a bright orange crescent moon, two twisted spiral ribbons in orange and black, and six adorable little black bats with golden bead eyes. This pattern uses basic amigurumi and motif techniques to build flat and lightly stuffed shapes, then assembles them into a cascading mobile. Perfect for Halloween decor, doorways, or a themed window display — this garland is lightweight, portable, and full of seasonal charm.
Progress Tracker
0% Complete
— Crescent Moon (Make 1) :
Info :
This crescent is worked as two identical shallow domes joined together around a metal or cardboard crescent form, or stuffed lightly and sewn closed if no frame is used. Use pumpkin orange yarn for the top facing side and black for the edge if you want the sewn edge detail seen in the photo. Work tightly so the moon holds its shape.
Round 1 :
6 sc in magic ring (6)
Round 3 :
(1 sc, inc) x 6 (18)
Round 4 :
(2 sc, inc) x 6 (24)
Round 5 :
(3 sc, inc) x 6 (30)
Round 6 :
(4 sc, inc) x 6 (36)
Round 7 :
(5 sc, inc) x 6 (42)
Round 8 :
(6 sc, inc) x 6 (48)
Info :
We will build a shallow dome. From here out, work in rows around the oval to shape the crescent arc. Keep the fabric flat; use stitch marker to note beginning of round.
Round 9-12 :
1 sc in each st (48)
Round 13 :
(6 sc, dec) x 6 (42)
Round 14 :
(5 sc, dec) x 6 (36)
Info :
Begin forming the inner concave curve for the crescent by removing stitches on the inside arc. If using a metal crescent frame, stop and fit the piece over the frame now to estimate inner edge shaping.
Round 15 :
(4 sc, dec) x 6 (30)
Round 16 :
(3 sc, dec) x 6 (24)
Round 17 :
(2 sc, dec) x 6 (18)
Round 18 :
(1 sc, dec) x 6 (12)
Info :
Fasten off leaving long tail for sewing. Make two identical pieces. If using a crescent frame, you will stitch the outer edges of both pieces around the frame, stuffing lightly between. If no frame, stuff lightly to maintain shallow crescent. Black trim is added later to mimic the photo outline.
Round 20 :
Prepare to join halves: position the two halves wrong sides together around frame or one atop the other aligned. With black yarn, sl st around outer edge through both layers to join and create a defined outer rim. Work slowly to keep slip stitches evenly spaced (approx 60 sl st around, adjust to actual count when joining).
Info :
If you are working over a metal crescent, insert the frame into the seam as you join so the seam conceals the frame. If not using a frame, add a tiny amount of stuffing before closing the last third, then finish closing with invisible stitches.
— Spiral Ribbons (Make 2 long strips — Left and Right) :
Info :
Each spiral ribbon is constructed from repeating teardrop motifs joined end-to-end to form a long flexible strip. One strip should be worked primarily in orange with black edge, the other in black with orange edge, then twisted together and stitched lightly to form a spiral column. Make two identical long lengths of about 40 teardrop motifs each for a long garland (you can shorten to taste).
Teardrop Motif Round 1 :
Start with orange: ch 4, join with sl st to form small ring. Work 8 sc into ring (8)
Round 2 :
Inc in each st around (16)
Round 3 :
(1 sc, inc) x 8 (24)
Round 4 :
(2 sc, inc) x 8 (32)
Round 5 :
1 sc in each st (32)
Info :
We will now elongate this circle into a teardrop by working additional stitches along one half. Turn your work to create a lip for the long point of the teardrop.
Round 6 :
Ch 1, sc in first 8 sts, hdc in next 8 sts, 2 dc in next 8 sts, hdc in next 4 sts (counts may vary, aim for extended curve) (32)
Round 7 :
1 sc in each st around focusing more height at the pointed end (32)
Round 8 :
Switch to black yarn (or black trim) in the last sl st. With black, sl st along outer edge to define edge. Work evenly for a neat ridge.
Info :
Fasten off orange if working separate, leaving a tail for join. Leave a small loop at the tip to stitch motifs together end-to-end. Make the required number of motifs (approx 40 per long strip to reach length seen in photo). If you prefer fewer motifs, make 20–30 motifs each for a shorter garland.
Joining Motifs :
When joining, stack motifs end to end and whip stitch the tip of one to the base of the next through both layers. Be consistent with orientation so the inner orange arc is visible across the length. Join all motifs to form two long strips approximately 60–90 cm depending on motif count.
Info :
Once both strips are complete, block them gently with steam or wet blocking to shape. Then twist strips around each other by holding the top and letting gravity turn them into a spiral. Pin into shape and tack stitch every 5–8 cm to hold the spiral permanently. At the top, leave a small loop to attach the moon.
— Small Bat (Make 2) :
Info :
Small bat is a mostly flat motif with a small rounded head. Work tightly with black yarn. Use tiny gold beads for eyes or stitch with yellow thread. Make two small bats for higher positions on the garland.
Round 1 :
6 sc in magic ring (6)
Round 2 :
Inc in each st (12)
Round 3 :
(1 sc, inc) x 6 (18)
Round 4 :
1 sc in next 6 sts (to form head), ch 6, sl st into next stitch at base to create wing foundation, ch 6, sl st into next stitch (head and two wing loops formed) (18)
Info :
We will work scalloped wings from the wing loops. Keep the head slightly stuffed: push a tiny amount of fiberfill into the center behind the head before finishing the head row.
Round 5 :
Work into each wing loop: (sl st, sc, hdc, 2 dc, hdc, sc, sl st) into each loop to create scalloped wing. Do both wings (18 + scallops)
Round 6 :
Turn and sc across the base to join wings to the head. Make 18 even sc across to stabilize (18)
Round 7 :
Edge with BLO: 1 sc in each st BLO for a defined edge (18)
Info :
Attach two gold seed beads for eyes using embroidery thread. Tie knots inside head and weave ends through 3–4 stitches to secure. Alternatively use French knots with yellow thread to make eyes.
Round 8 :
Fasten off leaving a 10 cm tail for sewing. Weave tail through edge to hide, then trim. Make 2 small bats total.
— Medium Bat (Make 2) :
Info :
Medium bat is similar to small but slightly larger wing detail and a slightly puffed body. Make two to vary spacing for visual interest.
Round 1 :
6 sc in magic ring (6)
Round 3 :
(1 sc, inc) x 6 (18)
Round 4 :
(2 sc, inc) x 6 (24)
Round 5 :
1 sc in next 8 sts (head), ch 8, sl st to base for first wing loop; sc in next 8 sts (body center), ch 8, sl st to base for second wing loop (24)
Info :
Lightly stuff head area now with a tiny pinch of fiberfill; the body should remain almost flat for hanging balance.
Round 6 :
Work wing scallops into each chain loop: (sl st, sc, hdc, 2 dc, 2 dc, hdc, sc, sl st) into each loop to create larger scallops. Repeat for both wings.
Round 7 :
Join across base with sc across to bring shape together; sc evenly across the body base (24)
Round 8 :
Edge with BLO: 1 sc in each st BLO to create a neat raised wing edge (24)
Round 9 :
Embellish: Add two gold beads for eyes sewn into the head area. Fasten off leaving long tail for sewing to ribbon.
— Large Bat (Make 2) :
Info :
This large bat sits at the bottom of the garland in the photo. It has a wider body and more defined wing scallops to read well at a distance. Make two large bats or one large and one medium depending on how heavy you want the bottom to be.
Round 1 :
8 sc in magic ring (8)
Round 3 :
(1 sc, inc) x 8 (24)
Round 4 :
(2 sc, inc) x 8 (32)
Round 5 :
1 sc next 10 sts (head), ch 10 sl st to base for wing loop; 1 sc next 12 sts (body), ch 10 sl st to base for wing loop; remainder sc to complete round (32)
Round 6 :
Work each wing loop with an extended scallop sequence: (sl st, sc, hdc, 2 dc, 3 dc, 2 dc, hdc, sc, sl st) into each loop to create dramatic wing points.
Round 7 :
Join wings and body with sc across the base, distributing 32 sc evenly. Keep a slightly rounded chest by adding a few sts in front center if desired (+2 sc center)
Round 8 :
Edge with BLO for raised wing rims: 1 sc in each st BLO around (32)
Round 9 :
Add bead eyes: sew two gold seed beads approximately 3 stitches apart at head center. Fasten off leaving a 15 cm tail for sewing to ribbon and for hanging height adjustment.
Info :
Because large bats are heavier, you may prefer to hang them from the bottom of the spiral using a short length of orange yarn looped through the seam to distribute weight.
— Connector & Hanger Details :
Info :
Use short orange yarn cords to suspend each bat from the spiral column. Vary lengths between 6–20 cm to create staggered hanging positions as shown. For the top hanger, form a small chain loop (ch 30) and attach to the moon top seam. You can add a decorative bead at the bottom of the lowest bat as in photo.
Round 1 :
Make simple cord: ch 60 (or desired length), turn, using slip stitches along chain back to start to make a sturdy hanging loop. Fasten off and weave ends in.
Info :
Alternatively, make several thinner cords and braid them for a stronger suspending loop. Attach cords to the moon by sewing through the seam or through a small metal jump ring anchored into the seam.
— Edge Trim & Detailing :
Info :
In the photo the spiral and moon edges are outlined in black for contrast. To reproduce that look, work a final round of black sc around the outer edges of the crescent and along each spiral motif after joining. Use BLO for ridged effect where visible.
Round 1 :
With black yarn, join at any seam and sc evenly around the outer rim of the moon and ribbons. Approximately 60 sc around moon outer rim; adjust to your sewing spacing across ribbons.
Round 2 :
1 sc in each st BLO around for a neat raised ridge (work where desired only, not necessary on entire length) (counts vary)
Info :
Use small matrix stitches of black along the inner orange edge in the spiral to mimic the defined line in the image. These may be simple single crochet slip-stitch joins or a tiny embroidered chain stitch with black yarn.
— Assembly & Final Shaping :
Info :
Before sewing everything together, lay pieces out in the order you want them to hang. The pictured arrangement: moon at top, then long spiral column with alternating small-medium-large bats spaced along the length, and a bead tassel at bottom.
Round 1 :
Attach moon to top of spiral by sewing loop of spiral into moon seam at the top center. Use whip stitch and the long tails left when joining spiral motifs for a secure join.
Round 2 :
Sew bats to the spiral: use the long tail on each bat to stitch from bat seam through spiral seam on the correct motif. Reinforce with 6–8 secure stitches so bats do not droop or rotate excessively (no stitch counts).
Info :
Stitch each bat so the body sits slightly out from the spiral allowing the wings to show — a small tab sewn through the seam will hold them at a slight angle. Alternate sides to create a balanced look when hung.
Round 3 :
Add final embellishment: bead tassel or crystal at the very bottom. Tie a small bead cluster and sew through the bottom seam of the lowest bat for weight and sparkle.
Info :
Weave in all ends, block lightly, and steam gently to finish. If the spiral does not maintain twist, tack stitch along its length at 5–8 cm intervals on the back side only to hold shape.
This Halloween garland brings classic seasonal color and a touch of whimsy to any doorway or shelf. Each crochet motif — from the crescent moon to the tiny bat wings — adds personality and movement to your décor. Making this piece is a satisfying mix of repetitive motifs and careful assembly that rewards you with an eye-catching finished piece. 🎃🦇 Hang it proudly or gift it to a fellow spooky-loving friend — this little project adds big seasonal cheer. Happy stitching!