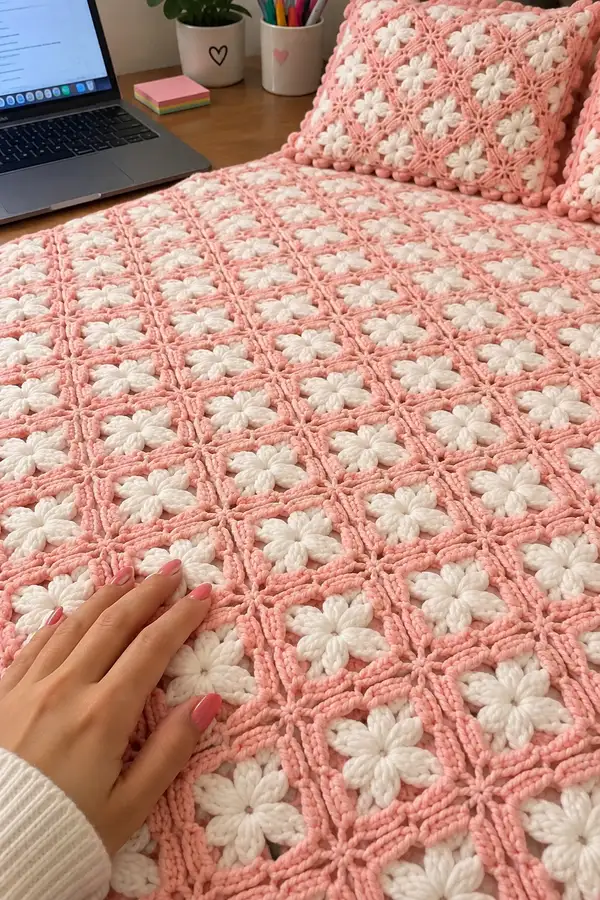
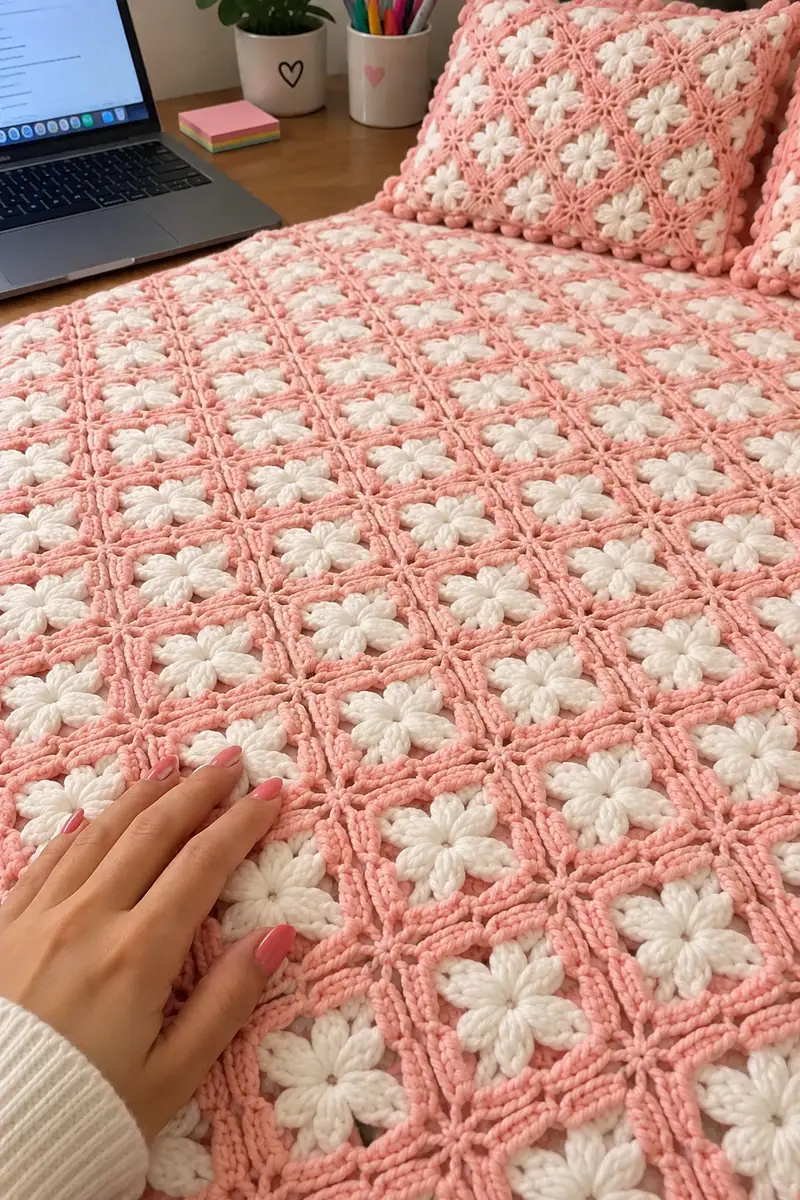
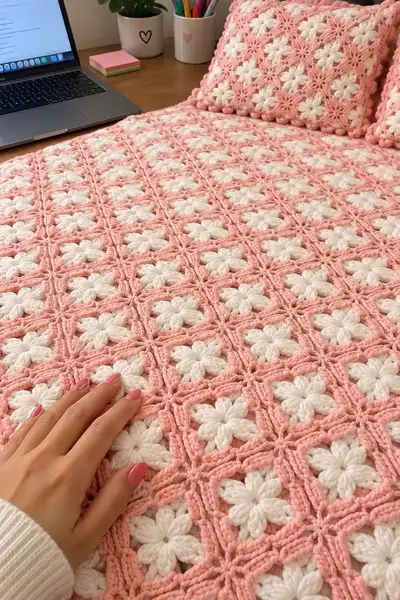
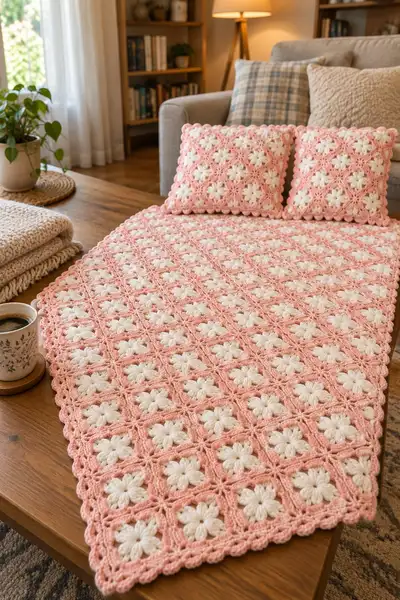
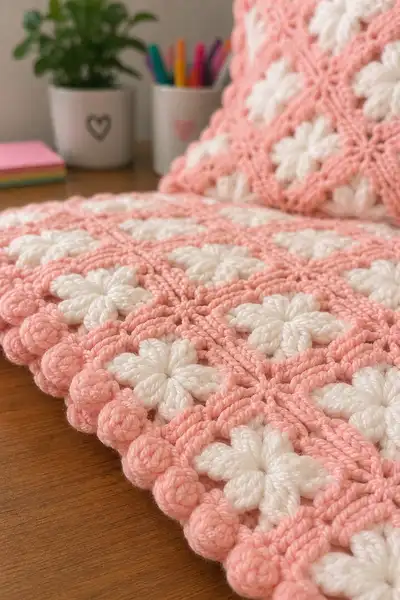
A soft, floral-inspired bedspread made from delicate puff-petal squares joined into a feminine coral-and-cream throw. The pattern uses a simple repeating flower square with a raised coral frame and a bobble scallop border for a cozy, handmade look. Perfect for a bedside throw or decorative bedspread, this pattern includes instructions for motif construction, join-as-you-go assembly, pillow covers, and a lush scalloped edging.
Progress Tracker
0% Complete
— Notes & Gauge :
Info :
Gauge: one finished motif (including coral frame, before blocking) measures approximately 4.5" (11.5 cm) square when worked with worsted/aran yarn and a 6.0 mm hook. Gauge can vary with puff stitch tension—work a test motif and block lightly for most accurate sizing.
Info :
Terminology: This pattern uses 'puff' for the floral petal clusters and 'bobble' for the final scallop. Puff instructions: yo, insert hook, pull up loop, yo, pull up loop, yo, pull up loop (3 times total), yo and pull through all loops on hook, ch1 to close the puff. Bobble instructions: 5 dc into same stitch leaving final loops on hook each time, yarn over and pull through all 6 loops, ch1 to close bobble.
— Motif (Flower Square) :
Round 1 :
With cream yarn. Make a magic ring. Ch1 (does not count), *puff (see Info) into ring, ch1; rep from * 7 more times — you will have 8 puff petals with ch1 spaces between (8 puff, 8 ch1). Tighten ring and join with sl st into the first ch1 space.
Info :
Keep your puff height consistent: make each puff using exactly 3 pull-ups before finishing the puff and ch1 between puffs. After completing Round 1, arrange the 8 puffs evenly in a circle so petals sit flat.
Round 2 :
Change to coral. Join with sl st into any ch1 space. Ch3 (counts as dc), 1 dc in same ch1 space (2 dc in same space), ch1, *(3 dc in next ch1 space, ch1) repeat around for 8 ch1 spaces; after last repeat, sl st to top of ch3. You will have 8 groups of 3 dc separated by ch1 (24 dc, 8 ch1).
Info :
Round 2 forms the first coral ring around the petals — this ring begins to square the motif by creating more defined stitch groups that can be manipulated into corners on next rounds.
Round 3 :
Ch1, sc in same st, *(ch2, sc in next dc between groups) 2 times to create a small opening between groups, then sc in the next dc; rep around finishing with sc in last st; sl st to first sc. Total sc around: 32 sc with 8 ch2 loop positions distributed (32 sc).
Info :
Round 3 adds chain-2 spaces that will be used to create the rounded corners later. Keep your sc tension even so the motif lays flat.
Round 4 :
Ch3 (counts dc), 2 dc in same stitch, *skip next 4 sc, in the next ch2 sp work (2 dc, ch2, 2 dc) (corner made), skip next 4 sc, in next sc work 3 dc; rep from * around to form 4 corners and 4 sides. End with sl st to top of ch3. Count: 4 corner groups of 4 dc each (16 dc), plus 4 side groups of 3 dc each (12 dc) total 28 dc plus 4 ch2 corner spaces.
Info :
Round 4 converts the circular rhythm into a square arrangement: the (2 dc, ch2, 2 dc) corners give defined square corners and the side 3-dc groups form even side panels. Check that corners are roughly 90 degrees before proceeding.
Round 5 :
Ch1, sc in same st, *in next 3 dc work 1 sc in each (3 sc), in ch2 corner work (sc, ch3, sc), repeat from * around. End sl st to first sc. Total count: 4 corner ch3 spaces, side sc totaling 4 sides x3 sc = 12 sc, plus 8 corner sc = 20 sc (but think of work as 4 sides with 3 sc each and corners separate).
Info :
Round 5 creates larger corner chain-3 spaces to enlarge the square; these chain-3 corners will be used to form the next framework of the square and to make join points when assembling squares.
Round 6 :
Ch3 (counts dc), 2 dc in same corner ch3 sp, *dc in next 3 sc (work 3 dc across the side), in next corner ch3 sp work (2 dc, ch3, 2 dc), rep from * around. End sl st to top of ch3. Stitch count: corners contribute 4x4=16 dc, sides contribute 4 sides x3 dc =12 dc total 28 dc (same as Round 4 but elongated).
Info :
If you prefer a slightly larger motif for a cozier bedspread, repeat Round 6 once more to widen each side before completing the motif. That will increase overall motif width by approximately 5-8 mm per extra round.
Round 7 :
Ch1, sc in same st, *(2 sc in next dc) x3 across each side (6 sc per side), in corner ch3 sp work (sc, ch4, sc), repeat. End sl st to first sc. Total sc around: 4 corners with 2 sc each (8) + 4 sides x6 sc = 24 sc = 32 sc total.
Info :
Round 7 adds extra single crochet rows to square the block and prepare a clear grid line for joining. The ch4 in corners gives extra room to join adjacent motifs with a clean join-as-you-go slip-stitch connection.
Round 8 :
Ch2 (counts as hdc), hdc in same st, hdc in each sc around until corner ch4: in ch4 work (hdc, ch3, hdc). Continue around and sl st to top of ch2. Total hdc: 32 hdc with 4 ch3 corner spaces.
Info :
Round 8 uses hdc to slightly flatten the surface and create an attractive raised frame. If you desire a more textured frame, work Round 8 in BLO to get a subtle ridge.
Round 9 :
Ch1, sc in same st; *sc in each hdc across the side (count 6 sc), in corner ch3 work (sc, ch5, sc), rep around. End sl st to first sc. Total sc: 4 sides x6 = 24 sc + 8 corner sc = 32 sc, with 4 ch5 corners.
Info :
The ch5 corner loops are intentionally larger to accept join-as-you-go on two adjoining sides if you assemble blocks in a grid. Keep these corners consistent in height for easy joining.
Round 10 :
Ch3 (counts dc), dc in same st, dc in each sc across the side (6 dc), in corner ch5 work (2 dc, ch5, 2 dc). Rep around and sl st to top of ch3. Total dc = 4 corners x4 dc =16 + 4 sides x6 dc =24 for a total of 40 dc plus 4 ch5 corner spaces.
Info :
At this point each motif should measure roughly 4.5" (11.5 cm) square before blocking. If your motif measures smaller or larger, change hook size or yarn weight for subsequent motifs to maintain consistent gauge across the bedspread.
Round 11 :
Ch1, sc in same st, *sc in each dc across the side (6 sc), in corner ch5 work (sc, ch6, sc), rep across. End sl st to first sc. Count: 4 sides x6 sc =24 sc + 8 corner sc = 32 sc, 4 ch6 corners.
Info :
Round 11 is optional if you want a wider coral frame; it also creates deep corner loops needed for join-as-you-go for larger motifs (like bed-sized layouts). Use this round if you plan a wide border later.
Round 12 :
Ch2, hdc in same st, hdc in each sc across until corner ch6: in ch6 work (hdc, ch3, hdc). Continue around and sl st to join. Final count: 32 hdc with 4 ch3 corner spaces. Fasten off and weave end. Block lightly if desired.
Info :
Fasten off leaving a 5-6" (12-15 cm) tail in coral for join-as-you-go if you plan to start joining immediately. If making multiple motifs in batches, weave in ends after joining to keep workspace tidy.
— Motif Stitch Notes & Variations :
Info :
Variation 1: To make petals fuller, use a 4-loop puff instead of a 3-loop puff in Round 1; this will increase center bulk and slightly increase motif size (approx +3-4 mm). Variation 2: For a denser frame, work Round 8 in BLO for a ribbed raised frame effect. Variation 3: Swap the color order to a coral center and cream frame for a reversed look—adjust yarn amounts accordingly.
— Join-As-You-Go Assembly (JAYG) Method — Edge Preparation :
Info :
This bedspread is assembled using join-as-you-go to preserve crisp coral grid lines. We recommend planning your layout first — typical throw in the photos is 9 x 30 motifs for a long bed runner or 30 x 30 for a twin-size small bedspread. Adjust number of motifs to fit desired final dimensions.
Round 13 :
To join first motif to second: With coral on motif 2, begin Round 12 (hdc round) but when you reach a side that touches a completed motif, instead of hdc in the ch space, sl st into the corresponding ch space of the adjacent completed motif, ch1, and continue. Continue joining sides in this manner to attach motifs one side at a time. Count per joined side: when you replace 6 hdc with 6 join actions, stitch counts across the working motif remain visually consistent—total hdc count will match previous round's visual density.
Info :
When join-as-you-go slipping into adjacent motif spaces, maintain the same loop height (use the same ch spacing) so the join is even. Use the corner ch3 or ch5 spaces to align corners first then work sides to avoid distortion.
Round 14 :
As you join three motifs into an L-shape, on the third motif work the corner joins first: into corner ch-space work (hdc, ch3, sl st into corner ch-space of adjacent motif, ch3, hdc) to produce a clean 3-way join. Continue around motif completing all remaining sides with join sl sts. Fasten off and weave end when one motif is fully joined on all needed sides.
Info :
When joining, point the motifs so that the flower centers lie flat and petals face the same direction across the whole grid. This creates visual continuity across the bedspread.
Round 15 :
If you prefer a more visible seam, after JAYG is complete, with coral held, work one round of sc around entire assembled blanket through both loops only (BOTH LOOPS) across the grid, crocheting through the back loop of adjacent motifs for a ridge effect. Work 1 sc in each hdc/sc from previous rounds creating a visible raised frame. Final total around the blanket will depend on layout size (count = number of side stitches x number of sides plus corner stitches).
Info :
Work this seam round with consistent tension: this round acts as seam reinforcement as well as an aesthetic border between blocks. If you used join-as-you-go, this sc round can be lighter (looser) since joins are already secure.
— Layout Planning & Joining Sequence :
Info :
Plan your motif grid before joining. Typical assembly sequence: make a base strip of 6-10 motifs joined side-to-side, make multiple strips, then join the strips longwise. Join inside-out (attach motif to previously joined strip edges) to keep the working edge tidy. Use pins to align as you go.
Round 16 :
Join technique for internal seams: when three motifs meet at a corner, finish the third motif's corner by inserting a sl st in both adjacent motifs' corner ch-space and then ch1 before continuing — this creates a neat 3-way intersection that is flat and secure. Count for that corner joining action: (hdc, ch3, sl st into adjacent motif A corner, sl st into adjacent motif B corner, ch3, hdc).
Info :
Double-check each 3-way intersection after joining and if gaps are visible, use a small whip stitch with yarn needle and coral yarn through corner loops to close gaps invisibly.
— Pillow Cover (2 motifs by 2 motifs) :
Round 17 :
Make 4 motifs for each pillow front. Join them JAYG into a 2x2 square using the same process described. For backing, cut a piece of fabric or crochet a plain 2x2 motif back in single color to match coral. Alternatively crochet a plain square: ch 26, row 1 sc across, row 2-30 sc to desired pillow height, adjusting rows to match motif height, then seam.
Info :
Pillow closure: optionally make the back as two overlapping panels (envelope) to easily insert a pillow form. Leave one side unjoined and fold to create overlap of approx. 4" (10 cm).
Round 18 :
Sew pillow edges by mattress stitch: place front and back right sides together and use a yarn needle with coral to mattress stitch through the breathing loops for a nearly invisible edge. Leave an opening to insert the pillow form then finish closing by mattress stitch.
Info :
For plump pillows use a form slightly larger than the cover size to avoid sagging—stuff with polyester insert or batting and smooth out corners.
— Blanket Construction Steps (Full Bedspread Layout) :
Round 19 :
Create motifs in batches of 10-20 depending on space and time. Block each motif lightly if you plan to join later to square them, pinning corners to ensure a consistent grid. Use the join-as-you-go method for the clean boxy coral lines seen in the photos.
Info :
When making large numbers of motifs, work in color-chunking: complete 10-15 cream centers first, then switch to coral frames to avoid frequent color changes and waste. Leave tails long enough to weave in later if not joining immediately.
Round 20 :
Start with a base strip: make motif 1, then motif 2 and join to motif 1 on one side using join-as-you-go in Round 12/13 method. Continue across until the strip is the desired width in motifs. Make multiple strips and then join the strips together along long edges using the same JAYG corner-first method.
Info :
Joining strips: always align petals so flower centers are oriented the same direction. This ensures the petals read as continuous floral pattern across the bedspread instead of alternating directions which can look busy.
Round 21 :
After joining motifs into a full bedspread panel, work one unifying round in coral across the entire outside edge: sc evenly around the entire outer perimeter, placing 3 sc in each corner space to maintain the squared corners. This gives a clean base for the scalloped bobble border.
Info :
When sc-ing around the entire perimeter, count stitches across one side and use that count to calculate increases for corners so the border lies flat and does not ripple.
Round 22 :
Optional reinforcement round: in BLO only, work a round of sc around the perimeter to create a subtle raised frame. Work evenly and check that edges are straight. This round will also strengthen seam lines and ensure the scallop sits on a stable base.
Info :
Use a contrasting hook size (5.5 mm) for the perimeter rounds if you want a tighter, firmer border base that prevents stretching while bobbles are added.
— Scalloped Bobble Border (Multiple Rounds) :
Round 23 :
With coral yarn. Ch1, sc around entire perimeter placing sc evenly — count total sc around and note number; we will build the bobble repeat from this count. End sl st to first sc.
Info :
For the photos, the scalloped bobble border is composed of several bobble rounds to achieve the deep rounded edge. We'll work this as Rounds 24-31 progressively building bobbles and spacing them evenly.
Round 24 :
Ch3 (counts dc), *skip next sc, (bobble) into next sc, ch1, dc into next sc; rep from * around. This creates an initial bobble spacing; total count depends on sc count but plan for a bobble every 3rd stitch approximately (approx total bobbles = total sc ÷ 3).
Info :
Keep bobble placement consistent around corners by placing a bobble centered on each corner cluster (three sc space) so corner peaks have a bobble. If necessary, add or subtract a few sc prior to bobble round to distribute bobbles evenly.
Round 25 :
Ch1, sc in same st, *ch2, sc in next ch1 between bobbles, rep around closing with sl st. This sets up chain loops behind the bobbles for a fuller profile. Count: one sc per bobble plus ch2 loops between.
Info :
Round 25 builds space around bobbles to allow them to sit proud rather than flatten. This is seen in the photos as a puffy scallop edge.
Round 26 :
Ch1, in each ch2 loop work (sc, bobble, sc). Rep around placing a bobble centered inside each ch2 loop. This deepens the scallop by layering bobbles. Fasten off and weave ends after finishing the final bobble round.
Info :
If you want even more pronounced scallops, repeat Round 26 for an additional layer, but test on a swatch first so the edge does not curl. The pattern pictured uses a double-layer bobble effect (two bobble rounds).
Round 27 :
Finishing round: With coral, sl st into the back of each bobble and work an even round of sc through both loops of the previous row around the full perimeter to neaten the back of the scallop. This gives the border stability and hides tail ends. Fasten off and weave ends securely.
Info :
Weave in all ends to the back of the blanket and trim. Use locking knots or small dot of fabric glue on ends if giving the bedspread as a wash-and-wear gift to prevent unraveling during washing cycles.
— Final Blocking & Care :
Info :
Lightly steam block or wet block the finished bedspread to open the puff petals and smooth motif edges. Lay flat to dry pinned to correct dimensions. Avoid heavy agitation in washing machine; hand wash or gentle machine wash in cold water then lay flat to dry. Use mild detergent for best results.
Info :
Storage tip: fold loosely with acid-free tissue to preserve puff texture and avoid compressing the bobble scallop edges long-term.
— Troubleshooting & Tips :
Info :
If corners pull in, add an extra group of dc across the side rounds once (repeat a dc increase round) to flatten. If the join has small gaps, use a small whip stitch with matching yarn to gently close gaps at 3-way intersections.
Info :
To change bedspread size: add or subtract motifs in both directions. Each motif adds approximately 4.5" to the width/height—calculate desired final dimensions before making motifs.
Completing this Coral Pink Bedspread is such a gratifying project — every puff petal and coral frame pieces come together into a cozy, vintage-inspired piece you can treasure. The textured bobble scallop gives the finishing touch that makes the bedspread feel handmade and luxurious. Whether you keep it for your own room or gift it to someone special, it’s a labor of love worth every stitch. 🧶💗 Happy crocheting and enjoy the snuggly result!