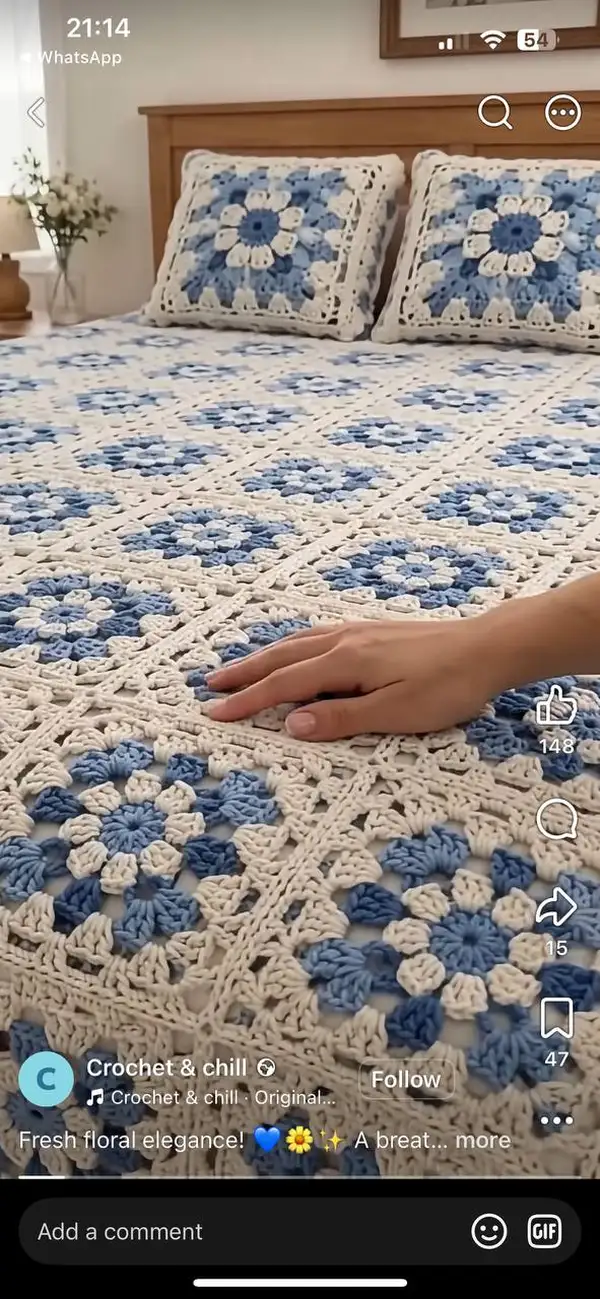
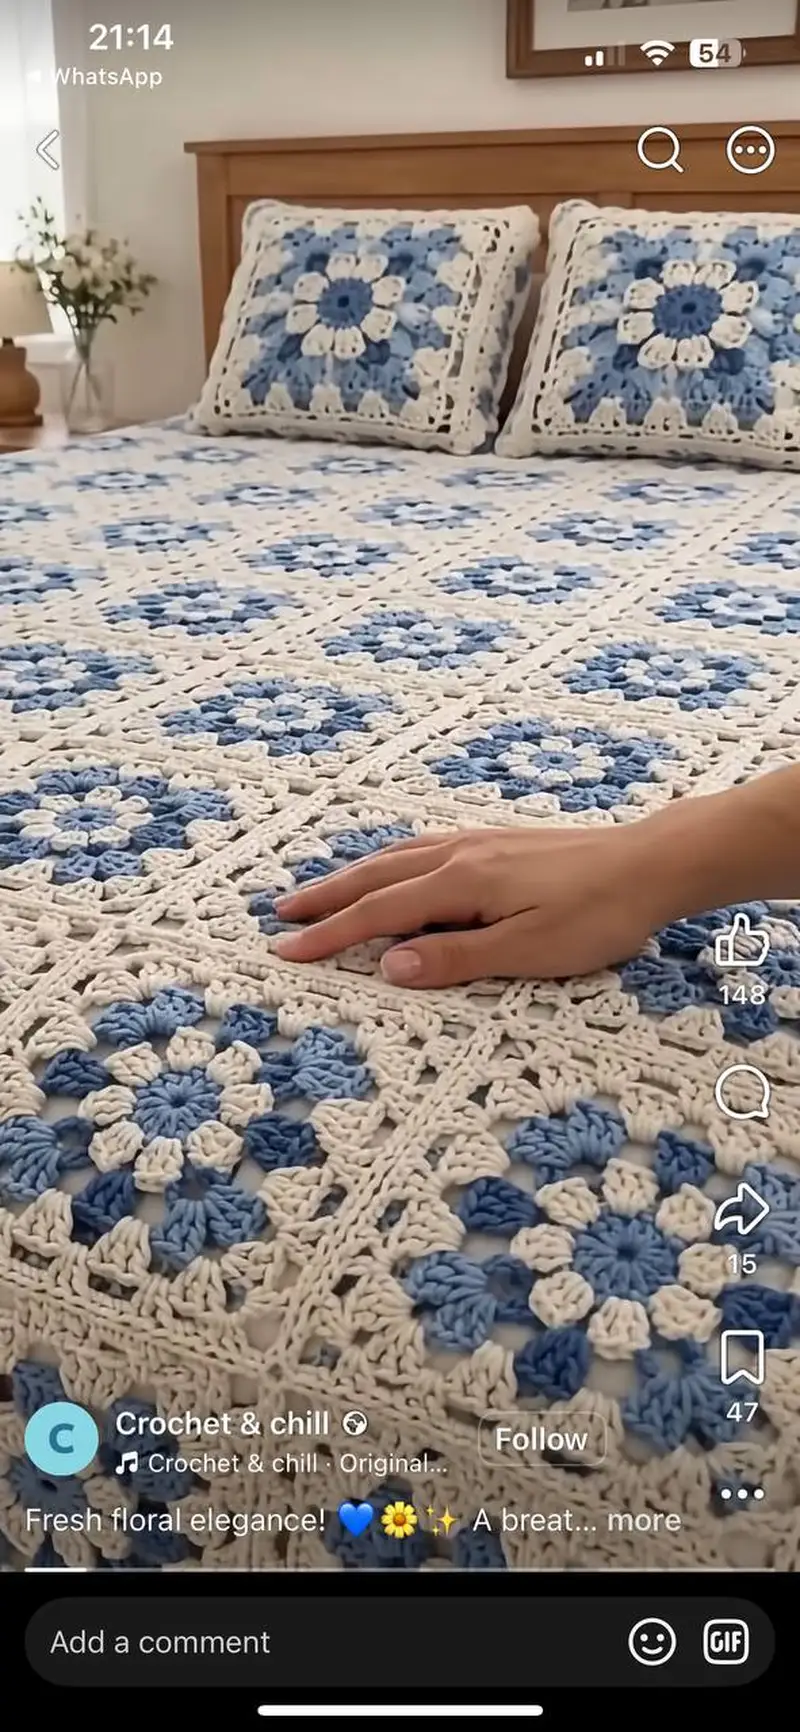
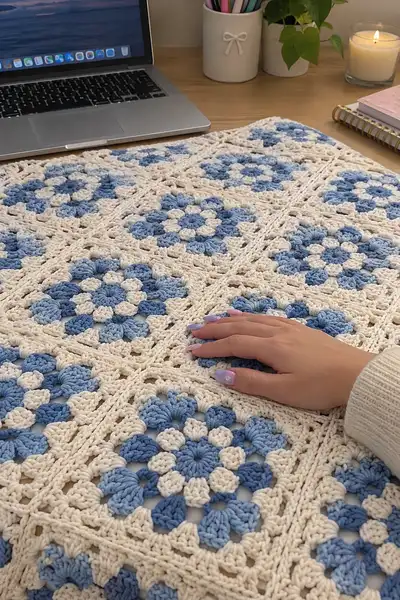
A soft, airy bedspread made from floral-inspired granny squares in graduated light blues and cream. This pattern recreates the layered cluster motifs, joined with a delicate lacy cream border for a vintage-meets-modern look. Detailed instructions cover each motif round, joining method, multi-row borders, and pillow/shams to match. Perfect for bringing a calm, coastal palette to your bedroom.
Progress Tracker
0% Complete
— Gauge & Notes :
Info :
Gauge is not critical for this bedspread but will affect final size. With 4.0mm hook and worsted cotton, each finished 12-round square measures approximately 11cm (4.25in) across after blocking. Adjust hook size to reach desired density and drape. Work tightly enough to keep puff/cluster stitches defined but not so tight that join stitches are hard to work.
Info :
Cluster definition used in this pattern: '3dc cluster' means yarn over, insert hook into stitch, yarn over, pull up loop, yarn over, pull through 2 loops; repeat 2 more times in same stitch (you have 4 loops on hook), yarn over and pull through all 4 loops. Puff stitch variant: yarn over, insert hook, pull up loop (repeat 3-4 times depending on puff height), yarn over, pull through all loops and ch1 to secure.
— Motif (make 84 squares typical full/queen) :
Round 1 :
With Darker Blue, make a magic ring. Ch2 (counts as first dc), 11 dc in ring. Join with sl st to top of ch2. (12)
Round 2 :
Change to Medium Blue. Ch3 (counts as dc), *ch1, 1 dc in next st* rep around to create small chain spaces between dcs. Join to top of ch3. (12 dc, 12 ch-1 sps)
Round 3 :
With Sky Blue, join in any ch-1 sp. Ch3, 2 dc cluster in same ch-1 sp, ch2, 3 dc cluster in next ch-1 sp, ch2; rep around to make 6 clusters (petal bases). Join to top of ch3. (6 clusters, 6 ch-2 corners)
Info :
The cluster round creates the petal shapes. Keep tension even on clusters so each petal height is consistent. Count clusters—there should be 6 around. Adjust if needed before proceeding.
Round 4 :
With Medium Blue, join in ch-2 corner sp. Ch3, 2 dc cluster in same sp, ch1, (3 dc cluster, ch2, 3 dc cluster) in next ch-2 corner to form a rounded petal pair, ch1; work (3 dc cluster, ch1) between clusters along sides to create a fuller petal look. Continue around to obtain 12 visible petal lobes, ending with join to top of ch3. (Approx 12 clusters/12 ch spaces)
Round 5 :
With Cream, join in any ch-1 sp between clusters from prior round. Ch1, sc in same sp, *ch3, sk next 3 dc cluster stitches, sc in next ch-1 sp* rep around to form open chain loops around petals. Join with sl st to first sc. (12 ch-3 loops)
Round 6 :
With Cream, join in a ch-3 loop. Ch3, 11 dc in same ch-3 loop to make a puffed round that frames each petal (12 groups of 12 dc). Sl st to top of ch3. (12x12 dc groups)
Info :
Work evenly into chain loops to keep puffed rings circular. If your dc groups appear staggered, gently pull the cluster foundation to align before continuing.
Round 7 :
With Medium Blue, ch1, sc in same st, *ch3, sc in center top of next puffed group* rep around to create chain arches that will later form square corners. Join with sl st. (12 ch-3 arches)
Round 8 :
With Cream, to start forming square: Join in a ch-3 arch, ch3 (counts as dc), 2 dc, ch2, 3 dc in same arch (corner made). Move to next chain arch: 3 dc, ch1, 3 dc; rep around placing (3dc,ch1,3dc) on sides and (3dc,ch2,3dc) at four corners to square up. Join with sl st to top of ch3. At end of round you should have a square with four defined corners. (Counts will vary: 4 corners, 4 side sections)
Info :
Round 8 squares up the motif; monitor counts on each side to ensure even sides (same number of 3dc groups between corners). Adjust by adding or subtracting 'ch1 spaces' if necessary to make sides equal length before proceeding.
Round 9 :
With Cream, ch1, sc in same st, *ch2, sk next 2 sts, sc in next st* rep around the square edge to create a light mesh foundation for joining. Join. (Even mesh counts depending on side groups, keep consistent)
Round 10 :
With Cream, working evenly: ch3 (counts as dc), 2 dc in each ch-2 space along side, and at corners work 3 dc, ch2, 3 dc. This increases the square by one row while keeping corners square. Join to top of ch3. (Square expanded by one round)
Info :
If you prefer a larger motif per square, repeat Rounds 9-10 an extra time in cream to reach desired scale. For the bedspread pictured each square uses 10 rounds total including colorwork and two square-forming rounds.
Round 11 :
Optional decorative round: With Medium Blue, work '3dc cluster, ch1' in each side 3-dc group and (3dc cluster, ch2, 3dc cluster) at corners to add extra texture. Join and fasten off. Square complete. (Texture round adds depth)
Info :
Weave in yarn tails after making each square, or leave long tails for a whipstitch join. Blocking each square flat before joining is highly recommended for neat joins and even layout.
— Making a Set of Squares :
Info :
Make 84 squares for a typical queen-size bedspread as pictured (layout 6x14 or similar—adjust number as desired). You can reduce for twin or increase for king by adding rows/columns of squares. Keep color distribution even: alternate darker and lighter center rounds to create the graduated floral look. Use a small container to group completed squares by placement before joining.
Info :
Arrange squares on a flat surface before joining, rotating as needed to align petals aesthetically. Count total squares and map them into rows to ensure the final bedspread will be symmetrical. Photographic reference indicates 7 columns by 12 rows for a large spread—your yardage will vary.
— Joining Squares (Join-As-You-Go or Whipstitch options) :
Info :
Two joining options provided: Join-As-You-Go (JAYG) with a final decorative border, or whipstitch join and then add the same border. JAYG produces a cleaner edge and is described first.
JAYG Round 1 (for joining two squares) :
With Cream and RS facing, align a completed square to a base square. Join with sl st in corner ch-2, ch1, sc in corner, ch1, sk to next ch-1 mesh and work *sc in corresponding mesh of base square through both loops (join), ch1* across side until corner. At corner work sc in corner, ch1, continue to next side. This effectively joins along a side with small sc and ch1 spaces forming a decorative ladder-like join.
Info :
When JAYG, pick up matching loops on the base square to avoid shifting motif alignment. Use your fingers to keep petals from twisting while picking up stitches from both squares.
JAYG Round 2 :
Work a round of sc all around the outside edge of the newly joined pair in Cream to tidy joins. Where squares meet, work sc through both loops to strengthen. Allow sl st joins at corners to transition smoothly. This prepares group for next row of squares.
Info :
If working by whipstitch, block squares and align edges carefully before sewing. Use mattress stitch or whipstitch with cream yarn and neat even tension to create an invisible join. Knot securely and weave ends inside nearby loops.
Joining Pattern :
Join squares row by row. First join squares in each horizontal row, then join rows together using same JAYG method or sew through side loops. Keep seam allowance flat and avoid bunching at corners. After all joins, work a preliminary sc round in Cream to clean the entire outer perimeter before adding decorative borders.
Info :
Check alignment often—if a row has a slight curve, ease it out by loosening joins and re-blocking the affected squares. This moment is the easiest place to fix shape errors before committing to the border work.
— Preliminary Edge Clean-up (1 round) :
Round 1 :
With Cream and RS facing, join at any outer corner. Ch1, sc evenly around the entire outer edge, placing (3 sc) in each corner to keep square shape. Join with sl st and fasten off. This creates an even foundation for border rounds. (Edge sc count will depend on bedspread dimensions)
Info :
Keep sc tension consistent. If your outer edge seems too tight, use the smaller hook (3.5mm) to avoid puckering; if too loose, a 4.5mm might smooth it—test on sample swatch.
— Border Round Series (Decorative triple border) :
Border Round 1 :
With Cream, join in any sc along edge. Ch3 (counts as dc), 1 dc in next 2 sc, *ch1, sk 1 sc, 3 dc in next 3 sc cluster or group* rep across sides. At corners work (3 dc, ch2, 3 dc) to maintain square corners. Join. This round creates a raised grouped texture along the join seams. (Count depends on edge length)
Border Round 2 :
With Cream, ch1, sc in same st, *ch4, sc in next ch-1 or chain arch* rep to create open lacy chain loops along the border. At corners work ch5 to create larger corner loop. Join and fasten off if desired. (Lacy loops formed for edgings)
Info :
These chain loops will be used to anchor decorative picots and bobbles in later rounds. Keep corner chain counts larger to avoid pulling corners in.
Border Round 3 :
With Cream, join in a chain loop. Ch1, sc, ch3, sc in same loop to form small shell; in each loop along side work (sc, ch3, sc). At corners work (sc, ch5, sc) to accentuate corners. Join with sl st and fasten off. This creates the delicate scalloped edge visible on the bedspread.
Info :
Block the entire bedspread after Border Round 3. Pin corners square and spray-block to set the lace. Allow to dry completely before pillow/sham assembly.
— Decorative Raised Lace Band (Optional wide border) :
Round 1 :
With Cream, join at corner. Ch3, 2 dc in same st, ch2, 3 dc in same st (corner formed). Along side work *sk next 2 sts, (3 dc, ch1, 3 dc) in next st* to create raised shell groups spaced by ch-1. Join and fasten off. (Creates a bold raised band)
Round 2 :
With Cream, join behind shell groups and work 'reverse sc' along base to push shell forward: join in ch-1 spaces between shells, work 5 sc across each connecting space, continue around. Join. This makes shells pop from the background.
Info :
If adding this decorative band, reduce the number of outer picot rounds to avoid an overly heavy edge. This band is optional and can be used to increase bedspread width slightly.
Round 3 :
With Cream, work a final finishing round of sc along the edge of the decorative band, placing (sc, ch2, sc) at corners. Fasten off and weave in ends. Block once more to set edge.
— Pillow Sham (make 2) :
Info :
Make matching 2 or 4 squares per sham depending on sham size. For a standard 50cm x 50cm sham, join 4 squares 2x2. For an oblong pillow use 6 squares arranged 2x3. Sham instructions here assume 2x2 square layout.
Sham Square Assembly Round 1 :
Work 4 matched motif squares (as made above). Block all four squares flat. Join two squares horizontally using JAYG method. Join remaining two identically. Then join row1 and row2 together to make a 2x2 panel. Work one round of sc in Cream around panel to tidy edges. (2x2 panel finished)
Sham Border Round 2 :
With Cream, ch1, sc evenly around panel, at corners work (3 sc). Work an optional picot round: *sc, ch3, sl st into base of sc* across for a delicate edge. Fasten off and weave ends.
Sham Back & Closure :
Make a back panel the same size using plain sc rounds in cream or two overlapping rectangles in cream to create an envelope closure. Sew back panel to front along three sides; insert pillow form and close final side with hidden stitches or buttons. Optional zipper installation instructions are provided in Info below.
Info :
For an envelope closure: make a back panel the same width but 1/3 longer, fold the bottom third up to overlap, and sew edges to front leaving overlap as the opening. For zipper: sew zipper onto one long side using mattress stitch at the seam allowance and stabilize with pins.
— Finishing & Weaving Ends :
Info :
Weave in ends by threading a yarn tail into a yarn needle and weaving through the back loops of a few stitches in opposite directions to lock. Trim close to work. For visible joins, weave tails into the join to hide them between layers.
Blocking :
Lay bedspread flat on foam mats, pin corners square, and gently spray with water until damp. Shape squares and edges so borders and seams are even. Allow to dry fully (6-12 hours). Blocking evens out stitches and lifts puff clusters for a consistent floral texture.
Info :
Block each small section before final assembly for the neatest finish. For large bedspreads you may need extra hands to pin and shape evenly.
— Alternate Join (Whipstitch detailed) :
Round 1 :
Arrange two squares RS up. Thread a length of cream yarn onto a yarn needle. Insert needle through back loop of first square and back loop of second square at the outermost stitch and whipstitch across edge through both loops. Maintain even spacing and tension. At corners make two stitches to secure and continue. Repeat for all adjacent sides.
Info :
Whipstitch gives a flatter seam than JAYG. Use this method if you prefer an invisible looking seam. Weave ends into the seam for a tidy finish and stitch across joins again if you want extra rigidity for bedspread use.
— Optional Embellishment: Tiny Picot Flowers :
Round 1 :
With a contrast blue, in selected ch-3 loops across border, work (sc, ch3, sl st in top of sc) to make tiny picot flower centers. Place these evenly along border rounds to echo the motif centers. Fasten off and weave ends.
Info :
Place picots every 4-6 groups depending on desired density. Secure with a drop of fabric glue at the base of each picot if used on heavy-use bedspreads to prevent snagging.
— Full Bedspread Layout & Sizing Guide :
Info :
Each finished square after blocking measures roughly 11cm (4.25in). For queen size (approx 200cm x 230cm), you will need about 14 x 19 squares (266 squares) or create a central panel with borders to reach size—our pictured spread uses larger squares and a narrower layout to achieve an airy drape. Adjust number of squares to fit your mattress and allow for tuck-in allowance.
Info :
To estimate yarn: measure area of one square (after blocking) and multiply by number of squares to get approximate yarn. Remember joining and border rounds use substantial cream yarn; keep extra skeins for continuity of dye lot.
— Care Instructions :
Info :
Hand wash in cool water with mild detergent, reshape and lay flat to dry. Cotton may relax when wet; re-block if needed. Avoid bleach and tumble drying to preserve yarn color and structure.
Info :
Spot-clean minor stains promptly using a damp cloth and mild soap. For heavy wear, consider using the bedspread as a decorative throw to preserve its delicate lacework.
This fresh light blue floral bedspread pattern brings together classic granny skills with pretty cluster texture to create a timeless bedroom accent. Each square is a small creative victory that builds into a beautiful whole—imagine the calm coastal color palette across your bed! Take your time with blocking and joining; the results are so rewarding. 🧶💙🌼