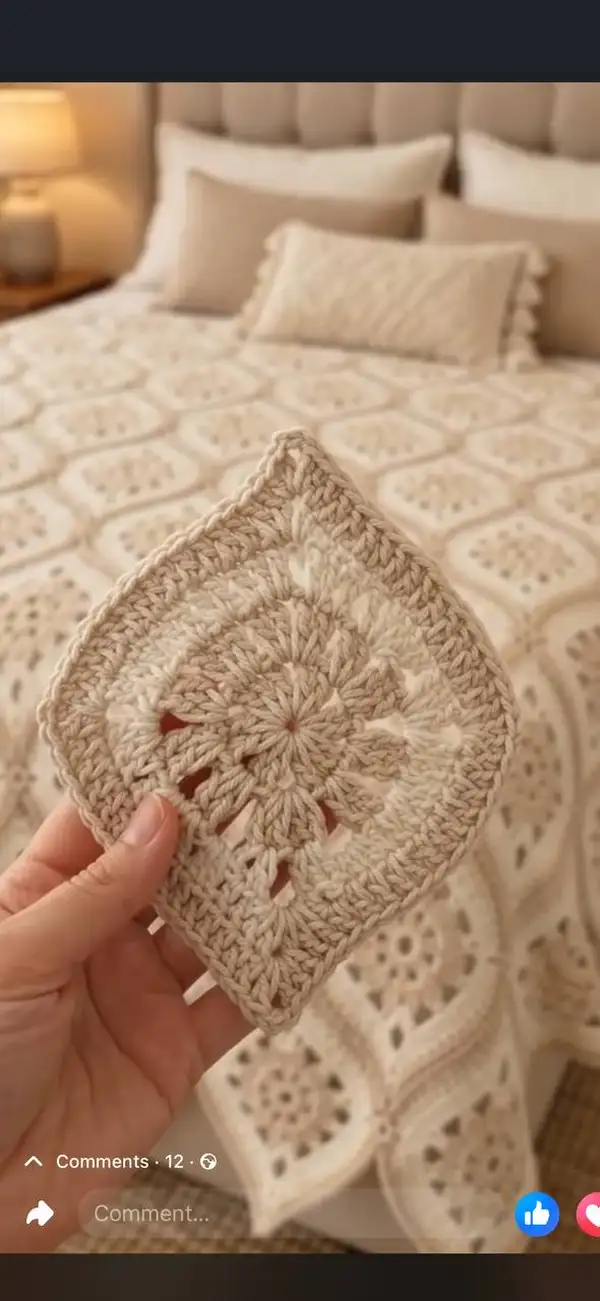
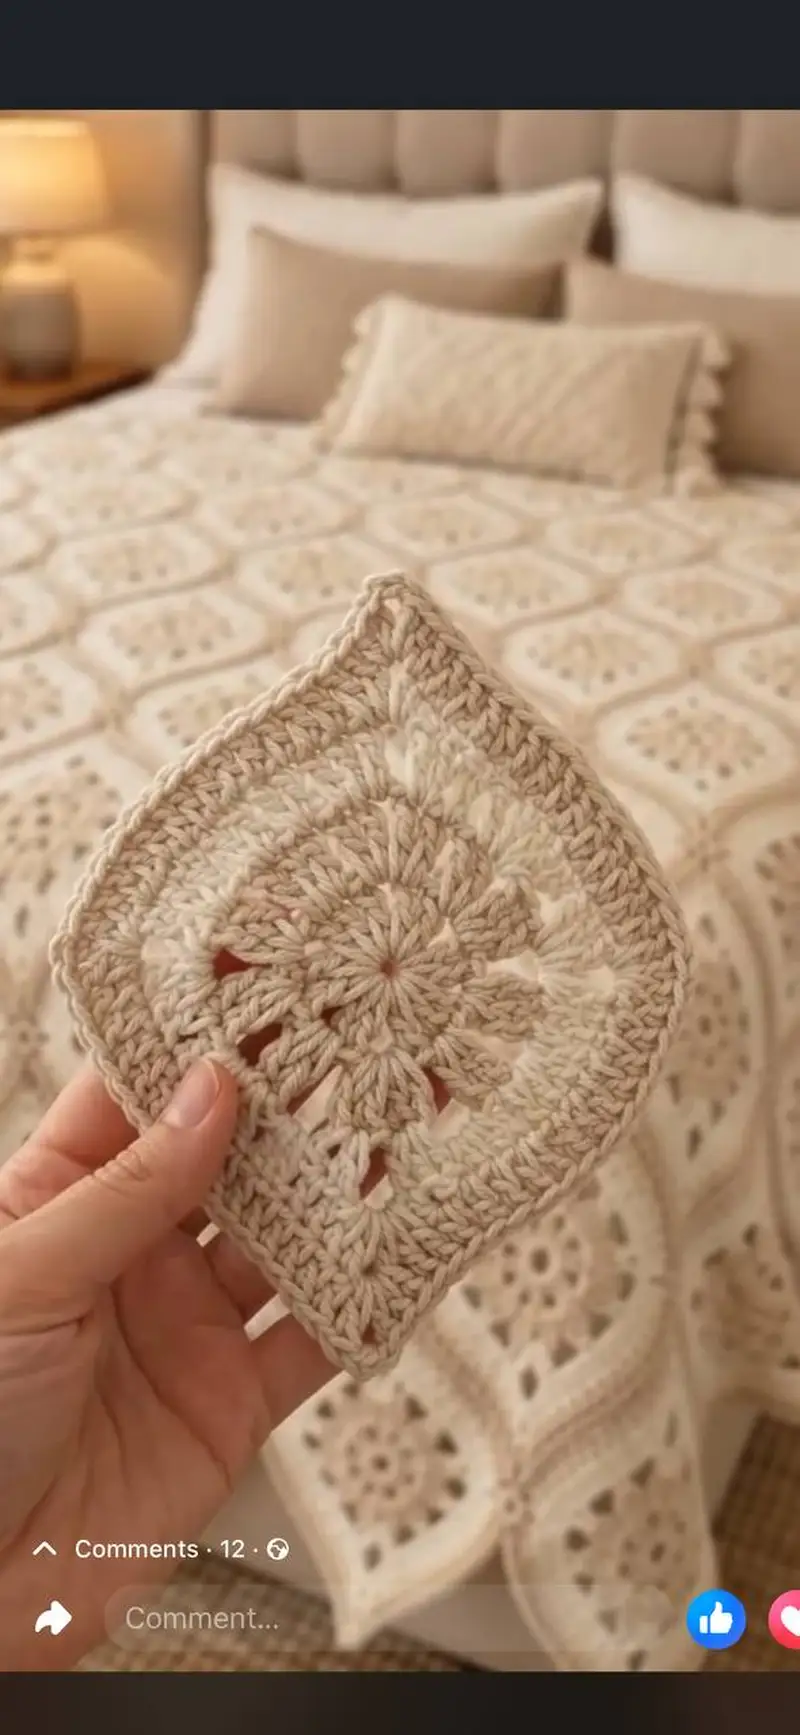
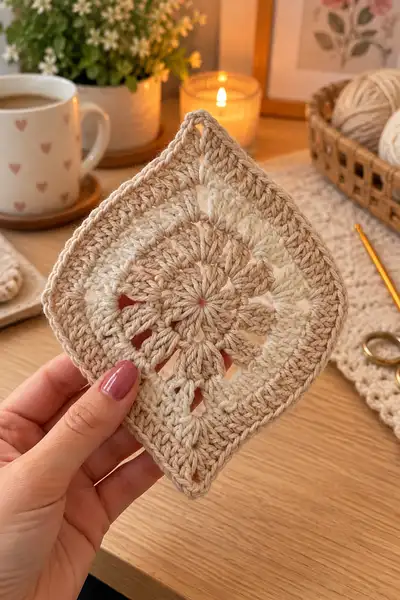
A beautifully textured bedspread built from ornate Moroccan-style ogee tiles in soft cream and beige tones. Each tile features petal-like clusters, airy chain spaces and a gentle ogee/teardrop shape that becomes a cohesive geometric spread when joined. Carefully designed for an intermediate crocheter, the pattern includes motif construction, joining methods and a layered border to finish your cozy blanket.
Progress Tracker
0% Complete
— Motif (Single Ogee Tile) :
Round 1 :
Work a magic ring. Ch3 (counts as dc), work 15 dc into magic ring. Join with sl st to top of ch3. (16 dc)
Round 2 :
Ch3 (counts as dc), *1 dc in next st, 1 inc (2 dc) in next st*; rep from * to * around. Join with sl st to top of ch3. (24 dc)
Round 3 :
Ch3, *2 dc in next 2 sts, inc in next st*; rep around. Join. (32 dc)
Round 4 :
Ch3, *3 dc in next 3 sts, inc in next st*; rep around. Join. (40 dc)
Round 5 :
Ch3, *4 dc in next 4 sts, inc in next st*; rep around. Join. (48 dc)
Info :
These increase rounds create a circular disk that will later be shaped into the ogee/square. Use stitch marker on first dc of each round until comfortable with counting.
Round 6 :
Ch3, *5 dc in next 5 sts, inc in next st*; rep around. Join. (56 dc)
Round 7 :
Ch3, *6 dc in next 6 sts, inc in next st*; rep around. Join. (64 dc)
Round 8 :
Ch3, *7 dc in next 7 sts, inc in next st*; rep around. Join. (72 dc)
Info :
At this stage you have a round disk. We will begin converting to the ogee/square shape by introducing four defined corner clusters. Count your rounds and confirm you have 72 base stitches before proceeding.
Round 9 :
Ch1, sc in same st, *ch4, sk 7 sts, sc in next st*; rep from * 3 more times, ch4, sk 7 sts, join with sl st to first sc. You now have 8 chain spaces around evenly spaced for petal openings and corner shaping. (8 ch4 sps, 8 sc)
Round 10 :
Change to contrast/lighter shade if using two-tone. Ch3 (counts dc), in same sc work 2 dc, *in next ch4 space work (2 dc, ch2, 2 dc) for a petal/corner cluster; in next 8 sts work 8 dc evenly across; rep from * around ending with 2 dc in last sc. Join. (This round creates 4 corner cluster spaces and petals between them; total effective dc groups = 8 clusters)
Info :
If carrying a second color, carry the unused yarn loosely along the back through the ch spaces so it does not show on the right side; secure every few stitches with a slip stitch if needed.
Round 11 :
Ch3, 1 dc in each dc across until you reach a (2 dc, ch2, 2 dc) corner cluster; in the corner cluster work dc in each dc and (2 dc, ch2, 2 dc) again to reinforce corner; continue. Join. (maintain clusters at four corner points)
Round 12 :
Ch1, sc in same, *ch3, sk 3 dc to form a small chain arch, sc in next st across*; rep around. Join. (This creates openwork arches that become the ogee lace detail)
Round 13 :
Ch3, in each ch3 arch work (dc, ch1, dc) to accent and puff out the petal shapes; in corner (2 dc, ch3, 2 dc). Join. (This broadens the corner arches to square shape)
Info :
Keep tension gentle over ch arches to avoid pulling the center in. If your arches look small, relax your tension and make sure ch counts are accurate.
Round 14 :
Switch to main cream color (if you used contrast) and ch2 (counts as hdc), work 1 hdc in each dc and ch space around to create a tidy texture foundation. Join. (even stitch count across; refer to your placement of 4 corner clusters)
Round 15 :
Ch3, *dc in next 7 sts, (2 dc, ch2, 2 dc) in corner ch3 space*; rep around. Join. (This round gives nice square shaping by anchoring four corners into larger corner blocks)
Round 16 :
Ch1, sc in each st across to tidy edges, placing 3 sc in each corner block (one in each dc and one in ch2 space). Join. (square begins to appear; counts based on previous round construction)
Info :
At this stage your tile should show a soft ogee/teardrop top point and four rounded corners. Block this motif flat to measure and ensure edge consistency before continuing with outer rounds.
Round 17 :
Ch3, 1 dc in next 10 sts, in next corner block work (2 dc, ch3, 2 dc), repeat around. Join. (adds height and works into corner arches)
Round 18 :
Ch2, 1 hdc in each dc and ch space around, placing 2 hdc in the ch3 corner. Join. (even tidy row to prepare for textured rounds)
Round 19 :
Ch3, *2 dc in next 3 sts, ch1, sk 1 st*; rep around. Join. (creates small grouped clusters and chain holes that give the motif lace)
Info :
Use the back-of-work occasionally to check symmetry: motifs should be even with four corner hubs and an ogee top point. If one side looks larger, adjust tension or rip back to the last even round.
Round 20 :
Ch3, dc around working into top of groups and into corner ch spaces as (2 dc, ch2, 2 dc) in corners. Join. (This maintains square dimension and readies motif for final shaping)
Round 21 :
Ch2, hdc in each st around, placing 3 hdc in each corner ch2. Join. (This gentle textured round evens the fabric prior to outer shell)
Round 22 :
Ch3, *dc in next 4 sts, dc cluster (3 dc cluster) over next ch arch*; rep around. Join. (clusters form the visible petal spokes that read clearly in the finished motif)
Info :
If you prefer a more pronounced petal, use puff stitch clusters (yarn over, insert, pull through etc.) in place of 3-dc clusters; maintain counts by replacing one 3-dc with one puff cluster.
Round 23 :
Ch3, dc in each dc and ch space around, placing (dc, ch2, dc) in each corner. Join. (This brings the motif edge out toward square form)
Round 24 :
Ch1, sc in each st for two full rounds to create a firm base for joining later. Join each round. (these rounds make the edges neat and uniform)
Round 25 :
Change to lighter shade yarn held together with main color (optional). Ch2, hdc across each st BLO for a subtle ridge; join. (creates a ridge that lines up when tiles are joined)
Info :
Repeat motifs will be joined on the last two rounds or sewn after blocking. Make one motif fully to check size and adjust hook or rounds to match the pictured tile size (approximately 12cm across for swatch gauge).
Round 26 :
Ch3, dc in each st across in FLO to create texture on the surface and to set the final edge height. Join. (edge becomes slightly raised to help seams sit flush)
Round 27 :
Ch1, sc evenly around including 3 sc in each corner block for a squared appearance. Join and fasten off leaving long tail for joining if you prefer whip stitch joins. (edge stabilized)
Info :
If you are making many motifs, make a sample of four to join and test the joining method now (see joining section). Blocking motifs before joining will flatten clusters and set dimensions; wet-block or steam-block to your preference.
— Joining Methods & Joining Rounds :
Round 29 :
Join-As-You-Go (JAYG) method - Preparation: With a finished motif A and a completed motif B to attach, lay motif B on top of motif A aligning edges. Work with right sides facing up.
Round 30 :
Start at one corner of motif A; with long tail from motif B, join to the sc of motif A with sl st then ch1. Work sc in each sp along edge of motif B, and for each corresponding st on motif A work sl st into the matching sc (or work sc through both loops) to join. Continue across until corner; join corners with 3 sc to anchor. Fasten off. (repeat along each side)
Info :
When joining with whip stitch or mattress stitch, pin motifs together first to match motifs and prevent twisting. Use a tapestry needle, and sew through the back loops of both motifs for a flatter seam.
Round 31 :
Flat Slip Stitch Join - Hold two motifs together with right sides facing out. Insert hook through edge stitch of both motifs, yo and pull through and sl st to join. Work sl st in each matched stitch along side. This creates a tidy raised ridge on the right side. (Good for visible seams)
Round 32 :
Invisible Mattress Join - With tapestry needle and long tail from motif B, work mattress stitch through back loops only of both motifs: insert needle through center of edge stitch on motif A and then motif B, pulling tail to join invisibly. Repeat along edge. (best for seamless look)
Info :
Alternate joining: use single crochet seam (sl st into edge, sc across) for a decorative ridge. Keep tension even to avoid pulling motifs out-of-square.
Round 33 :
Continuous JAYG - When adding subsequent motifs, join one side fully by sl st or sc as described, then rotate motif and join second side leaving the last two sides un-joined to maintain flexibility. Finish by joining final side with neat corner anchoring (3 sc in corner spaces).
Round 34 :
Blocking and Adjustments - If any joins cause slight rippling, steam or wet-block again after entire layout is joined to allow seams to relax and flatten.
Info :
When planning the arrangement, create a paper template of your bed dimensions including seam allowances. Lay out tiles on the floor and adjust placement to avoid repeated color clumps from variegated yarn.
— Large Field Assembly (Layout & Joining Sequence) :
Round 36 :
Determine spread size: Count how many motifs across (width) and down (length) you need. Sample: 8 motifs across by 10 motifs down = 80 motifs for a queen-size spread depending on your motif size. Adjust counts to match bed dimensions.
Round 37 :
Assembly Sequence: Join motifs in horizontal rows first. Make rows of desired length (join motifs edge-to-edge using chosen join). Press each row lightly and pin seams. Join rows vertically to create full field.
Round 38 :
Edge Treatment Before Border: Once the field is assembled, measure full assembled width and length and confirm top/bottom orientation to locate ogee points that should align into a continuous pattern.
Info :
Leave a few motifs unjoined at strategic points and attach later if you want to insert extra motifs or reorient corners without disturbing large seams.
Round 39 :
Square-up row edges: If row edges are uneven, add one round of sc along the outermost edges of the whole field to square the perimeter before working the main border rounds (see below). Use one color for a unified look.
Round 40 :
Fasten off long tails and weave ends into nearby motifs for secure joins. Trim excess. Block entire field if you have space; otherwise block rows individually and re-assemble.
— Border & Edging (Multiple Rounds) :
Round 41 :
Border Round 1: With right side facing, join yarn anywhere on perimeter. Ch1, sc evenly around the entire perimeter, placing 3 sc in each outer corner stitch to maintain square corners. Join with sl st and do not fasten off. (even sc round)
Round 42 :
Border Round 2: Ch3 (counts dc), *dc in next 3 sts, ch1, sk 1* repeat around; place (2 dc, ch3, 2 dc) in each corner. Join. (creates small open texture)
Info :
Measure border depth after each few rounds to keep final bedspread within desired measurements — add or omit rounds accordingly.
Round 43 :
Border Round 3: Ch2, hdc in each st across and in corner ch3 spaces work 4 hdc spaced evenly. Join. (neat textured row)
Round 44 :
Border Round 4: Ch3, dc in each st around to build a sturdy border. Join. (solid round for stability)
Info :
To mimic the visual raised ridge seen in the image, add a ridge round in BLO or FLO on one of the following rounds. This lifts the outermost ridge and echoes the tile texture.
Round 46 :
Border Round 5 (Texture Ridge): Change to 3.5mm hook if desired. Ch2, hdc in each st BLO around to create a raised ridge. Join. (subtle ridge)
Round 47 :
Border Round 6: Ch1, sc in each st across; in corner place 3 sc. Join. (tidy edge)
Round 48 :
Border Round 7 (Decorative Row): Ch3, *skip 1, dc in next, ch1* repeat around; in corners (2 dc, ch3, 2 dc). Join. (creates a final open lace round)
Round 49 :
Border Round 8 (Final Finish): Switch to contrast/darker beige. Ch1, sc in each st around and finish with crab stitch (reverse sc) around the last round if you want a gentle rope-like finish. Fasten off and weave ends. (clean, finished edge)
Info :
For a prominent border like the pictured edges, repeat the textured ridge and decorative rounds until desired border width is achieved. Use two strands held together for a chunkier border if you want a heavier look.
— Alternate Motif Variation Rounds (Optional Decorative Rows) :
Round 50 :
Variation A (Puff Petal Emphasis): Instead of three-dc clusters in round 22, work 5-loop puff stitches (yarn over, insert hook, pull up loop five times, yo and draw through all loops, ch1 to close) into cluster positions. Work subsequent rounds the same but accommodate the slight puff height by blocking.
Round 51 :
Variation B (Raised Ogee Spine): After round 26, work a row of front post dc around the outermost cluster groups to create a raised ridge running through each tile — work fpdc around designated dc from previous round. Join and fasten off.
Info :
These variations will slightly change your motif gauge — adjust the number of motifs across/ down to maintain final bedspread size.
— Final Finishing Rounds & Care :
Round 52 :
Final Weave & Secure: Using yarn needle, weave all tails into the back of motifs by threading yarn through at least 4-5 adjacent stitches across multiple motifs for security. Trim ends close to work.
Round 53 :
Block Entire Bedspread: Lay spread flat on blocking mat. Spray with water or use steam. Pin edges straight and let dry completely. This sets the ogee shapes and flattens joins for a polished finish.
Round 54 :
Care Instructions Round: Hand wash in cool water with mild detergent or machine wash on gentle cycle inside a large laundry bag; reshape while damp and dry flat to maintain shape.
Info :
For long-term stability, avoid tumble drying; store folded in breathable cotton bag to prevent dust and yellowing of cream yarns.
— Production Notes & Troubleshooting Rounds :
Round 55 :
Gauge Check: Make a 3x3 motif swatch and block it to measure. Example gauge: one motif blocked = approx 12cm square (adjust hook if your motif is larger/smaller).
Round 56 :
Adjusting Size: To make motifs larger: add two more increasing rounds early (following pattern (n dc, inc) x8) before forming corner clusters. To make motifs smaller: omit a final increase round.
Round 57 :
Edge Correction: If your assembled field cups or waves slightly, add an extra sc round on the shorter edges and a hdc round on the longer edges to balance tension before the main border.
Round 58 :
Joining Correction: If seams look loose, unpick a small section, pin tightly and resew using invisible mattress stitch pulling gently to match gauge across join.
Info :
Take photos at key stages so you can compare rows and motif orientation regularly. This helps avoid accidentally flipping motifs and keeps ogees aligned into continuous rows.
— Extended Rounds for Large or Extra-Textured Borders (Optional) :
Round 59 :
Extra Wide Border 1: Ch3, dc in each st for 4 rounds to build depth. Join each round. (quick solid rounds for weight)
Round 60 :
Extra Wide Border 2 (Braid): Work 3 rounds of (fpdc, bpdc) alternating across each round to create a braided rope effect. Join each round. (textured rope border)
Round 61 :
Extra Wide Border 3: Ch1, sc around; then crab stitch (reverse sc) around final round for a rope edge. Fasten off, weave in ends. (distinct border finish)
Info :
For heavier borders consider carrying two strands of yarn held together to echo chunky look in the photograph. This will use more yarn and increase overall weight.
— Pattern Summary & Repeat Guidance :
Round 62 :
Each full motif uses approximately 27 rounds of work including edge rounds and small texturing rows. The motifs are joined along outermost edge rounds so that the seam falls just outside the decorative petal area.
Round 63 :
For a queen bed example: make 8 motifs across by 10 motifs down. After joining and blocking, add 8-12 border rounds depending on desired overhang and look.
Round 64 :
For a throw/lapghan: use 4 motifs across by 5 motifs down, joining and finishing with same border sequence. Scale by adding or removing whole motifs rather than adding partial motifs for best visual integrity.
Info :
Keep a log of motif counts by row and color usage to maintain consistent placement of any variegated yarn effects across the assembled field.
— Advanced Decorative Details & Stitched Embellishments :
Round 65 :
Surface Embroidery Option: Use a contrasting taupe yarn and a tapestry needle to couch a simple running stitch along the ogee ridge lines for added definition. Stitch gently to not distort fabric.
Round 66 :
Applied Motifs: Crochet small rosettes and sew them at intersections of four motifs for a subtle applique; secure with small whip stitches and weave ends under rosette base.
Info :
Test any surface embroidery on a spare motif to ensure the visual effect you want before adding to the entire spread.
— Extended Production Rounds (Bulk Workflow Tips) :
Round 67 :
Batch Work Strategy: Make motifs in small batches of 10-20 to keep consistency in tension. Join completed batches into rows and finally into the full field to avoid handling a very large single piece until later stages.
Round 68 :
Yarn Management: Wind yarn into smaller center-pull balls for easier carrying. Label balls with motif numbers if using subtle color shifts to maintain a pleasing spread across the bed.
Round 69 :
Time-Saving Tools: Use a yarn bowl and multiple hooks for different border textures if you are working with assistants or switching between motifs and borders frequently.
Info :
Keeping a tidy workspace and clear layout for pins, blocking mats and measuring tools will save time when working on a project of this scale.
— Final Quality Check Rounds :
Round 70 :
Inspect all joins for even tension and no skipped stitches. Re-stitch any gaps. Ensure border is straight and corners square. Remove blocking pins only after fabric is fully dry and set.
Round 71 :
Final Press: Lightly steam any stubborn bumps from a safe distance, do not press directly onto wool/acrylic blends; use cloth barrier if pressing with iron.
Info :
Document the final measurements, motif counts and yarn usage in a pattern notebook for any future reproductions or gifting information.
Assembly Instructions
- Attach tiles into horizontal rows first. Join right sides facing and use your chosen join (sl st or mattress stitch) to connect edges; pin each motif in place before sewing to ensure alignment.
- Join rows vertically by aligning row seams and sewing through corresponding edge stitches. Work across the seam with even tension so the rows remain flat and the ogee pattern flows.
- Square the assembled field by working one round of sc around the entire perimeter to tidy and standardize the edge before adding the decorative border.
- For corners, anchor neatly by placing 3 sc in the corner ch spaces and check that the ogee top points sit evenly on the bed spread design.
- Block individual motifs (or rows) flat before final assembly for best results. After full joining, block the entire spread to even out stitches and set the shape.
- Weave in long tails by threading through several nearby motifs and back across the seam; secure by threading tail across 4-6 stitches and knotting inside if desired.
- If using Applied Rosettes or embroidery, attach these after the final joins and blocking so they sit crisply on the finished fabric.
- Trim all ends close to work but leave a small tail inside seams to avoid unraveling. Re-check joins after the first wash to tighten any loosened stitches.
Important Notes
- 💡Use stitch markers at the beginning of each motif round to prevent miscounting, especially during increase rounds that rely on multiples of 8
- 💡Stuffing is not required for this flat motif project; instead focus on consistent tension to keep motifs flat and even
- 💡Block motifs individually or in small batches for better control; full-field blocking requires a large dry area but yields the best final look
- 💡Maintain consistent tension when joining motifs; inconsistent joining tension is the most common cause of rippling or buckling
- 💡When changing colors, fasten off and weave ends neatly or carry yarn inside small ch spaces, but do not carry across large surfaces to avoid visible strands
- 💡Measure often: check motif gauge and assembled width/length periodically to ensure it will fit your intended bed size
- 💡When sewing motifs together, use a yarn needle and take small, neat stitches through the back loops of each edge for a flatter seam
- 💡If using variegated yarn, lay out motifs by color run to avoid clustering similar color sections together
This Moroccan Ogee Tiles bedspread is a beautiful project that turns repeating granny motifs into an elegant, cozy statement piece. Each tile’s petal clusters and airy chain details catch light to create soft texture across the bed. Working motif-by-motif makes this large project approachable — little wins accumulate into a gorgeous finished spread you’ll be proud to display. 🧶✨ Take your time, block well, and enjoy the rhythmic satisfaction of joining tile after tile. Happy stitching! 🌿
What is the finished size of this bedspread?
Finished size depends on motif size and number used. Example: with motifs approx 12cm square, an 8 x 10 layout will be roughly 96cm x 120cm before borders. Adjust motif counts for desired dimensions.
Can I use different yarn weights for this pattern?
Yes — thicker yarns will yield larger motifs and a cozier, heavier blanket. Use a hook 1-2 sizes up and adjust the number of motifs to reach your target size.
Do I need to block motifs before joining?
Blocking is strongly recommended. It evens the motifs, opens lacework and makes joining far easier and more accurate.
What is the best joining method?
For a seamless look use the invisible mattress stitch. For a decorative raised join use slip stitch or single crochet join. Choose based on the desired visible seam effect.
How much yarn will I need?
Estimate for a queen-size bedspread is 2200-2600g of main worsted yarn plus 300-500g for accents. Actual usage depends on motif size and border rounds.
Can I make the tiles reversible?
Yes — choosing simpler stitches and avoiding visible sl st joins on one side, or using mattress stitch on back loops, will make the spread look good on both sides.
How do I repair a pulled join or seam?
Unpick a small section of the seam, re-pin motifs, and resew with a tapestry needle using mattress stitch. Always work a bit beyond the visible gap for extra security.
Can I customize the color layout?
Absolutely. Plan motifs on the floor first to space out shades from variegated yarn and create balanced color distribution across the spread.
Stay in the Loop!
Get notified when we release new free crochet patterns and join our crafting community!