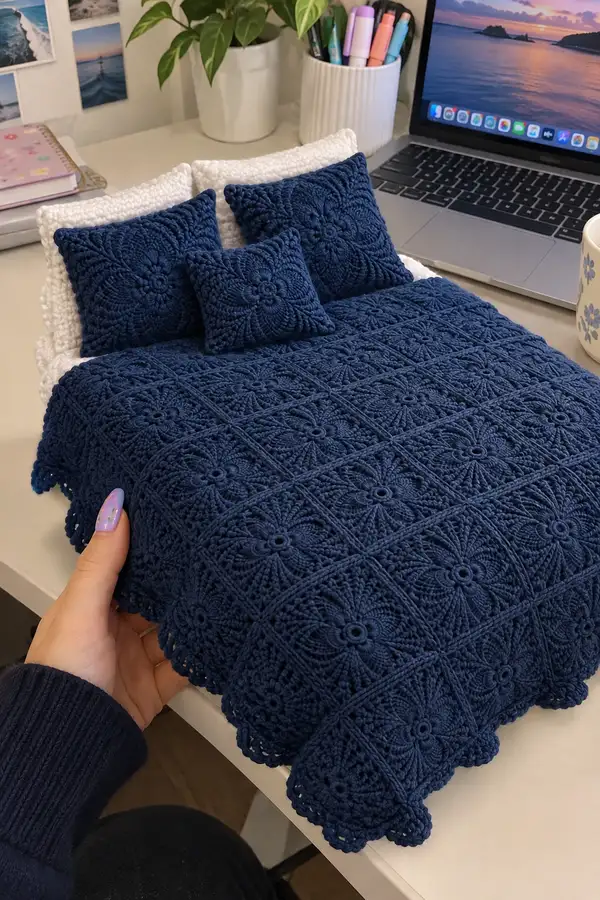
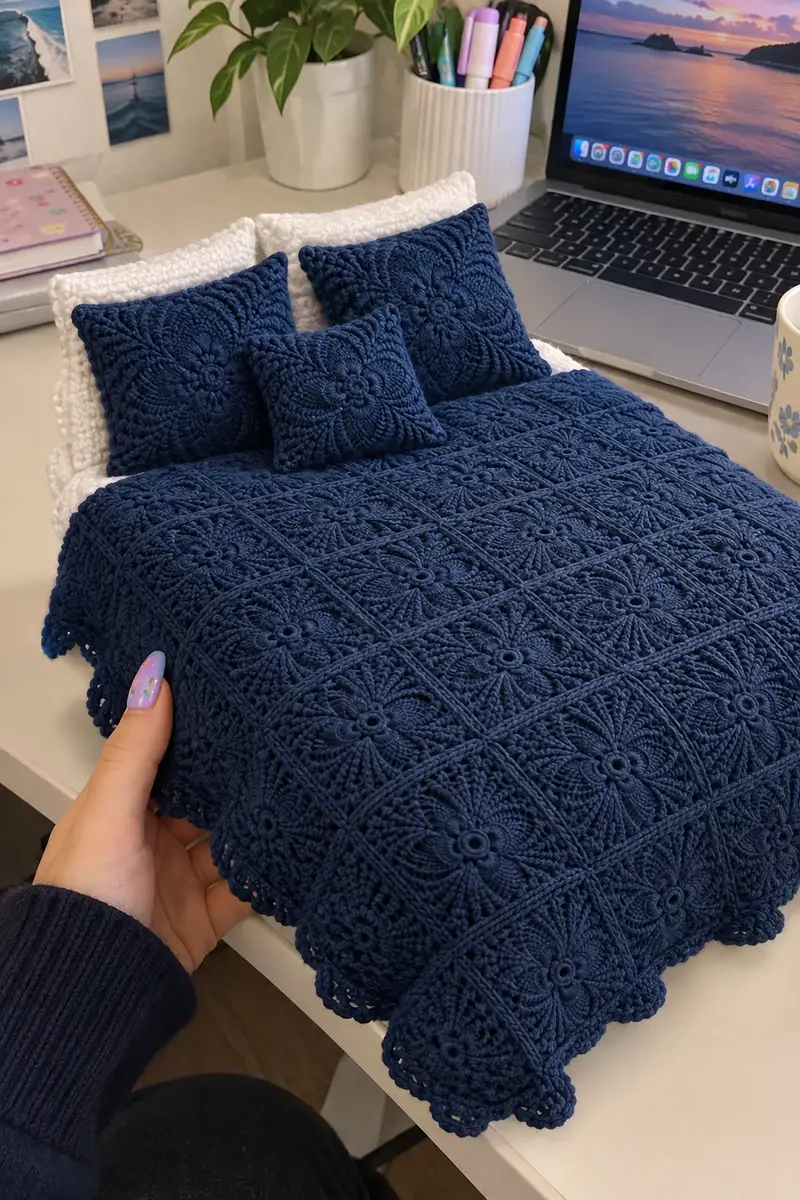
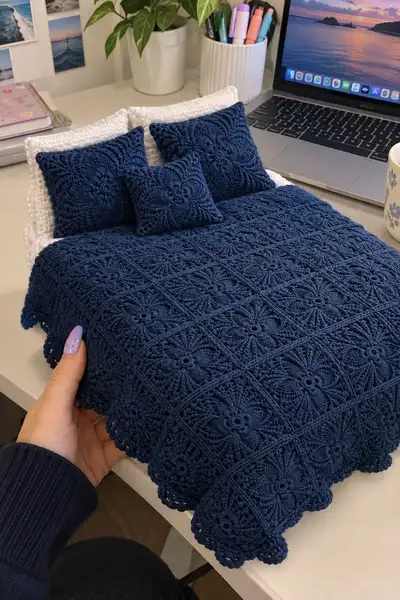
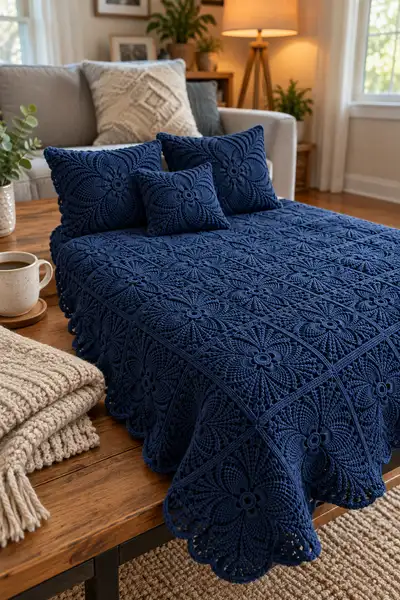
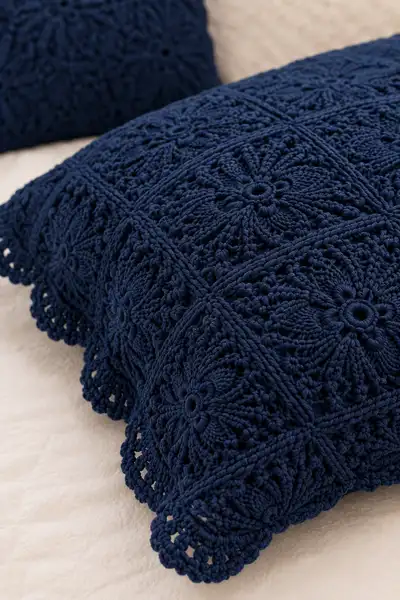
A luxurious navy blue bedspread made from joined floral crochet squares. Each square features a raised rosette center, radiating petal texture and a delicate scalloped edge — assembled into a dramatic vintage-inspired spread. This pattern includes instructions for the motif, joining, scalloped border and matching pillow covers, ideal for a decorative bed or large throw.
Progress Tracker
0% Complete
— Notes & Gauge :
Info :
This bedspread is worked from individual floral square motifs joined together and edged with a scalloped lace border. Gauge for each finished motif measures approximately 9.5" (24 cm) square when worked in worsted cotton with a 4.0 mm hook. Because this is motif-based, final size can be adjusted by changing the number of motifs in each direction. For reference, a 6 x 8 grid of motifs will create roughly a lap/throw size; 8 x 10 or larger will approach twin/full bed sizes. Keep your tension consistent and block motifs before joining for best results.
Info :
Puff stitch used in this pattern: yarn over, insert hook into indicated stitch, yarn over and pull up a loop — repeat this 4 times (you will have 9 loops on hook), yarn over and pull through all loops, chain 1 to close puff. Adjust puff construction if your yarn is bulky; for very thick yarn use 3 yarn-over loops.
— Motif (make 48+ for full bedspread; make grid to desired size) :
Round 1 :
Make a magic ring, ch 1, 6 sc into ring. Pull tight and sl st to first sc. (6)
Round 2 :
Inc in each st around. (12)
Round 3 :
(1 sc, inc) x 6. (18)
Round 4 :
(2 sc, inc) x 6. (24)
Round 5 :
(3 sc, inc) x 6. (30)
Round 6 :
(4 sc, inc) x 6. (36)
Info :
Keep rounds 1-6 worked tightly to produce a firm center. Use a stitch marker on the first stitch of each round to help track placement and count when working textured rounds that skip stitches.
Round 7 :
1 sc in each st around. (36)
Round 8 :
1 sc in each st around. (36)
Info :
This short even round band creates a stable base for the raised rosette. After Round 8, you will form the central petal texture by working puff clusters and tall stitches in the next several rounds.
Round 9 :
*Ch 3, skip 2 sts, puff in next st; ch 1, sc in next st*; rep from * to * around to create 12 puff placements. If counts differ slightly, maintain spacing visually. Sl st to join. (36 maintained visually)
Info :
Make 12 evenly spaced puff clusters - these will become anchors for the petal clusters. Puff placement here is decorative and adds height; keep both sides of motif oriented with the right side facing you for consistency across all motifs.
Round 10 :
Work in each puff cluster as follows: in each puff space, join with sl st, ch 3 (counts as first dc), 7 dc into the same space, sl st into next sc between puffs to anchor petal. This creates 12 tall petals radiating outwards; end with sl st to join. (12 petal groups)
Round 11 :
*In top of each petal group: ch 1, sc into base between petals, ch 4, sl st into center of petal cluster to create a small loop; ch 1, sc in next base*: repeat around. This forms a ring of decorative loops between the petals. Maintain visual symmetry. (12 loops)
Info :
At this stage the motif has a distinct rosette with petals. Work the next rounds to convert the round motif toward a square shape by adding corner chain-spaces and extended clusters that create the sides.
Round 12 :
Ch 1, *sc in base of petal cluster, ch 3, skip petal top, sc in next base; rep from * around to form a scalloped ridge. Sl st to join. (36 approx.)
Round 13 :
(This round begins building out to a larger circle) 2 sc in each sc around. (approx 72)
Info :
Although we list 'approx 72' here, focus on developing an even band of stitches larger than the petal ring. The exact stitch count will scale with how many sc are present from the prior textured work; aim to approximately double the stitch density to create room for the next texture round.
Round 14 :
1 sc in each st around to compress the band and even out the working edge. (approx 72)
Round 15 :
Info :
We will create four corner zones to start turning this round motif into a square. Identify 4 evenly spaced points (approx every 18 stitches if you have 72) and mark them with stitch markers — these will become the corners of the square. If your counts are slightly different, place markers visually at quarters of the round.
Round 16 :
*[Sc across next 8 sts], (sc, ch 4, sc) in next st as corner marker*; rep from * to * 4 times creating 4 corner ch-4 spaces. Sc across in between corners. (counts will equal existing stitch count plus 4 chain-spaces used as corners)
Round 17 :
Working into chain-4 corner spaces: at each corner work (sc, ch 3, 2 tr, ch 3, sc) into corner ch-4; along each side work a sequence of (puff clusters separated by 2 sc) to create the textured side panels. Repeat for 4 sides. End with sl st. (visual counts)
Info :
This pattern purposely moves from strictly measured counts into slightly flexible shaping so motifs keep their decorative texture and still form square corners. When making multiple motifs, aim for consistent corner placement so joins are neat. Block each motif square flat immediately after finishing to set the corners.
Round 18 :
Across each side: *in between corner and next corner: [ch 1, sc in next 2 sts, puff cluster in next 2 sts, sc in next 2 sts]*; work corners as (sc, ch 4, sc). This sets up 4 side panels with raised texture. Sl st to join. (square established visually)
Round 19 :
1 sc in each st around working into back loops only along the last round to create a defined ridge between motifs once joined. Work (sc, ch 3, sc) in each corner ch-space. (visual count; maintain evenness across sides)
Info :
Work Round 19 in BLO to create a ridge that will act as the joining edge later. Consistent BLO rows result in a neat raised seam when squares are sewn together or joined with slip stitches.
Round 20 :
Ch 1, *2 sc in next st, sc in next 8 sts across side, 2 sc in next st, (sc, ch 3, sc) in corner*; rep around to strengthen the square sides. Sl st to join. (visual count)
Round 21 :
Work a decorative filet and picot row along each side: *sc across 10 sts, (ch 3, sl st into same st) for picot spacing; repeat across side; corner: (sc, ch 4, sc)*. Sl st to join. (visual count)
Info :
Add a small chain picot every 10 stitches to break the density and create the lacy grid effect visible in the photos. Adjust spacing depending on your stitch count for each side so the picots look even.
Round 22 :
Work 1 sc in each st around but in the corner ch-4 spaces work (sc, ch 3, sc) to keep corners squared. Sl st to join. This completes the basic square body before the outer lace scallop. (visual)
Round 23 :
Start scalloped edging on motif: *[sc, hdc, 3 dc, hdc, sc] in each side cluster repeat, (sc, ch 3, sc) in corners*; sl st to join. This creates small scallops along the edge that will interconnect when motifs are joined. (visual)
Round 24 :
Work an outer lacy ring: *ch 4, skip 2 sts, sl st in next, repeat across sides; corners: (ch 4, sl st) into space*; sl st to join. (visual)
Info :
By Round 24 the motif should measure roughly 9-10" (24-25 cm) square unblocked. Block each motif to exact square size using pins and steam or wet-blocking. This ensures uniform joins later.
Round 25 :
Make decorative rope ridge: join with sl st into ridge row, ch 1, *fpdc around the ridge stitch for 4 stitches, bpdc for 4 stitches; repeat across side; (fpdc 4, bpdc 4) at each side and (sc, ch 3, sc) at corners.* This adds the cable-like ridge visible between squares. Sl st to join. (visual)
Round 26 :
Work a final finishing scallop: *[sc, ch 3, 3 dc in next, ch 3, sc] across side scallop points, (sc, ch 4, sc) in corners*; sl st to join. Fasten off and weave in ends. Each motif is now complete. (final motif)
Info :
Make as many motifs as needed for your chosen layout. Common layout examples: 6 x 8 = 48 motifs for a medium throw; 8 x 10 = 80 motifs for a twin; 10 x 12 = 120+ motifs for full-to-queen coverage. Because each motif is heavily textured, the spread will have good drape but solid coverage. Block all motifs to identical dimensions before joining.
— Joining Motifs (join-as-you-go or sew) :
Info :
Two main joining methods are recommended: slip stitch join-as-you-go (JAYG) or mattress/seam sewing with yarn and tapestry needle. The JAYG method creates a flat, continuous ridge between motifs similar to the photo. We provide both options; choose what gives you the finish you prefer.
Round 27 :
Join-as-you-go method (working on a completed motif as you reach its final round): Lay the new motif on top of the already-placed motif with right sides facing up and matching corners. When you reach a side you wish to join, instead of sl st to join in your new motif, insert hook into the corresponding stitch on the adjacent motif and sl st through both loops, then continue on new motif. Work this across each side you wish to join, then fasten off. Repeat for each motif making the grid. (join visually)
Info :
When joining, ensure ridges align: the BLO ridge row (Round 19) was designed to create a consistent seam. Match BLO ridge of one motif to the top loops of the adjacent motif to create the subtle raised dividing lines. Use stitch markers on corresponding corners so joins are square.
Round 28 :
Sewing join method: With tapestry needle and matching yarn, use a mattress stitch through the back loops of the ridge on both motifs, spacing stitches evenly for a flat seam. Make sure to weave yarn through several motifs to anchor ends and reduce bulk. Tie small secure knots and weave in ends on the wrong side. (visual)
Info :
If using sliding join or whip stitch, test a short length first to confirm the seam appearance. Mattress stitch offers the most invisible seam, while JAYG gives a decorative continuous join. Choose based on how pronounced you want the ridge to look.
— Center Panel Assembly :
Round 29 :
Layout your motifs in your desired grid on a flat surface. For an 8 x 10 arrangement, start from the center row and work outward, joining motifs horizontally first, then join rows vertically to avoid distortion. Pin motifs in place before final joining. (visual)
Round 30 :
After joining all internal seams, check for tension inconsistencies and re-block joined areas if needed. Add small reinforcing mattress stitch passes along long seams for stability if the spread will be heavily used. (visual)
Info :
Leave the outer edges unjoined until you are ready to add the border; it is easier to measure and add edge treatments with the full assembled center panel laid flat and blocked.
— Outer Border & Scalloped Edge :
Round 31 :
With right side facing, join yarn at a corner seam. Work 1 round of sc evenly around the entire perimeter, working (sc, ch 3, sc) in each motif corner to preserve square corners. This evens the raw edges and creates a base for the lace rounds. (visual)
Round 32 :
1 sc in each st around maintaining corner sc-ch3-sc. Work in BLO on this round to create a reinforced ridge for the next textured rounds. (visual)
Info :
By working in BLO around the assembled panel you create a unified ridge line that ties together the ridge rows from each motif. This concealed seam reads as a narrow grid line in the photographs.
Round 33 :
Begin outer lace: *[ch 5, skip 3 sts, sl st] repeat across edge; at corners work (ch 6, sl st into corner)*. This creates a long looped edge for attaching scallops. Sl st to join. (visual)
Round 34 :
Scallop foundation: *[sc in loop, hdc in same loop, 5 dc in next loop, hdc, sc] across loops; in corner loops work a slightly larger scallop (sc, hdc, 7 dc, hdc, sc)*. Sl st to join. (visual)
Round 35 :
Work a refined scallop and picot: *[sc, ch 3, 3 dc, ch 3, sc] across scallops; every fifth scallop add a small picot (ch 3, sl st in top). Ensure corner scallops mirror motif corner size for a rounded scalloped border. Sl st to join. Fasten off and weave tails into the nearest ridge. (visual)
Info :
For a dramatic ruffle like in the photo, add a second scallop row directly on top of the first by repeating Rounds 34-35 but working 2 or 3 dc more per scallop to create a fuller wave. Be careful: larger scallops use more yarn and increase the spread's final size slightly.
Round 36 :
Optional rope edging: join yarn and work (fpdc 3, bpdc 3) around the last scallop row, finishing with a tidy sl st to the starting point. Fasten off and weave in ends. This gives the outermost ridge similar to the photograph where a small twisted rope frames the scallops. (visual)
Info :
After the complete border, steam-block the entire assembled bedspread on a large flat surface (or use a professional blocking service if making very large sizes) to set scallops and even grid lines. Allow to dry completely before use.
— Matching Pillow Covers (make 2 large and 1 small) :
Round 37 :
Make motifs identical to bedspread motifs for pillow fronts. For each pillow front use 4 motifs for a small 1-motif-centered cushion, 4 motifs arranged as 2 x 2 for a larger square, or 9 motifs (3 x 3) for a large lumbar. Block and join motifs following the joining instructions above. (visual)
Round 38 :
For each pillow back: Option A — crochet a solid linen stitch back to match size using worsted cotton: ch to width, then work rows of sc for desired coverage (approx same number of sts and rows as motifs size). Option B — sew a fabric back cut to exact dimensions and insert hidden zipper or envelope closure. (visual)
Info :
I recommend Option B with fabric back for a cleaner interior and easier pillow insert replacement. If you prefer the textured look on both sides, work 2 motif panels and seam them together with a small opening for the insert.
Round 39 :
Sew or crochet the pillow back to the motif front using slip stitch or mattress stitch. If crocheting a back panel, use sc around the edges to join; ensure even distribution so motifs do not pucker. Fasten off and weave ends. (visual)
Round 40 :
Optional decorative flange: Work 1 round of sc around the pillow edges in BLO, then 1 round of small scallops (sc, ch 3, sc) at the edge for a finished look. Insert pillow insert and close seam. (visual)
Info :
Choose an insert slightly smaller than the finished pillow panel for a plush appearance. For a firm, structured look pick an insert roughly the same size as the panel and fill to the recommended fullness.
— Additional Decorative Details & Finishing :
Round 41 :
Optional surface embroidery: With tapestry needle and matching yarn, work a few extra raised chain stitches across petal valleys to exaggerate ridges if desired. Secure and weave in ends. (visual)
Round 42 :
Edge reinforcement: run a very small whip stitch around inside seams to prevent stretching if you expect heavy use or machine washing; use a cotton thread that matches yarn for discretion. (visual)
Info :
Spot-clean the bedspread or hand-wash in warm water with mild detergent. Because of the heavy texture, avoid machine agitation which can distort corners and scallops. Re-block after washing if necessary.
Round 43 :
Final inspection: trim all ends, inspect joins for any missed loops, and re-strengthen corners with a few reinforcing stitches if needed. Press lightly with steam at a safe distance; do not iron directly on cotton yarn. (visual)
Info :
The finished spread is heavy and drapey; add mattress-safe non-slip pads under the foot of the bed if sliding is a concern. For extra warmth, lay a flat cotton sheet underneath to protect motif texture against daily wear.
— Extended Alternate Square Variation (for optional larger petal definition) :
Round 44 :
Alternate motif start: work R1-R8 as above but in R10 increase petal height to 11 dc instead of 7 (ch 3, 11 dc in petal space) to produce longer petals. Adjust rounds 13-18 by adding 6 more sc across sides to compensate for the larger circumference. (visual)
Round 45 :
Follow same corner and scallop sequence but change scallop stitches to [sc, hdc, 5 dc, hdc, sc] across side repeats and use ch5 loops for the lace foundation to add a broader scallop. (visual)
Info :
Alternate variation will increase each motif dimension by ~0.5"-1" depending on your tension. Use this variation if you want a more dramatic flower relief across the spread.
— Troubleshooting & Tips (additional Info sections sprinkled throughout) :
Round 46 :
Info :
If a motif edge appears wavy, it may be overworked — block it slightly stretched out and pin corners to square. If it remains wavy after blocking, try omitting one repeat of the final scallop row on the motifs that look too large to make all motifs uniform.
Round 47 :
Info :
If you note a mismatch in motif counts when joining rows (one motif narrower or wider), visually redistribute by shifting a few joining stitches or add a small sl st column to even out the seam. This is preferable to ripping a full motif later.
Round 48 :
Info :
Consistent use of the same yarn dye lot is recommended for a uniform navy colour across an entire bedspread. Cotton can vary between lots; purchase enough yarn before starting to avoid mismatched shades.
Round 49 :
Info :
Store your blocked motifs flat and stacked separated by acid-free tissue if you will assemble later — this preserves the blocked shape and prevents creasing in delicate scallops.
Round 50 :
Info :
When measuring approximate yarn required: each motif uses about 55-75 g of worsted cotton depending on variation; multiply by the number of motifs and add 10% for joining and border. The large bedspread estimate in Materials above includes this buffer.
Round 51 :
Info :
For a lightweight version of the bedspread, substitute a sport-weight cotton and smaller hook (3.0-3.5 mm). Expect smaller motif dimensions and more motifs to cover same bed size; yarn usage will differ accordingly.
Round 52 :
Info :
If your puff stitches are too bulky and cause uneven joins, decrease puff building loops from 4 to 3 loops (yarn over and pull up loop three times) and chain 1 to close to reduce thickness while maintaining texture.
Round 53 :
Info :
Keep a small sample motif as a gauge swatch to test your hook and yarn to reach the recommended motif size before committing to full production. This will save time and yarn adjustments later.
Completing this navy floral bedspread is a wonderfully satisfying journey—each square you finish adds another layer of texture and depth to the final piece. The rich navy medallions and scalloped border come together into a dramatic, vintage-inspired spread that feels custom-made. I hope you enjoy every motif, join and scallop—it's truly a project worth savoring. 🧶💙✨