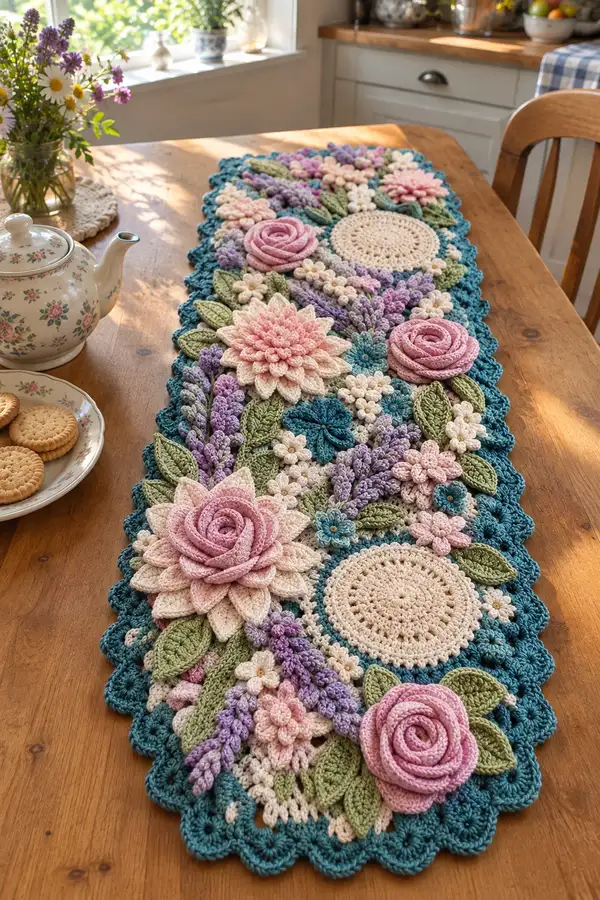
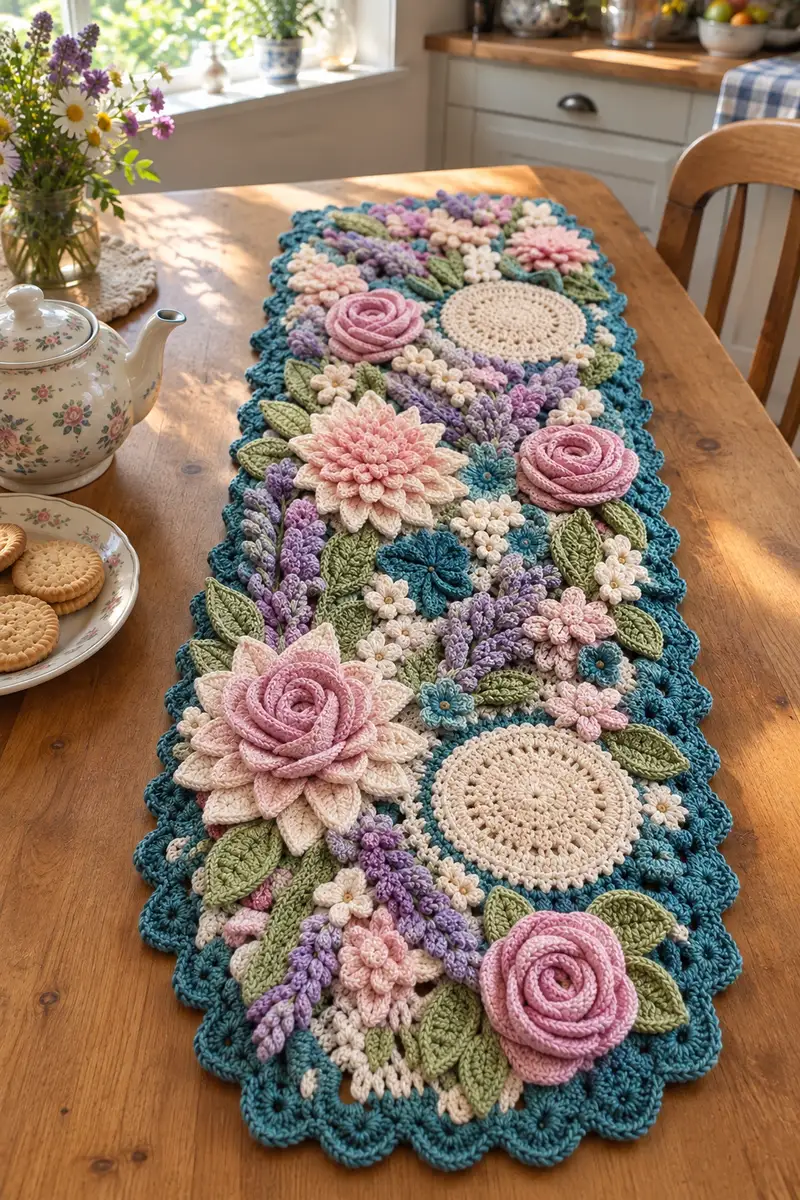
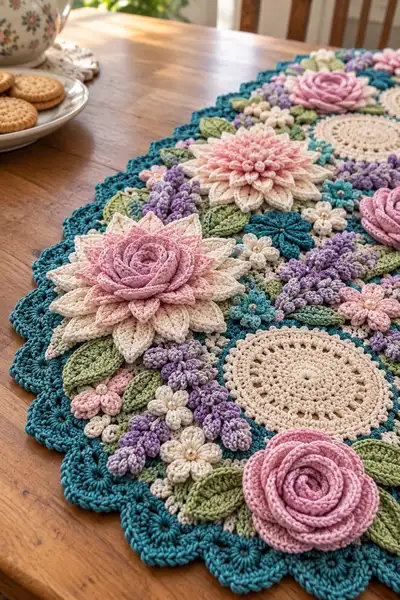
A romantic, heavily textured table runner composed of layered floral appliques, leafy sprigs and circular doily bases. This runner features three dimensional roses, layered dahlias, lavender sprigs and tiny blossoms in soft pastels with a deep teal scalloped border. Perfect as a centerpiece for a long dining table or sideboard, it combines motif crochet, raised petals and careful assembly for a truly heirloom finish.
Progress Tracker
0% Complete
— Foundation Base Circles (make 3) :
Round 3 :
(1 sc, inc) x 6 (18)
Round 4 :
(2 sc, inc) x 6 (24)
Round 5 :
(3 sc, inc) x 6 (30)
Info :
These circles form the main doily-like bases seen under the larger flowers. Work in cream/ivory. Keep tension relaxed for better drape.
Round 6 :
(4 sc, inc) x 6 (36)
Round 7 :
1 sc in each st (36)
Round 8 :
(5 sc, inc) x 6 (42)
Round 9 :
1 sc in each st (42)
Round 10 :
*(ch2, skip 1, sc) around to create subtle eyelet texture (42)
Info :
You can puff the central rounds for slight padding by working 2 rounds of 1 hdc in each st then continuing with sc rounds. Block flat before assembly.
Round 11 :
Change to contrasting edging color if desired. 1 sc in each st (42)
Round 12 :
(3 sc, ch2, sc in same st) repeat around for scallop foundation (42)
Info :
Fasten off leaving a long tail for sewing onto the runner foundation later. Make three of these, spacing them evenly along the runner layout.
— Large Layered Dahlia (make 2 large dahlias) :
Round 3 :
(1 sc, inc) x 6 (18)
Round 4 :
(2 sc, inc) x 6 (24)
Round 5 :
1 sc in each st (24)
Round 6 :
Change to petal color shade A. (ch3, 2 dc, ch3, sl st in same st) Repeat in each st around forming 24 petals; sl st to join
Info :
Petal base: use elongated clusters to create fullness. Work petals closely so they overlap when layered. Block lightly with a pin in center to open petals.
Round 7 :
Row of sc around petal feet: 1 sc in each st around the base (24)
Round 8 :
Round of (1 sc, ch3, 1 sc in same st) in each base stitch to make petal anchors (24)
Round 9 :
Second petal layer: attach yarn in between petals, *(ch4, 4 dc cluster under petal point, ch4, sl st) repeat 24 times to create pointed petals
Round 10 :
1 sc around base to stabilize (24)
Info :
For a fuller look, make a third petal layer using a slightly lighter color and smaller petals (hdc clusters). The overlap should hide the layer below.
Round 11 :
Third petal layer (optional): (ch3, 3 hdc, ch3, sl st) in each anchor (24)
Round 12 :
Center rosette: MR with 8 sc, join and work 2 rounds of sc to create a padded center. Sew to center of dahlia.
Round 13 :
Fasten off and weave ends. Shape petals to curve upward using blocking and a damp cloth or steam shaping.
Info :
Stuff a very small amount of fiberfill into the rosette center before sewing it to the dahlia to achieve slight doming. Use a circular whipstitch to attach securely.
— Spiral Rose (make 3) :
Round 1 :
Ch 60 (long strip length depends on desired rose diameter; adjust by lengthening/shortening chain) (work in soft blush pink)
Round 2 :
Row 1 of strip: sc in 2nd ch from hook and each ch across (59)
Round 3 :
Row 2 of strip: ch1, turn, (blo sc in each st) across to create a pronounced ridge (59)
Round 4 :
Repeat Row 2 for 2-3 more rows to create a sturdy strip (59)
Info :
For a substantial spiral rose, work 4-6 rows and use a narrower strip for tighter roses or a wider strip for roomy roses. Slight blocking helps even the strip.
Round 5 :
Fasten off leaving long tail. Starting at one short end, roll strip into a spiral, securing every 4-6mm with whipstitches through the bottom ridge to form a rose shape.
Round 6 :
Stitch the rose base to a small felt circle if desired for stability, then sew the felt circle beneath the rose when attaching to the runner.
Info :
Varying chain lengths gives roses of different diameters; trim and tuck ends so the back is neat. Use a longer tail to secure tightly.
— Layered Petal Accent (Medium Flower, make 2) :
Round 3 :
(1 sc, inc) x 8 (24)
Round 4 :
1 sc around (24)
Round 5 :
Petals: *(ch3, 2 dc, ch3, sl st in same st) repeat 24 times (24 petals)
Round 6 :
Stabilize base with 1 sc in each st around (24)
Info :
Mist one or two petals with a steam iron to get them to curl slightly; this small manipulation adds life to the flower.
— Small Five-Petal Flower (make many) :
Round 1 :
MR, ch1, (sc, ch3) x 5, sl st to first sc to form five loops. (5 loops)
Round 2 :
In each ch3 loop: (sc, hdc, dc, hdc, sc) forming a petal. Fasten off and add a small bead in center with a few stitches (flower ~2 cm).
Info :
Make numerous tiny flowers in cream, pink and teal to fill gaps. Sew beads into centers for a refined finish, using small knots to secure beads at the back.
— Tiny Button Flowers (make many) :
Round 2 :
Switch to contrasting color or bead, sl st around and finish. These act as filler buds and look lovely clustered between leaves.
Info :
Use cream or soft pink for tiny buds. Sew onto runner with two stitches through the center and secure the knot well under an applique to hide the tail.
— Lavender Sprig (make 8-12 sprigs) :
Round 1 :
Ch 12 (or desired sprig length). Change to lavender yarn.
Round 2 :
Work back along chain: in 2nd ch from hook *(sl st, sl st, ch1) repeat to end to create base ridge (11)
Round 3 :
Branching buds: Attach small clusters: in alternate spaces from chain base make a bobble cluster: (yo, insert, pull up, yo, draw through 2) x3 then finish cluster by drawing through all loops and sl st in same sp. Repeat along length creating 6-8 buds.
Round 4 :
Finish with a slender stem: ch6, sl st back along chain in each ch to reinforce. Fasten off leaving tail for sewing.
Info :
Make these with 2 tones of lavender for visual depth; stitch sprigs under leaves to look naturally tucked into the arrangement.
— Sculpted Leaves (make 20-30) :
Round 1 :
Ch11. Row 1: sc in 2nd ch from hook to last ch (10)
Round 2 :
Turn, hdc in next 3, 3 dc in next, hdc in next 3, sc in last (creates central spine and shape)
Round 3 :
Rotate: sl st to base of leaf, then work along opposite chain: sc, hdc, 3 dc, hdc, sc; fasten off leaving long tail for sewing (leaf length ≈ 4-6cm)
Info :
Work leaves in two sizes by adjusting initial chain length. Using BLO on one side before finishing gives a nice ridge down the leaf when blocked.
— Textured Bud Clusters (small filler clusters) :
Round 1 :
MR, ch2, 10 hdc in ring, join (10)
Round 2 :
*(ch2, puff stitch in next st) x 10 creating a bumpy surface; fasten off and leave tail for sewing
Info :
These clusters add the small round texture seen grouped under larger flowers. Use a slightly darker shade than the main flowers so they read as shadowed buds.
— Small Turquoise Daisies (make 8-10) :
Round 1 :
MR, ch1, 8 sc (8)
Round 2 :
*(ch3, sl st in next) around to make 8 loops; in each loop work (sc, hdc, dc, hdc, sc) for petite petals. Sew bead center.
Info :
These pop nicely against the cream bases and larger flowers; add them clustered around dahlia centers for color balance.
— Joining Motif Foundation (long runner panel) :
Round 1 :
Chain a foundation row the length of your runner layout (recommend chaining approx 160-200 for an approximate 90-100cm long runner; adjust to table length). Work in teal or chosen backing color to form lattice foundation.
Round 2 :
Row 1: Turn, sc in 2nd ch from hook and across to form a tight foundation (approx 159-199 sc)
Round 3 :
Work 4 rows of sc to create a firm strip to which motifs will be sewn. (same stitch count)
Info :
Alternatively, make several foundation panels and join them by mattress stitch to match the arrangement of motifs. The foundation will show just slightly under the heavy applique clusters; keep it neat.
— Arrangement & Placement (Layout Guidance) :
Info :
Lay the runner foundation on a flat surface. Position three doily bases running lengthwise; stagger large dahlias and spiral roses so they alternate along the center. Place leaves, lavender sprigs, small daisies and clusters to fill gaps. Photograph the layout before sewing to preserve your chosen composition.
Round 1 :
Pin each large motif in place using sewing pins; ensure even spacing and symmetry from long edge to long edge.
Info :
Use contrasting thread to baste motifs in place temporarily if you want to test removal or re-arrangement; permanent sewing should use matching yarn and invisible stitches.
— Sewing & Attachment (per motif) :
Round 1 :
Use a tapestry needle and long tail to whipstitch motif base to foundation through back loops only of base and foundation to create a slight shadowed seam.
Round 2 :
For raised flowers (roses/dahlias), sew the center first, then tack down petal tips at 4–6 points around the base so petals maintain three-dimensionality. Use small, hidden stitches at petal bases.
Info :
Sew leaves by anchoring midrib first, then apply tiny stitches along outer edges where they meet nearby motifs. This secures them flat while allowing slight lift at the tips.
— Bead & Center Embellishment :
Round 1 :
Sew pearl beads into the centers of small five-petal flowers and select dahlias using a fine needle and short thread. Pass thread twice through bead and knot securely at the back of the applique.
Info :
Hide knots by stitching them into the base of the motif; add a dab of fabric glue for security if the runner will be handled frequently.
— Scalloped Border (worked after all motifs sewn) :
Round 1 :
Attach deep teal yarn to an outer edge of the foundation panel. Round of sc evenly around the entire runner edge; where shapes are indented, work 2 sc in corners to keep even tension. Approx stitch count depends on runner periphery.
Round 2 :
*(ch4, skip 2 sc, sl st in next sc) repeat to create a chain-loop scaffold around the edge; adjust spacing so loops are evenly sized around corners and curves
Round 3 :
In each chain-loop: (sc, hdc, 3 dc, hdc, sc) to create a scallop shell. Repeat around (scallop count ≈ 40-60 depending on runner length)
Info :
Block the entire runner gently after making the scallops to even the shells and allow the flowers to sit naturally on the edge. Use pins to set scallops to uniform height.
Round 4 :
For a textured rim, work picots between scallops: sl st to midpoint between shells, ch3, sl st into top of ch3 to form picot, then sl st to next shell base. Fasten off and weave ends.
— Final Finishing Rounds & Securement :
Round 1 :
Inspect all motif attachments. Reinforce any loose areas with additional small whipstitches from back to front, taking care not to pierce bead centers or visible petal faces.
Round 2 :
Light steam block the entire runner by laying on a towel and steam with iron at safe wool/cotton setting held just above the surface (do not press with the iron). Shape petals with fingers while warm to set curves.
Info :
If the runner will be laundered, hand-wash gently and reshape when damp to maintain scallop and petal form. Cotton yarn tolerates gentle washing; test a sample first.
— Alternate Smaller Motifs & Repeats (optional) :
Round 1 :
To add more dimensional interest, repeat the Spiral Rose or Dahlia patterns with reduced chain lengths and fewer petal rows for secondary flowers. Adjust placement in gaps.
Round 2 :
Make extra leaves and lavender sprigs to tuck under large flowers where necessary — these small details lift the overall composition.
Info :
Creating a practice motif set before committing stitches to the final yarn helps you estimate quantities and test color transitions.
— Suggested Stitch Counts & Math Notes :
Round 1 :
Most circular motifs here use a standard 6-increase scheme per round (6,12,18,24,30...). Always check that your increases match the formula to keep rounds flat: for N groups of increases, add N stitches per increase round.
Info :
When working petal layers and clusters across many stitches, count petals and anchors rather than individual stitch counts to ensure even spacing. If a layer has 24 anchors, each anchor must be spaced exactly every base stitch for even petals.
— Pro Tips for Professional Finish :
Info :
Use color-gradated yarns for petal layers to achieve soft ombre effects similar to the photographed runner. Sew from the underside and keep joins invisible by taking stitches through both motif and foundation behind the petal feet. Take photos of layout before sewing so you can reproduce composition consistently.
Completing this Cottage Rose Table Runner is such a joyful, immersive experience — like stitching a garden one flower at a time. Each layered petal and tiny bud adds character and a personal touch to your table. The teal scalloped border frames the romantic pastels beautifully and makes this piece feel like a cherished heirloom. I hope you enjoy arranging and sewing each motif as much as I did making the sample. 🌸🧶