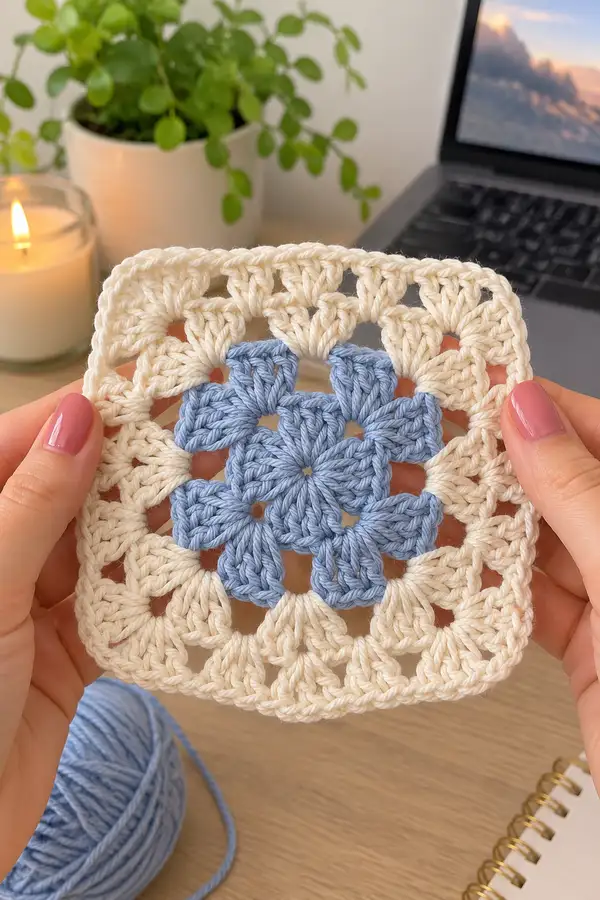
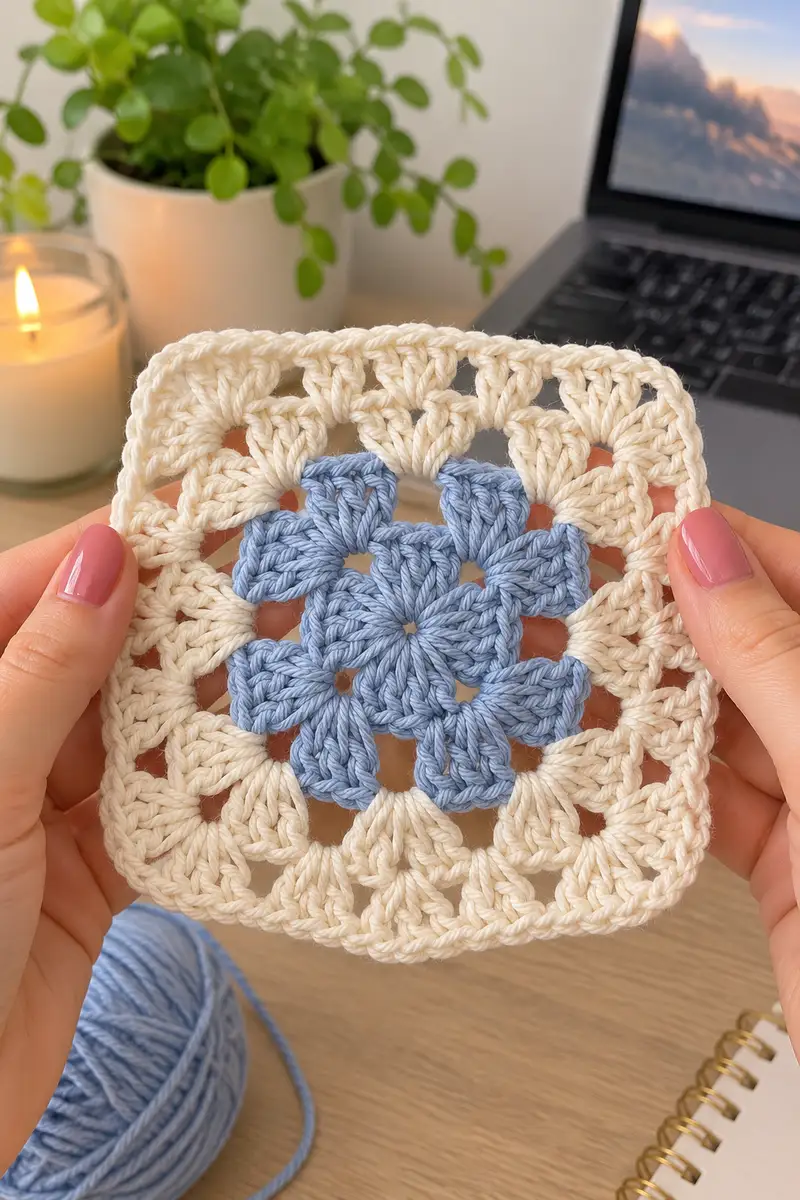
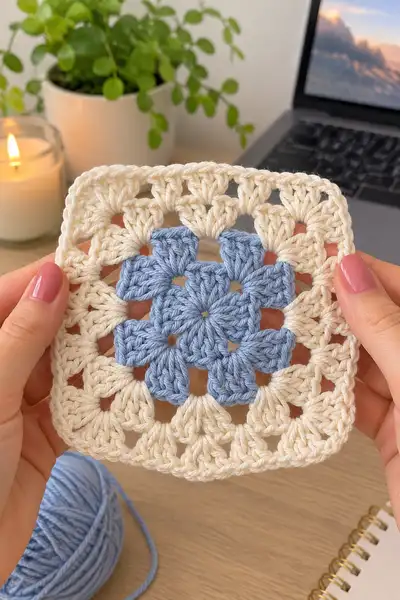
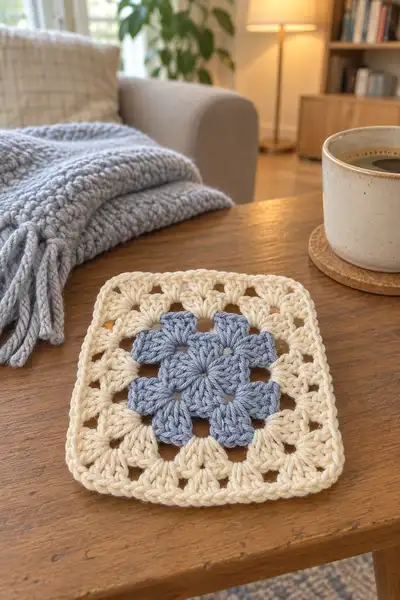
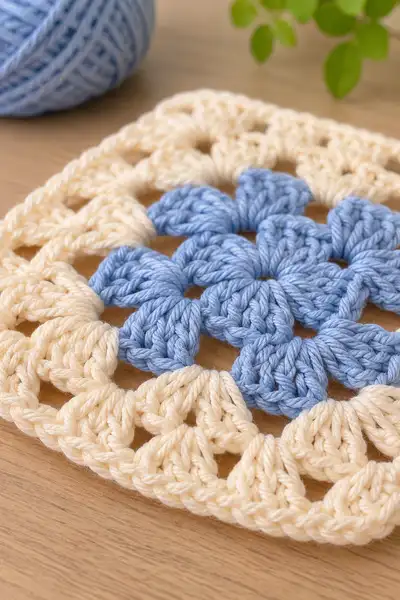
A soft, vintage-inspired granny square featuring a textured blue floral center and a creamy, airy outer frame. This pattern uses puff/cluster techniques and simple color changes to create a delicate square suitable for blankets, cushions or coasters. Clear step-by-step rounds and helpful tips make it easy to follow and adapt in size. Perfect for creating a coordinated set in soothing blue and cream tones.
Progress Tracker
0% Complete
— Notes & Special Stitches :
Info :
This square is worked in joined-rounds from the center outward. The center uses puff or 3-dc clusters to create a petal look; subsequent rounds transform the round into a square using corner chain spaces. Use a stitch marker to mark the first stitch of each round. Puff stitch: yarn over, insert hook into indicated space, yarn over and pull up a loop (repeat 3 or 4 times as indicated so you have 7 loops on hook), yarn over and pull through all loops, ch1 to close puff if pattern instructs. For clusters we will often work 3 dc cluster: (yarn over, insert hook, pull up loop) x2 then yarn over and pull through all loops to close depending on style.
Info :
Gauge is not critical for a motif, but for consistency use the same hook throughout. The finished sample measures approx 12 cm (4 3/4 in) square using 4.0mm hook and worsted-light cotton shown. Block lightly to reach final measurements.
— Center / Round 1 - forming the floral hub :
Round 1 :
With dusty blue, make a magic ring. ch1 (does NOT count), 8 dc into ring, pull ring closed. Join with sl st to first dc. (8 dc)
Round 2 :
ch3 (counts as dc), in same st work a puff cluster: yarn over, insert hook, pull up loop, yarn over, insert into same st, pull up loop, repeat until you have 7 loops on hook, yarn over and pull through all loops, ch1 to close puff (counts as a tall petal). *Skip next dc, ch1, in next dc work 1 puff cluster, ch1; rep from * around for total of 8 puff clusters separated by ch1 spaces. Join with sl st to top of starting ch3. (8 puff clusters)
Info :
Keep puff clusters consistent in height — pull loops up to roughly same height before closing. Place a stitch marker at the join for Round 3 reference then remove or move as needed.
Round 3 :
ch3, 1 dc in same space (build up base), *ch2, in next ch1-space work (1 dc, ch1, 1 dc) to form a tiny petal corner base, ch2; rep from * around so you have a small elongated ring of 8 petal-bases. Join with sl st to top of starting ch3. This round creates the turning points for next round to sit on. (8 petal-bases)
Info :
Switch to cream yarn now for the transition round if you want the center flower to be distinctly blue. Carry blue yarn to weave later or fasten off and weave in end.
— Round 4 to Round 6 : expanding petals into a circular motif :
Round 4 :
With cream, join in any ch2 from previous round with sl st, ch3, 2 dc in same space, ch1, *(3 dc) in next ch2-space, ch1; rep from * around until you have worked 8 groups of 3 dc separated by ch1. Join with sl st to top of ch3. This gives a fuller ring around the blue center. (24 dc in 8 groups)
Round 5 :
ch3, 2 dc in same space, ch2, 3 dc in same space (corner made). *In next ch1 space along side work (3 dc, ch1, 3 dc) to form side cluster; at next corner ch2 work (3 dc, ch2, 3 dc); rep from * around so each side between corners has one side cluster. Join with sl st to top of starting ch3. (This begins to make a square-like rhythm)
Info :
At the end of Round 5 you will see the first hints of square corners; place markers in the corner ch2 spaces to keep track for future rounds. Tighten your starting loop before joining to avoid gaps.
Round 6 :
ch3, 2 dc in same space, ch2, 3 dc in same space (corner). *Along the side ch1-space work (3 dc, ch1) once, then skip to next side space; repeat side clusters twice between corners so each side now has 3 groups of (3 dc) separated by ch1. At each corner work (3 dc, ch2, 3 dc). Join with sl st. (Now you have 4 corners and 3 side clusters per side)
Info :
If you prefer a stronger color contrast, change back to blue for another textured round now. Otherwise continue in cream for a classic frame. Always finish join with sl st and weave in color change tails neatly toward the work.
— Round 7 to Round 12 : converting into a clear square and building height :
Round 7 :
ch3, 2 dc in same st, ch2, 3 dc in same sp (corner). *In each ch1 side space work (3 dc, ch1) twice to create additional side groups; at next corner work (3 dc, ch2, 3 dc). Join with sl st. (corners x4, side clusters x between corners increase)
Round 8 :
ch3, 2 dc in same sp, ch2, 3 dc in same sp for corner. *In each side space between corners work (3 dc, ch1) three times; repeat to next corner. Join. This builds the visibility of the square side.
Info :
From Round 7 onwards the number of 3-dc groups on each side increases by one each round. Keep corners exactly as (3 dc, ch2, 3 dc) for square geometry. Move corner markers as you complete each round.
Round 9 :
Repeat Round 8 pattern: ch3, corner (3 dc, ch2, 3 dc), then along each side work (3 dc, ch1) four times (or one more than previous round). Join. This increases side groups by one again. (Each side now will have 6 groups if following earlier counts — adjust as needed to keep shape square)
Round 10 :
ch3, corner (3 dc, ch2, 3 dc), then (3 dc, ch1) five times along each side between corners. Join. Keep tension even to prevent wavy edges.
Info :
If you notice corners pulling tight, add an extra ch1 between side clusters near the corner to relax the turning. Conversely, if sides are sagging, tighten your joins and block more firmly later.
Round 11 :
ch3, corner (3 dc, ch2, 3 dc), work (3 dc, ch1) six times along each side. Join with sl st to top of starting ch3. Continue to keep corners consistent.
Round 12 :
ch3, corner (3 dc, ch2, 3 dc), then (3 dc, ch1) seven times along each side between corners. Join. This completes a wider rectangular-squared round; check squareness and adjust tension if needed.
Info :
At this point, if you are making a small coaster or block, you may stop and proceed to finishing rounds. For a blanket, continue to expand by repeating growth rounds outlined next. Keep track of how many side clusters you have — helpful when joining multiple squares later.
— Round 13 to Round 30 : progressive expansion (repeatable motif rounds) :
Round 13 :
ch3, corner (3 dc, ch2, 3 dc) in corner ch2-space. Along each side work (3 dc, ch1) eight times. Join. (Corner x4 remain constant; side repeat count increases by one each round.)
Round 14 :
ch3, corner (3 dc, ch2, 3 dc), along side work (3 dc, ch1) nine times between corners. Join.
Info :
As rounds grow, the number of stitches per round increases by 24dc plus the corner spaces (approx) for each new side cluster — this is expected for traditional granny growth. Work sweaters of yarn color every 4-6 rounds if you want stripes.
Round 15 :
Repeat pattern: ch3, corner (3 dc, ch2, 3 dc), then (3 dc, ch1) ten times each side. Join. Keep handling yarn gently so side groups lay flat.
Round 16 :
ch3, corner (3 dc, ch2, 3 dc), (3 dc, ch1) eleven times per side. Join. Move corner markers each round to the corner ch2-space for accurate placement.
Round 17 :
ch3, corner (3 dc, ch2, 3 dc), (3 dc, ch1) twelve times per side between corners. Join.
Info :
If your square begins to ripple, steam-block lightly and pin to a square template before joining into larger projects. Adjust hook size down one step in later rounds to tighten edges if necessary.
Round 18 :
ch3, corner (3 dc, ch2, 3 dc), (3 dc, ch1) thirteen times per side. Join as usual. This and following rounds continue to expand your square for blanket-size projects.
Round 19 :
ch3, corner (3 dc, ch2, 3 dc), (3 dc, ch1) fourteen times per side. Join.
Round 20 :
ch3, corner (3 dc, ch2, 3 dc), (3 dc, ch1) fifteen times per side. Join. Check measurements against desired final size every few rounds.
Round 21 :
ch3, corner (3 dc, ch2, 3 dc), (3 dc, ch1) sixteen times per side. Join. Continue expansions as needed.
Info :
To create a subtle raised ridge, work an additional round in BLO (back loops only) using sc across to create a defined border line. Use this trick to separate color sections or create texture stripes.
Round 22 :
ch3, corner (3 dc, ch2, 3 dc), (3 dc, ch1) seventeen times per side. Join. If adding a new color, change yarn at the beginning of this round.
Round 23 :
ch3, corner (3 dc, ch2, 3 dc), (3 dc, ch1) eighteen times per side. Join. Keep tension and gauge consistent across color joins.
Round 24 :
ch3, corner (3 dc, ch2, 3 dc), (3 dc, ch1) nineteen times per side. Join.
Round 25 :
ch3, corner (3 dc, ch2, 3 dc), (3 dc, ch1) twenty times per side. Join. This is a good point to measure and stop if making a cushion panel or medium blanket square.
Round 26 :
ch3, corner (3 dc, ch2, 3 dc), (3 dc, ch1) twenty-one times per side. Join.
Info :
When you change to a new color, fasten off the old color leaving a 10-15 cm tail for weaving. Begin the new color by joining with sl st to the last join and proceed immediately so joins are neat.
Round 27 :
ch3, corner (3 dc, ch2, 3 dc), (3 dc, ch1) twenty-two times per side. Join.
Round 28 :
ch3, corner (3 dc, ch2, 3 dc), (3 dc, ch1) twenty-three times per side. Join.
Round 29 :
ch3, corner (3 dc, ch2, 3 dc), (3 dc, ch1) twenty-four times per side. Join. If your square is getting very large, occasional chain-tightening and even blocking may be required.
Round 30 :
ch3, corner (3 dc, ch2, 3 dc), (3 dc, ch1) twenty-five times per side. Join. This completes a broad expanse for larger blanket squares.
Info :
If you'd like to add texture rows, replace one expansion round with a 'shell round': work (dc, ch1, dc) in successive ch1 spaces along sides and (dc, ch2, dc) in corners to create an open shell decoration.
— Round 31 to Round 60 : optional large-scale expansion and decorative rounds :
Round 31 :
ch3, corner (3 dc, ch2, 3 dc), (3 dc, ch1) twenty-six times per side. Join. Add stitch markers to new corner ch2s each time if helpful.
Round 32 :
ch3, corner (3 dc, ch2, 3 dc), (3 dc, ch1) twenty-seven times per side. Join.
Round 33 :
ch1, switch to BLO round: sc in BLO across each st and across side cluster tops to create a textured ridge around the square. Join with sl st. This creates a defining ridge useful as a change line.
Info :
Back-loop-only (BLO) rounds help stabilize the work and create a decorative seam. Use a size down hook if you want a firmer edge for joining squares later.
Round 34 :
ch3, corner (3 dc, ch2, 3 dc), (3 dc, ch1) twenty-eight times per side. Join. If you are working stripes, consider switching color every 6th round.
Round 35 :
ch3, corner (3 dc, ch2, 3 dc), (3 dc, ch1) twenty-nine times per side. Join.
Round 36 :
Decorative star round: with contrast color, join in any side ch1-space, *ch1, sc in side ch1-space, ch2, skip next dc group, rep across each side; at corner ch2 work (sc, ch2, sc) to keep corner openness. Join and weave ends. This creates an airy overlay effect.
Info :
Decorative rounds like the star or shell can break monotony for large projects and add a hand-knitted look. Keep stitches even to preserve square shape.
Round 37 :
Return to main expansion: ch3, corner (3 dc, ch2, 3 dc), (3 dc, ch1) thirty times per side. Join.
Round 38 :
ch3, corner (3 dc, ch2, 3 dc), (3 dc, ch1) thirty-one times per side. Join.
Round 39 :
ch3, corner (3 dc, ch2, 3 dc), (3 dc, ch1) thirty-two times per side. Join. Continue this pattern to reach desired size, noting each round adds one side cluster per side.
Round 40 :
ch3, corner (3 dc, ch2, 3 dc), (3 dc, ch1) thirty-three times per side. Join.
Round 41 :
ch3, corner (3 dc, ch2, 3 dc), (3 dc, ch1) thirty-four times per side. Join.
Info :
For a large blanket made of many squares, stop expanding squares once they match your joining method and the blanket grid size. It's easier to join squares with consistent outer rounds (e.g., stop all squares at Round 40).
Round 42 :
ch3, corner (3 dc, ch2, 3 dc), (3 dc, ch1) thirty-five times per side. Join.
Round 43 :
ch3, corner (3 dc, ch2, 3 dc), (3 dc, ch1) thirty-six times per side. Join.
Round 44 :
ch3, corner (3 dc, ch2, 3 dc), (3 dc, ch1) thirty-seven times per side. Join.
Round 45 :
ch3, corner (3 dc, ch2, 3 dc), (3 dc, ch1) thirty-eight times per side. Join. If planning to join squares, consider stopping at a round where each side cluster count is easily divisible by your joining method.
Round 46 :
ch3, corner (3 dc, ch2, 3 dc), (3 dc, ch1) thirty-nine times per side. Join.
Round 47 :
ch3, corner (3 dc, ch2, 3 dc), (3 dc, ch1) forty times per side. Join.
Round 48 :
ch3, corner (3 dc, ch2, 3 dc), (3 dc, ch1) forty-one times per side. Join. This is well beyond small-sample sizing and appropriate for very large projects if desired.
Info :
At large sizes, add intermediate supporting rounds in sc or hdc to reduce stretching and support weight for blankets. You can also intersperse decorative rounds as shown to refresh color and tension.
Round 49 :
ch3, corner (3 dc, ch2, 3 dc), (3 dc, ch1) forty-two times per side. Join.
Round 50 :
ch3, corner (3 dc, ch2, 3 dc), (3 dc, ch1) forty-three times per side. Join.
Round 51 :
Decorative ridge round: ch1, sc in each st around in BLO to make a neat frame. Count stitches to ensure evenness. Join with sl st to first sc.
Info :
The BLO sc round evens out the outermost edge and makes a clean base for final edging or joining. Use a slightly smaller hook if you want a firmer edge.
Round 52 :
ch3, corner (3 dc, ch2, 3 dc), (3 dc, ch1) forty-four times per side. Join.
Round 53 :
ch3, corner (3 dc, ch2, 3 dc), (3 dc, ch1) forty-five times per side. Join.
Round 54 :
ch3, corner (3 dc, ch2, 3 dc), (3 dc, ch1) forty-six times per side. Join.
Round 55 :
ch3, corner (3 dc, ch2, 3 dc), (3 dc, ch1) forty-seven times per side. Join.
Round 56 :
ch3, corner (3 dc, ch2, 3 dc), (3 dc, ch1) forty-eight times per side. Join. At this stage you have a very large square — check for evenness and straighten corners when blocking.
Round 57 :
Optional popcorn or bobble round: join contrast color, *work popcorn (5 dc in same st, remove hook, insert hook into first dc of popcorn and pull loop through to close) in every fourth side cluster to create tiny raised dots; repeat evenly. Join. This is decorative and optional.
Info :
Decorative popcorns and bobbles require consistent spacing — plan repeats around side counts so they sit evenly. Use stitch markers to map spacing before working them.
Round 58 :
ch3, corner (3 dc, ch2, 3 dc), (3 dc, ch1) forty-nine times per side. Join.
Round 59 :
ch3, corner (3 dc, ch2, 3 dc), (3 dc, ch1) fifty times per side. Join.
Round 60 :
ch1, join with sc in each st around (or BLO sc if you want texture). Join and weave in color tails. This prepares the square for final edging rounds.
Info :
From here you may stop expanding and add final edging rounds to neat the square for joining or display. Final sc rounds are excellent to stabilize the edge before slip-stitch joining multiple squares together.
— Round 61 to Round 80 : edging options and finishing details :
Round 61 :
Edging option A - Simple sc border: ch1, sc in each st around, working (sc, ch2, sc) in each corner ch2 to keep corners square. Join with sl st, fasten off and weave ends. This gives a tidy finish.
Round 62 :
Edging option B - Reverse single crochet (crab stitch) for a twisted rope edge: with right side facing, join contrast color and work reverse single crochet evenly across each st and around corners (work 3 reverse sc in corner). Join and finish. This makes a strong decorative border.
Info :
Try crocheting the crab stitch with a slightly smaller hook for a tighter, rope-like edging. Practice on a scrap before committing to the square edge.
Round 63 :
Edging option C - Picot scallop: join color, *sc in next 2 sts, (dc, ch2, dc) in next st to form scallop, sc in next 2 sts; rep around, with picot (ch3, sl st into top of dc) in center of each scallop if desired. Join and weave in ends.
Round 64 :
Edging option D - Shell rope: join color, *skip 2 stitches, in next stitch work (5 dc) as a shell, skip 2 sts, sc in next st to anchor; rep around and work 3 sc in each corner to keep it square. Join and finish.
Info :
Edge choice depends on function. For blankets, a flat sc border or crab stitch is durable. For cushions or coasters, scallops or shells add decorative appeal. Always block after edging for best shape.
Round 65 :
If joining multiple squares, choose a joining method now: whip stitch with matching yarn for invisible seam; join-as-you-go slip stitch method for continuous join; or single crochet join for a framed seam. Prepare matching squares and measure alignment before stitching.
Round 66 :
Blocking: dampen square lightly and pin to a square blocking board (use measurements appropriate to your project). Pin corners and midpoints; allow to dry completely. For steam blocking, hover iron at safe distance or use a steam iron briefly — do not press flat with heavy heat if yarn is synthetic.
Info :
Blocking evens stitches and opens lacy spaces. Always block before joining squares for accurate alignment. Use rust-proof pins and a protective cloth if steam-blocking onto a wooden or plastic board.
Round 67 :
Weaving in tails: Thread tails on tapestry needle and weave through the back of border stitches for a minimum of 6-8 cm to secure. Trim close without cutting into fabric. For color changes, weave tails into same-color areas when possible.
Round 68 :
Optional surface crochet: Using contrasting color, surface chain or surface single crochet around selected motifs (for example outlining the blue center petals) to highlight shapes. Work slowly, keeping even tension.
Info :
Surface crochet is a gentle decorative option. Practice on a scrap square to test placement and tension. It is especially effective to outline puff cluster petals for definition.
Round 69 :
Final check: inspect all corners and edges. If any corner looks short, add an extra ch1 at the corner or place one additional sc in the corner area. If any side droops, add a narrow sc or hdc round to tighten the edge.
Round 70 :
Labeling & notation: If making many squares, label each with a small paper tag noting round count and color sequence for reproducibility. Store squares flat until joining.
Info :
Keeping careful notes during the first sample block saves time when producing dozens of matching squares for blankets or garments. Record hook size, yarn brand, and any special edging choices.
Round 71 :
Optional last decorative stitch: join a metallic or textured yarn and work a single round of 'star stitch' or 'bobbles' for subtle sparkle. Join and weave ends neatly.
Round 72 :
Final finish: use a gentle fabric shine or softener spray if desired (test on scrap first), and press lightly with a warm iron from the wrong side with a cloth barrier if yarn tolerance permits.
Info :
Most cotton blends press well; acrylics do not respond to high heat. Always test on a scrap and use the lowest effective heat setting.
Round 73 :
Storing: Lay finished squares flat in breathable fabric or between acid-free paper if storing long-term. Avoid folding to prevent permanent creases.
Round 74 :
Making a coaster set: Stop at Round 6-8 for small coasters. Use a tighter hook (3.5mm or 3.25mm) and thicker yarn for a sturdy coaster finish. Add an extra sc border to seal edges.
Round 75 :
Making a cushion panel: Stop at Round 25-35 depending on desired panel size. Make two identical squares and join with sc or mattress stitch; add stuffing and a zipper or button closure as desired.
Info :
Joining methods affect final drape. Mattress stitch provides an invisible seam, sc join creates a framed edge. Choose depending on look and durability required.
Round 76 :
Making a blanket: produce many squares of identical round and edging counts. Lay out squares before joining to plan color distribution. Join with preferred method and add a wide border to frame the assembled blanket.
Round 77 :
Care instructions: Hand wash or machine wash gentle (cold water) for cotton-blend squares. Reshape while damp and dry flat. Avoid high heat tumble drying if possible to keep square shape.
Round 78 :
Troubleshooting: If one square consistently differs in size, re-check hook size, yarn brand, and tension. Re-block both squares to see if differences are corrected before reworking stitches.
Round 79 :
Creative variations: Make the center using a 3-round flower motif instead of puff clusters, or insert a small appliqued center for seasonal themes. Swap yarn weights and hooks for dramatic size changes.
Round 80 :
Final encouragement: Enjoy the rhythm of making squares — repeatability is meditative. This pattern scales easily and is forgiving to creative changes. Happy stitching!
This cozy blue and cream granny square brings a touch of artisan elegance to any home project. With a floral puff center and a soft open cream frame, it makes a beautiful building block for blankets, cushions and seasonal decor. Enjoy the meditative rhythm of repeating the motif, and take pride as each square comes together into a warm handmade piece. 🧶💙✨