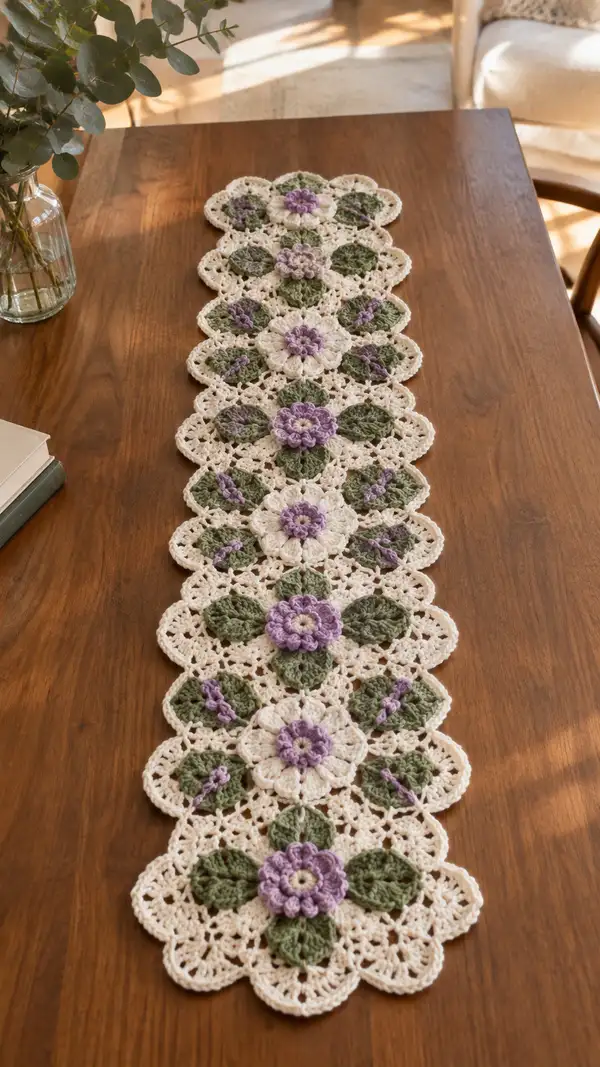
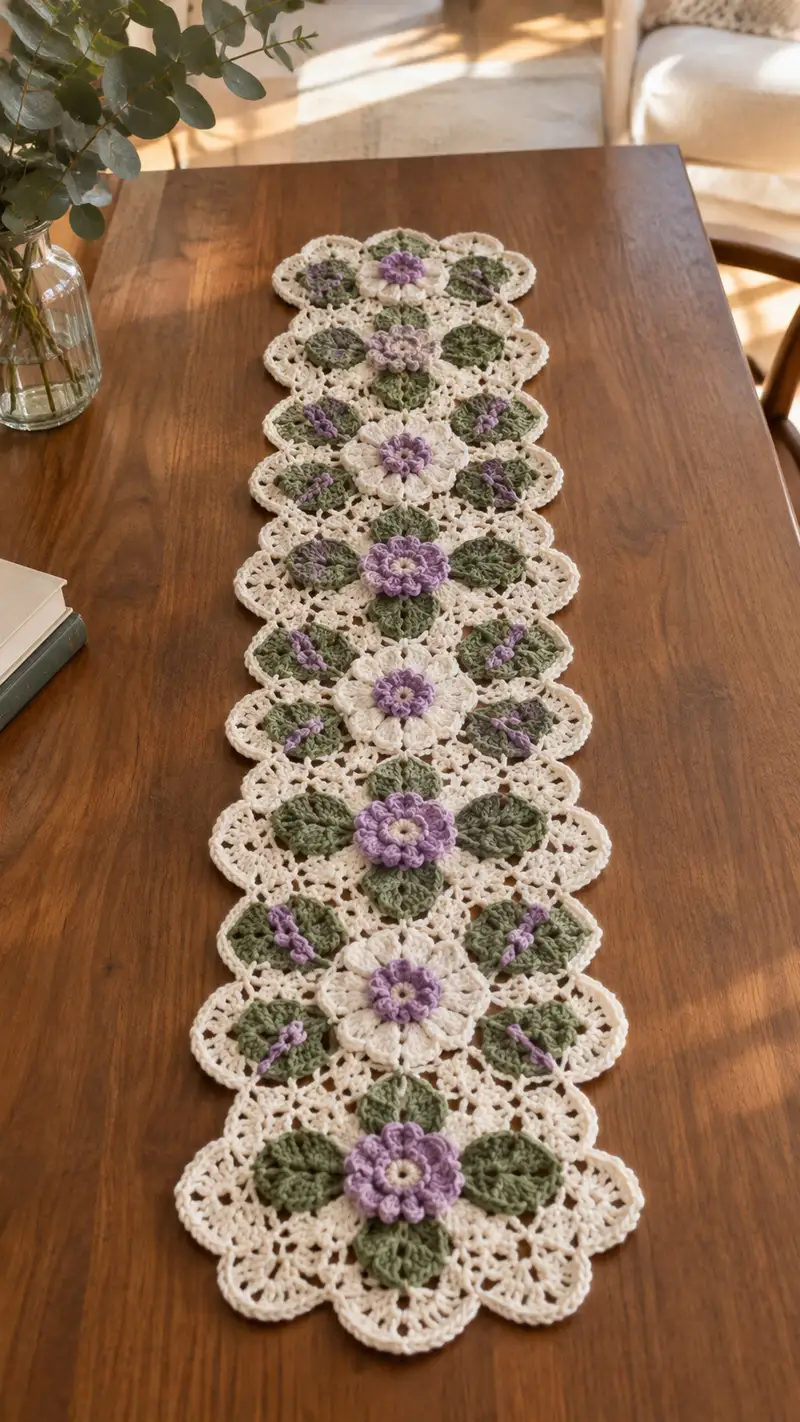
A delicate table runner made of joined floral crochet motifs in cream, sage green and soft purple. Each motif features a raised purple center, layered cream petals and sage leaves, joined with a lacy cream mesh. This long runner sits beautifully down the center of a dining table and brings a fresh, vintage-inspired botanical charm to any room. Clear motif-based instructions make it easy to repeat and join for any desired length.
Progress Tracker
0% Complete
— NOTES & SPECIAL TECHNIQUES :
Info :
This pattern is worked in separate floral motifs that are joined as you go to form a continuous runner. Each motif is made of 5 parts: center puff ring (purple), inner round of small petals (cream), four sculpted leaves (sage), a lacy connecting round (cream), and an outer scalloped edge (cream). Puff stitch: yarn over, insert hook, yarn over, pull up a loop (repeat to have 5 loops on hook), yarn over and draw through all loops, ch1 to close puff. Counts below reflect all stitches placed in each round. Use stitch markers to mark round starts when working continuous rounds.
Info :
Gauge is motif-based. One completed motif measures approximately 5.5" (14 cm) across from petal tip to opposite petal tip when worked in worsted weight yarn with 3.5mm hook. Adjust your hook size for desired motif size or if your stitches are too loose.
— Center Puff Cluster (Make 1 per motif) :
Round 1 :
With Soft Purple, work 6 sc in magic ring. Tighten ring. (6)
Round 2 :
Inc in each st around (2 sc in each st). (12)
Round 3 :
(1 sc, inc) x 6. (18)
Info :
Place a contrast marker on the last stitch of this round to mark the right-most point for later alignment with petals. Keep stitches fairly loose for the puff stitches to sit nicely on top.
Round 4 :
Change to Pale Lilac (optional highlight). *Puff in next st, sl st in next st* around to form 6 small puffs with a sl st between. (18 stitches + 6 puffs counted as 24 texture elements)
Round 5 :
Change back to Soft Purple. Ch1, 1 sc in same st, *ch3, skip next st, 1 sc in next* around to form 6 ch-3 loops spaced evenly. (12 sc + 6 ch-3 loops)
Info :
These ch-3 loops will become the base spaces for the first ring of petals. Make sure loops are evenly sized; use your fingers to gently shape them if needed.
Round 6 :
Join cream yarn in first ch-3 space. In each ch-3 space work: (sc, hdc, 3 dc, hdc, sc). Repeat in each of the 6 spaces. (6 petals x 7 sts = 42)
Round 7 :
Ch2, 1 dc in first st, *(ch1, skip 1, 1 dc in next 3 sts of petal) repeat across petal shell*, sl st to join. Maintain 42 dc placement with ch-1 spaces (42 dc + spaces)
Info :
Round 6 creates the sculpted cream petals around the purple center. Use a slightly looser tension on dc groups so petals puff up rather than lie flat.
— Secondary Petal Round & Transition (Make 1) :
Round 8 :
Change to Cream. Ch1, 1 sc in each st and in each ch-1 space around the petal ring. (count: approximately 42 sc, adjusting to actual stitches placed)
Round 9 :
(2 sc, 1 inc) x 14 (if you had 42 sc) -> This creates 56 stitches. (56)
Info :
Round 9 expands the motif to provide room for the leaves. If your count does not equal 56 because of slight tension differences, adjust increases evenly to reach approximately 56 stitches (working in groups so leaves sit centered between petals).
Round 10 :
1 sc in each st around. (56)
Round 11 :
(3 sc, 1 inc) x 14. (70)
Info :
This round broadens the base for attaching four sculpted leaves. Make sure the increase repeats are even so leaves will be placed at roughly quarter points of the circle.
— Sculpted Leaves (Make 4 per motif) :
Info :
We will now create four elongated leaves spaced evenly. Work each leaf into a carefully counted sequence of stitches so each leaf sits on a quadrant of the motif. You will work a leaf over a span of 14 stitches on the round-11 base; leaves are shaped in rows to be slightly 3D.
Leaf A - Round 12 (Start leaf) :
Join Sage in the designated base st for the first leaf. Ch1, 1 sc in same st, 1 hdc in next, 1 dc in next, 2 dc in next, 1 dc in next, 1 hdc in next, 1 sc in next = forms leaf foundation (total 8 sts placed into 8 base stitches).
Leaf A - Round 13 :
Turn work to work back across leaf: ch1, 1 sc in first st, 1 hdc in next, (2 dc, ch1, 2 dc) centered over the leaf apex, 1 hdc, 1 sc to finish. Fasten off and weave in the short tail. Leaf measures about 1.5" (3.8 cm).
Info :
Use a slightly looser tension on leaf apex rows to allow shaping. Pin leaf to motif if needed while finishing to ensure it curves outward.
Leaf B (Opposite) - Round 14 :
Repeat Leaf A steps at the base st located directly opposite Leaf A. (work same 2-round leaf sequence). Fasten off and weave ends.
Leaf C - Round 15 :
Repeat leaf sequence at next quadrant base to the right of Leaf A. Work Round 12 & 13 leaf shaping. Fasten off.
Leaf D - Round 16 :
Repeat leaf sequence at the final quadrant base to complete four leaves evenly spaced. Fasten off and weave ends. (4 leaves completed)
Info :
After all four leaves are attached, the motif should show a distinct cross of leaves with the floral center at the middle. Trim and weave all tails neatly.
— Lacy Connecting Round (Join Mesh) :
Round 17 :
With Cream, join in any st between leaves. Ch4 (counts as tr), *skip 2, tr in next, ch2, tr in next* repeat around to create an open lattice. Adjust repeats so that you end with a sl st to top of starting ch4. (approximate tr count: 28 tr + ch-2 spaces)
Round 18 :
Ch1, 1 sc in same st, *ch3, skip tr, sc in next tr* around to create ch-3 loops between treble clusters. (sc count approx 28 with 14 ch-3 loops)
Info :
These ch-3 loops are join points for adjacent motifs (join-as-you-go) or anchor points for delicate picot edging. Keep these loops open and even for easier joining later.
Round 19 :
1 sc in each sc and 3 sc in each ch-3 loop to convert loops to small arches. (sc count approx 28 + 14*3 = 70)
Round 20 :
(4 sc, 1 inc) x 14. (70 + 14 = 84) This evens and rounds the motif edge preparing for scalloped outer edge.
Info :
If you intend to make a longer runner, at this point stop and make X motifs. The pattern photo uses 9 full motifs joined in a straight strip. You can make more or fewer depending on table length.
— Outer Scalloped Edge & Small Motif Variations :
Round 21 :
Ch1, *(sc, skip 2, 5 dc in next, skip 2, sc) repeat around to create scalloped shells across the outer round. Each shell uses 5 dc. Final count depends on motif circumference; expect about 12 shells placed evenly. (approx 84 sts remained as anchors)
Round 22 :
In each 5-dc shell work: sl st, ch3, 2 dc, ch3, sl st into center of shell to create a fuller puffed scallop. Fasten off and weave ends. (texture elements created: 12 scallops)
Info :
For motifs intended to alternate with leaf-only motifs (seen in the photo as lighter flower vs darker flower alternation), create a Secondary Motif variant where the central puff is flattened and leaves are emphasized. The stitch counts will be similar so joining remains straightforward.
— Small Accent Motif (Make as needed) :
Round 1 :
With Sage, mr, 6 sc in MR. (6)
Round 2 :
Inc around (12). (12)
Round 3 :
Change to Lavender, ch1, 1 sc in each st. (12)
Round 4 :
In every second stitch make a small puff (puff, sl st) to create a raised accent. This creates 6 puffs. Fasten off leaving tail for sewing into lattice spaces between larger motifs.
Info :
These small accents are used in the photo inside the leaf compartments of certain motifs; use them sparingly to create accents of purple against green leaves when assembling motifs.
— Join-As-You-Go Method (Connecting Motifs in a Strip) :
Info :
We recommend joining motifs as you complete the outer scalloped edge using the ch-3 loops created in Round 18 and the scallop anchors in Round 21. Pin motifs in their final positions before joining; alignment is critical for a neat runner.
Round 23 (Joining Step for Motif 2 to Motif 1) :
On Motif A, when you reach a ch-3 loop to be joined to Motif B, sl st into corresponding ch-3 loop of Motif B, ch1, then continue to next anchor on Motif A. Where you are joining two shells, use sl st through both loops to create a clean join. Continue joining 6-8 points per motif contact depending on overlap. (no new stitch count; count becomes integrated)
Round 24 :
After joining along one side, rotate work and join along the opposite side of the motif strip in the same manner. Use 6-8 join points per motif-to-motif seam. Check alignment frequently. Fasten off and weave ends.
Info :
For a long runner, join motifs in a single column by joining each new motif to the previous one along one edge, then stitch across both sides as you go. The pattern photo shows motifs joined in straight alignment with small offset in alternating motif styles.
— Reinforcing the Central Join Row :
Round 25 :
With Cream, work a reinforcing round along the seam line: sc through both joined shells' bases across the seam to tidy the join. Work 1 sc in each visible seam st. (st count depends on joined seam length; expect 30-40 sc across seam length of each motif)
Round 26 :
Optional: Work a decorative chain-lace over the seam by crocheting *ch4, skip 2, sl st* along the seam row to highlight the join. Fasten off and weave ends.
Info :
Take care not to pull joins too tightly; the runner should remain slightly flexible and flat. Pin and block the joined column as you complete several motifs so the piece stays even.
— Edge Row (Full Length Final Border) :
Round 27 :
With Cream, starting at one short end, attach yarn and work along the entire length of the runner producing a neat scalloped outer edge. Work *(sc, ch3, 3 dc in next shell arch, ch3, sc) across each exposed outer scallop across the whole length.* Count is dependent on total motif shells encountered; for a nine-motif runner expect 9 x ~12 shells = ~108 shell anchors across length.
Round 28 :
In each ch3 space of the previous round work (sl st, ch3, 2 dc, ch3, sl st) to deepen scallops and create an attractive finished edge. Fasten off and weave tails.
Info :
When edging the long strip, smooth the runner on a blocking mat and work edging with the runner pinned so shells lie flat and even. Use extra pins at curve points to keep shells from skewing.
— Decorative Picot Row (Optional) :
Round 29 :
Optional picot finish: With a 3.25mm hook and cream, work 1 sc in each sc from the previous round. Every 6th sc work a picot (ch3, sl st in first ch). Continue around both long sides and both short ends for a delicate vintage finish. Fasten off and weave tails.
Info :
The picot row adds a tiny delicate point to each scallop for an antique look. Wet-block lightly if you prefer the picots to sit flat rather than stand up.
— Blocking & Finishing :
Info :
Pin the runner on a foam blocking mat, stretching gently so each motif is flat and the scalloped edges are even. Spray lightly with water or blocking spray and allow to dry fully. For a crisper finish, use a light starch or sizing spray as per yarn manufacturer's instructions.
Round 30 :
Trim and weave all remaining ends into the back of the work. If any joins feel loose, reinforce with an invisible mattress stitch using matching cream yarn.
Info :
For a runner of a different length, repeat motif creation and joining sequences until you reach desired length. The join-as-you-go sequence (Rounds 23-24) can be adapted to join two or three motifs across if making a wider table runner or placemat set.
This Cream and Sage Purple Flower Table Runner is a labor of love that blends texture, color and floral charm into a stunning decorative piece. Each motif builds from a puffed purple center into sculpted cream petals and sage leaves, then joins into a delicate lace column perfect for any table. The join-as-you-go construction makes assembly satisfying and the finish is lovely when blocked. 🧶🌸 Display it proudly or gift it — it will brighten any room with handmade warmth. Enjoy every stitch! ✨