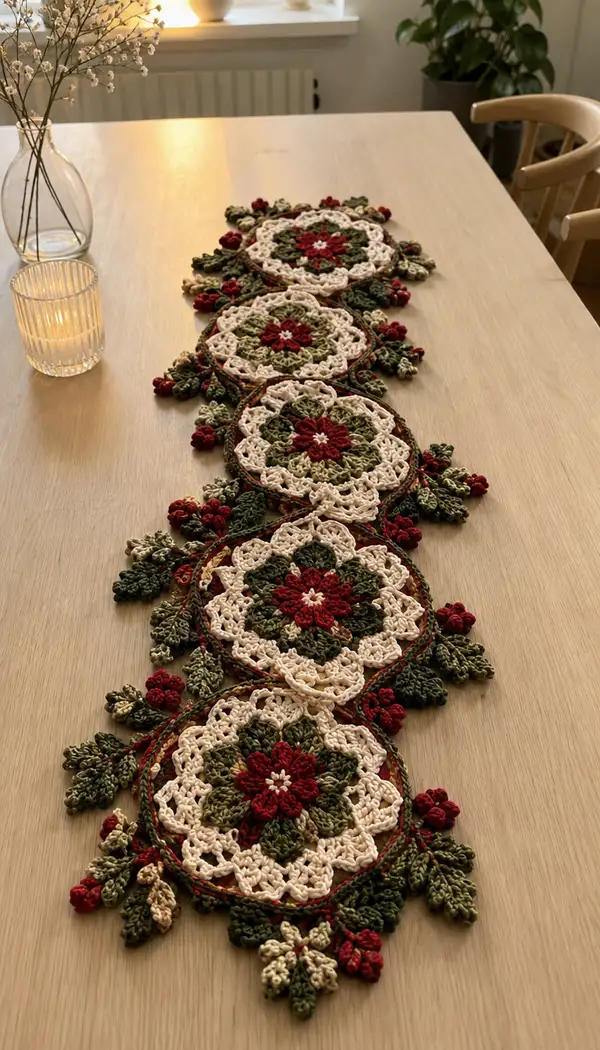
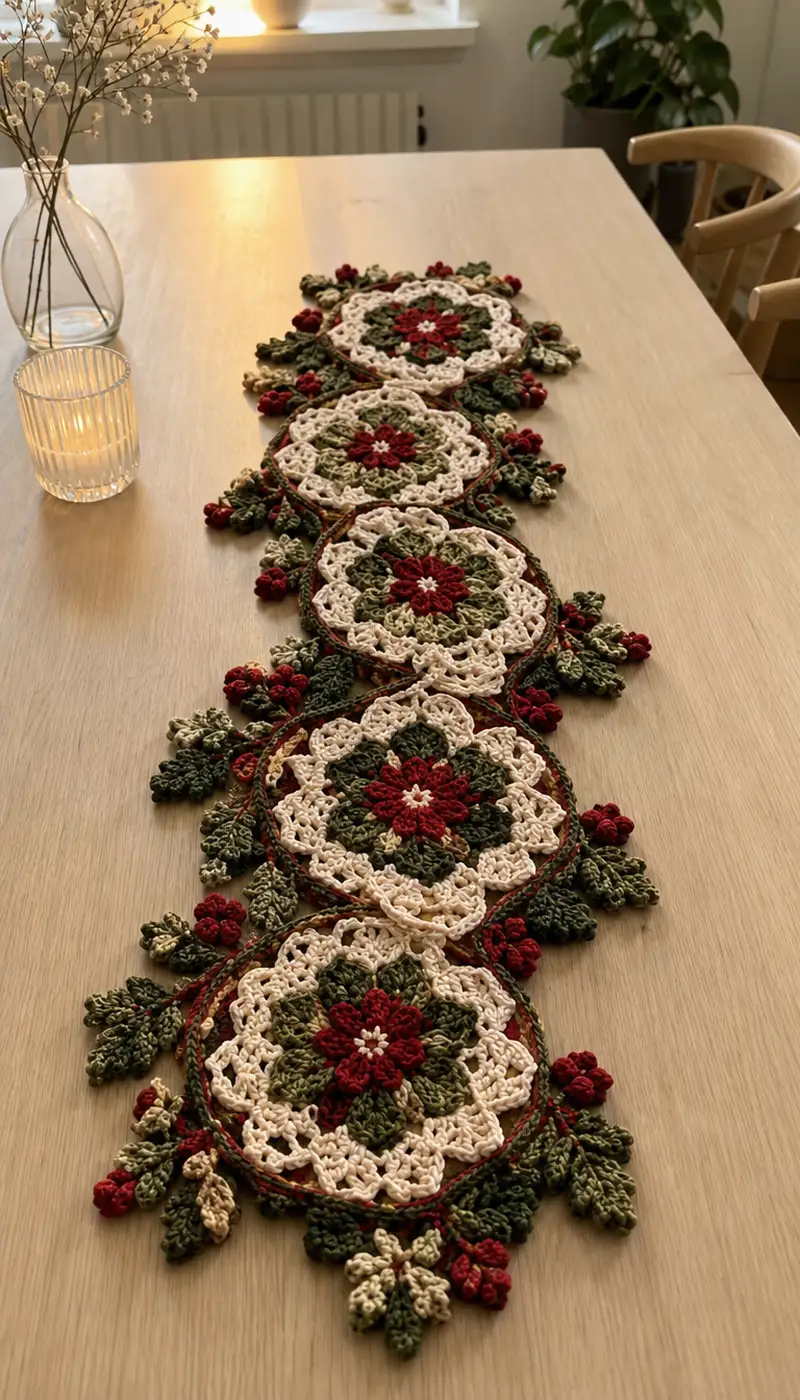
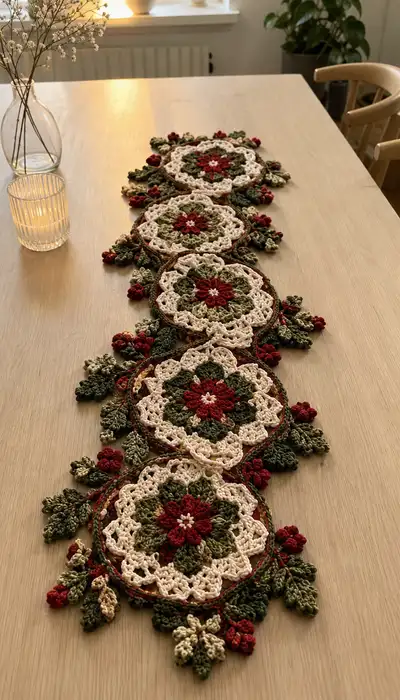
Create an elegant cream and burgundy floral motif table runner composed of linked round mandalas edged with leafy vines and tiny berry clusters. This pattern recreates the layered flower centers, lacy cream scallops, green leaves in two tones, and small burgundy berries visible in the photo. Designed for a decorative dining table runner made from repeating motifs joined with a delicate vine-like joining and finished with a scalloped edged.
Progress Tracker
0% Complete
— Overview :
Info :
This pattern is written to make one floral motif which you will repeat and join to form a runner. The sample runner uses five motifs joined with a narrow vine and decorative leaves/berries between joins. Work tightly to maintain crisp lace. All rounds are worked in continuous rounds unless instructed otherwise; use a stitch marker for round starts.
— Motif (Make 5 or desired number) :
Round 1 :
Make a magic ring, ch1, 8 sc into mr, tighten ring (8)
Round 2 :
Ch3 (counts as dc), (1 dc, 1 dc) in next st - work 2 dc in each st around to form 16 dc total; join with sl st to top of ch3 if closing, or continue in continuous rounds (16)
Round 3 :
(1 dc in next 1 st, 2 dc in next st) x8 (24)
Round 4 :
(2 dc, 1 dc, 1 inc) pattern conceptualized here as (2 dc in consecutive stitches, 1 dc in next, 2 dc in next) - simplified: (2 dc, 1 dc, inc) x6 yields consistent shell spacing (30)
Info :
Rounds 2-4 build the solid flower center. Use burgundy yarn for rounds 1-4. If changing colors, finish round then fasten off and join new color for the petal round.
Round 5 :
Change to dark olive green. Ch1, sc in same st, *ch3, sk 2 sts, 3 dc cluster in next st, ch3, sc in next st* repeat around 6 times to begin petal shaping (30 petals/spaces concept; positioning forms 6 larger petals)
Round 6 :
Using lighter olive green, join in each 3-ch sp: *(sc, hdc, 3 dc, hdc, sc) in ch3 sp* x6 (6 floral petals formed, counts remain in 30 foundation points as shells)
Round 7 :
Ch1, sc into each stitch and into each dc of the clusters across to build a round foundation, working 1 sc per base stitch and 2 sc where needed to maintain round count (30)
Round 8 :
Info :
Place a stitch marker at the first stitch of this round to mark the top of motif center. This is a good point to check motif diameter and block if desired before continuing into lacy rounds.
Round 8 :
Change to cream yarn. Ch4 (counts as tr), *sk next st, (tr, ch1, tr) in next st (forming small treble V clusters), ch2, sl st to next base st; repeat around to form open spaces. Maintain 30 reference points (appearance: 15 lacy arches)*
Round 9 :
Ch1, sc in each base st and in each ch-1 sp around to close any large holes and create foundation for scallop (30)
Round 10 :
*(Ch3, 5 dc in next sc, ch3, sl st in next sc) repeat around to create the first scallop shell. Work 6 large scallops spaced evenly across motif – count wise, shell clusters will each occupy 5 dc so total stitches after shell placement remain balanced
Info :
When working scallops, maintain consistent tension; shells should be full and rounded. If your scallops pull inward, increase hook size by 0.25-0.5mm for these rounds only or work shells with a looser tension.
Round 11 :
Ch1, sc behind each scallop by working sc in the top of shells and in between shells to form a lacy ring; aim to place 48 sc evenly distributed around the ring (48)
Round 12 :
Info :
Measure motif: motif should lie flat and measure approximately 12-14cm (4.5-5.5") across depending on yarn/hook. Block this motif now if needed to open scallops and set shape before outer detailing.
Round 12 :
Working in cream: *ch4, sl st in 3rd dc of scallop shell center, ch2, 1 dc in next sc, ch2* repeat around to begin open lace band (maintain 48 reference points where applicable)
Round 13 :
Ch1, in each ch4 arch: (sc, hdc, 3 dc, hdc, sc) creating small rounded petals; you should have 12 small outer petals (12 large arches translated into 12 smaller petals) - count stitch total approx 60 depending on exact spacing (estimate 60)
Round 14 :
Change to a thin burgundy accent and work 1 round of sc around the outermost edge to define motif border; keep count consistent with previous round (60)
Info :
Keep ends long when fastening off so you can weave them in or use them to join motifs later. If you plan on joining motifs with a vine, do not fasten off the burgundy accent round – leave a 60-80cm tail for linking.
Round 15 :
Using cream, create final decorative scallop: *(sk next 4 sts, 7 dc in next st, sl st to base) x 6 to create six larger decorative scallops around the motif. Space evenly to create a rounded outer edge (six deep scallops)
Round 16 :
Ch1, sc in each stitch across the back of the scallops to add stability; aim for an even total stitch count that sits comfortably along the scallop edge (approx 72)
Round 17 :
Info :
If you wish motifs larger or more open, omit Round 16 and work an extra lace row (ch3 loops) instead. This pattern makes each motif sturdy for tabletop use while remaining light and decorative.
Round 17 :
In cream, work delicate picot edging: *(sc, ch3, sl st in base of sc) across the edge of each scallop to form picots. Space evenly to create a subtle scalloped crisp edge (approx 72 picots)
Round 18 :
Info :
Fasten off leaving yarn tail if you will use this color to whipstitch motifs together; otherwise weave in ends neatly. Make required number of motifs (sample uses 5 motifs).
— Leaves (Make many – 30-40 leaf elements total) :
Info :
Leaves are worked flat in rows, using two green shades for depth. Each motif in the runner is surrounded by 5-8 leaves of varying sizes; make small, medium and large leaves to vary the layout.
Leaf - Small (Make 12) Round 19 :
Ch6, sc in 2nd ch from hook, hdc, dc, hdc, sc, ch1, turn (leaf foundation) (6)
Round 20 :
Working along the opposite side of chain foundation: sc in first st, hdc in next, dc in next, hdc in next, sc in last, sl st into base to complete leaf tip; fasten off leaving tail for sewing. Leaf length approximately 2.5-3cm.
Leaf - Medium (Make 10) Round 21 :
Ch8, sc in 2nd ch from hook, hdc, dc, 2 dc in next, dc, hdc, sc, ch1, turn (8)
Round 22 :
On opposite side: sc, hdc, dc, 2 dc in center st, dc, hdc, sc, sl st into base to close. Fasten off leaving long tail for sewing. Block lightly to shape. Leaf length ~4cm.
Leaf - Large (Make 8) Round 23 :
Ch10, sc in 2nd ch, hdc, dc, tr, dc, 2 dc in next, dc, tr, dc, hdc, sc, ch1, turn (10)
Round 24 :
Work opposite side mirroring: sc, hdc, dc, tr, dc, 2 dc in center st, dc, tr, dc, hdc, sc; sl st into base to finish. Fasten off and weave tail for sewing. Leaf length ~5-6cm.
Info :
To create a veined look, use a running stitch with darker green yarn down the center of the leaf after sewing, or work a back post st before fasten off to create ridge. Vary leaf orientation for a natural look when attaching around motifs.
— Berry (Make multiple small clusters) :
Berry - Small Puff (Make 30+) Round 25 :
Using burgundy yarn and 3.0mm hook: ch2, 5 dc into second chain from hook to make a tight puff (5 dc in ch) then sl st into first dc to form a tiny knot-like berry; leave a 10-12cm tail for sewing and stuffing.
Round 26 :
Info :
For fuller berries, make a little tuft by wrapping yarn around your finger and fastening with a few sc through the coil, or create stacked bobble with (yo, insert, yo, pull through 2) x 5 and close as bobble. Lightly stuff with a tiny pinch of fiberfill before closing the last sl st for a rounded berry.
Berry - Cluster Assembly Round 27 :
Sew 3-5 berries together using tails by stitching through centers to form small clusters. Secure with extra knots and weave ends into the underside of cluster to avoid visible tails.
Info :
Make both single berries and clusters to create natural variation between motifs and along vine joins. Use fewer berries for a subtle look or many for a festive, textured edge.
— Vine / Linking Chain (Make long vine to join motifs) :
Round 28 :
Using thin burgundy accent left long from motif border or join new yarn: ch120 (or length to span distance between motif centers), sl st into edge of motif A at chosen join point, ch10 and sl st into corresponding point on motif B to join; repeat linking points to attach motifs with gentle arcs. For sample runner, link motifs at 6-8 points creating continuous vine effect.
Info :
When linking, pin motifs on blocking mat in the exact layout before sewing or slip-stitching the vine. This ensures spacing is even and leaves/berries fall naturally between motifs.
Round 29 :
After joining motifs with burgundy chain/vine, work one round of sc around the burgundy chain and the immediate surrounding cream stitches to anchor vine to motifs—sc evenly along chain and into stitch edges (stitch count varies with vine length)
Round 30 :
Info :
If you prefer an invisible join, use the tapestry needle and mattress stitch around joined points instead of sl st; this creates a neater seam, but is slower. Whichever method used, ensure you sew through both motif layers securely.
— Decorative Outer Leaves and Accent Clusters :
Round 31 :
Sew medium and large leaves around the external scallops, alternating dark and light green. Attach leaves at the base of scallops using yarn tail and mattress stitch, pointing leaves outward for full coverage. Position small berries in clusters close to leaves to mimic natural berry sprigs.
Round 32 :
Info :
Attach more leaves to spaces between motifs where vine curves. Use small stitches through the cream rounds so the sewing thread is hidden. For stability sew through two rounds of motif edge rather than single loops which can slip.
Round 33 :
To create layered leaf clusters: stack a small leaf over a medium leaf offset slightly and secure with a few stitches at the base; tack a berry cluster to the overlap to anchor the layered look (repeat around each motif junction as desired).
Round 34 :
Info :
Try different groupings: 2 leaves + 1 berry cluster at main joins and 1 leaf + 1 single berry at smaller spaces produce a natural, balanced appearance. Keep symmetry across the runner for a tidy aesthetic or vary for rustic charm.
— Reinforcement and Finishing Rounds :
Round 35 :
Using cream yarn, work a reinforcement round along the inner edges where leaves are attached: sc through both motif edge and leaf base to bind securely. Work slowly and check both sides for uniform look (stitch count depends on attachments)
Round 36 :
Info :
Weave in all tails with a yarn needle, taking care to hide ends inside nearby petals or scallops. Trim ends flush after weaving through several centimeters of fabric to secure them.
Round 37 :
Blocking: damp block or steam-block entire runner laid flat on a blocking board or towel, pinning scallops and leaf edges until dry. Blocking opens lace and makes motif join edges sit flat for a professional look.
Round 38 :
Info :
Care instructions: Hand wash cold and lay flat to dry. Cotton yarns may shrink slightly if machine washed; blocking may need to be re-done after the first wash.
— Optional Extra Lace Border (Add if you want wider runner) :
Round 39 :
With cream, pick up stitches evenly along outside edge of runner and ch3, *dc in next 2 sts, ch2, sk 2* repeat around to form arches for extra lace border (stitch count varies by runner length)
Round 40 :
In each ch-2 arch work (sc, hdc, 5 dc, hdc, sc) to create a consistent repeating scallop. Space evenly; if needed, add or remove ch-2 spaces to end cleanly at corners or ends.
Round 41 :
Info :
If you add the extra border, be mindful of motif join points; you may want to stitch the border through both layers of motif joins to stabilize the entire runner.
Round 42 :
Edge finish: Work one final round of sc around the outermost border or picot edging to neaten. Fasten off, weave ends, and re-block.
Round 43 :
Info :
Trim any stray threads and check runner for wobble - if any motif seems loose, add a few invisible mattress stitches under the motif for stabilization. Enjoy placing your runner and photographing the finished piece for pattern sharing.
This Cream Burgundy Floral Motif Table Runner brings vintage-inspired lace and dimensional botanical details to your table. Each modular motif interlocks elegantly with vines, leaves, and tiny berry clusters to create a timeless centerpiece perfect for gatherings. The repeatable structure makes it easy to scale the piece to fit any table length, and the layered stitchwork creates beautiful shadows and texture when placed under soft light. 🧶🌿 I hope this pattern inspires a cozy, handcrafted accent in your home. Happy stitching! 🎀