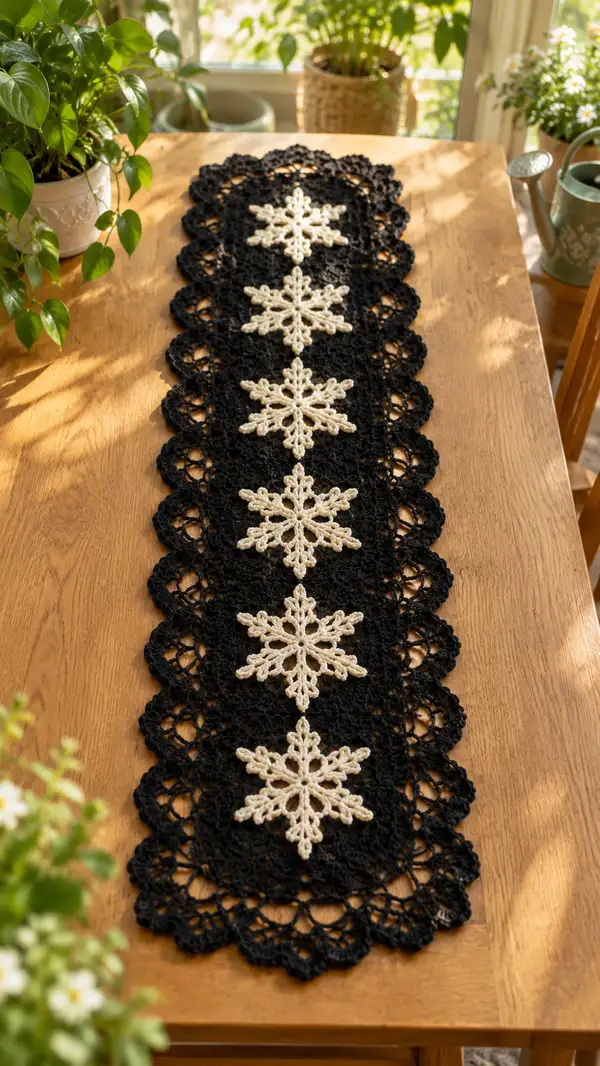
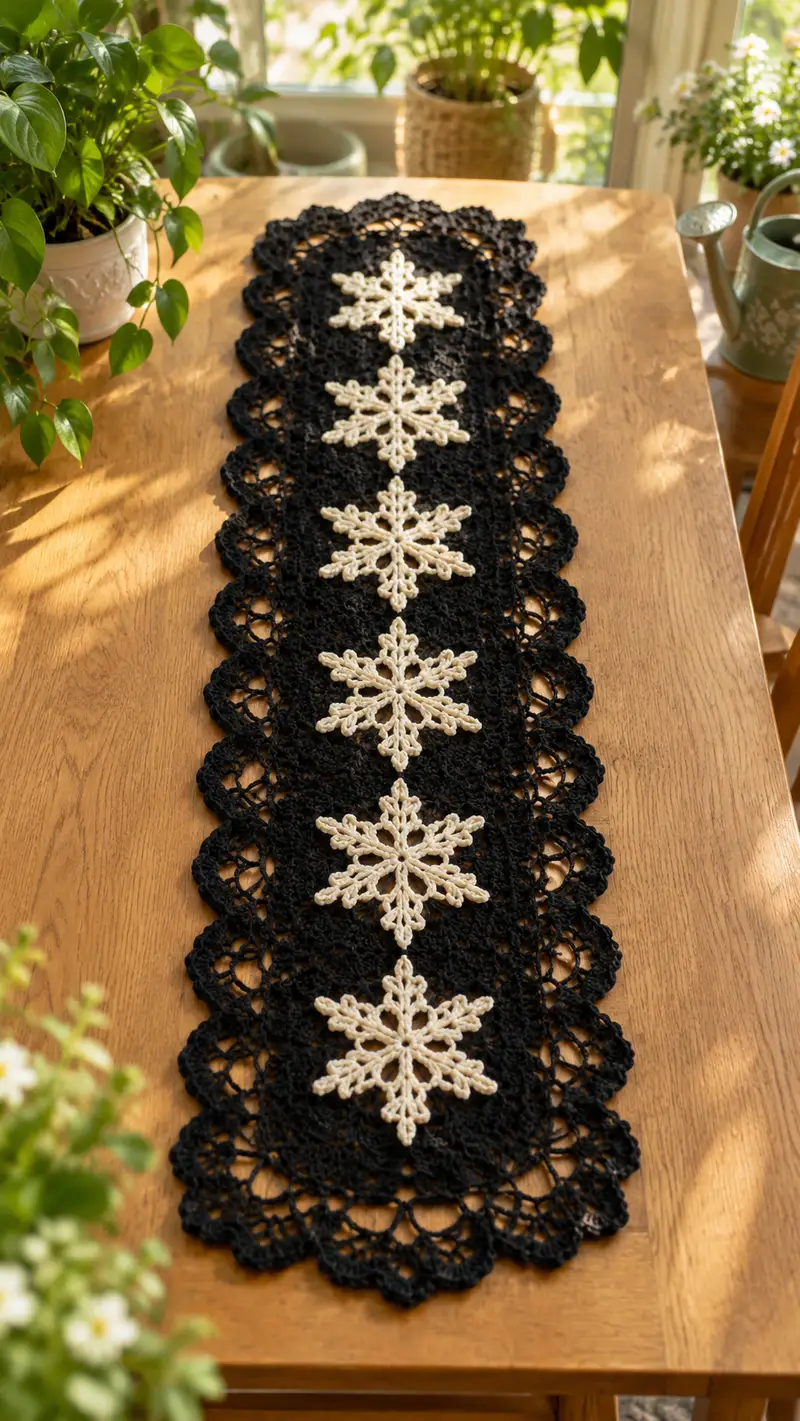
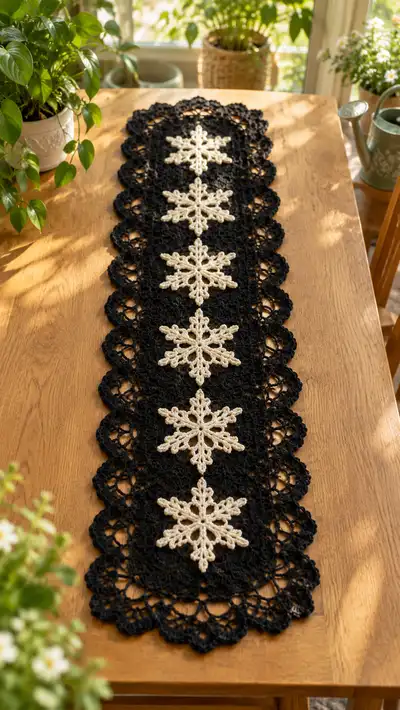
A striking black lace table runner accented with a row of cream crocheted snowflakes down the center. This elegant runner pairs delicate openwork with bold contrast — perfect for holiday tabletops or year-round modern farmhouse decor. The pattern uses modular motifs joined to a central lace panel and finished with a scalloped edge for a polished, professional look.
Progress Tracker
0% Complete
— Overview & Gauge :
Info :
This pattern is modular: you will make cream snowflake motifs (make 6 for the sample runner), a long black lace center panel sized to accept those motifs, and an ornate black scalloped border worked onto the sides. Gauge is flexible for lace. For reference, one finished snowflake motif measures approximately 6.5-7 cm (2.5-2.75") from point to point when worked with sport weight yarn and a 3.0-3.5 mm hook. Adjust hook size for desired crispness of points. Blocking will open the lace and set final dimensions.
Info :
Recommended finished runner for sample: approximately 12-14" wide by 36-44" long with 6 motifs; adjust motifs count to lengthen or shorten. Work tension firmly but not tight; lace needs some give during blocking.
— Materials Note :
Info :
You will need matching yarn weights for both colors to keep drape consistent. If you change yarn weight, make a single motif and sample panel strip first to check scale and adjust number of motifs accordingly.
— Snowflake Motif (Make 6 or desired number) :
Round 1 :
Work 6 sc in magic ring (6)
Round 3 :
(1 sc, inc) x 6 (18)
Round 4 :
(2 sc, inc) x 6 (24)
Round 5 :
(3 sc, inc) x 6 (30)
Info :
These first rounds form a small, tight central disc to anchor the snowflake arms. Keep stitches even and pull the magic ring closed before proceeding so the center is neat.
Round 6 :
1 sc in each st (30)
Round 7 :
(4 sc, inc) x 6 (36)
Round 8 :
1 sc in each st (36)
Round 9 :
(5 sc, inc) x 6 (42)
Round 10 :
1 sc in each st (42)
Info :
After Round 10 you have a flat circle with 42 stitches. These stitches are the anchors for the six arms — we will create six anchor groups spaced every 7 stitches (42 ÷ 6 = 7). Place small removable stitch markers at the first stitch of each 7-st anchor for easy reference.
Round 11 :
Ch1, *sc in next 6 sts, ch5 (picot chain loop for arm base), sl st in next st (anchor)* ; rep from * to * around placing 6 loops (6 ch5 loops, anchor points remain) (42)
Info :
Each ch5 loop will become the base for a snowflake arm; the sl st anchor centers each arm. Keep loops even; do not pull tight — these loops will be shaped into branches in later rounds.
Round 12 :
*Work 1 sc into each st across to sl st anchor, (sc, hdc, dc, ch3, dc, hdc, sc) into the ch5 loop to form the first layer of an arm; then sc in the anchor sl st* ; rep x6 (arm clusters worked; base round remains 42)
Round 13 :
1 sc in each st around to tidy anchors and connect arm bases (42)
Round 14 :
Working into each arm cluster: *ch2, sk first sc of cluster, (dc, ch2, dc) into central dc of cluster, ch2, sl st into outer picot of cluster; return to base with sc in anchor* ; rep around (42)
Info :
Rounds 11-14 start sculpting the arm shapes. Keep tension consistent so each of the six arms lies flat. If one looks small, tug gently during blocking later to even sizes.
Round 15 :
Ch1, *sc in anchors and base stitches to reach arm, (ch4, sc) into the outermost tip of arm to start secondary branches, sc back to anchor* ; rep x6 (42)
Round 16 :
Work 3 small picot clusters onto each arm tip: into each ch4 from previous round work (sc, ch3, sl st into loop) then sc to anchor, making delicate points (42)
Round 17 :
1 sc in each st around connecting picots and tidy base (42)
Round 18 :
Form secondary side branches: *from arm base, ch6, sl st into a chain space created between rounds 12-16 to form a side loop; return sc to anchor* ; rep x12 (42)
Info :
Rounds 15-18 add small branch details that give the snowflake its lacy, multi-pointed appearance. If your yarn is very springy, reduce picot size to ch2-ch3 to keep points crisp.
Round 19 :
1 sc around to secure branches and tidy overall shape (42)
Round 20 :
Begin decorative edging: *(sc into next 3 sts, ch3, sl st into same st to form a small shell) repeat across each arm and branch to create a scalloped outline* ; rep for each arm and connecting spaces (work evenly, final stitch count approx 42 plus shells)
Round 21 :
Refine points: Into each shell work (sc, ch4, picot (sl st into 3rd ch), sc) to make pointed tips on each arm; redistribute sc between shells to keep motif flat (final effective anchor count remains even around)
Info :
At this stage you should have six clear arms with multiple points. Snip yarn leaving a 12-14" tail for sewing or joining to the center panel. Block each motif to exact size by pinning to a blocking board and misting or wet-blocking to open the lace and set points.
Round 22 :
Optional reinforcement round: sc evenly around through back loops only to produce a slight raised ring on the back, helping with sewing (sc count even)
Round 23 :
Final tidy round: sl st into first st, fasten off and weave end after blocking
— Center Lace Panel (Work one long strip to accept motifs) :
Info :
The center lace panel is worked flat in rows. For the sample runner, chain a foundation of 160 chains (or adjust to match motif spacing) then work filet/open lace rows. The width should be sufficient for motifs to sit centered with two scallop borders on each side. If you prefer a narrower runner, reduce foundation chain in multiples of the filet pattern repeat (see below).
Round 1 :
Ch160 (foundation) - ch3 counts as first dc, turn; in 4th ch from hook work dc, then follow the filet pattern: *dc in next ch, ch2, skip 2 ch for open mesh, dc in next ch* across to end, turn (foundation row creates initial mesh)
Round 2 :
Ch3, dc in each dc across, when you reach a ch2 space work (dc, ch2, dc) to maintain open square, repeat across; turn. Maintain overall dc counts so edges are neat (approx row dc count consistent)
Info :
Filet Lace Repeat: Each mesh repeat is dc, ch2, skip 2 ch. Work in repeating blocks of 4 chains across. This creates a rectangular open lace suitable to showcase the snowflake motifs. Keep row count even so motifs can be attached centered along the length.
Round 3-10 :
Repeat Round 2 (work 8 rows total of mesh to create a panel height that will later be sandwiched between scalloped edges). For sample runner you will work 40 rows of filet lace total to match motif diameter and runner length; divide placement space for 6 motifs evenly across rows.
Info :
Mark the centers of the panel with removable markers where each snowflake will be attached. For six motifs on 160-ch foundation, place centers approximately every 26-27 chains along the length. The vertical placement should center the motif between mesh rows — block the panel and motifs first, then final attach.
Round 11 :
Change to a decorative 2-row repeat to create a denser area for sewing motif centers: Ch3, dc across but work every 8th dc as (dc, ch1, dc) to create small loop anchors for joining (counts remain consistent with mesh)
Round 12-20 :
Alternate mesh rows and anchor rows as needed until panel reaches required length to accommodate motif spacing: sample uses 40 rows; adjust counts to place 6 motifs evenly (continue filet mesh pattern with occasional anchor rows)
Info :
Block the whole panel flat before final joining. Wet blocking opens the filet and sets even row alignment; pin the panel square to avoid drift. Measure centers again after blocking to ensure motifs align visually on the softened fabric.
Round 21 :
Work one tidy sc round along both long edges to give a stable base for scalloped border: sc evenly along edge stitches, place corner increases if working boxed ends (if working straight ends only, work sc evenly) (approx edge stitch count matches panel)
— Scalloped Side Border (Work both long sides) :
Info :
The scalloped border is crocheted onto the side edge sc round. Each scallop sits across a repeat of 8 base stitches. Count your edge scs and determine scallop count; for the sample 160-ch foundation and 40-row panel, expect about 20 scallops per side. Work identical edging on both sides for symmetry.
Round 1 :
With black yarn, attach at one short end corner of panel, ch1, *sc in next 2 sc, (hdc, dc, tr, dc, hdc) all in next st to form a shell, sc in next 2 sc* ; rep across side until corner (scallop clusters create large scallops) (shells spaced every 8 stitches)
Round 2 :
Turn and work a second row of shells: *sc across two base sc, (sc, ch3, picot, sc) into center of shell from previous round to create pointed scallop; sc across next two base sc* ; rep across (shell count unchanged)
Info :
Edge scallops are best created with shells of increasing height then finished with a picot for a crisp point. Keep tension consistent and block the edge after both sides are complete so scallops arch uniformly.
Round 3 :
Work a third decorative pass: (sl st into next sc, ch3, 3 dc cluster into shell apex, ch3, sl st into same apex) across to emphasize scallop arches; this adds depth and a lightly ruffled edge (shell count consistent)
Round 4 :
Finish edges with a neat slip-stitch round along outermost scallop stitches to even out points and hide join tails (fasten off and weave ends)
Info :
If you wish a more elaborate lace edge, add a fourth round of tiny picots between scallops for a delicate eyelet row. Record the scallop count so both sides mirror exactly when repeating on the opposite edge.
— Short Ends & Corners (Both ends of runner) :
Round 1 :
If working boxed corners, at each short end work (sc, inc, sc) across 4-6 corner stitches to round the corner and flow into side scallops. Alternatively, finish short ends with a row of small shells mirrored from side scallops to create cohesive corners (stitch counts depend on panel width)
Info :
For a clean finish, work short-end decorations after side scallops so corner shells match edge shells. Pin and measure before finalizing to ensure symmetrical corners.
— Joining Snowflakes to Center Panel :
Info :
After blocking both motifs and panel, position motifs centered along panel length using pins. For six motifs, pin centers roughly every 6.5-7" depending on motif size. The snowflakes can be joined either by sewing with the cream long tails or crocheting a connecting slipstitch round through both pieces; sewing provides a flatter join.
Round 1 :
Using long yarn tail from each snowflake, sew each motif to panel at the anchor sl st centers and additional points around each arm: make 8-10 attachment stitches per motif distributed evenly across arms and center (secure knot and weave in tail)
Info :
When sewing, work from the back of the panel into the motif so your knots and ends sit on the underside. Use small stitches catching one or two threads to keep joins invisible from the front. If crocheting a join, use a color-matched cream to single crochet through panel sc and motif edge loops around each motif circumference; keep tension loose to avoid puckering.
Round 2 :
After all motifs are attached, check alignment and make any slight adjustments by unpicking a couple of attachment stitches and re-setting motif before final secure weave.
— Optional Decorative Connector Chain (Center spine) :
Info :
To mirror the linked look seen in the original, you can crochet a decorative chain connecting the centers of the snowflakes using cream yarn. Work a small chain with picots and slip stitch each picot into motif centers, creating a continuous vertical spine.
Round 1 :
With cream yarn, from top motif center ch6, sl st into center of next motif; ch6, sl st into next center; rep to bottom creating a delicate vertical chain. Fasten off and weave in ends behind runner.
Info :
Space chains so they hang slightly above the panel but remain attached — this creates visual continuity and a subtle highlight that draws the eye down the runner.
— Final Assembly & Finishing Rounds :
Round 1 :
Weave in all loose ends on back of runner. Use yarn needle to bury tails horizontally across several stitches to secure without bulk.
Round 2 :
Steam or wet-block entire runner to final measurements. Pin scallops and snowflake points to exact shape and allow to dry fully. Spray with light starch if you want stiffer, crisper points on snowflakes.
Round 3 :
Inspect joins and reinforce any motifs with one or two additional hidden stitches if necessary. Trim any visible stray fibers and press gently on the reverse if needed.
Info :
For long-term care, hand wash gently in cool water and lay flat to dry. Avoid tumble-drying or wringing to preserve lace shape and blocked points.
— Optional Variations & Adjustments :
Info :
To lengthen or shorten the runner: change the number of snowflake motifs and adjust foundation chain of center panel accordingly. To make a wider runner, work two central panel strips joined with a wider central motif column or add additional mesh repeats to foundation chain in multiples of the filet repeat.
Info :
Swap color contrast: reverse colors (black snowflakes on cream panel) for a softer look. Use metallic thread on the snowflakes for holiday sparkle, but add an extra row of reinforcement as metallics can be slippery.
Info :
If you prefer crocheting joins: after positioning motifs, use cream yarn and single crochet through motif edge loop and panel mesh stitch in sequence to crochet the motif in place with evenly spaced tacking stitches.
Final Info :
Record your stitch counts for each section if you plan to make more than one runner to ensure repeatability. Keep motifs and panels blocked to the same measurements for the cleanest assembly.
This elegant table runner brings a handmade, seasonal focal point to your dining table with classic contrast and delicate lacework. Each snowflake motif and scalloped edge combines to create a balanced, heirloom-style piece you'll be proud to display. Enjoy the relaxing rhythm of crocheting modular motifs, joining them with care, and watching the runner come together into a beautiful, polished centerpiece. 🧶❄️✨