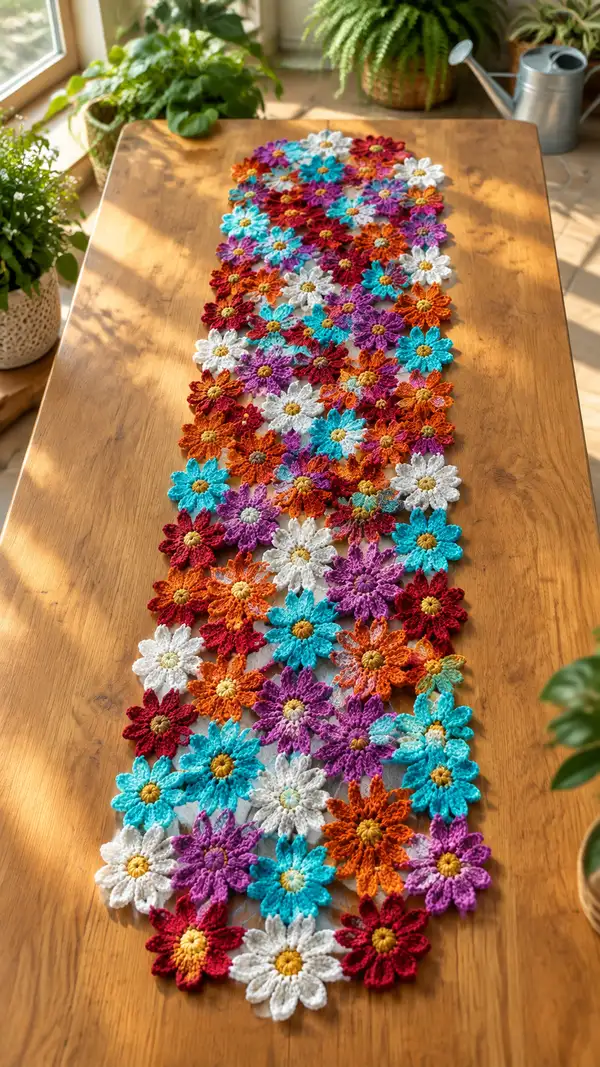
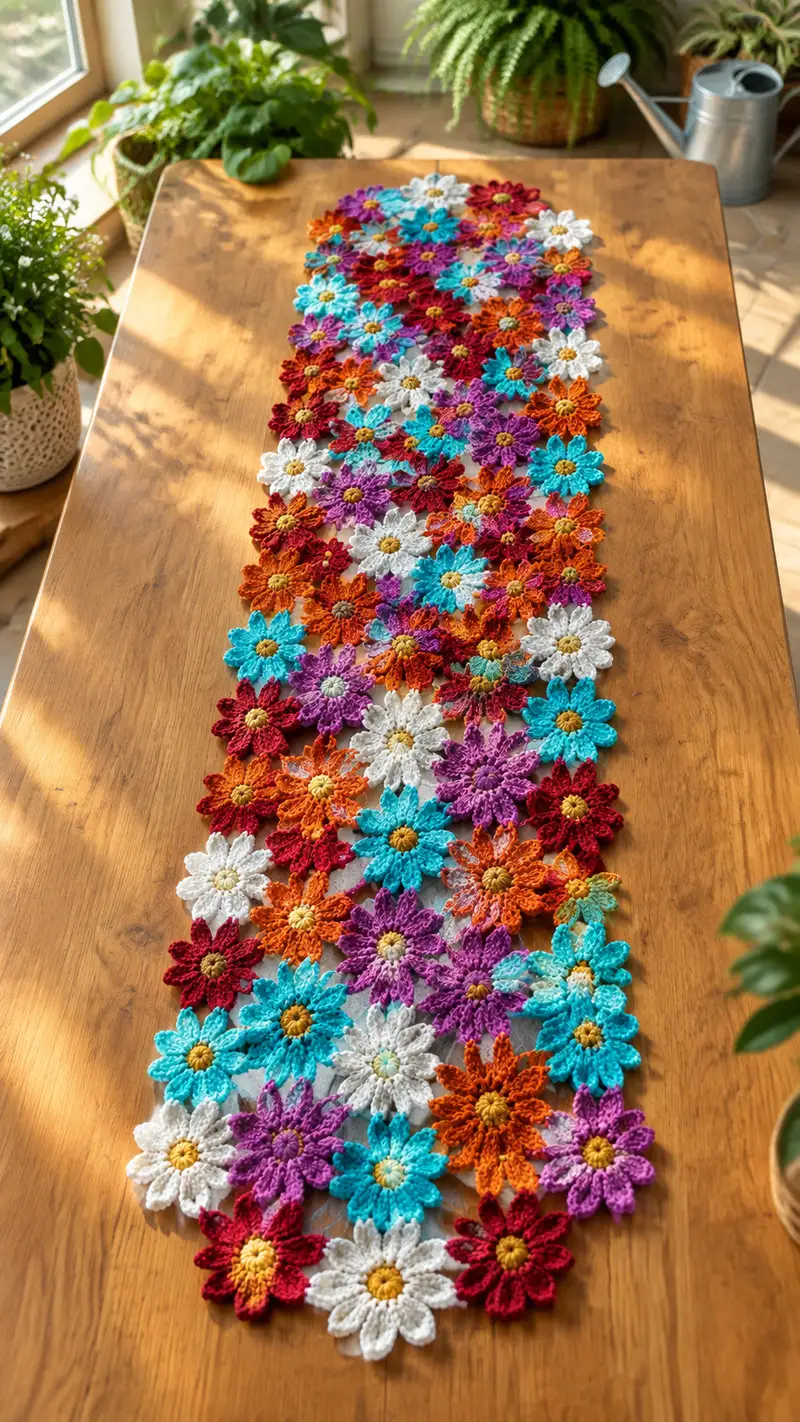
A vibrant, garden-inspired table runner made from interlocking crochet daisy motifs in bright, jewel-toned colors. Each motif features a textured center and two layers of petals for depth and movement. The runner is assembled with a join-as-you-go technique for a delicate, lacy finish that lies beautifully along a dining table or sideboard.
Progress Tracker
0% Complete
— Overview :
Info :
This pattern creates one modular daisy motif and several variations; motifs are joined with a join-as-you-go method. Each standard motif contains a textured center and two rounds of petals (inner small petals and larger outer petals). Work motifs in your chosen color palette and assemble following the layout diagram. Where counts are given, they are stitch counts for the round (or number of loops/petals). Flower size using worsted cotton and 3.5mm hook: approximately 9-10 cm diameter for the full motif.
Info :
Gauge note: Blocks and colors matter. Work tightly enough so stuffing (if used in other projects) will not show through; petals should be firm but flexible. If you prefer smaller, more delicate flowers, use 3.0mm hook. For larger, looser flowers, try 4.0mm and adjust colors/yarn accordingly.
— Standard Daisy Motif (Base Motif) :
Round 1 :
Make a magic ring. 6 sc in magic ring (6)
Round 2 :
6 inc (12) — (work 2 sc in each st around to form a compact center)
Round 3 :
1 sc in each st (12) — (even round to build height of the center)
Info :
If you want a raised golden center, work Rounds 1-3 in a center color (e.g., golden yellow). Fasten off and weave in tail, or continue by changing color seamlessly for petals (see Rounds 4+).
Round 4 :
Change to petal color. *ch 5, sl st into next st* x12 (create 12 chain loops around the center) — After this round you will have 12 loops to form 12 inner petals
Info :
When changing to petal color, carry the center yarn to hide end or leave a 10 cm tail to weave behind the motif. Ensure loops are even; use your hook to gently pull loops into shape before forming petals.
Round 5 :
In each ch-5 loop: (sc, hdc, 3 dc, hdc, sc) all worked into the same ch-5 loop. Repeat around forming 12 inner petals. After finishing final petal, sl st to base to secure. (Petal cluster count: 12 petals)
Info :
Work petals loosely enough so they lay flat yet hold shape. For a slightly textured inner petal, replace the central '3 dc' with '5 dc' to make fuller inner petals. Keep consistent across motifs for even appearance.
Round 6 :
Fasten off the petal color or continue. If creating two-tone petals, change to outer petal color now. sl st into back of a petal base to position for outer petal round.
Round 7 :
Change to outer petal color (optional). Work into spaces between inner petals: *ch 3, (sc, ch 3, sc) in space between petals, ch 3, sl st into base of next inner petal* x12. This creates chain arches between petals to anchor larger outer petals. You will have 12 arches for outer petals.
Info :
Alternately, for a more lacy runner, make the outer petal foundation with *ch 6, sl st into next base stitch* to form longer arches and more open outer petals. Decide now whether you want dense outer petals or airy lace for the runner.
Round 8 :
Into each ch-3 (or ch-6 if you chose longer arches) arch, work outer petal: (sc, hdc, dc, tr, dc, hdc, sc) — form 12 larger outer petals. After final petal, sl st to base stitch and fasten off, leaving a 10 cm tail for weaving if not joining immediately.
Info :
Be mindful of working petals in the same orientation for each motif to make joining easier and more uniform. Outer petals should overlap slightly with adjacent motifs during assembly to create a seamless flower bed effect.
Round 9 :
Optional edge picots: With contrast yarn, join at any petal tip and work around the petal tips: *sc at tip, ch 3, sl st at tip* repeat for each petal tip to create small picots around edge (12 picots). Fasten off and weave in ends.
Info :
Picots add a delicate finish and help join motifs smoothly when using join-as-you-go on the outer petal tips. If you prefer a softer edge, skip picots and instead block petals slightly outward.
— Variant Motif: Two-Layer Center (Raised Center Variation) :
Round 1 :
mr, 6 sc in magic ring (6) — small central bump
Round 2 :
6 inc (12) — expand to form core
Round 3 :
Change to contrasting center color. Work 12 sc in BLO around (12). This creates a neat ridge for a raised center band.
Info :
Use this technique when you want centers that pop—good for golden or variegated yarns. The BLO round creates a subtle ridge that appears as a ring when viewed from the top.
Round 4 :
Ch 4, sl st into next st around to make 12 loops; proceed to inner petal round as in standard motif. Continue petals in contrasting petal color.
Info :
This variant increases visual depth in the motif and works perfectly as occasional accent motifs dispersed across the runner.
— Variant Motif: Compact Daisy (Smaller Motif for Fillers) :
Round 3 :
Switch to small petal color, *ch 4, sl st into next st* x12 (12 loops)
Round 4 :
Petal: in each ch-4 loop work (sc, 2 dc, sc). Makes smaller, neater petals for filling gaps between larger flowers. Fasten off and weave in tail.
Info :
Compact motifs are used as fill pieces to tightly pack the runner and avoid overly large gaps. They are faster to work and do not require an outer petal round.
— Joining & Layout Planning :
Info :
Decide on your runner layout before joining. The pictured runner alternates full motifs with compact filler motifs in offset rows, creating a meandering, organic arrangement. Take a photo of your layout or mark positions on a flat surface before you begin joining. Use stitch markers or pins to reserve positions during join-as-you-go.
Info :
We recommend laying out motifs in columns staggered so outer petals of one flower overlap the petals of two adjacent flowers. Plan the final stitch connections at the petal tips and side arches — these are the best anchor points for a secure join with minimal visible seam.
Round J1 :
Join-as-you-go begins on the last round of petal formation of a new motif. After working final outer petal and before fastening off, position the new motif over a placed motif where petals overlap. Instead of a final sl st, *sl st into tip of adjacent motif's petal, ch 2, sl st back into same tip to secure*, repeat at every overlapping petal tip (aim for 3-4 connection points per overlap). Then fasten off. Repeat as you join each new motif. (Connections per overlap vary)
Info :
When joining, keep tension similar to motif stitch tension. Use the same yarn as outer petal or a matching color to hide joins. For contrasting joins, use a thin thread or contrasting yarn to create decorative connections.
Round J2 :
Alternative join: work reverse single crochet (crab stitch) along the inside petal backs before finishing to create a subtle ridge and stronger seam. Whip the crab stitch through both motifs at the join points for added stability.
Info :
If you prefer a nearly invisible join, weave a long tail from the new motif through several petal base stitches of the neighboring motif using a yarn needle and then knot and weave in. This method works best when motifs are blocked and aligned precisely.
— Joining Sequence & Example Layout Steps (many Info rounds for clarity) :
Info :
Step A: Make a base column of motifs equal to the runner length you desire. For a long runner like the image, plan for 10-14 full motifs in a zigzag arrangement with compact fillers in between.
Info :
Step B: Join the second motif to the first by lining up three adjacent outer petal tips and joining as described in Round J1. Repeat until a vertical column is formed. Keep motifs oriented the same way for consistent overlap.
Info :
Step C: Start the second column offset by half a motif: position motifs in staggered rows, joining where the outer petal tips meet the sides of motifs in column one. Use 2-4 attachment points per motif overlap to secure the layout while keeping open spaces airy.
Info :
Step D: Add compact motifs as fillers between large motifs to tighten the lace and prevent large gaps. Join compact motifs to three surrounding petals with single sl sts at the tip and one additional anchor at the base if necessary.
Info :
Step E: Continue building outwards from the first column: join motifs row by row. Frequently flatten the piece and check alignment. Adjust joins before finishing to keep outer edges even and flowing.
— Edge & Border (finishing rounds) :
Round E1 :
After all motifs are joined, work a unifying border around the runner to tidy edges. With a neutral color, join with sl st at an outer petal tip and work: *ch 3, sl st into next petal tip* around the entire perimeter, placing extra stitches into shallow gaps. This creates loops for a decorative picot round. (Loop count varies with runner perimeter)
Info :
Work steadily and evenly into the outermost petal tips and any gaps. If the runner edge curves inward, add extra sl sts or small sc clusters to flatten outward. If it flares, skip some loops to bring the edge in.
Round E2 :
Into each ch-3 loop around the edge: (sc, ch 3, sl st) to form small picot scallops. Fasten off and weave in ends. For a scalloped edge replace sc with (sc, hdc, sc) in larger openings for a fuller finish.
Info :
Edge rounds are forgiving; pin your runner to a flat blocking surface and pin each scallop so the edge is consistent. Steam-block or wet-block the entire piece to open lacy spaces and settle joins.
— Blocking & Final Adjustments :
Info :
Blocking: Soak the runner in lukewarm water with mild soap, then gently squeeze out excess water. Lay flat on blocking board or towel and pin each petal tip and edge scallop in place. Shape petals as desired—flatten slightly for a neat table runner or ruffle for a floaty look. Allow to dry completely before removing pins.
Info :
For added stiffness (if you want the runner to lie very flat), apply diluted fabric stiffener or spray starch lightly during blocking on the reverse side. Test on a scrap motif first to avoid unwanted stiffness on delicate petal edges.
— Variations & Extra Motif Types (useful for filling and shaping) :
Round V1 :
Cluster filler motif: mr, 8 sc in ring (8), sl st to join. Ch 4 loops x8, form small petals (sc, dc, sc). Fasten off. These tiny flowers sit between large motifs to avoid large gaps.
Info :
Use filler motifs sparingly and place them where gaps would otherwise create long negative spaces. Fillers are quicker and add color spots throughout the design.
Round V2 :
Open lace connector: ch 6, sl st into petal base of two adjacent motifs, ch 6, sl st into next; repeat forming chain links between motifs for airy joins rather than tight attachments.
Info :
These open connectors are ideal if you want a more lattice-like runner. They are less stable for heavy use but provide a delicate appearance.
— Full Example Sequence to Create a 12-Motif Column Runner (step-by-step rounds and Info):
Info :
Make 12 standard daisy motifs and 8 compact filler motifs for a narrow long runner. Work motifs in chosen color order. Block motifs individually if you prefer crisp edges before joining. Follow the join-as-you-go procedure and assemble motifs into a single column, then add offset column and fill gaps.
Round S1 :
Make motif 1 in full (Rounds 1-8). Lay flat and position motif 2 adjacent so outer petal tips overlap at 3 points. Work motif 2 and on its final outer petal round join at overlapping tips using sl st joins. Continue to motif 12 to form column.
Info :
Check alignment after every 3 joins. If a motif sits higher or lower, gently adjust before completing further joins. Use pins to temporarily hold motifs while you add joining stitches.
Round S2 :
After column is complete, create the offset column by repeating motif placements to one side and joining to the first column where petals overlap. Insert compact fillers between columns as gaps appear.
Info :
The pictured runner uses three staggered columns with compact fillers to produce a flowing long runner. You can scale up or down by increasing or decreasing the number of motifs and fillers per row.
— Assembly & Weaving Off Ends :
Info :
Weave tails into petal backs to keep the front neat. Use a yarn needle to tunnel ends through at least 5-6 stitches and then trim close. For color changes, bury ends between two petals so they are invisible on the surface.
Round A1 :
For final reinforcement: Optional whip stitch through overlapped petal bases on the reverse side at every third join point to prevent motifs from loosening with use. Use matching yarn for invisible stitching.
Info :
If the table runner will be placed under heavy objects, reinforce joins more heavily and consider applying a thin, clear fabric glue at reverse joins for longevity. Test glue on a scrap first to ensure no discoloration.
— Care Instructions & Notes :
Info :
Wash on a gentle cycle or hand wash in cool water, reshape and dry flat. If using cotton, colorfastness may vary—prewash yarn or test a scrap. Store the runner flat or rolled to avoid deep creasing.
Info :
You can change motif size to change runner width: fewer or smaller motifs yield a narrow runner; more or larger motifs yield a table center wide runner. Experiment with the number of columns and motif sizes to suit your table dimensions.
Finishing this runner is a real delight — every flower adds a new splash of color until your table feels like a blooming garden. Pin, block, and admire how the petals settle into a delicate lace panel that looks hand-crafted and joyful. Whether you keep it for special meals or as a cheerful everyday accent, this runner brings warmth and texture to your home. 🧶🌼✨