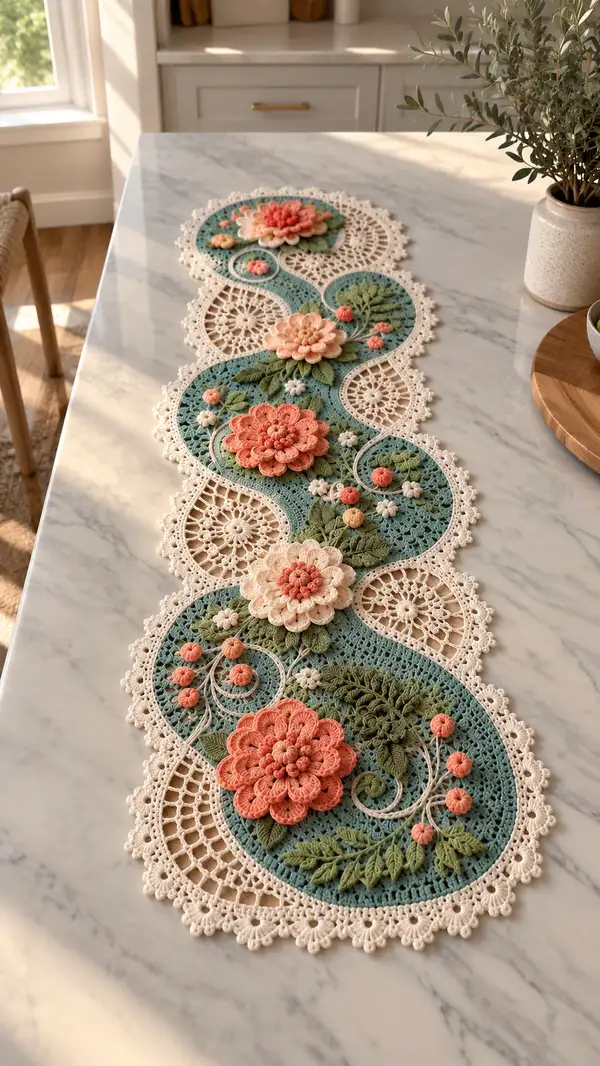
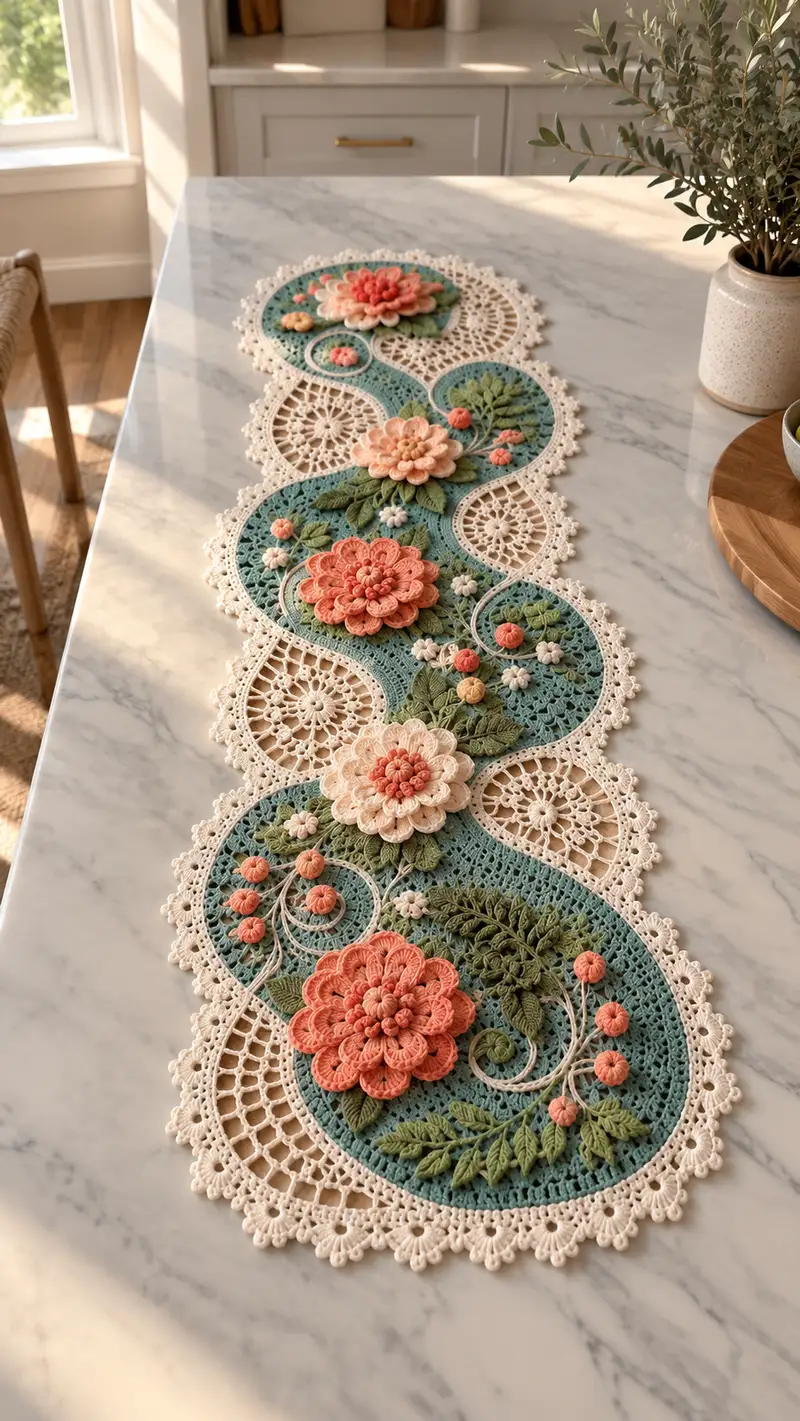
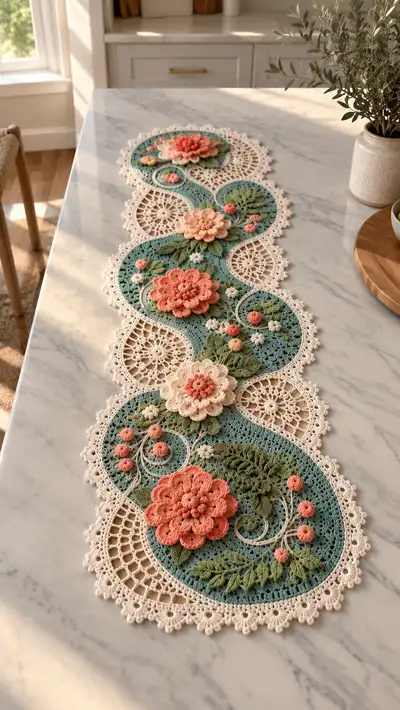
A beautifully detailed crochet table runner featuring sculpted 3D flowers, layered leaves, and delicate lace medallions. This design pairs soft coral, blush and cream florals against a dusty teal oval field with a scalloped lace border for an elegant, cottage-inspired centerpiece. The runner is constructed from repeating circular and oval motifs joined with embroidered vines and finished with a picot lace edge for a refined finish. Ideal for gifting or elevating a dining table with handcrafted charm.
Progress Tracker
0% Complete
— Overview & Notes :
Info :
This runner is constructed from alternating lace medallions (open cream circles) and filled oval teal panels that are joined edge-to-edge in a serpentine layout. You will create 5 lace medallions and 4 teal oval panels and embellish the ovals with layered 3D flowers, leaves and buds. Make motifs slightly loose then block to exact dimensions before joining for neat seams. Use stitch markers at the beginning of each round for accurate counts.
Info :
All rounds are worked in continuous rounds unless instructed otherwise. Join with a sl st at the end of a round only when specified. When changing colors, fasten off and weave ends, or carry yarn when noted. Gauge is flexible; aim for tight enough fabric that stuffing won't show through flower petals.
— Lace Medallion (Make 5) :
Round 1 :
Make a magic loop, ch 3 (counts as dc), 11 dc into loop, join with sl st to top of ch-3 (12 dc) (12)
Round 2 :
Ch 5 (counts as dc+ch2), *dc in next st, ch2; rep from * around, join with sl st to 3rd ch of ch5 (12 dc with 12 ch-2 sps) (12)
Round 3 :
Sl st into first ch-2 sp, ch 3, 2 dc in same sp, ch 2, 3 dc in same sp (shell), *3 dc, ch2, 3 dc in next ch-2 sp; rep around, join with sl st (12 shells with ch2 sps)
Round 4 :
Ch 1, sc in same st, *ch 5, skip shell, sc in center dc of next shell; rep around, join with sl st (12 ch-5 sps)
Round 5 :
Into each ch-5 sp: (sc, hdc, 3 dc, hdc, sc) to form petal-lace arches; join with sl st (12 arches)
Info :
Maintain even tension; this motif should block to an approximate diameter of 14-16 cm depending on yarn and hook. Block with a circular template to keep rounds even.
Round 6 :
Ch 1, sc in first stitch; *ch 3, sc in top of next arch; rep around to create 12 looped picot spaces; join with sl st (12 ch-3 sps)
Round 7 :
Work (sc, ch1, 3 dc, ch1, sc) into each ch-3 sp to make small laminated loops; join with sl st (12 lace loops)
Round 8 :
Ch 1, sc evenly around back loop only (BLO) of previous round to create a leveled inner ring (approx 60 sc) (60)
Round 9 :
Ch 3, *2 dc in next st, ch1, sk1; rep around to create airy bridging rows; join with sl st (approx 60-72 dc depending on spacing)
Round 10 :
Ch 1, sc in each st around in BLO to stabilize ring (60-72)
Round 11 :
*[ch3, sk 2, sc] repeat around to form mesh; join with sl st (final count approx 48 sc and 24 ch-3 loops)
Round 12 :
Edging: into each ch-3 loop work (sc, ch3, sc) to create small arches; join with sl st (24 arches)
Round 13 :
Picot scallop: *ch1, sc in arch, ch3, sl st in 3rd ch (picot), sc in same arch; rep around; join and fasten off. Weave ends.
Info :
Leave medallions flat and wet-block immediately. Pin to circular shape and let dry. Label medallions 1-5 to track join order to ovals later.
— Teal Oval Panel (Make 4) :
Round 1 :
Using teal yarn, ch 12, join with sl st to form loop (12 ch ring)
Round 2 :
Ch 3, 2 dc in same ch, dc in next 9 ch, 3 dc in last ch; work along opposite side of foundation chain dc in next 9 ch; join to top of ch-3 (24+4 =28) (28)
Round 3 :
Ch 2 (counts as hdc), hdc around top and bottom including increases at ends: (hdc across 10, 3 hdc in next 3 sts at end, hdc across 10, 3 hdc in next 3 sts) join with sl st (approx 32)
Round 4 :
Ch 1, sc evenly around into both loops of sts to create a firm edge (32 sc) (32)
Round 5 :
Ch 3, *sk1, dc in next 2, ch1; rep around to create a subtle mesh; join with sl st (approx 32 dc/mesh points)
Info :
Work rounds 3-6 tightly so the oval maintains defined edges for sewing flowers and leaves. Mark center with a stitch marker for flower placement reference.
Round 6 :
Ch 1, sc in each st around in BLO to create a subtle ridge for decorative placement (32)
Round 7 :
Increase round for height: (sc in next 5, inc) x 5, sc in next 7 (total approx 37) (37)
Round 8 :
Even round: 1 sc in each st (37)
Round 9 :
(4 sc, inc) x 6, then sc in remaining stitches to finish oval shaping (approx 43) (43)
Round 10 :
Even round: 1 sc in each st (43)
Round 11 :
BLO rib: 1 sc in each st BLO for 2 rounds to create a textured inner field for embroidery (43)
Round 12-16 :
Continue even rounds 1 sc in each st (43) to reach a comfortable panel depth. After round 16, fasten off and weave ends leaving long tails for attaching to medallions.
Info :
When panels are blocked they should measure approx 18 x 12 cm. Adjust rounds 7-11 up or down one repetition depending on your gauge to keep proportions consistent with medallions.
— Large 3D Flower (Make 4) :
Round 1 :
Make magic ring, ch1, 8 sc into ring, join with sl st to first sc (8)
Round 2 :
Ch1, inc in each st around (16)
Round 3 :
(1 sc, inc) x 8 (24)
Round 4 :
Ch2, *tr in same st, ch1, sl st back into top of tr to create a raised textured loop; rep around to make 24 textured loops. Fasten off and change to petal color for layering.
Info :
These initial loops will serve as the inner cluster and support the petal layers. Stuff center lightly with a pinch of fiberfill to give the flower gentle dome shape; do not overstuff.
Round 5 :
Join petal color with a sl st behind a loop, ch2, in same space work (2 dc, ch1, 2 dc) to form first petal, skip next loop, *(2 dc, ch1, 2 dc) in next loop; rep around to form 12 small petals; join (12 petals)
Round 6 :
Ch1, sc around petals into base stitches to secure (24 sc)
Round 7 :
Second petal row: In front of existing petals, join yarn and work (ch2, 5 dc in base of petal, ch2, sl st) in every other petal to create larger outer petals (6 large petals)
Round 8 :
Ch1, sc around base of outer petals for stability (36 sc)
Round 9 :
Third petal row: Join accent color and work layered popcorn petal: *ch1, (5 dc in same st, remove hook, insert hook into first dc of that group, pull loop through to close popcorn), sl st to base; rep for each outer petal (6 popcorns)
Round 10 :
Embellish center: with blush or peach, make a tight 6-sc circle on top: magic ring ch1, 6 sc, pull ring closed, sew to center with a few tying stitches. Add small french knot style embellishments with yarn.
Info :
After completing petals, press each petal gently with fingertips to arrange; use steam lightly if necessary. Fasten off leaving long tail for sewing to teal panel. Repeat for 4 large flowers.
— Medium Flower (Make 2) :
Round 1 :
Magic ring, ch1, 6 sc into ring, join (6)
Round 3 :
(1 sc, inc) x 6 (18)
Round 4 :
Petal row: *ch2, 3 dc in next st, ch2, sl st in same st; rep around to make 6 petals; join and fasten off leaving tail (6 petals)
Info :
These medium flowers sit layered under larger flowers in the layout. Slight stuffing in the center helps lift the petals for realism.
— Small Rosette Buds (Make 20) :
Round 1 :
Magic ring, ch1, 6 sc into ring, tighten and fasten off leaving tail for sewing (6)
Round 2 :
Optional tiny wrap: wrap contrasting color sl st around center 2-3 times and secure to create a rosebud texture; leave long tail to sew buds to panels.
Info :
Make many tiny buds in coral, peach and yellow to accent vine swirls. Sew with long tails to allow flexible placement before securing.
— Leaves (Make 24) :
Round 1 :
Ch 8, sc in 2nd ch from hook, hdc, dc, tr, dc, hdc, sc (leaf spine) (7 sts)
Round 2 :
Work along one side: sc in first 2, hdc in next, dc in next, tr in next (center tip), dc next, hdc next, sc next; turn and repeat on opposite side to mirror, join with sl st at base. Fasten off leaving long tail for sewing.
Round 3 :
For large sculpted leaves, make larger foundation ch 12 and increase the central clusters of dc/tr for a fuller leaf. Make 12 large leaves and 12 small leaves for variety.
Info :
Block leaves lightly on paper with pins to open the veins; add a single length of embroidery yarn through the center for a raised midrib if desired.
— Spiral Vines & Embroidered Stems :
Round 1 :
Use a length of cream or blush yarn and tapestry needle. Lay the vine path on the blocked panel and stitch chain-stem with a series of long embroidered chain stitches (or surface slip stitches) across the teal panel. For each vine use approx 40-60 cm of yarn.
Round 2 :
Secure both ends of vine discreetly on the underside with tiny stitches. Add small branch stitches to anchor buds and leaves along the vine path with tiny straight stitches and French knot-style wraps.
Info :
Use a contrasting lighter color for vines to create delicate definition. Test the placement by laying flowers and leaves before final stitching.
— Assembly Prep & Block :
Info :
Block all medallions and panels flat to accurate dimensions: medallion diameter approx 14-16 cm, oval panels approx 18 x 12 cm. Pin pieces on a blocking mat and allow to dry fully to prevent distortion during joining.
Info :
Arrange runner on large flat surface in the wavy alternating pattern: starting with an oval at one end then medallion, oval, medallion, etc. Ensure consistent overlap and margin for seam allowance approximately 0.5-1 cm.
— Joining Motifs (Seaming) :
Round 1 :
Place an oval and adjacent medallion face-up. Using cream yarn and a tapestry needle, use whip stitch or invisible ladder stitch to join the lace picot edge to the oval outer sc edge. Aim for stitches every 3-4 mm to keep seam flat.
Round 2 :
Join all pairs in sequence: oval1-medallion1-oval2-medallion2 etc. After joining the first sequence, check curvature and re-pin where necessary to correct small misalignments.
Info :
When joining, match picot scallops of medallions to ch-spaces of ovals. Work from the center outward so the runner doesn't skew to one side. Do not pull yarn too tightly—seams should be snug but flexible.
— Edge Border & Final Lace (Edging around whole runner) :
Round 1 :
With cream yarn, join at any seam, ch1, sc evenly around the entire runner edge including medallion scallops and oval edges (estimate 280-320 sc total). Place 1 sc in each picot and 2 sc where panels meet to reinforce joins.
Round 2 :
*Ch3, sc in next st; rep around to create uniform picot loops; join with sl st (approx 90-100 loops)
Round 3 :
Into each ch3 loop work (sc, ch3, sc) to create small arches; join (approx 90 arches)
Round 4 :
Final scallop: *ch1, sc in arch, ch5, sl st in 5th ch to make picot, sc in same arch; rep around; join and fasten off. Weave ends neatly.
Info :
Edge rounds create a unified lace frame for the runner and hide seam irregularities. Work slowly along curved joins; add a few extra sc in high-tension spots to prevent rippling.
— Placement & Attachment of Flowers, Leaves, and Buds :
Round 1 :
Position large flowers at the center of each teal oval (4 flowers). Place medium flowers offset under large flowers to create layered bouquets. Use pins to hold placement and step back to view balance.
Round 2 :
Sew each flower with long tails using ladder stitch through the base of petals into the oval surface. Make 8-10 secure stitches around the base of large flowers; weave tails through underside and knot discreetly.
Round 3 :
Sew leaves along vine paths, slightly overlapping the flower bases. Tuck leaf bases under petals and secure with 3-4 stitches. Attach small buds near vine tips with a few stitches each to hold orientation.
Info :
Arrange buds in groups of 3 or 4 for naturalistic clusters. Use a long tapestry needle to make invisible stitches; weave ends several times for security because runner may be used frequently.
— Decorative Embroidery Details :
Round 1 :
Using contrast thread, embroider tiny leaf veins on petals and add French-knot style centers for small white filler flowers made from 3-4 wraps of yarn. Use a single strand for delicate lines.
Round 2 :
For vine spirals, use long chain-stitched embroidery to make graceful S-curves across the teal field. Tie off securely and hide tails under leaves or beneath the seam on the underside.
Info :
Embroidered details bring depth—less is more. Add subtle highlights to petal ridges and leaf midribs rather than heavy outlines that compete with 3D elements.
— Final Finishing :
Round 1 :
Check all loose ends and weave them into the structure. Trim excess yarn close to the fabric but not so close that tail slips back through.
Round 2 :
Lightly steam-block the assembled runner with a cloth over the yarn to avoid direct heat. Reshape scallops and petals with fingers while warm for final positioning.
Info :
Store flat or gently rolled with tissue to avoid flattening raised flowers and leaves. Spot-clean gently with mild soap and cold water; avoid vigorous agitation or machine washing.
Completing this floral table runner is such a rewarding experience—each motif becomes a little vignette of petals, leaves and lace. As the motifs join, the runner unfolds into a harmonious, heirloom-quality centerpiece perfect for special gatherings or everyday beauty. Take your time with blocking and placement—it makes all the difference in the final result. 🧶🌸 Enjoy making something truly personal and lovely that will brighten any table for years to come. ✨