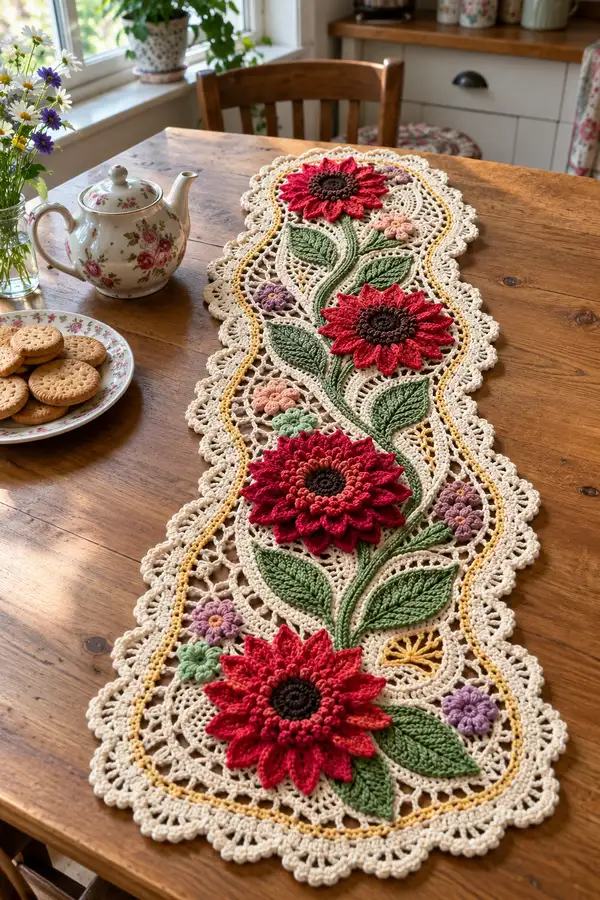
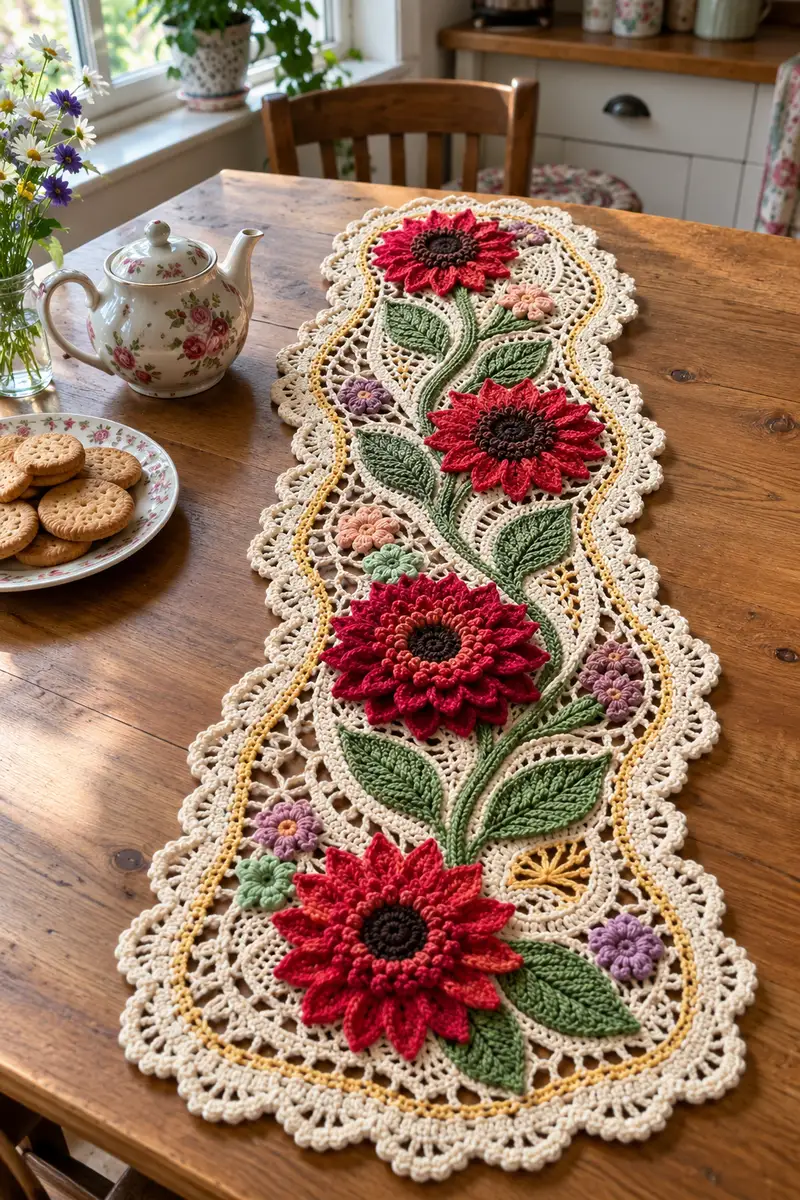
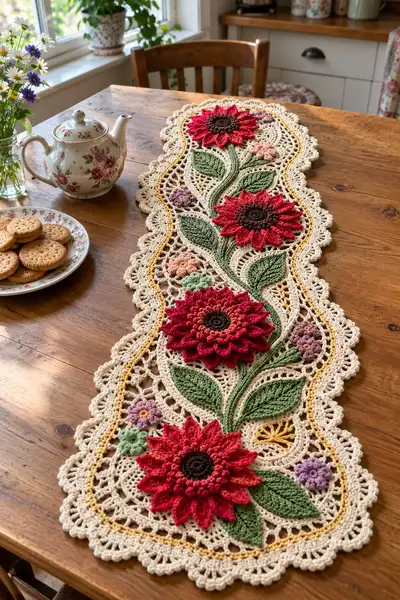
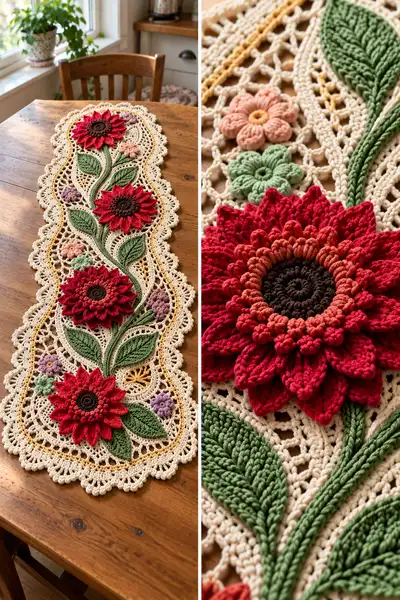
Create a stunning vintage-inspired lace table runner featuring three large layered flowers, sculpted leaves, trailing vines and a scalloped lace border. This detailed pattern recreates the layered 3D petals, dense braided stems and openwork background shown. Perfect for a dining table, dresser or as a centerpiece to brighten any room.
Progress Tracker
0% Complete
— Notes & General Construction :
Info :
This long runner is constructed as a continuous openwork base into which three large layered flowers, stems, leaves and small filler flowers are joined. Work the background central panel first, then make appliques (large flowers, leaves, small flowers). Attach appliques using join-as-you-go (JAYG) or hand-sew with mattress/whip stitch. Block all pieces before final assembly. Use the 3.5mm hook for lace base and the 3.25mm hook for petals and leaves if you prefer more sculpted texture.
— Base Mesh Panel (make 1 long oval panel) :
Round 1 :
Using cream yarn and 3.5mm hook, ch 12, join with sl st to form a ring (12 chs counted as foundation). Alternatively work MR 12 dc if preferred for a tighter centre (12)
Round 2 :
Ch3 (counts as dc here and throughout), 23 dc evenly into foundation ring, join with sl st to top of ch3 (24)
Round 3 :
Ch1, sc in same st, ch4, sk 1, sc in next st, ch4 rep around forming 12 ch-4 loops, join with sl st (12 ch-4 loops)
Round 4 :
Into each ch-4 loop: (sc, ch3, 3 dc, ch3, sc) — creates gentle petals around centre. Join with sl st (12 small motifs)
Info :
Work rounds 1-4 loosely to encourage lace openness. Use stitch markers to mark every third loop to help keep symmetry when expanding the panel into its long oval shape.
Round 5 :
Ch1, sc in each visible st around and across top of each small motif; between motifs make ch5 and sc in centre of next motif, creating wider loops. You will have approx 72 sc + 12 ch-5 loops (count depends on exact tension)
Round 6 :
Into each ch-5 loop: (sc, ch4, 4 dc, ch4, sc) to expand mesh. Work 12 larger fan motifs (12)
Round 7 :
Ch2, *dc in next 4 sts, ch3, sk next ch-space; repeat from * around to create alternating dc arches around the fans. Adjust stitch counts to keep panel flat (approx 120 dc/arches)
Round 8 :
Ch1, sc around following foundation of arches; place sc into top of each arch and into chain spaces to create stable row. Keep stitch count even by adding or removing ch1-spaces at ends of panel to maintain oval curve (approx 140 sc)
Info :
At this stage decide the width of your runner; to lengthen, continue working extra even rounds of mesh in the centre section using rows of treble arches alternating with sc rows. For the photographed runner, the base will be extended to accommodate three large flower positions spaced evenly.
Round 9 :
Row shaping for sides: Ch3, dc in next 10 sts, (ch5, skip 2, dc in next 10) repeat across long edge; symmetrical return on other side for a scalloped elongation. Count per long side ~ 8 arches of dc sets (work to match desired length)
Round 10 :
Ch1, sc in each dc and in ch-spaces to lock in shaping. Add sc around short rounded ends with increased sc per end to maintain oval curve. Typical total sc here approx 220-260 depending on length chosen
Round 11 :
Work an open net section along central spine: ch5 (counts as tr+ch2), *sk 2, tr in next st, ch2; repeat across center creating net ladders. On return round sc into each chain loop to stabilize (net width approx 3-5 tr columns)
Round 12 :
Ch1, sc across stabilising net and edges; at positions where large appliques will attach, mark approximate centres with stitch markers. For three flowers, place markers at approx 20%, 50% and 80% of runner length.
Info :
Blocking tip: block this base mesh flat, pinning narrow necks and ends to keep the final runner symmetrical. If using join-as-you-go, do not weave ends until appliques are attached.
Round 13 :
Ch3, *dc in next 6 sts, ch3, sk 1; repeat across to elongate arches; join with sl st. This creates additional openwork for airy appearance (stitch numbers variable by length)
Round 14 :
Ch1 sc around including into chain loops to create a steady trim. Ensure placement markers remain visible for applique joining (approx 240 sc)
Round 15 :
Edging preparation: work 1 round of 3 dc groups separated by ch3 across long edges, and increased stitches across short ends to maintain oval curvature. This gives a base to attach piping and the scalloped border later.
Info :
If you prefer to make the runner longer or shorter, add or remove repeats of Rounds 9-13 in the center before doing decorative piping and border rounds. Be sure to keep the three applique markers spaced evenly relative to the centre marker.
Round 16 :
Optional narrow piping line: switch to mustard yarn. Ch1, sc all around working 2 sc in corner/curve sts to prevent pulling. Join with sl st and fasten off mustard after completing this round. The piping creates the warm contrasting line seen in the photograph (stitch count matches R15)
Round 17 :
Switch back to cream. Work 1 round sc around in BLO to create a ridge for scalloped border to sit on (this round will be covered by border). Maintain spacing and even tension.
Round 18 :
Begin scallop base: *ch5, sl st into 3rd ch from base, sk 3, sc in next st; repeat around. This creates a scallop loop foundation. Adjust ch length for preferred scallop size.
Info :
At the end of base mesh work, press and block the piece flat so the three applique markers remain accurate and the lace sits flat for JAYG. While blocking, make your appliques so they can be pinned and joined neatly.
— Large Layered Flower (make 3 identical) :
Round 1 :
With dark brown center color and 3.25mm hook, make a MR, ch1, 8 sc in MR, pull tight, join with sl st (8)
Round 2 :
Ch1, 8 inc around (16) — (inc = 2 sc in same st)
Round 3 :
Ch1, (1 sc, inc) x 8 (24)
Round 4 :
Ch1, (2 sc, inc) x 8 (32)
Info :
Center rounds form a slightly raised disc. Work tightly so that the center sits proud when the petal layers are applied. Place a marker at beginning of round for counting.
Round 5 :
Ch1, sc in each st around (32)
Round 6 :
Change to orange/terracotta. Ch1, *fpdc around next st (wrap yarn twice if you want a puffier post), repeat around to create textured raised ring. Join with sl st (32)
Round 7 :
Change to deep red. Ch3, *in next st work: (ch2, 5 dc cluster in next st, ch2, sl st to same st) skip next st, sl st in next; repeat around creating initial petal anchors. You should have ~16 petal anchors (16)
Round 8 :
Into each petal anchor: ch1, (sc, hdc, 5 dc, hdc, sc) to form fuller petals. Join and fasten off. Count petals — 16 full petals (16)
Info :
Petal rounds create the first layered row. Ensure each petal is worked into the same anchor point for symmetry. Use 3.25mm hook for tighter, sculpted petals.
Round 9 :
For second petal layer (behind first): with red, work between petals: sl st to space between petals of previous round, ch3, (3 tr, ch3, 3 tr) anchored in spaces to create raised fan anchors for the next layer — approx 16 anchors.
Round 10 :
Into each anchor: ch1, sc, (picot optional), (hdc, 7 dc, hdc), sc — forming large overlapping petals behind first layer. Join. Keep stitch counts consistent so outer round has 16 large petals (16)
Round 11 :
Change to a slightly darker red for depth. Work a round of popcorns across the bases of outer petals to create a bobbled inner ring: *ch1, make popcorn (5 dc cluster) in base of each petal, ch1; repeat for each petal base (16 popcorns)
Info :
To make petals sit upwards, block each completed petal layer by pinning the outer edge slightly forward and steam/block lightly (if cotton, wet block). This helps achieve the layered sculpted look in the photos.
Round 12 :
Optional third petal layer: attach yarn behind existing outer petals in each space, ch1, sc, (2 hdc, 9 dc, 2 hdc), sc — creating a very full outermost petal row. You will have 16 petals across layer 3 (16)
Round 13 :
Edge finishing for flower: work 1 round sc around the entire flower, catching the lower edges of petals to form a compact applique. Fasten off leaving a long tail for sewing (approx stitches variable)
Info :
Stitch counting: ensure each petal is symmetrical — if you have 16 petal anchors, maintain 16 petals per layer. Use fewer or more petals depending on your desired flower fullness, but keep petal count consistent across layers for balance.
— Flower Center Detail (bobble ring) :
Round 1 :
Using dark brown and MR, ch1, 10 sc in MR, pull tight, join (10)
Round 2 :
Ch1, (1 sc, inc) x 5 (15)
Round 3 :
Ch1, sc around (15)
Round 4 :
Make popcorn/bobble round: *ch1, popcorn (5 dc in next st, remove hook, insert into first dc of cluster and pull loop through) ch1; repeat across to create 15 bobbles. Fasten off leaving long tail for sewing into center of main flower.
Info :
Sew the center disc tightly into the throat of the layered petals. Use the long tail to whip the center into place, pulling slightly to make the center proudly domed as in the photograph.
— Leaf (make 6 large leaves and 4 medium leaves) :
Round 1 :
With green yarn and 3.25mm hook, ch 12, sc in 2nd ch from hook and across to end (11 sc) — this is a long chain leaf foundation
Round 2 :
Ch1, turn, sc across, in last st work (3 sc) into tip to turn and work down opposite side of foundation chain: sc across back to beginning (approx 22 sc)
Round 3 :
Ch2, *fpdc around next st, bpdc around next st; repeat to create alternating post stitches as central vein detail across both sides. Join at base with sl st (approx 22 post sts)
Round 4 :
Ch1, sc around edge working 2 sc in tip to maintain shape. At this round add a subtle decrease at leaf base to create tapered petiole (approx 26 sc)
Info :
To create realistic vein texture, on Round 3 emphasize fpdc (front post) on one side and bpdc (back post) on the return to create raised central ridge. Work fairly tight tension to preserve sculptural shape.
Round 5 :
Round of surface slip stitches to shape: sl st evenly in each st around, pulling slightly as you go to curve the leaf midline. Fasten off leaving long tail for sewing. Block lightly to set shape.
Round 6 :
Optional extra shaping: with duplicate stitch and same green yarn, embroider a central vein by working surface sl sts along the center from base to tip to accent the raised ridge.
Info :
Large leaves in the photo are shown with a folded midline. To achieve this, after blocking fold leaf along center and make a few small securing stitches through folded center using matching yarn to maintain the ridge.
— Stem / Braided Vine (make 1 long vine to link flowers) :
Round 1 :
With green yarn ch 100 (or length to reach between flower positions and across runner). Turn and sc in 2nd ch from hook and across to make cord (99 sc). This creates a flat cord stem that can be sewn in place.
Round 2 :
Ch1, working along cord edges, sc evenly around sides to create a tubular visual and stable cord (approx 200 sc total). Fasten off leaving long tail for sewing.
Info :
For a plumper vine similar to the photographed braided stem, make three thinner cords and braid them together before sewing, or work a three-strand i-cord technique. If you prefer, insert thin floral wire inside the stem for slight shaping but wrap wire ends in yarn to keep them from poking through.
— Small Filler Flowers (make 8-10 in assorted colors) :
Round 1 :
With small color (mint, lilac, or pale pink) and 3.25mm hook, MR, ch1, 6 sc in MR, join (6)
Round 2 :
Ch1, (inc) x 6 (12)
Round 3 :
Ch1, *sc in next st, ch3, sl st in base of same st to form a loop petal; repeat around making 6 ch-3 loop petals; join. Fasten off leaving a tail for attaching
Info :
For slightly puffier little flowers, use bobble or puff stitch for each petal: ch1, *make puff in next st (yarn over 6 times, pull through loops, yarn over and pull through all), sl st to secure; repeat.
— Joining Appliques to Base (JAYG or sew) :
Round 1 :
Place the large flower over its marked spot on the base. If using JAYG, align the back of the flower with the mesh loops so you can pick up foundation stitches through both the flower back and the base edge in a joining round.
Round 2 :
For each flower anchor point, insert hook through base mesh ch-space and corresponding st on flower back, pull up a loop and ch1, sc through both layers to secure. Work a round of sc around the flower edge catching the base every 3-4 sts to anchor fully. Use evenly spaced stitches to prevent distortion (approx 60 sc anchors per flower depending on petal diameter)
Info :
Pin each flower and leaf in position before joining. Ensure stems cross under leaves in a natural curve. For small filler flowers sew only through the center disc to keep them free-standing.
Round 3 :
Attach leaves by sewing with mattress stitch through leaf base and into mesh around the net opening so the leaf appears to grow from the stem. Secure stem under leaf with extra stitches.
Round 4 :
Sew the braided vine with small whip stitches along its length to the base mesh, securing at each flower junction and at leaf bases. Curl the vine slightly before basting to achieve a natural S-curve as seen in the photo.
Info :
When hand-sewing attachments, use the long tails from each applique worked earlier. Weave the tail through the back loops and the mesh foundation to conceal and secure the join. Consider adding a few discreet stitches through petal layers to prevent sagging over time.
— Border Scallop & Lace Trim :
Round 1 :
With cream yarn and 3.5mm hook, pick up stitches along the ridge created earlier (Round 17 of base). Ch1, sc evenly around entire runner working 2 sc in deep curves and 1 sc on long edges. Maintain stitch count symmetry by adding sts on short ends (approx 260-300 sc).
Round 2 :
Ch5, sk 2 sc, sl st in next sc; repeat around to create loop foundation for scallops. Space loops to match the scallop size in photos (approx 40-50 loops)
Round 3 :
Into each ch-5 loop: (sc, ch3, 7 dc, ch3, sc) forming large scallops; join and fasten off. Keep each scallop consistent in stitch numbers to produce even edging.
Info :
For the final decorative picot edge visible in the photos, work an additional round of small picot points: *sc, ch3, sl st in 3rd ch forming picot every 3-4 sc across scallop tops. This yields a delicate lacy finish.
Round 4 :
Work a final round of shell clusters across each scallop top for fullness: into each scallop top (5 dc, ch2, 5 dc) then sl st into scallop base. Fasten off and weave ends.
Info :
Optional: Add a narrow mustard cord (worked as slip-stitch chain) sewn into the scallop valley near the runner edge for the framed piping seen in the photo. Sew the cord into place using small stitches of matching mustard yarn.
— Decorative Details & Final Assembly :
Round 1 :
Sew small filler flowers into cavities between large petals and leaves. Use short stitches to attach only through center so petals remain puffed. Add tiny embroidered French knots in contrasting color at the centers for visual interest.
Round 2 :
Reinforce junctions: add extra ladder or mattress stitches where stems meet flowers and leaves to prevent flopping. Check both sides of the runner and weave any loose ends to the back to keep the front neat.
Info :
Block the completed runner flat using a steam iron or wet-blocking method appropriate for your yarn. Pin petals slightly forward and leaves with raised central ribs to mimic the three-dimensional look. Allow to dry fully before use.
Round 3 :
Once dried, trim any visible ends and press gently. For extra stability for a table setting, consider adding a lightweight non-slip liner underneath the runner when placed on smooth surfaces.
Info :
Care instructions: handwash cold with mild soap and dry flat. Cotton will relax; re-block as needed to maintain shape. Avoid harsh bleach or machine agitation to preserve delicate lace and layered petals.
This vintage floral lace runner is a joyful mix of delicate openwork and sculpted flowers — a truly satisfying project to make and display. The textured petals and raised leaves create a beautiful table centerpiece full of personality and charm. Each applique comes together to form a cohesive, show-stopping design that will brighten your home and invite compliments. 🧶 Pin it, make it, and enjoy every stitch of the process! 🌼✨