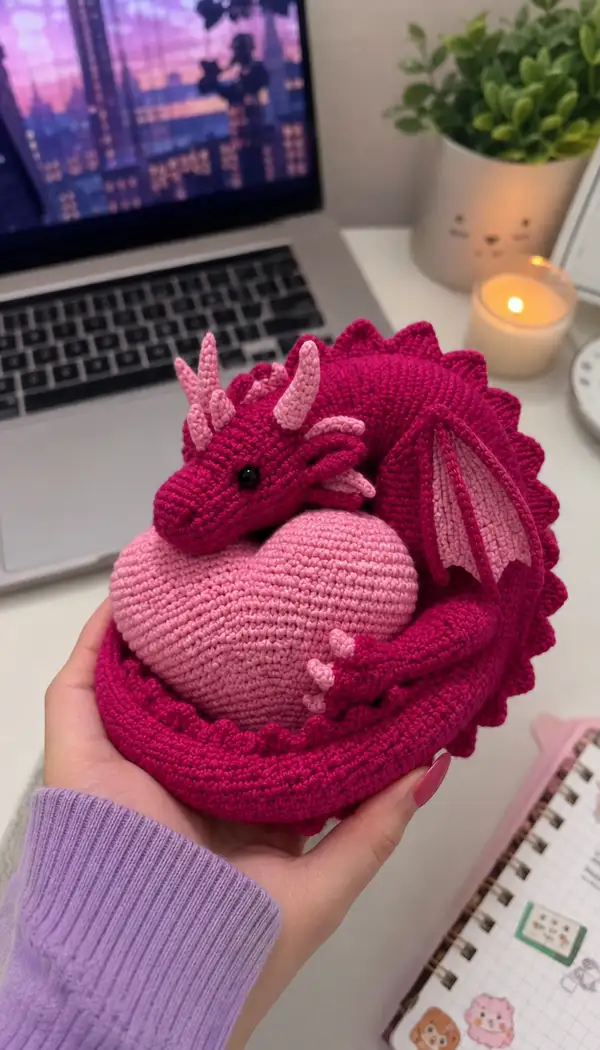
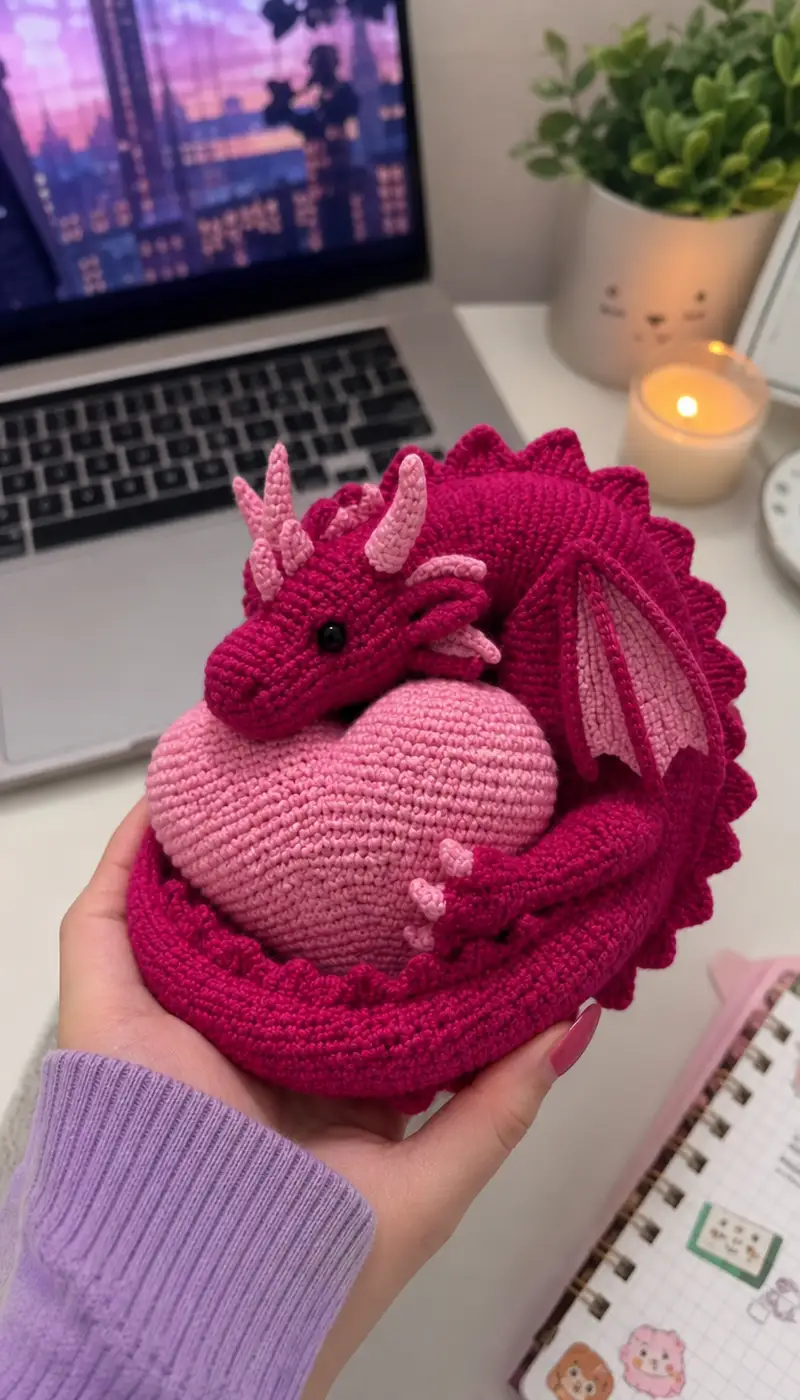
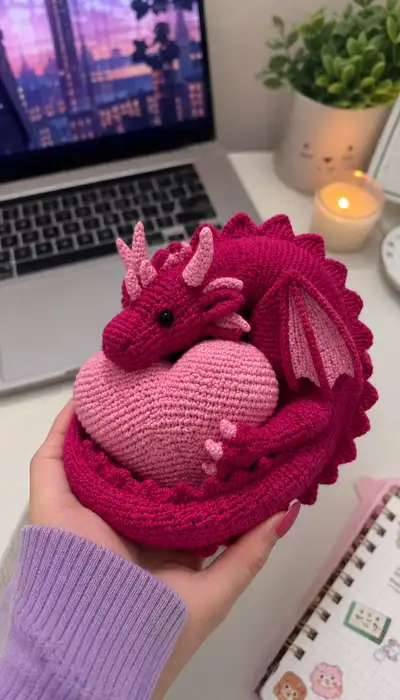
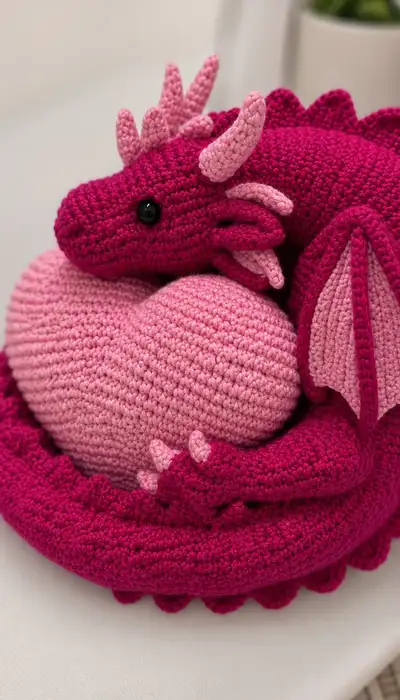
A sweet curled dragon lovingly holding a plush heart — perfect as a gift or desk companion. Worked in two contrasting pinks, this design features a rounded curled body, textured back spikes, tiny claws, horned head and delicate wing membranes. The heart nest and scalloped base create a cozy pose that looks adorable from every angle. Detailed shaping and clear round-by-round instructions guide you through every step of construction.
Progress Tracker
0% Complete
— Head :
Round 1 :
6 sc in magic ring (6)
Round 3 :
(1 sc, inc) × 6 (18)
Round 4 :
(2 sc, inc) × 6 (24)
Round 5 :
(3 sc, inc) × 6 (30)
Round 6 :
(4 sc, inc) × 6 (36)
Round 7 :
(5 sc, inc) × 6 (42)
Round 8 :
(6 sc, inc) × 6 (48)
Info :
Begin working continuous rounds (do not join) for a smooth spiral. Place a stitch marker in first stitch of each round and move up each round. Use deep fuchsia yarn. These increases create a rounded muzzle-start; we will elongate for the snout in the next rounds.
Round 9 :
1 sc in each st (48)
Round 10 :
1 sc in each st (48)
Round 11 :
(6 sc, inc) × 6 (54)
Info :
Rounds 9-11 create extra length at the upper head. If placing safety eyes, plan to insert them between rounds 12-14; mark positions now so eyes are even.
Round 12 :
1 sc in each st (54)
Round 13 :
1 sc in each st (54)
Round 14 :
(7 sc, inc) × 6 (60)
Info :
Place safety eyes between rounds 13 and 15 approximately 9-11 stitches apart (measured across the muzzle). For this design, we placed eyes about 10 sts apart to get a soft friendly expression. If using embedded eyes, attach washers now before stuffing.
Round 15 :
1 sc in each st (60)
Round 16 :
1 sc in each st (60)
Round 17 :
(7 sc, dec) × 6 (54)
Info :
Begin forming the rounded snout/cheek junction. Start light stuffing now—about 60%—so you can shape cheeks and keep detail when you decrease.
Round 18 :
(6 sc, dec) × 6 (48)
Round 19 :
1 sc in each st (48)
Round 20 :
1 sc in each st (48)
Round 21 :
(5 sc, dec) × 6 (42)
Info :
Increase stuffing density as you approach Round 22—head should be fairly firm but still soft enough to slightly indent. Use small amounts of fiberfill to avoid lumps. If you included a safety eye washer, keep stuffing distributed around the washer to avoid slippage.
Round 22 :
(4 sc, dec) × 6 (36)
Round 23 :
1 sc in each st (36)
Round 24 :
(3 sc, dec) × 6 (30)
Round 25 :
(2 sc, dec) × 6 (24)
Info :
At this stage you can add inner ear anchors or start sewing on the frill bases (small petals) that sit behind the eye. We will create frills separately and stitch them on around the cheek area between rounds 10-18 for a layered look.
Round 26 :
(1 sc, dec) × 6 (18)
Round 28 :
Fasten off leaving a long tail for sewing into the neck / body later. Finish stuffing completely through the opening and close using a yarn needle by sewing the 6 remaining sts closed (6 then pull tight).
Info :
Head is closed for now; keep tail for attaching to body. Stuff firmly but not so tight that stitches spread — you still want a smooth surface for sewing. If you prefer the head to be slightly elongated, add two extra even rounds (1 sc each) before beginning decreases.
— Neck Connector :
Round 1 :
Using main color, ch 6, join to form a ring and sc 6 around (6)
Round 3 :
1 sc in each st (12)
Info :
This short collar tube will be sewn into the body opening. Leave a long tail for sewing; fasten off only after attaching to the body to ensure a neat, flexible neck join.
— Body :
Round 1 :
6 sc in magic ring (6)
Round 3 :
(1 sc, inc) × 6 (18)
Round 4 :
(2 sc, inc) × 6 (24)
Round 5 :
(3 sc, inc) × 6 (30)
Round 6 :
(4 sc, inc) × 6 (36)
Round 7 :
(5 sc, inc) × 6 (42)
Round 8 :
(6 sc, inc) × 6 (48)
Info :
Make the body wider compared to head; this gives the curled pose volume. We are building a squat, tube-like body that will later flatten into a coil. Keep rounds continuous for consistent texture. Use deep fuchsia.
Round 9 :
1 sc in each st (48)
Round 10 :
1 sc in each st (48)
Round 11 :
(7 sc, inc) × 6 (54)
Round 12 :
1 sc in each st (54)
Round 13 :
1 sc in each st (54)
Round 14 :
(7 sc, inc) × 6 (60)
Info :
If you want a flatter base for the curled bed, you can switch to BLO for 2-4 rounds near the bottom later. We will shape and stuff the body, then coil it around the heart. For now continue to build height for the back arch.
Round 15-18 :
1 sc in each st (60)
Round 19 :
(7 sc, dec) × 6 (54)
Round 20 :
(6 sc, dec) × 6 (48)
Info :
Start stuffing the body lightly through an opening left in the underside. Since the body will curve and wrap, avoid stuffing too firmly — this will allow you to bend and shape the coil. Mark the position for the heart to sit inside the curve; roughly the center-front area between rounds 12-18.
Round 21 :
(5 sc, dec) × 6 (42)
Round 22 :
(4 sc, dec) × 6 (36)
Round 23 :
1 sc in each st (36)
Round 24 :
1 sc in each st (36)
Round 25 :
(4 sc, dec) × 6 (30)
Info :
We will leave an opening of about 8-10 rounds length on the underside for attaching limbs and inserting the heart pocket, then continue closing later. If you plan to attach the head in a natural curve, leave the body end a few rounds open for the neck connector to be sewn into.
Round 26 :
(3 sc, dec) × 6 (24)
Round 27 :
(2 sc, dec) × 6 (18)
Round 28 :
(1 sc, dec) × 6 (12)
Info :
Fasten off leaving a long tail for sewing. Before fully closing, fit the heart inside the curve to ensure proportion; adjust stuffing or round counts if the curve is too tight or too loose.
— Tail (Make 1) :
Round 1 :
6 sc in magic ring (6)
Round 3 :
(1 sc, inc) × 6 (18)
Round 4-6 :
1 sc in each st (18)
Round 7 :
(2 sc, dec) × 6 (12)
Round 8-9 :
1 sc in each st (12)
Round 10 :
(1 sc, dec) × 4, 4 sc (8)
Round 11-14 :
1 sc in each st (8)
Info :
Stuff tail lightly and leave long tail for sewing. For a poseable tail, thread a piece of pipe cleaner or flexible wire through the center before stuffing and fold wire ends down toward body attachment to hide them. Tail will be sewn to the back end of the body, with the tip curling toward the heart.
Round 16 :
Fasten off and close opening; leave tail for attaching and shaping.
— Back Spikes / Scallops (Make 12-16 small spikes) :
Round 1 :
ch 3, 2 hdc in 2nd ch from hook, hdc in last ch (3) - join to make small cone base
Round 2 :
ch 1, 2 hdc in first st, 1 hdc in next, 2 hdc in last (5)
Round 3 :
ch 1, 2 sc in each st around (10) - shape spike by sc decreasing next round
Round 4 :
(sc2tog) × 5 (5)
Round 5 :
sc around (5) - fasten off leaving tail for sewing
Info :
Make 12-16 spikes depending on desired spacing. Alternate sizes by repeating only 3 rounds for smaller spikes or 5 rounds for larger. Sew spikes along the top spine from head base to tail, spacing them evenly; the sample has about 14 medium spikes.
— Horns and Frills (Head details) :
Horns (Make 2 large) Round 1 :
6 sc in magic ring (6)
Round 2 :
(inc, 1 sc) × 3 (9)
Round 3-6 :
1 sc in each st (9)
Round 7 :
(1 sc, dec) × 3 (6)
Round 8 :
sc around (6) - fasten off leaving long tail. Stuff lightly to keep upright shape.
Small frills (Make 6) Round 1 :
ch 4, sl st in 2nd ch from hook, sc next, hdc in last (3 small lobes)
Info :
Horns in the sample are worked in pale blush pink and attached to the top of the head — two main horns and multiple smaller frills arranged like mane pieces along the cheek and neck. Stagger small frills along rounds 10-16 of the head to recreate the layered look.
— Ears / Side Petals (Make 2) :
Round 1 :
ch 6, sc in 2nd ch from hook, sc in next 3 ch, 3 sc in last ch, continue working on opposite side of foundation ch sc in next 3 ch, sl st to join (12)
Round 2 :
1 sc in each st (12)
Round 3 :
(2 sc, inc) × 3, 1 sc in next 3, (inc, 2 sc) × 3 (18)
Round 4 :
1 sc around (18) - fasten off leaving long tail
Info :
These flattened petals are layered behind the horns to form the cheek frills; place one set on each side slightly behind the eye area and sew securely with the long tail. Slight curve can be achieved by sewing inner edge more tightly than outer edge.
— Front Legs / Arms (Make 2 identical curved arms) :
Round 1 :
6 sc in magic ring (6)
Round 3 :
(1 sc, inc) × 6 (18)
Round 4-6 :
1 sc in each st (18)
Round 7 :
(3 sc, dec) × 4 + 2 sc (14)
Round 8-10 :
1 sc in each st (14)
Round 11 :
(2 sc, dec) × 3 + 2 sc (11)
Round 12 :
1 sc in each st (11)
Round 13-14 :
(1 sc, dec) × 3 + 2 sc (8)
Round 15 :
1 sc in each st (8)
Round 16 :
Fasten off leaving a long tail for sewing. Stuff fingers more firmly than arm; stuff arm lightly to allow it to curve around heart.
Info :
Add three tiny claws to each hand by making ch 3 and sc back along the chain; make them in pale blush and sew to the front tip of the hand. The arms in the sample are positioned hugging the heart, so leave a slightly longer tail for easier shaping during assembly.
— Hind Legs / Feet (Make 2) :
Round 1 :
6 sc in magic ring (6)
Round 3 :
(1 sc, inc) × 6 (18)
Round 4-6 :
1 sc in each st (18)
Round 7 :
(3 sc, dec) × 4 + 2 sc (14)
Round 8-10 :
1 sc in each st (14)
Round 11 :
(2 sc, dec) × 3 + 2 sc (11)
Round 12-15 :
1 sc in each st (11)
Round 16 :
Fasten off leaving tail for sewing. Stuff feet firmly so they support the seated pose; sew feet to base of body under the nest ensuring even spacing for balance.
Info :
Feet are slightly wider and flatter than arms. Flatten the first few rounds of each foot slightly by stitching along the center of the sole to create shape, then sew into place with several secure stitches.
— Wings (Make 2) :
Wing Membrane (inner) Round 1 :
Using blush pink, ch 8, sc in 2nd ch from hook and across (7)
Round 2 :
ch1, turn, sc across (7)
Round 3 :
ch1, turn, (sc, inc) across to widen (10)
Round 4 :
ch1, turn, sc in each st (10)
Round 5 :
ch1, turn, (2 sc, inc) × 3 + 4 sc (13)
Round 6 :
ch1, turn, sc across (13) - fasten off leaving long tail
Wing Rim (outer) Round 1 :
Using main color, join to long edge of inner membrane and sc around the outer edge with 2 sc in tip stitches to round corners, total around 28 sts depending on shaping
Round 2 :
1 sc in each st (28)
Round 3 :
1 sc in each st BLO to create a ridge along the wing base (28)
Info :
Sew the wings to the back slightly behind the shoulder rounds (approximately body rounds 10-14). Make sure wing seams are hidden; position with slight forward tilt so the dragon appears protective over the heart.
— Heart (Big Plush Heart that the dragon holds) :
Round 1 :
With blush pink, 6 sc in magic ring (6)
Round 3 :
(1 sc, inc) × 6 (18)
Round 4 :
(2 sc, inc) × 6 (24)
Round 5 :
(3 sc, inc) × 6 (30)
Round 6-8 :
1 sc in each st (30)
Round 9 :
(3 sc, dec) × 6 (24)
Round 10 :
1 sc in each st (24)
Round 11 :
(2 sc, dec) × 6 (18)
Round 12 :
1 sc in each st (18)
Info :
We will make two halves and then seam them together over the heart-shaped curve. At this point, for a fuller heart shape, stop increasing earlier or later depending on how rounded you want the lobes.
Round 13 :
(1 sc, dec) × 6 (12)
Round 14 :
6 sc (6) - Fasten off and leave long tail for seaming halves
Info :
Make 2 identical domes following Rounds 1-14. Stuff each dome firmly to maintain plumpness. Join the two domes by placing them together and stitching along the bottom edge with whip stitch, shaping the seam to create the classic heart dip at the top center. After seaming, add a few even rounds around the seam (sc in each bottom st) to smooth and close any gaps — about 2-3 rounds, increasing or decreasing slightly to match circumference.
Heart Finish Round 1 :
After joining, sc around 18 sts to clean seam (18)
Heart Finish Round 2 :
1 sc around (18)
Info :
Leave an opening of about 6-8 sts to add extra stuffing for final shaping. Stuff the heart very firmly so it holds shape under the dragon's arms. Close with invisible decrease rows until you finish with 6 sts and fasten off. Weave tail inside heart and close.
— Nest / Scalloped Bed :
Round 1 :
Using main color, ch 30, join with sl st to form a ring (or make a flat spiral base about 30-32 sts diameter)
Round 2 :
sc around the ring (30)
Round 3 :
(1 sc, inc) × 10 (40)
Round 4 :
1 sc around (40)
Round 5 :
(2 sc, inc) × 10 (50)
Round 6-8 :
1 sc around (50)
Round 9 :
BLO 1 sc around to create inside ridge (50)
Round 10-12 :
1 sc around (50)
Round 13 :
Now create scalloped edging: *skip 1 st, 5 dc in next st, skip 1 st, sl st in next st* rep around (10 scallops)
Info :
This creates the decorative ruffled bed edge visible in images. The nest should be large enough to hold the heart and a curled body around it. If needed, add two extra increase rounds before working scallops to enlarge nest circumference. Sew nest to bottom of body at the final round so the dragon appears nested into the bed.
— Assembly & Finishing Details :
Info :
Before assembly, weave in and trim loose ends from all parts. Block the wings lightly if necessary by pinning them into shape and lightly steaming or wet-blocking to soften edges (test yarn care first). Place all pieces around the heart and pin them in place to plan sewing order.
Step :
Sew the neck connector into the body opening using the neck tail. Ensure the head is positioned so snout rests over the heart. Use invisible mattress stitch or whip stitch and tighten to bring head neatly into curve.
Step :
Sew arms on either side of heart so fingers cup the heart — sew through the arm tip and into body front rounds 12-16 to anchor. Use ladder stitch to hide joins and add extra thread around the wrist for secure hold.
Step :
Sew the tail to the back end of the body, curving it toward the heart and securing with several stitches. If using wire, mold to shape now and stash wire ends inside the seam for safety.
Step :
Sew the spikes and scallops along the spine from base of head to end of tail. Use evenly spaced placement — in sample there are about 14 spikes. Sew each spike securely with several passes and knot ends inside the body.
Step :
Sew wings to the back between body rounds 10-14 with wing base lying flat; tack the lead edge and the lower tip to create a shallow pocket for the arm to rest over the heart.
Step :
Attach horns and frills to head: two large horns central and small frills layered behind ears. Sew small petals to create that layered mane effect and trim any stray yarn.
Info :
Embroider nostrils with two short satin-stitch lines under the snout tip and a small smile if desired. Add blush with a small amount of soft fabric paint or powdered blush blended on cheeks for a finished look.
Info :
Secure the heart into the arms by stitching a few hidden stitches from heart to wrists/arms and to body underside so the heart stays centered while maintaining a plush feel.
Info :
Finally, weave all tails into the piece, knot inside for security and trim neatly. Inspect seams and add extra securing stitches in high-stress areas (under arms and tail base).
Completing this curled dragon is such a rewarding project — every tiny horn, scallop and wing gives it personality! The cozy pose makes it a perfect gift or shelf friend, and the two-tone heart adds a sweet focal point. Enjoy the process and the very satisfying assembly where the dragon finally hugs its heart. 🧶💖 Take photos of your finished piece and relish the handmade magic!