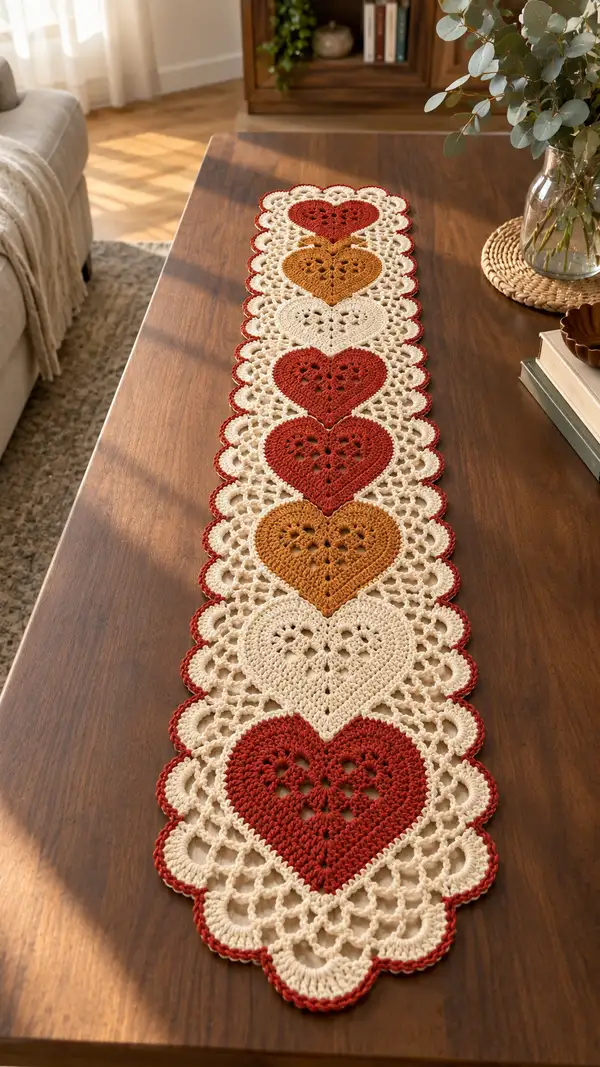
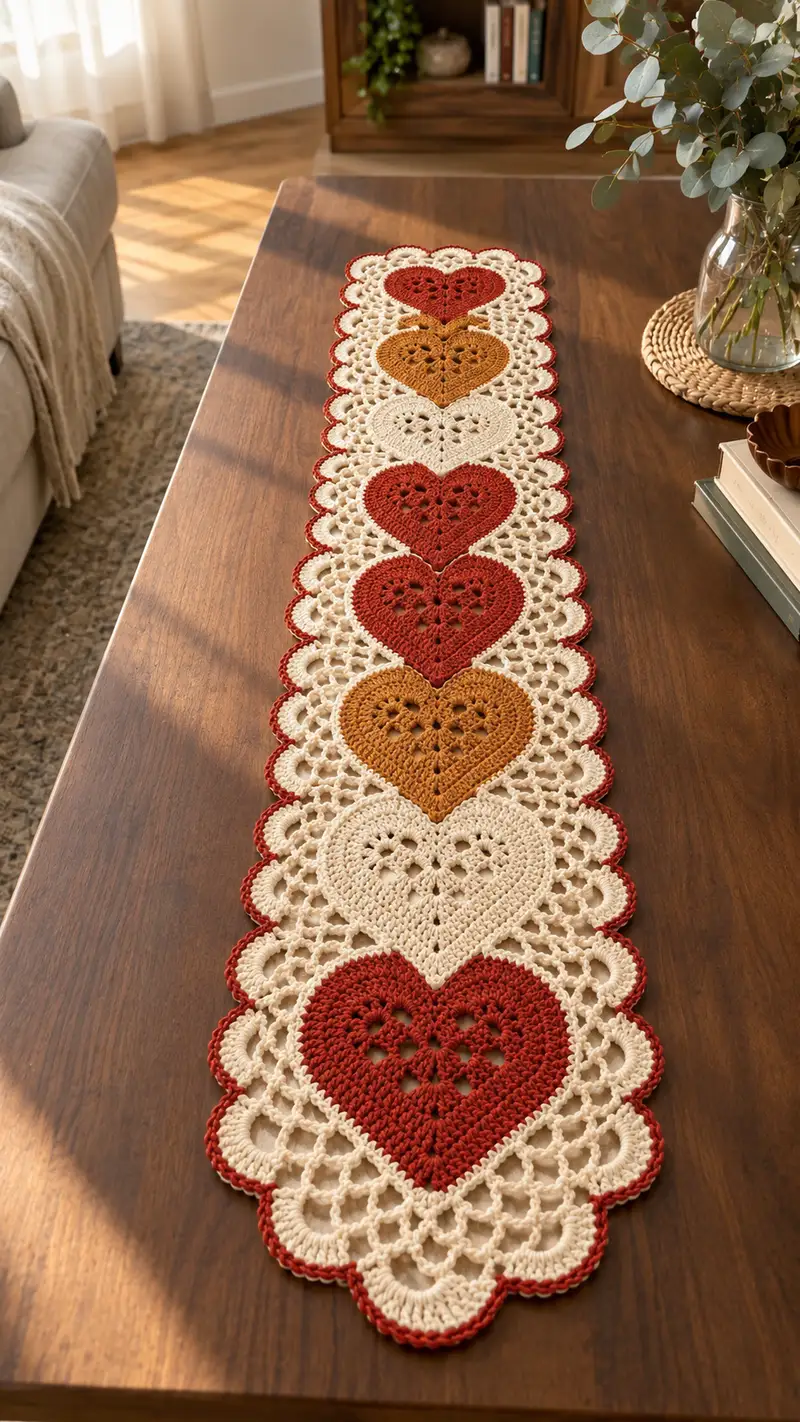
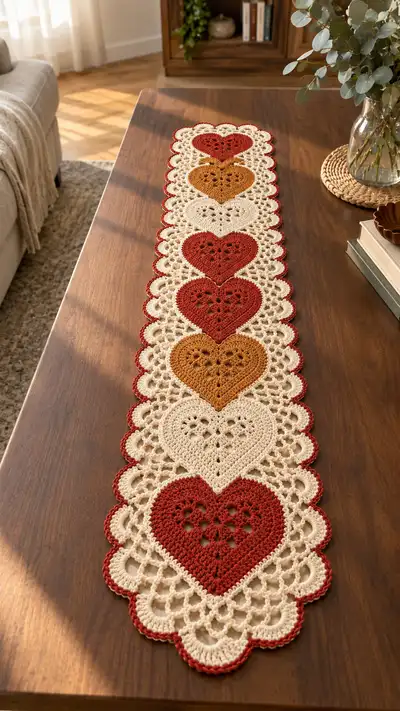
A romantic lace table runner featuring a row of openwork hearts connected by elegant mesh panels and a scalloped border. Alternating warm tones of deep red, mustard gold and soft cream create a vintage-inspired centerpiece. The runner is worked motif-by-motif and joined as you go for a seamless, flat result. Perfect for dining tables, sideboards, or seasonal decor.
Progress Tracker
0% Complete
— Overview :
Info :
This table runner is built from repeating heart motifs joined by an open mesh connector. Work each heart motif flat, then join them edge to edge using a join-as-you-go chain-arch method described in the Join sections. Finally work a scalloped edging around the entire runner in a contrasting color. Throughout the pattern all rounds are worked in continuous rounds unless otherwise noted. Keep tension consistent and block motifs flat before final edging.
Info :
Gauge: Each completed heart motif measures approximately 6.5 inches (16.5 cm) across at the widest point when worked in worsted weight yarn with a 4.0mm hook. Adjust hook size to match your tension if needed. This runner pictured is made from six hearts plus connectors and scallops; adjust motif count to lengthen or shorten the runner.
— Heart Motif (Make One) :
Round 1 :
With chosen heart color, make a magic ring. Ch 3 (counts as first dc), work 11 dc into ring. Join with sl st to top of ch-3. (12)
Round 2 :
Ch 3, dc in same st, 2 dc in each stitch around. Join with sl st to top of ch-3. (24)
Round 3 :
Ch 3, dc in same st, (dc in next st, 2 dc in next st) repeat around. Join. (36)
Round 4 :
Ch 3, dc in same st, (dc in next 2 sts, 2 dc in next st) repeat around. Join. (48)
Info :
Rounds 1-4 create a circular base; we will begin shaping the heart from round 5 by making increases that favor two top lobes followed by shaping down to a point. Keep joins invisible by inserting hook under both loops for sl st joins.
Round 5 :
Ch 3, dc in same st, (dc in next 3 sts, 2 dc in next st) x 12. Join. (60)
Round 6 :
Ch 2 (counts as hdc), hdc in same st, (hdc in next 4 sts, 2 hdc in next st) x 12. Join. (72)
Round 7 :
Ch 1, sc in same st, sc in next 5 sts, (2 sc in next st) x 12. Join. (84)
Round 8 :
Change to BLO for texture: Ch 3, dc in same BLO, dc in next 6 BLO, (2 dc in next BLO) x 12. Join. (96)
Info :
This round begins to create a flatter surface and a subtle ridge. Working in the back loops only creates a slightly raised rim that helps define the heart shape later. Place a stitch marker at the beginning of every round to keep count easy.
Round 9 :
Switch to RS positioning: Ch 1, sc in same st, sc in next 8 sts, *ch 6, sk 4 dc, sc in next 4 dc, sc in next 8 sts; rep from * to create four small chain arches around the circle. Join. (96 sc + 4 ch-6 arches remains visually consistent)
Round 10 :
Ch 3, dc into next 4 sc, (5 dc shell into top of first ch-6 sp), dc in next 8 sc, (5 dc shell into next ch-6 sp), dc in next 12 sc, (5 dc shell into next ch-6 sp), dc in next 8 sc, (5 dc shell into next ch-6 sp), dc in remaining sc to complete the round. Join. (count: 96 stitches including shells and dc groups)
Info :
Round 10 is where the top lobes begin to form: the shells create three-dimensional lobes when blocked flat. Keep shell stitch tension loose enough to be flat but tight enough to hold shape.
Round 11 :
Ch 2, hdc in top of each dc and into shells as 1 hdc per dc and 1 hdc in the center top of each 5-dc shell. Across each shell work (hdc, ch2, hdc) into the center to leave a small ch-2 top opening. Join. (maintains approx 96 stitch-equivalents)
Round 12 :
Change to cream/connector color now if you will join motifs with this color (optional). Ch 1, sc in same st, *ch 5, sk 4 hdc, sc in next 5 hdc; rep from * around creating uniform ch-5 arches between denser shell areas. Join. (approx 14-16 ch-5 arches depending on placement)
Info :
If changing color, carry the unused yarn inside the work loosely or cut and weave in later. These ch-arches set up the lacy body of the heart and will also form the perimeter that joins to the mesh connector.
Round 13 :
Ch 3, dc into each sc and into each ch-5 arch work (dc, ch 1, dc) into the center of arch to form a lacy mesh. Join. (this provides stable points for joining)
Round 14 :
Ch 1, sc in each st and in ch-1 spaces around. At top center of motif, work extra shaping: sc 3 into one stitch to form the heart dip shaping (this will create the top indentation when blocked). Join. (approx 96 sc equivalents)
Info :
Block the motif flat now, shaping the top dip and bottom point of the heart with pins to accentuate the silhouette. Allow to dry completely before joining to the next motif. Make as many heart motifs as you need; the sample runner has six hearts, arranged in alternating colors: red, mustard, cream, red, cream, red (but you can vary sequence).
— Making Multiple Hearts (Repeat Motif) :
Info :
Work hearts in sequence, switching heart colors as desired. For a runner like the photo make 6 motifs: Heart A (red), Heart B (mustard), Heart C (cream), Heart D (red), Heart E (cream), Heart F (red). Block each motif flat before joining. Keep all motifs consistent in size - if one motif comes out slightly smaller, a quick spritz and re-block will help equalize size.
Heart 1 :
Follow Rounds 1-14 of Heart Motif. Finish off and weave in ends once blocked if not joining immediately.
Info :
For Heart 2 - Heart 6: Repeat Rounds 1-14 for each motif. Use the same counts and technique to ensure uniformity. If you plan to Join-As-You-Go, keep the last round color as the connector color; if you plan to sew, leave tails long for seaming.
— Connector Mesh (Join-As-You-Go Between Hearts) :
Info :
Between each heart you will create an open mesh panel built from chain arches and connecting sc/dc posts. The connector sits along the outer ch-arches of the heart motif and is worked in the background/cream color for continuity. We will describe the connector in a 12-round sequence; repeat between each pair of hearts and at both ends with half-panels for symmetry.
Round 15 :
With connector color and with motifs blocked and placed RS up, join yarn at the ch-5 arch on the right-hand side of Heart A with a sl st. Ch 3, dc into that arch top, ch 6, sk to next arch on opposite heart placement and dc into top of corresponding arch on Heart B. Repeat ch-6, dc across bridging the space with evenly tensioned chains so the hearts are aligned and evenly spaced. At the end of the row join with sl st. (This round forms the first bridging row.)
Info :
Adjust chain spacing to match the heart spacing so panels sit flat. Use pins to hold hearts in place while you make the first join. The ch-6 arches can be shortened or lengthened by one or two chains to fine-tune spacing.
Round 16 :
Ch 1, sc into each dc and into each ch-6 arch work (sc, ch 3, sc) across to create a row of ch-3 loops between hearts. Join. (each ch-6 becomes ch-3 loop cluster)
Round 17 :
Ch 3, dc across each sc and into each ch-3 loop work (dc, ch1, dc) to build a small shell atop each loop. Join. (keeps consistent stitch counts visually)
Info :
Continue building two or three rows of small arches to create a sturdy mesh that lies flat between the hearts. Begin mildly tensioning the chains to avoid sagging but do not pull so tight to pucker the motif edges.
Round 18 :
Repeat Round 16: Ch 1, sc in each st and into each ch-1 space work sc to stabilize the arch row. Join.
Round 19 :
Ch 3, dc in next 4 sc, ch 3, skip small counted spot, dc in next sequence to create a balanced trellis feel. Join. (this round creates a trellis which will be repeated to reach desired mesh height)
Round 20 :
Ch 1, sc in each st across, working sc into ch-3 spaces too, to consolidate the connector. Join.
Info :
Repeat Rounds 17-20 two more times (or until connector reaches approximately 2.0" - 2.5" tall depending on motif size) for a stable openwork strip between each heart pair. For the sample runner each connector is built to four rows of mesh (Rounds 16-19 repeated twice) before the final top joining round.
Round 21 :
Final connector round: Ch 1, sc around the perimeter of the connector and into the last arch of each heart (about 1 sc in each visible top loop), making sure to create an even edge. Join and finish off. Weave in tails. Repeat connectors for each gap between hearts and for the short end-cap connector at both runner ends with half-panels if desired.
— Scalloped Side Edging (Left and Right Sides) :
Info :
With all hearts joined into one long strip (or if working each connector as you go), the scalloped edges are worked in the contrast border color (deep red was used in the photograph). We will work 10 rounds of edging along both long sides to create a pronounced scallop and a delicate picot finish.
Round 22 :
Join border color at a corner arch on one short end. Ch 1, sc evenly along the side edge (work 1 sc into every 2-3 sts depending on density), placing 3 sc into the top of every connector arch to create anchor points. Join. (approx 120-140 sc along each long side depending on runner length)
Round 23 :
Ch 3, *5 dc into next sc (shell), sk 2 sc, sl st into the next sc; rep from * along side to create scallops. At connector anchor points work shells into the anchored 3-sc space. Join. (shells across side produce scallops that match motif spacing)
Info :
Pin the runner while working scallops to ensure curve and spacing are even. If a scallop appears too large, reduce dc count in the shells by one or two stitches; the pattern is forgiving and visually based on even repetition.
Round 24 :
Ch 1, sc in each dc across the scallop round so the scallop is stabilized. In the tip of each scallop work the following picot row: (sc, ch 3, sl st in top of sc) to form small decorative picots along the scallop tips. Join.
Round 25 :
Optional second scallop round for depth: Ch 3, in each picot space work (3 dc, ch2, 3 dc) to create layered scallops. Join and fasten off. Repeat the same edging process down the opposite long side, mirroring the same counts so scallops match exactly.
Info :
Work edging on both sides the same way. Small differences in tension will show after blocking so pin and shape carefully. If you want a narrower runner, reduce the number of scallops or omit the second scallop round.
— Short End Panels and End Scallops :
Round 26 :
At each short end of the runner, where the last heart meets the edge, create a half-connector panel: join yarn and ch 1, sc evenly around the exposed heart arcs to create a rectangular-ish half-panel to carry scallops. Work 3 rows of mesh (ch-5 arches consolidated with sc rows) to match the height of the connector mesh used between hearts.
Round 27 :
Once the short-panel reaches the same height as connectors, work the scallop sequence as for the sides: sc anchor row, shell round, sc consolidation, picot or layered shell finish. Mirror both ends so the runner reads symmetrical left-to-right and end-to-end.
Info :
If making a table runner intended to hang over both ends of the table evenly, make sure the short end panels result in identical height profiles on both ends by measuring the distance from the top of top scallop to the runner center.
— Decorative Top Round and Final Border :
Round 28 :
With border color, work one final round of sc around the entire outer edge of the runner (sc around scallops, sc around end panels, sc along connector top and heart edges). This final round evens the edge and hides any weaving points. Join and fasten off.
Round 29 :
Optional overlay: Work a contrasting thin round using reverse single crochet (crab stitch) in a single-color outline to emphasize the scallop contours. Attach yarn at any point, sc around and work reverse sc into the back direction. Fasten off and weave ends.
Info :
Many crocheters prefer a single contrasting outline to visually pop the scallops. Use a smaller hook (3.5mm) for a tidy reverse single crochet edge. The crab stitch creates a rope-like finished edge that resists curling.
— Final Blocking and Finishing :
Info :
Once all seams and edging are complete, block the entire runner flat on blocking mats using rustproof pins. Stretch scallops gently to round them and pin each tip. Lightly steam or mist with water and allow to dry thoroughly. Optionally use a light starch spray for a crisper finish but test on a scrap first to avoid stiffness that looks unnatural for a table runner.
Round 30 :
After blocking, weave in any remaining ends with a tapestry needle, tucking tails into the back of work. If any scallops gap, add a small reinforcing stitch at the inner shell base to secure the outer round. Press with a steam iron at safe distance if desired for a softer finish, or use spray starch for a stiff look.
Info :
Care instructions: Hand wash cold or machine wash on gentle cycle in a mesh lingerie bag if yarn allows. Reshape and re-block while damp. Avoid tumble drying to preserve delicate scallops and lace integrity.
— Alternative Variation Ideas :
Info :
Try alternating color placement for a striped effect, or make a monochrome runner for a subtler look. Use a fingering-weight yarn with a smaller hook for a narrower, more delicate runner, or a bulky cotton for a larger, more graphic look. Add beaded chains in the connector arches for holiday sparkle (string beads onto yarn before working connector chains).
This romantic lace table runner brings a handcrafted touch to any table. Each heart and scallop is a small celebration of craft and color, coming together into a long, elegant centerpiece. I hope you enjoy the relaxing rhythm of the mesh rows and the satisfying final blocking that makes the lace sing. 🧶💖 Add a vase of fresh flowers and enjoy the warmth handmade decor brings to your home. Happy stitching! 🌿