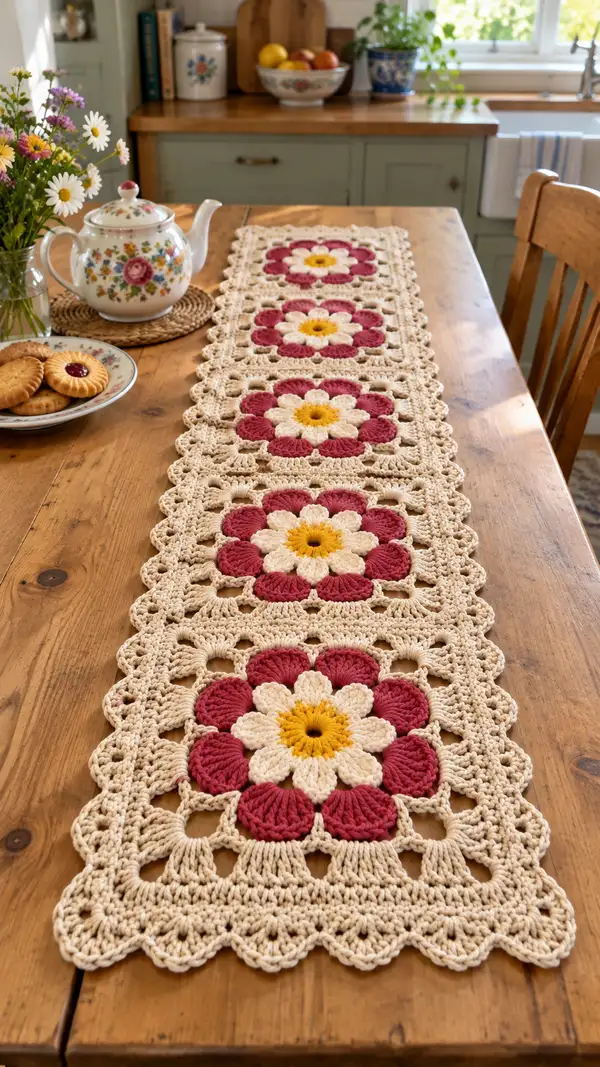
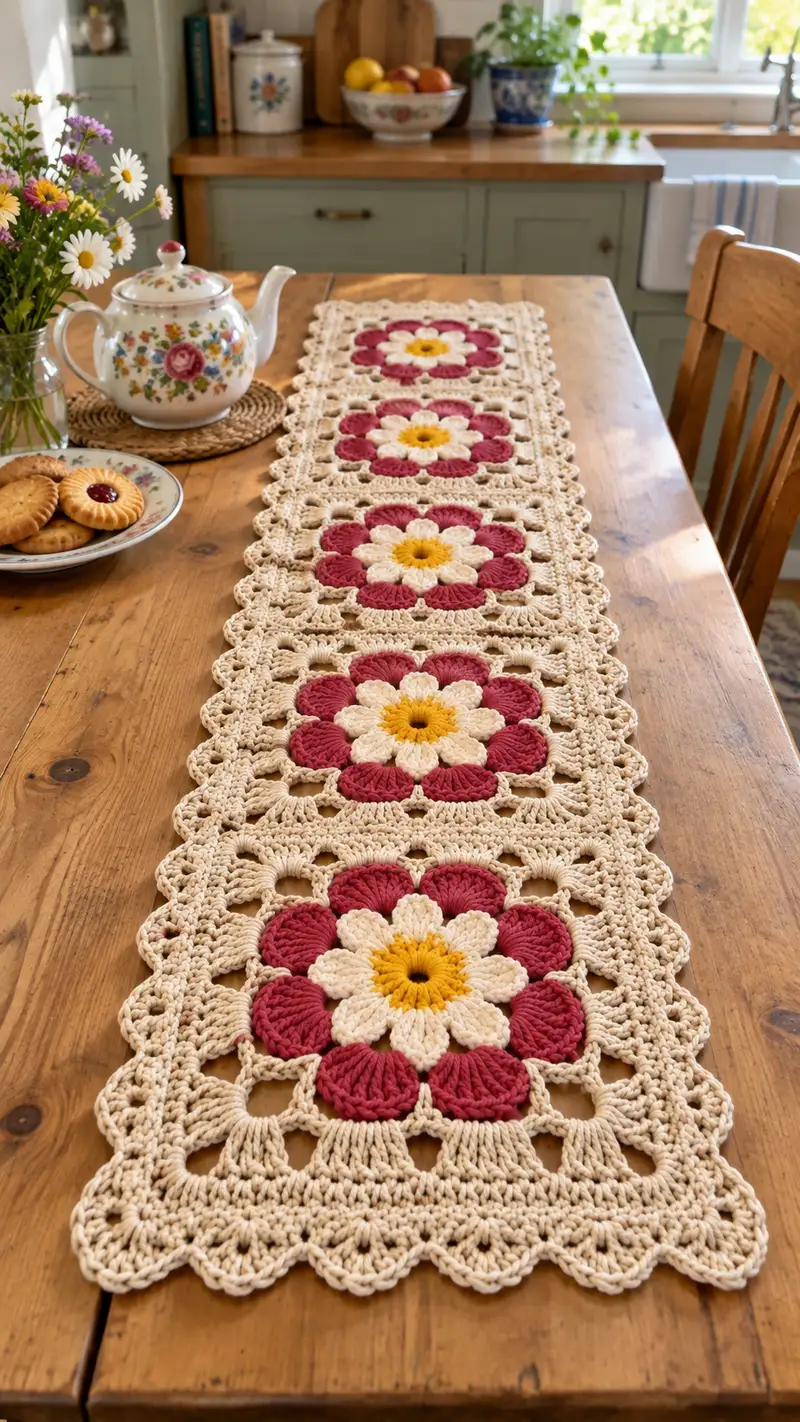
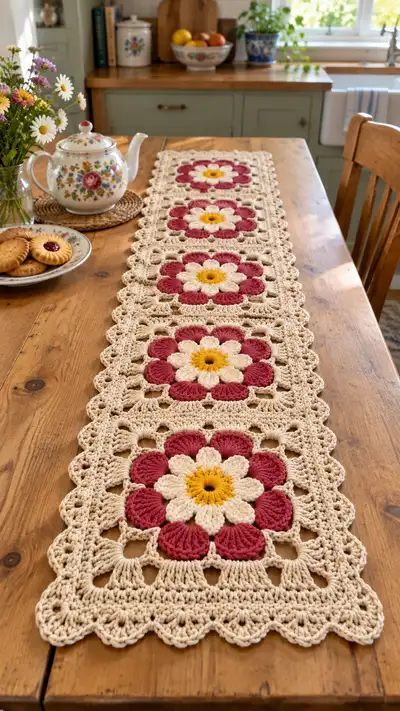
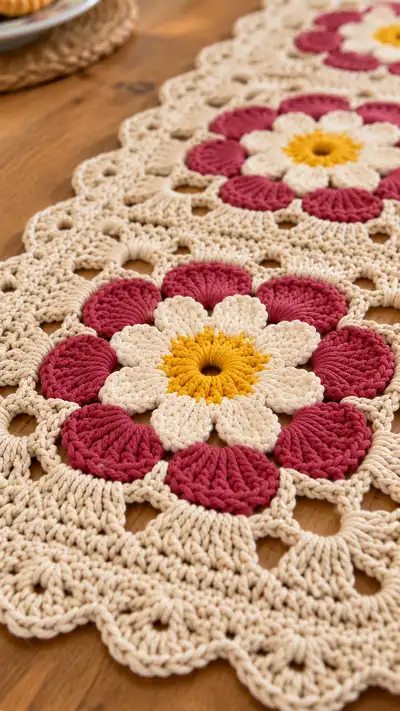
A vintage-inspired daisy table runner made from connected floral motifs in soft cream, warm yellow centers and deep rose petals. This detailed pattern guides you through making each puff-petal motif, joining five motifs end-to-end, and working a lacy scalloped border for a charming farmhouse table accent. Perfect for seasonal displays or everyday warmth, the runner showcases layered texture and an elegant repeated floral motif.
Progress Tracker
0% Complete
— Notes & Gauge :
Info :
This runner is made of repeated daisy square motifs that are joined end-to-end. Gauge for one finished motif (unblocked) is approximately 5.5" (14cm) across the center flower when using worsted-weight cotton and 5.0mm hook. Blocking will relax and enlarge motifs slightly. Make a single test motif to confirm size and adjust hook if necessary.
Info :
Puff stitch used: Yarn over, insert hook into indicated stitch, yarn over and pull up loop (repeat 4 times total to have 5 loops on hook), yarn over and pull through all loops on hook, ch 1 to close puff. Shorten or lengthen puff by adjusting number of pull-ups; keep consistent across motif.
— Daisy Motif (Make 5 motifs; Motif 1 = Rounds 1-30, Motif 2 = Rounds 31-60, Motif 3 = Rounds 61-90, Motif 4 = Rounds 91-120, Motif 5 = Rounds 121-150) :
Round 1 :
With yellow yarn, make a magic ring. Ch1 (does not count as st), work 8 hdc into ring. Pull ring tight. (8)
Round 2 :
2 hdc in each st around. (16)
Round 3 :
(1 hdc, 1 inc) x8. (24)
Info :
These three rounds form a firm, slightly domed center. Keep tension even so the center is not too tight or loose; the next rounds will be worked around this ring as anchors for inner petals.
Round 4 :
Change to cream/off-white yarn. *Ch3 (counts as first dc), skip 1 st, dc in next st, ch1, skip 1 st* across to create 8 ch-spaces overall; work last dc to end so you have 8 small ch1 spaces evenly distributed. Join with sl st to top of beginning ch3. (24 base stitches remain but you have 8 ch1 spaces around)
Round 5 :
*Work inner petal: into each ch1 space from previous round: (ch1, puff 5 loops, ch1, sl st into same ch1 space to anchor) - repeat in every ch1 space around.* You will create 8 puff petals sitting just beyond the center. Join with sl st to base. (8 puff petals)
Info :
Ensure puff loops are all pulled up to roughly the same height so petals look uniform; after making each puff anchor with a ch1 and sl st to compress and secure the puff. Keep tails out of the way to weave later.
Round 6 :
Working behind the puff petals into the base stitches: ch1, sc in same st as join, *sc in next 3 base stitches; (sc, ch2, sc) into space between puff petals to form small picot spaces* repeat around to create eight small sc clusters separated by ch2 loops. Join with sl st. (approx 32 sc plus 8 ch2 loops depending on spacing)
Round 7 :
Change to cream yarn lighter (if using two shades) or continue with same cream. *Ch3 (counts as dc), work 6 dc in the ch2 space from previous round to create a small shell, sl st to next sc; rep around to have 8 shells. Join with sl st to first dc.* (8 shells)
Info :
Eye/Placement :
Ensure the small shells are centered between inner petals—this round forms the foundation for the larger outer petals. If shells look off-center, undo and re-space your ch2 loops from Round 6 slightly so shells align with petal valleys.
Round 8 :
Change to deep rose yarn for outer petals. In each shell from Round 7: *sl st into shell, ch2, make a large puff petal: (yarn over, insert into shell, pull up loop) 6 times total (7 loops on hook), yarn over and pull through all, ch1 to close, sl st to same shell to anchor.* Repeat around to make 8 large puff petals. Join with sl st. (8 outer puff petals)
Info :
Outer petals are the standout feature—use slightly taller puff (6 pull-ups) for a pronounced petal. Keep consistent loop height and finish each puff with a ch1 to define the petal edge.
Round 9 :
With rose yarn: ch1, sc around the base of each puff petal placing 6 sc around each puff (work evenly across the base and slip down into the join area), sl st between petals into the valley spaces so petals are joined at their bases. Join with sl st. (approx 48 sc)
Round 10 :
Change back to cream. Ch3 (counts as dc), *dc in next 5 sts, ch2, skip 2 sts* around to create 8 open arches between petals. Join with sl st. (counts will approximate 48 dc with 8 ch2 arches)
Info :
These arches will create the negative space visible between motifs once joined. Keep arches consistent by counting stitches per arch and adjusting as needed between petals.
Round 11 :
Ch1, sc in each dc and in each ch2 space work (sc, ch3, sc) to create corner/opening points at the top of each arch. Join with sl st. (est. 56 sc + 8 ch3 loops)
Round 12 :
Ch3, *2 dc in next 7 sts, (dc, ch1, dc) into each ch3 loop as a decorative picot space* repeat around forming a wider square shape emerging. Join with sl st. (approx 64 dc including picot anchors)
Info :
Round 12 begins to square the motif; take care to place dc clusters evenly so square shape is established. If your motif looks more circular, increase spacing of dc clusters slightly to flatten corners.
Round 13 :
Ch1, sc in next 4 sts, *(ch4, sc) into the corner ch1 space to create a larger corner loop, sc in next 12 sts* around. You will form 8 larger ch4 corner loops that will be later used for decorative arches and joining. Join with sl st.
Round 14 :
Ch3, in each ch4 loop work: (3 dc, ch1, 3 dc) to make prominent corner shells. In sides between corner shells work 1 dc in each sc across to maintain straighter edges. Join with sl st. (Corner shells provide squareity and decorative points)
Info :
Check that the motif is approximately square—adjust by adding or skipping a dc along sides if necessary; aim for consistent straight edges between corner shells.
Round 15 :
Ch1, sc around maintaining two sc in each shell valley and 1 sc along side dcs to create a neat edge. Where side dc counts vary, distribute sc evenly. Join with sl st. (approx 80 sc)
Round 16 :
Ch3, *skip 2 sc, 5 dc cluster (shell) in next sc, skip 2 sc, dc in next sc* repeat around to create decorative openwork. Join with sl st. (shells and dc alternating)
Info :
Round 16 introduces an open lattice that echoes the petals; keep stitch counts balanced across sides. If you find a side is tighter, gently block your motif later to even edges.
Round 17 :
Ch1, sc in each st around, working 3 sc into each shell to flatten them. Join with sl st. (maintain stitch count approx 80 sc)
Round 18 :
Ch4 (counts as tr), *tr in next 6 sts, ch2, skip 2 sts* around to create tall arches and a lace frame. Join with sl st. (approx 80 tr with 8 ch2 arches)
Info :
These tall arches create the open lacy look between motifs; they will be echoed by the joining round when motifs are connected end-to-end.
Round 19 :
Ch1, sc in each tr, and in each ch2 arch work (sc, ch3, sc) to make pronounced connecting loops. Join with sl st. (approx 96 sc + 8 ch3 loops)
Round 20 :
Ch3, dc across sides making 10 dc per side between corners, and in each ch3 loop work (dc, ch1, dc) to maintain airy join points. Join with sl st. (approx 100 dc total)
Info :
At this point the motif should measure approximately 5.5"-6" across from petal tip to petal tip unblocked. If it is significantly larger or smaller, check tension and puff stitch height consistency.
Round 21 :
Ch1, sc in each dc and sc in each corner; where ch1 spaces occur work (sc, ch2, sc) to keep openwork consistent. Join with sl st. (est. 110 sc)
Round 22 :
Ch3, *2 dc in next 4 sts, skip 1* around to widen the motif slightly and add texture. Join with sl st. (approx 115 dc)
Info :
If you are making multiple motifs, stop here to weave in any trailing ends and block motif flat. Blocking will give accurate measurements for joining and will ease the joining process.
Round 23 :
Ch1, sc around placing 2 sc in the center of corner shells to make stronger corners. Join with sl st. (approx 120 sc)
Round 24 :
Ch2 (counts as hdc), hdc in each st around for 2 rounds to create a firm band that will help when seaming motifs together. Join with sl st at end of each round. (approx 120 hdc)
Info :
These two hdc rounds provide a joinable edge that resists stretching; keep tension even. If you prefer a tighter join, use sc rounds instead.
Round 25 :
Ch1, sc in next 4 sts, *ch5, skip 5 sts, sc in next 4 sts* repeat to create longer loop spaces which will later be worked into for decorative scallops. Join with sl st. (approx 8 ch5 loops)
Round 26 :
Ch3, in each ch5 loop work (5 dc) to create looping shells around the whole motif; between shells work 2 dc in side stitches to keep edges straight. Join with sl st. (approx 8 large shells)
Info :
These large shells will deliver the petal-adjacent scalloped border seen in the runner. Keep shell counts even across sides to maintain square shape.
Round 27 :
Ch1, sc in each dc and sc around, placing 3 sc into each shell valley to flatten shells. Join with sl st. (approx 160 sc)
Round 28 :
Ch3, *skip 2, 7 dc shell, skip 2, sl st into next sc* around to create heavy scallop points. Join with sl st. (approx 8 scallop points)
Info :
Round 28 forms the visible scallop edge that will interlock visually when motifs are joined. Keep shells consistent in height for a neat line when motifs are placed in a row.
Round 29 :
Ch1, sc in each st around, placing 5 sc across each scallop to stabilize the edge. Join with sl st. (approx 180 sc)
Round 30 :
Fasten off and weave in ends. Block motif flat to final dimensions and allow to dry. Repeat Rounds 1-30 for each motif required (total 5 motifs pictured).
Info :
Motifs 2 through 5: Repeat Rounds 1-30 exactly for each motif. For motifs 2-5 you may optionally change petal color combinations if making a multicolor runner. Keep the same cream border color for cohesion if you want the joined runner to look uniform.
— Joining Motifs (Join end-to-end to form runner) :
Info :
Lay motifs flat in the order you want (photo shows five motifs in a long row). Decide whether to join using slip-stitch join, whip stitch, or join-as-you-go (JAYGO). This pattern describes a single crochet join followed by a decorative chain lattice to echo the open arches in motifs.
Joining Step 1 :
With right sides facing and cream yarn, align Motif 1 and Motif 2 edges that will meet (side-to-side along one long edge). Using a 5.0mm hook, insert hook through corresponding st on Motif 1 and Motif 2 and sc through both loops (sc join) across the entire side, keeping tension relaxed to preserve motifs shape. Work sc in each matched st. Fasten off and weave ends. Repeat to join Motif 2 to 3, 3 to 4, and 4 to 5.
Info :
If you prefer a less visible join, use mattress stitch or whipstitch from the wrong side with a yarn needle. The sc join gives a visible ridge that echoes the runner's texture.
Joining Step 2 :
After joining all motifs into a single strip, work a single round of sc across the seam lines on the right side to tidy the joins: attach cream yarn at one end, sc evenly across each seam where motifs meet, placing extra sc in any gap areas. This creates a continuous firm seam and helps keep the runner flat. Fasten off and weave ends.
Info :
When joining motifs lengthwise (end-to-end as pictured), ensure petals line up vertically so the flower centers sit centered on the runner. Adjust seam tension if motifs cup or wave.
— Border & Scalloped Edge (worked around entire joined strip) :
Round 1 :
With right side facing and cream yarn, attach in any corner. Ch1, sc evenly around the entire runner, working 3 sc into each corner shell to maintain corners, and 1 sc in each edge st. When you reach the long joined sides, place 1 sc into each seam st. Join with sl st to start. (st count depends on runner length; you should have a neat uniform edge)
Info :
Work this sc round with slightly looser tension than motif rounds so the runner lays flat. Pin the runner to blocking board if needed and sc into pinned motif edges for stability.
Round 2 :
Ch3, *dc in next 3 sts, (dc, ch1, dc) in corner or shell spaces to create points, dc in next 3 sts* repeat around. Join with sl st. (creates a ridged base for scallops)
Round 3 :
Ch1, sc in each dc across for one round to flatten and even out the base. Join with sl st.
Round 4 :
Scallop round: *In next 5 sts work (sc, hdc, 3 dc, hdc, sc) to create a full scallop; skip 2 sts, sl st in next st* repeat around. At corners, work (sc, hdc, 5 dc, hdc, sc) to make larger corner scallops. Join with sl st. (Scallops should sit evenly around the runner perimeter)
Info :
Adjust number of skipped stitches between scallops so scallops sit evenly along long sides; you may need to add 1 or 2 extra sl sts per repeat on very long runners.
Round 5 :
Ch1, sc around placing 3 sc across each scallop to neaten edge. Join with sl st and fasten off. Weave in ends and block lightly to set scallops.
Info :
Optional: For a stronger, more decorative finish, work one more round of reverse single crochet (crab stitch) around the entire edge to give a rope-like finishing line.
— Alternative Join-as-you-go (JAYGO) Method :
Info :
If you prefer JAYGO, complete Motif 1 fully. Begin Motif 2 through Round 22, then on Round 23 instead of fastening off, position Motif 2 adjacent to Motif 1 and join into corresponding ch3 loops or sc rounds of Motif 1 with sl st or sc as you work; continue Motif 2 to completion. This creates a seamless join and saves weaving ends. Repeat for additional motifs.
Info :
JAYGO requires careful alignment of motifs and a consistent stitch count; pin motifs together before joining to ensure perfect placement.
— Finishing Touches :
Info :
Weave in all loose ends using a yarn needle, hiding tails through nearby stitches. Wet block or steam-block the entire runner gently, pinning scallops and outer edges until dry. This evens out motifs and joins and produces a professional finish.
Info :
Optional: Add a light starch spray to the finished runner to stiffen scallops if you plan to use it under heavier items or for a more formal table display.
Care Instructions :
Hand wash in cool water with mild detergent and lay flat to dry. Avoid tumble drying to preserve shape and color. Use gentle ironing or steaming on low heat if necessary.
Completing this daisy chain runner is such a rewarding finish — from the sunny yellow centers to the textured rose petals and lacy cream border, each stitch contributes to a timeless table centerpiece. Blocking and a careful join elevate it to heirloom quality. 🌼🧶 Place it down, pour a cup of tea, and enjoy the cozy cottage feel you've created by hand. Share your finished runner and relish each compliment it brings! ✨