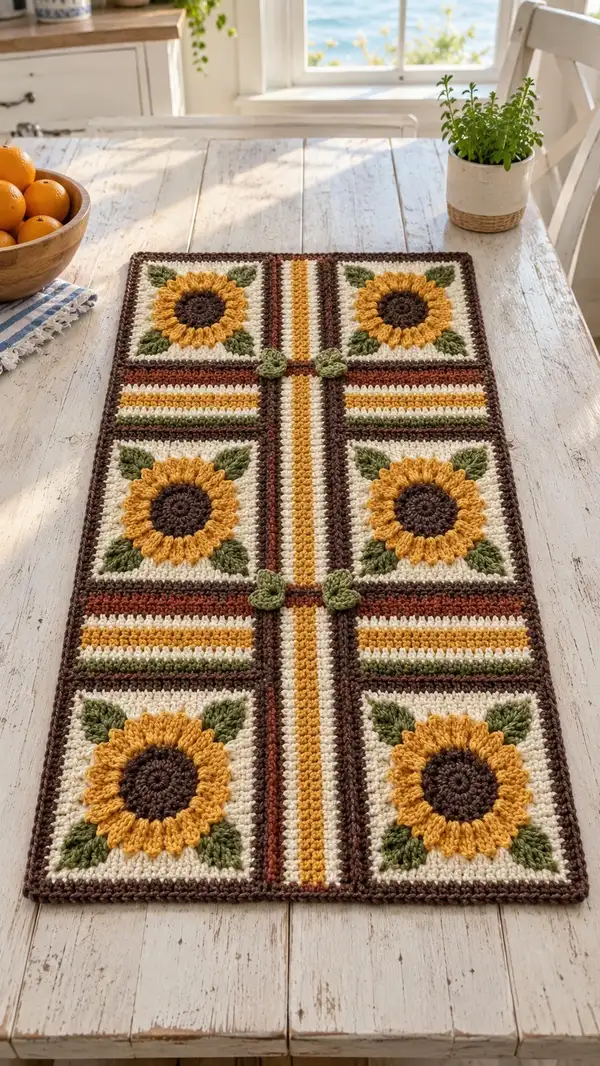
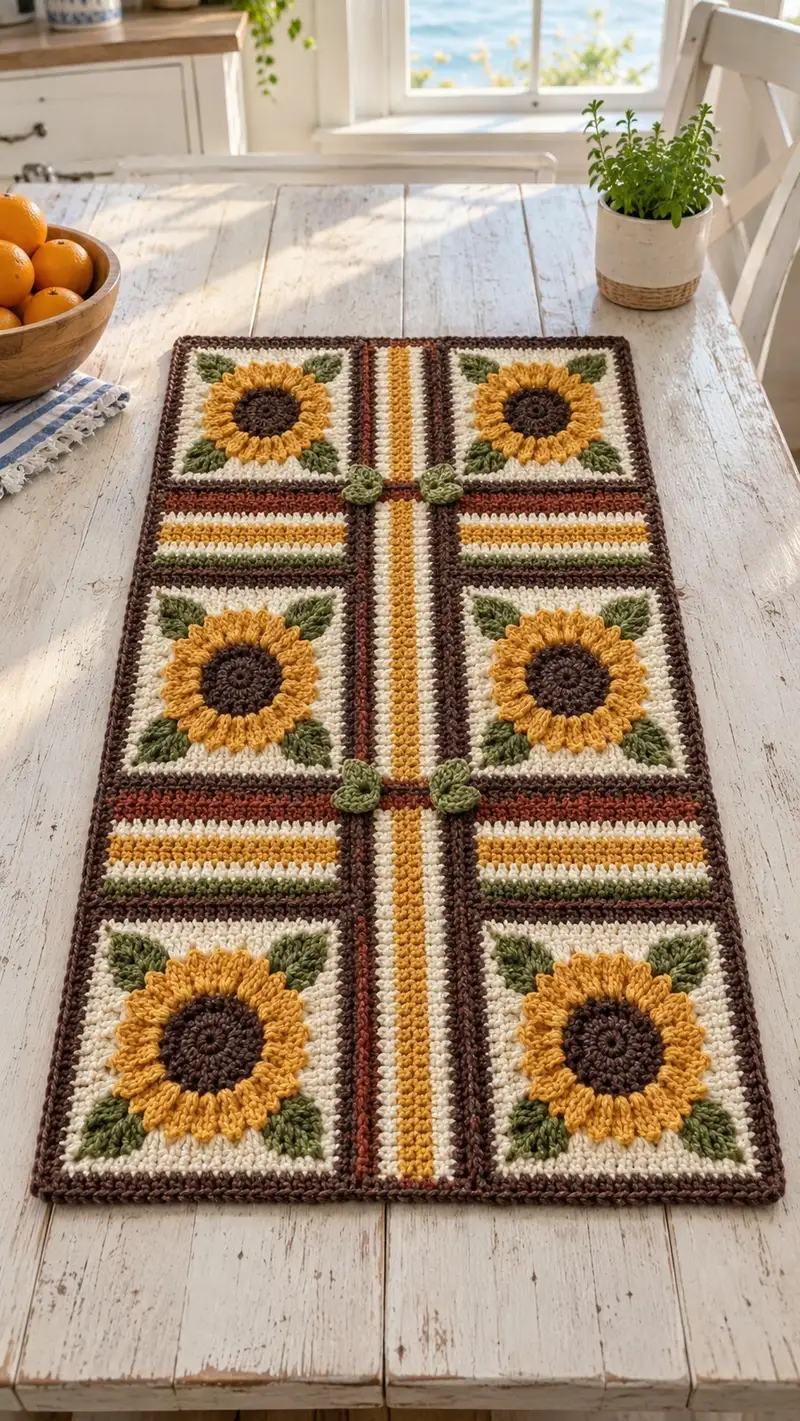
A warm, farmhouse-inspired table runner built from textured sunflower squares, leafy motifs and striped panels. Rich autumn colors (mustard, chocolate, rust, olive, and cream) create a cozy, layered look. The runner is finished with a deep chocolate border and small three-dimensional leaves at the join intersections. Perfect for a kitchen table, mantel, or seasonal centerpiece.
Progress Tracker
0% Complete
— Sunflower Square (Make 6) :
Round 1 :
Using Chocolate (dark brown), 6 sc in magic ring (6)
Round 3 :
(1 sc, 1 inc) x 6 (18)
Round 4 :
(2 sc, 1 inc) x 6 (24)
Round 5 :
(3 sc, 1 inc) x 6 (30)
Round 6 :
(4 sc, 1 inc) x 6 (36)
Info :
Check your magic ring central tension. These first 6 rounds form a tight, flat center for the sunflower. Keep stitches firm so the center reads dense against the puff petals.
Round 7 :
1 sc in each st around (36)
Info :
Switch to Mustard/Gold yarn with a secure join at the end of the round (or carry color up the inside if you prefer). We'll make the textured petals next; maintain slightly tighter tension for puff stitches so petals stand up.
Round 8 :
*Sc in next st, pc (yarn over, insert hook, yarn over and pull up a loop 4 times total for a 4-loop puff) in next st, yo and pull through all loops, ch 1 to close puff* repeat around (18 puffs, anchored into every 2nd stitch; base stitch count remains 36)
Round 9 :
Using Mustard, sc in each st around to secure petal base (36)
Info :
When making a puff cluster: insert hook into the stitch, yarn over pull up loop; repeat to create 4 loops on the hook (counting the working loop), yarn over and pull through all loops, ch 1 to secure the puff. Tug each puff lightly to even heights.
Round 10 :
Change to Chocolate. (2 sc, 1 inc) x 12 (48)
Round 11 :
(3 sc, 1 inc) x 12 (60)
Round 12 :
(4 sc, 1 inc) x 12 (72)
Info :
These increases evenly expand the motif to a working circumference that will accept corner shaping for a square. Work the increases evenly and count at the end of the round to confirm you reached the stated stitch count.
Round 13 :
1 sc in each st around (72)
Round 14 :
1 sc in each st around (72)
Round 15 :
1 sc in each st around (72)
Info :
Work three even rounds to firm up the petal-to-background transition. If your puffs are taller than expected, these rounds help lock the petals into place before corner formation.
Round 16 :
Prepare to square off: *Sc in next 16, (sc, ch 2, sc) into next st (corner)* repeat 4 times (80)
Round 17 :
1 sc in each st around, working 1 sc into each ch-2 corner (80)
Round 18 :
1 sc in each st around (80)
Round 19 :
1 sc in each st around (80)
Info :
At this stage the motif will start to appear slightly squared as the ch-2 corner spaces open. Use stitch markers at each corner to identify the corner spaces for consistent work on subsequent rounds.
Round 20 :
Change to Cream. 1 sc in each st around (80)
Round 21 :
1 sc in each st around (80)
Round 22 :
(7 sc, inc) x 10 (90)
Info :
The increase in Round 22 is to allow the square to reach a comfortable finished width. If you'd like a slightly smaller square, omit this round and maintain 80 sts for the next rounds instead.
Round 23 :
1 sc in each st around (90)
Round 24 :
1 sc in each st around (90)
Round 25 :
Switch to Rust/Terracotta. 1 sc in each st around (90)
Round 26 :
Switch to Cream. 1 sc in each st around (90)
Round 27 :
Switch to Mustard. 1 sc in each st around (90)
Round 28 :
Switch to Cream. 1 sc in each st around (90)
Info :
These color rounds create the inner framed square background visible behind the sunflower. Carrying colors inside is possible here; if you prefer no visible floats on the surface, break and rejoin at color changes.
Round 29 :
Switch to Olive (for corner leaf placement). *Work until you reach a corner marker, sc in next 4 sts, 3 hdc in next ch-2 corner space, sc in next 4 sts* repeat around (90)
Round 30 :
Switch to Cream. 1 sc in each st around (90)
Round 31 :
Switch to Chocolate. 1 sc in each st around (90)
Round 32 :
Using Chocolate, sc in BLO around to create a defined edge ridge (90)
Info :
Fasten off, leaving a 12-18" tail for joining. We will make 6 of these sunflower squares for the runner. Block each square gently to flatten the petals and corners before joining.
— 3D Leaf Motif (Make 4) :
Round 1 :
Using Olive, ch 6, sc in 2nd ch from hook, 2 sc, hdc, dc, hdc, sc over last 2 chs; turn to work back along opposite side of chain: sc, hdc, dc, hdc, 2 sc, sl st to first sc (small leaf shell, counts variable but completes symmetrical leaf)
Round 2 :
Working around the leaf edge, *sc evenly around leaf edge to shape, then 3 sc in tip to create a rounded tip* fasten off leaving a long tail for sewing
Info :
Make 4 small leaves to serve as decorative buttons at the central intersections. Use a slightly smaller hook (3.5mm) if you want a firmer leaf that holds shape better when attached.
— Stripe Panel Segment (Make 3 long vertical panels and 3 short horizontal panels) :
Foundation :
With Chocolate, ch 46 (or to desired length to match square height; this foundation chain will determine panel width). Turn; these are worked in rows.
Row 1 :
Sc in 2nd ch from hook and across (45)
Row 2 :
Change to Cream, ch 1, turn, sc across (45)
Row 3 :
Change to Mustard, ch 1, turn, sc across (45)
Row 4 :
Change to Chocolate, ch 1, turn, sc across (45)
Row 5 :
Change to Olive, ch 1, turn, sc across (45)
Row 6 :
Change to Cream, ch 1, turn, sc across (45)
Info :
These six rows create the basic stripe unit seen in the photograph: narrow bands of color. Repeat these six rows to reach the required length for each stripe panel. For the vertical long panels, repeat the 6-row stripe motif until the panel height equals the combined height of three sunflower squares (or your desired runner height).
Row 7-36 :
Repeat Rows 1-6 sequence (maintain 45 sts) until panel reaches target length. Fasten off and make 3 long vertical panels and 3 shorter horizontal panels sized to fit between square rows.
Info :
Keep track of the exact number of repeats for each panel so matching seams align perfectly when joining squares and panels later. Use blocking to square panels before joining.
— Joining Squares and Panels (Join-as-you-go or sew) :
Info :
Layout: Arrange six sunflower squares into three rows of two squares with a vertical stripe panel running between the left and right column and shorter horizontal stripe panels between rows. Pin pieces together on a flat surface before joining so you can visualize placement.
Step 1 :
With right sides facing up, align a left-hand square and the central vertical panel. Using long tail from the square edge or matching yarn, whip-stitch through corresponding edge stitches to join; work evenly placing 1 stitch for every 1-2 sc across the seam. Repeat for the right-hand square and the other side of the panel. (Seam counts will match square-side counts; aim for even spacing, approx 90 points along the joined edge.)
Info :
For a cleaner join you may use mattress stitch placing the pieces side-by-side. If you prefer a softer seam, use slip-stitch join through the front loops only so the seam reads as a ridge on the top side.
Step 2 :
Join horizontal stripe panels between the rows in the same manner to create the grid seen in the image. Use stitch markers at midpoints and corners to keep seams straight and consistent.
Step 3 :
Sew the small 3D leaves at the four central intersections (where the vertical panel meets the horizontal panels) using the long tails left when you made each leaf. Place two leaves per intersection to create the clover-like motif shown; stitch through the base of each leaf and weave the tail through the body of the runner to secure. Repeat for all four intersections.
Info :
Position the leaves carefully before sewing — they should sit centered on the seam crossings and should be slightly raised to create the little decorative knots seen in the photograph.
— Final Border and Edging :
Round 1 (Border start) :
With Chocolate, join at any corner, ch 1, sc evenly around the entire assembled runner working 1 sc in each available edge stitch and working (sc, ch 2, sc) in each corner to keep edges square. Count will vary depending on your total assembled stitches—work evenly and place stitch markers at corners.
Round 2 :
Sc in each st around, working 2 sc in each corner ch-2 space (to fill corners). Maintain smooth edges; do not increase the count except in corner spaces.
Round 3 :
Switch to Rust/Terracotta. Sc in each st around (same stitch count as Round 2)
Round 4 :
Switch to Chocolate. Sc in each st around (same stitch count)
Round 5 :
Switch to Cream, sc in FLO around to create a subtle ridge (same stitch count)
Round 6 :
Switch to Chocolate. Sc in each st around; fasten off and weave in all ends. Trim tails close after weaving through several stitches.
Info :
The alternating color rounds in the border echo the stripe panels. The BLO round gives a defined inner edge that frames each square and the central stripes beautifully.
— Optional Finishing Details :
Detail 1 :
For extra texture, add a final round of hdc in Chocolate around the entire piece, or add small tassels to the short ends if you made a narrow runner. If you add tassels, make four small tassels evenly spaced along each short end and tie securely.
Detail 2 :
If you prefer an invisible join between squares, use the join-as-you-go method on the final round of each square: when you reach a seam edge, sl st into corresponding st on adjacent square before continuing your round. This method will eliminate sewing later and create a neat top-side seam.
Info :
Block the completed runner flat with light steam or spray blocking: pin edges and corners to exact shape to get a crisp, professional finish. Allow to dry fully before moving or using on a table.
Finishing this sunflower table runner is such a satisfying moment — all the petals, stripes and tiny leaves come together to create a warm, cottage-style centerpiece. The modular construction lets you expand or shorten the runner easily, and the textured petals add delightful depth to any table. I hope making this piece brings you as much joy as it brings color to your home. 🧶🌻✨