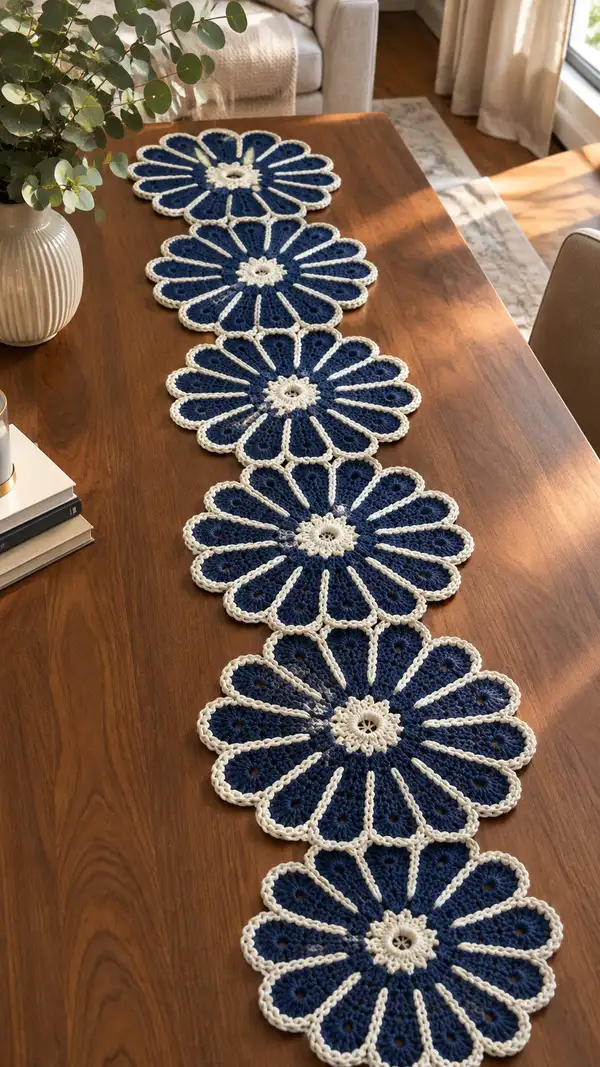
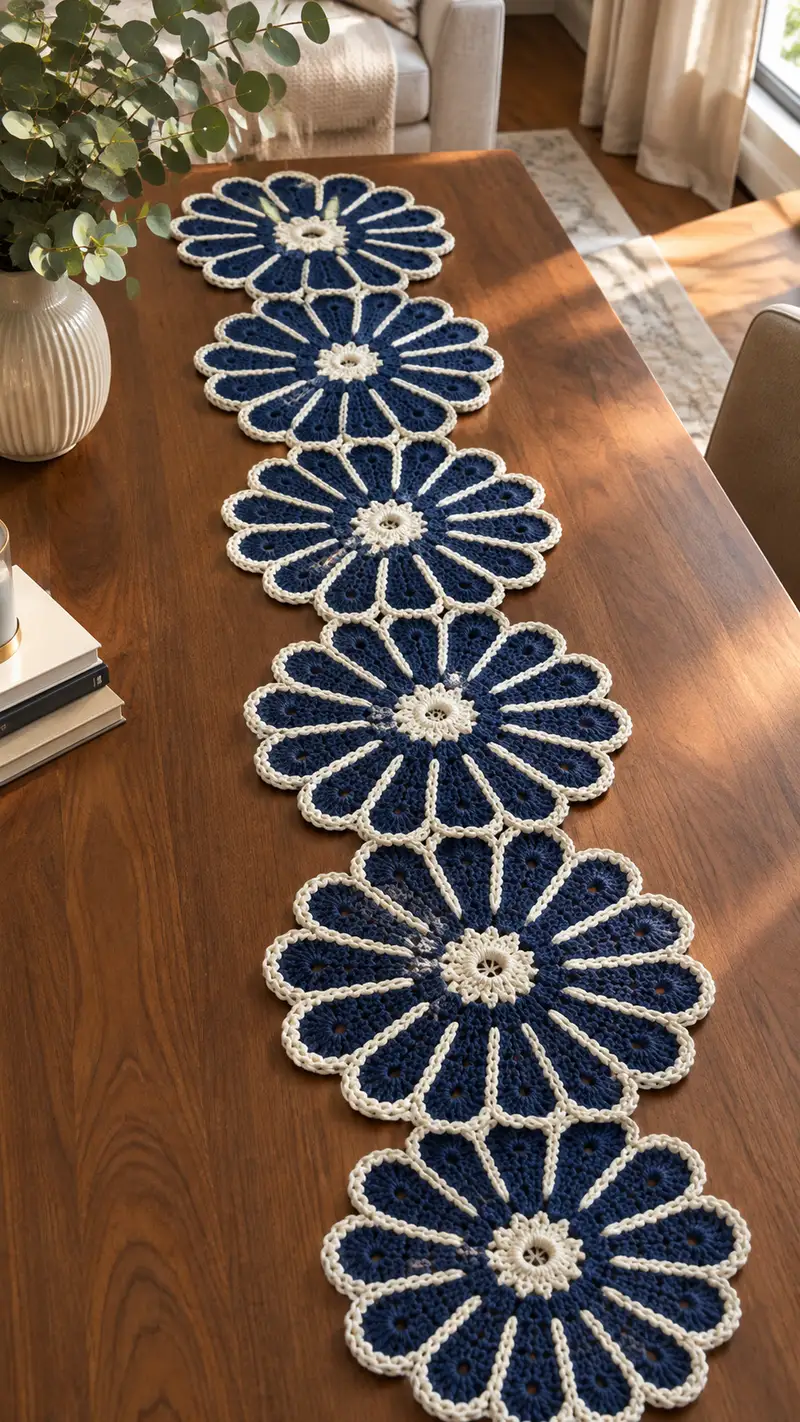
This elegant Daisy Chain Table Runner pattern creates a long row of daisy-like motifs worked in deep navy with a soft cream outline. Each motif is a layered round floral medallion with textured petals and a raised cream rib that defines each petal for a crisp, graphic look. The motifs are joined as you go to create a continuous runner perfect for a dining table, console, or sideboard. Detailed stitch-by-stitch rounds, joining options, and finishing instructions help you recreate the exact look shown.
Progress Tracker
0% Complete
— Motif (Make 7) :
Round 1 :
Using navy, make a magic ring. Ch 3 (counts as dc), work 11 dc into the ring, pull tight and join with sl st to top of ch 3 (12 dc) (12)
Round 2 :
Ch 3 (counts as dc). Work 2 dc in each dc around. Join with sl st to top of ch 3. (24)
Round 3 :
Ch 3, *dc in next st, 2 dc in next st* repeat from * to * around. Join. (36)
Round 4 :
Ch 3, *dc in next 2 sts, 2 dc in next st* repeat around. Join. (48)
Info :
Check the center circle is lying flat. If it cups, relax tension or block slightly later. This small solid disc is the motif's center.
Round 5 :
Ch 1, sc in same st and in next 3 sts, *ch 7, sc in next 4 sts* repeat from * around, ending with ch 7 and join with sl st to first sc. You will have 12 ch-7 loops for petals and 48 sc positions consumed. (12 ch-7 loops; base round uses 48 sc)
Info :
Each ch-7 loop defines one petal. Keep loops even in size—use the hook tip to measure the same length for every loop if necessary.
Round 6 :
Work petals into each ch-7 loop: join with sl st to the first ch-7 loop space, ch 1, (sc, hdc, 5 dc, hdc, sc) into loop, sl st into next sc from previous round to anchor petal; repeat for each loop. When you finish all 12, join to first sc. At the end of this round you will have 12 petals; round stitch count = 12 petals x 9 sts = 108 sts around the outer petal row. (108)
Round 7 :
Ch 2 (counts as hdc), *hdc in next 3 sts, 2 hdc in next st* repeat across each petal to create a smoother petal body and slightly increase the petal width. Work evenly across all petals. Join. (approx 144 — 12 petals x 12 hdc each = 144)
Info :
Check petals lay flat and symmetrical. Tug gently on each petal to even the tension if any are narrower or wider.
Round 8 :
Ch 1, sc in each st around working evenly through peaks and troughs of petals to compress slightly and define petal edges. Join. (144)
Round 9 :
Ch 3 (counts as dc), *2 dc in next st, dc in next 10 sts* repeat around to build a slight outer petal band. Join. (approx 156 — calculation: each pair of dc inc increases by 1 per 12-cycle; maintain count as you go and adjust to keep flat)
Info :
From Round 6 onward your stitch counts increase as you shape petal crowns; if your motifs are not lying flat, adjust tension or frog back a round and redo with slightly fewer increases in the outermost rounds.
Round 10 :
Ch 1, sc in each st around to compress the outer band and prepare for the raised ribs. Join. (156)
Round 11 :
Info :
Change to cream yarn now. Fasten off navy leaving a 10 cm tail to weave under later if you prefer, or carry it inside petals if working stripes. Cream will be used to create raised dividing ribs and the center ring.
Round 12 :
With cream, join into the base of any petal where the petal meets the center disc. Ch 1, sc evenly into 12 evenly spaced points around the inner ring where petals attach; we are creating an inner cream ring. Work 2 sc in the indicated center joins to make 12 or 24 sc depending on preference. For a neat center ring: work *sc in petal join, ch 3* repeat 12 times and join with sl st. (12 sc + ch spaces)
Round 13 :
Ch 1, work (sc, ch 2, sc) into each ch-3 space around to make a small cream picot- style ring. Join. (12 small picots)
Info :
This cream center will visually tie the motifs together when joined. Keep tension slightly looser here so the inner ring sits flat and doesn't pucker.
Round 14 :
Switch back to navy. Join navy at base of any petal top (outer edge of central disc). Ch 1, sc in same st and in next 12 sts across inner petal area to create a base row again. Join. (approx 48-60 depending on your spacing)
Round 15 :
Ch 2 (counts as hdc), *hdc in next 4 sts, 2 hdc in next st* repeat around to slightly expand a channel for the raised ribs to sit on. Join. (increased count from previous round; keep equal increases spaced across 12 petals)
Round 16 :
Ch 1, sc in each st around. Join. (same count as Round 15)
Info :
You will now create the raised ribs (cream) that define each petal. These are worked as surface slip stitches or as a chain ridge using cream yarn. Choose the method you prefer: surface slip stitch is flatter, FPdc ridges are more raised.
Round 17 :
With cream, join at the center above the first petal. Ch 1, *work a column: sl st down the center of the petal body from inner ring to outer edge (about 8-12 sl st depending on your petal height), secure with sl st at outer edge, ch 3 and sl st back to the inner ring anchor, then sl st into the next petal base. Repeat across all petals.* This creates evenly spaced cream ribs (no change to navy stitch counts). (12 ribs)
Info :
Work ribs consistently in the same stitch line on each petal. Use a stitch marker to mark the inner and outer anchor points of one petal and repeat those anchors for each rib for perfect symmetry.
Round 18 :
Switch to navy. Ch 1, sc around each petal tip and between ribs to blend the navy background and reduce gaps: sc in each stitch and in the small chain spaces at rib anchors. Join. (count dependent on previous rounds, approximately 156–180)
Round 19 :
Ch 2, hdc in each st for 2 rounds to firm the petal bodies and prepare the outer edging. Join each round. (same count each round)
Info :
Measure across the motif: it should be approximately 9-11 inches (23-28 cm) across depending on tension. If smaller or larger, adjust hook size or yarn weight accordingly.
Round 20 :
Ch 1, sc in each st around for a neat band to attach the outer scallop later. Join. (same count)
Round 21 :
Ch 3 (counts as dc), *skip 2 sts, (5 dc) in next st (shell), skip 2 sts, dc in next 3 sts* repeat around to create a scalloped petal edge; join. When working each shell, aim to center it on the petal tip. The number of shells should equal the number of petals (12). (approx 12 shells; total st count increases by shells)
Info :
Work the shells to be centered on each petal. If your shells shift into neighboring petals, frog and redistribute increases more evenly across the petal tip.
Round 22 :
Ch 1, sc in each st and 2 sc in the center of each shell to anchor them (this will slightly increase stitch count). Join. (new count reflective of shells; approx 200 sts)
Round 23 :
Change to cream. Join cream at any shell top. Work reverse single crochet (crab stitch) around the whole motif for a textured cream outline: working in the opposite direction, slanted single crochets in each st around. Join and fasten off, leaving a 20 cm tail for joining motifs. (same count as Round 22)
Info :
The crab stitch creates the tight rope-like cream edge shown. If you prefer less texture, work 1 sc in each st instead. Keep tension steady to maintain a uniform look.
Round 24 :
If you want a more pronounced scallop, rejoin cream and work picots at each shell peak as follows: sl st to shell peak, (ch 3, sl st into base of ch 3) to make a small picot; repeat at each shell peak around. Fasten off and weave ends. (12 picots)
Info :
Weave in the navy and cream tails now through nearby stitches, but leave joining tails that will be used to join motifs later. Blocking now after weaving ends but before final joining will make motifs lie perfectly flat.
— Petal Texture Rounds (Add detail & reinforcement) :
Round 25 :
Optional depth: With navy rejoined, work FPdc rows across each petal body by inserting the hook from front to back around the post of a dc three rows below (where appropriate) to make a subtle rib inside each petal; work FPdc in a vertical column across each petal top and secure at outer edge. Repeat for all petals. This won't change the round stitch count as FPdc replaces dc or hdc worked previously.
Info :
Front post stitches add height and texture and can be done as a decorative alternative to surface slip stitch ribs.
Assembly Instructions
- Join motifs as you go: On the final cream crab-stitch round of a completed motif, position the new motif adjacent to a finished motif so petals overlap slightly. Use the cream tail to sl st through the outer crab-stitch edge of the finished motif at every 3rd picot point to join; pin motifs first to ensure alignment.
- Sewing option: If you prefer sewn joins, use the navy yarn short tails left at each motif and whip stitch through the very edge of both motifs, pulling stitches snugly but not distorting the scallops.
- For straight runner alignment, place motifs center-to-center in a head-to-tail fashion (petal tips of one touching the center ring of the next) and pin along the seam before permanently joining; ensure each motif is oriented the same way to keep ribs aligned.
- When joining rows of three or more motifs, work join-as-you-go on one motif to attach to both neighbors: attach at outer scallop points and at inner ring anchors for stable joins.
- Finish the long runner edges by working an even cream border after all motifs are joined: work 1 sc around the outside edge of the entire runner, then 1 round of crab stitch to match individual motif finishing.
- After joining and finishing edges, wet-block the entire runner to final dimensions. Pin each motif flat ensuring seams are smooth. Allow to dry fully before removing pins.
- Weave all remaining tails under several stitches on the wrong side and trim close. For extra durability, secure some ends with a tiny dot of fabric glue hidden under stitches if desired.
- If using the runner as a functional table piece, consider backing with felt circles under each motif center for extra grip and to protect delicate surfaces.
Important Notes
- 💡Use stitch markers consistently at the beginning of each round to avoid counting errors and maintain symmetry in petals and shells.
- 💡Work motifs flat on a blocking surface as you finish each one; wet-block to exactly the same diameter so joins fit together evenly.
- 💡Stuffing is not used in this pattern; instead focus on tension and blocking to maintain a flat motif.
- 💡When changing colors, fasten off neatly leaving 20 cm tails for joining or weave in tails inside the motif to keep edges tidy.
- 💡For join-as-you-go, practice on two sample motifs to determine where your slip-stitches should land so the seam is nearly invisible.
- 💡Maintain consistent stitch tension across motifs; making one motif per sitting helps keep your tension consistent throughout a runner.
- 💡Keep a notepad with counts for each round so you can reproduce identical motifs on subsequent sets.
This Daisy Chain Table Runner transforms a dining table into an elegant, handmade display with timeless floral charm. Each medallion stitches into the next like a little row of garden daisies, and the navy-and-cream contrast draws the eye across the length of your table. Making this runner is both meditative and rewarding — you'll love placing it down and seeing how the motifs sing together. 🧶🌼 Share your finished runner with friends or keep it as a signature piece in your home. Happy stitching and happy hosting! ✨