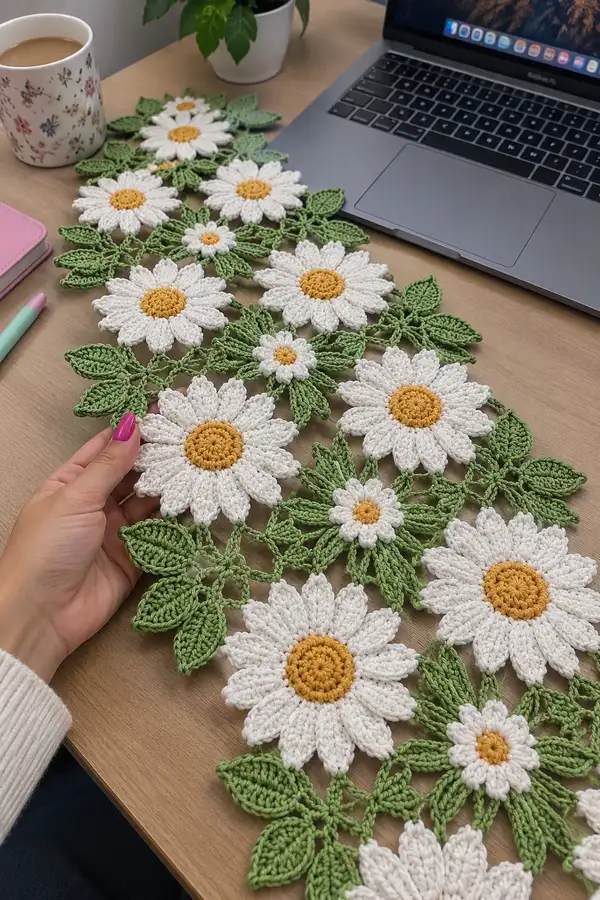
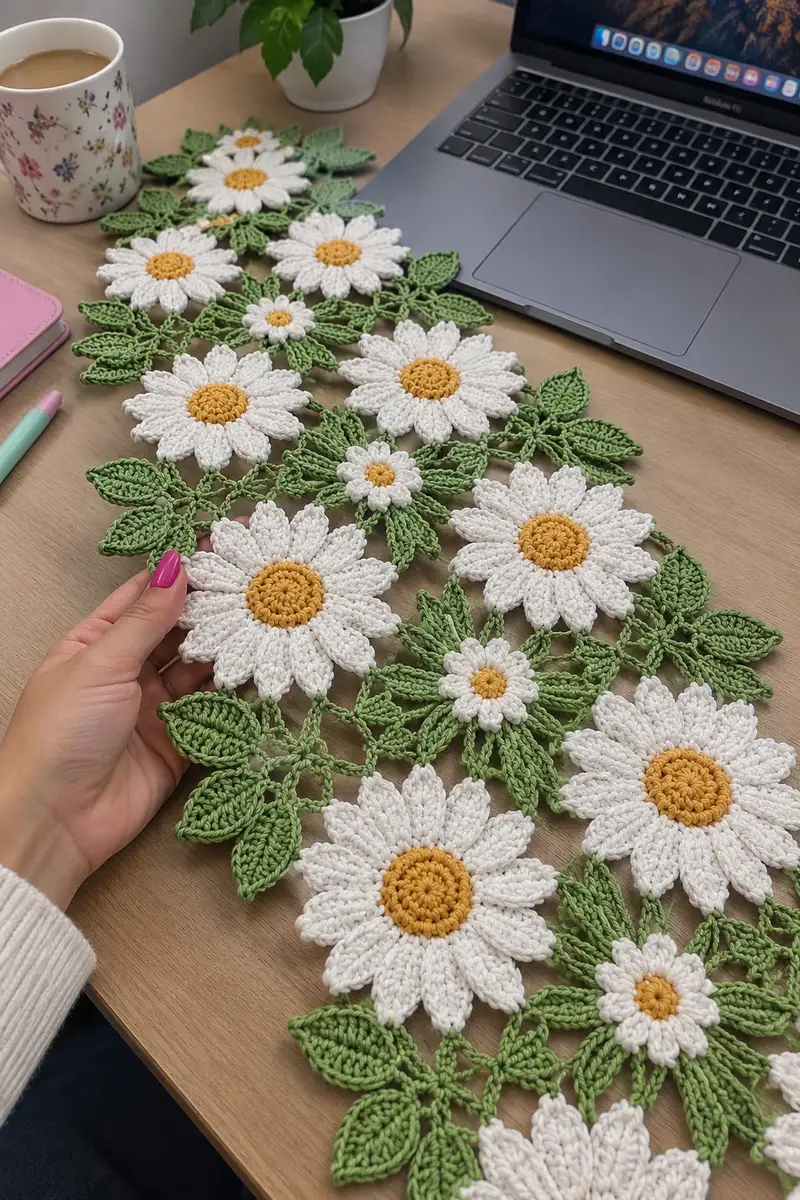
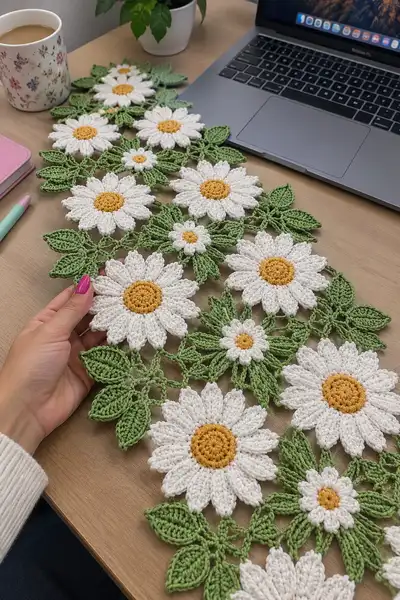
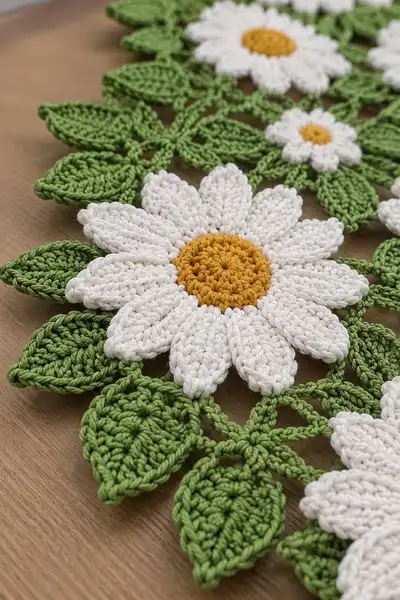
Bring a touch of spring to your table with this daisy lace table runner pattern. The design features large daisy motifs with layered petals, small daisies, and delicate leafy connectors crocheted in crisp white, sunny yellow and fresh green. The motifs are joined in a flowing, openwork layout to create a light, decorative runner that sits beautifully under a laptop, vase, or runner centerpiece. Perfect for cotton lovers and anyone who enjoys botanical, cottage-style decor.
Progress Tracker
0% Complete
— Overview :
Info :
This pattern describes three main motif types: Large Daisy motif, Small Daisy motif, and Leaf Connector motif. Work each motif flat. Join motifs using chain loops and slip stitches as described in the Joining and Assembly section. Block motifs lightly to flatten and even out stitches before joining. Use a 3.5mm hook for the described gauge and a dense, tidy fabric.
— Large Daisy (Make multiple as needed) :
Round 1 :
With golden yellow, 6 sc in magic ring (6)
Round 3 :
(1 sc, inc) x 6 (18)
Round 4 :
(2 sc, inc) x 6 (24)
Round 5 :
(3 sc, inc) x 6 (30)
Info :
These rounds form a flat disc for the daisy center. Keep tension consistent and press the stitches flat with your fingers to maintain a smooth centre for petal attachment.
Round 6 :
(4 sc, inc) x 6 (36)
Round 7 :
(5 sc, inc) x 6 (42)
Round 8 :
(6 sc, inc) x 6 (48)
Info :
Fasten off yellow center and switch to white for the petals. Join white in any stitch on Round 8 with a sl st where each petal will be made above one repeat - there will be 12 evenly spaced petal positions around this 48-st base (48/12=4; work petals into groups of 4 base sts).
Round 9 :
*sc in next 2 sts, ch4, skip next 2 sts, sc in next 2 sts* rep 12 times (48 base sts; 12 ch4 loops created)
Info :
The ch-4 loops form the foundation for each petal. Keep chain tension loose enough to allow petals to fan without pulling the center out of shape.
Round 10 :
Work petals into ch-4 loops: *(sl st into loop, ch1, sc, hdc, 3 dc, hdc, sc, sl st)* rep 12 times (12 petals formed; petals are worked around loops only)
Round 11 :
*sl st behind petal to base st, sc in next 3 base sts* rep 12 times (48)
Info :
Round 11 anchors petals back to the base and evens spacing. When working behind petals, keep stitches low so petals sit proud of the center.
Round 12 :
Prepare second petal layer base: *sc in next st, ch5, sc in next st* rep 24 times (24 chain-5 spaces across 48 base sts)
Round 13 :
Form second-layer petals: *(sl st into ch5, ch1, sc, 2 hdc, 5 dc, 2 hdc, sc, sl st)* into each ch5 rep 24 times (24 smaller petals arranged in alternating positions)
Info :
This second petal layer creates a fuller, dimensional daisy. For a flatter look, skip rounds 12-13 and work only the first petal row.
Round 14 :
Work an anchoring round: *sc in each base st and through the back of each second petal as you go* (approx 48 sc; keep count 48)
Round 15 :
Edge tidy: *sc in next 2 sts, picot on next st (ch3, sl st in 3rd ch), sc in next 2 sts* rep 8 times around to create subtle scalloped edges (count remains 48)
Info :
Fasten off and weave in ends leaving long tail if you want to use this as a labeled join point for assembly. Block motif gently to flatten petals so they spread evenly.
— Petal Refinement (Optional extra depth for large daisy) :
Round 1 :
Re-join white at base between petals with sl st then ch1, sc in same st to reinforce (48)
Round 2 :
*FLO: 1 sc in next 4 sts BLO across to create a subtle ridge behind petals* rep to end (48)
Info :
Working in BLO creates a back ridge that helps petals stand forward visually; use this only if you prefer more structure.
Round 3 :
Work small back-stitch decorative ridges between petals: *ch2, sl st into base at petal seam, ch2, sl st into next seam* rep 12 (decorative chain loops)
Info :
Fasten off and weave in ends. This refinement increases the visual thickness of the motif and helps with joining stability.
— Small Daisy (Make several for visual interest) :
Round 1 :
With golden yellow, 6 sc in magic ring (6)
Round 3 :
(1 sc, inc) x 6 (18)
Info :
Small daisies use fewer rounds to keep them compact. These small centers sit nicely between large daisies and leaf clusters.
Round 4 :
Join white, *sc, ch3, sc* around to create 6 chain-3 loops (use alternating base sts) (18 base sts; 6 ch3 loops)
Round 5 :
Petals: *(sl st in loop, ch1, sc, 2 dc, sc, sl st)* rep 6 (6 small petals)
Round 6 :
Anchor back: *sl st into base st and sc in following two base sts* rep to end (18)
Info :
Small daisies are quick to make and look great grouped in threes between larger daisies. Block lightly for consistency.
— Leaf Motif (Make many) :
Round 1 :
With green, ch6, join to form a small ring, or start with mr and 6 sc (choose ring style) (6)
Round 2 :
Work central vein: ch1, 10 sc into ring evenly (10)
Round 3 :
Begin shaping: *sc in next 2 sts, hdc in next, dc in next 2, tr in next 2, dc in next, hdc in next, sc in next* shaping left and right symmetric (10)
Round 4 :
Flip leaf and work return row along other side mirroring Round 3 to create point and fullness (10)
Info :
Work one side of the leaf along a short central chain and return along the opposite side; keep increases symmetric for neat shape. Leaves in the sample are plump and have a visible central vein formed by front post stitches in later rounds.
Round 5 :
Edge: *sc in next st, sc in next st, (3 dc cluster) in next, sc in next 2* rep around to define a ridged edge (10)
Round 6 :
FLO ridge: *1 sc in BLO for next 10 sts to create a raised vein behind leaf* (10)
Round 7 :
Make tip: *dec across last 4 sts to a point, chain 1 and secure* (6)
Round 8 :
Decorative picot at tip: *sc, ch3, sl st into 3rd ch, sc across base to start* complete both sides to produce finished leaf shape (10)
Info :
Leaves are normally made in pairs and joined by short chain stems to form leaf clusters. Make several sizes by varying the number of initial central chains (use ch8 for larger leaves).
— Leaf Cluster (Combine leaves into 1 cluster unit) :
Round 1 :
Create 3 medium leaves as above (3 leaves)
Round 2 :
Join leaves: Position leaves in a 3-point arrangement, join with green by working into edge sts of adjacent leaves: sl st through leaf edge, ch6 to form stem connector, sl st into adjacent leaf edge, rep to form 3 connectors
Info :
These clusters mirror the photo where small daisies sit within a star of leaf points. Make many clusters; vary spacing to shape your runner as desired.
— Connector Chain & Lacy Net (Build the openwork lattice) :
Round 1 :
With green, attach at a leaf cluster junction, ch8, sl st into designated petal seam on adjacent daisy to form a long connector (8-ch loop)
Round 2 :
*From that point, ch5, sc into next motif join point, ch5, sl st into next motif* rep to create repeating diamond-shaped spaces between motifs
Round 3 :
Strengthen lattice: *work sc around each chain space: (sc, ch2, sc) into each chain-5 loop* so the lattice is firm yet lacy
Info :
Chains vary in length between motifs to suit your layout. Keep chain loops consistent for an even openwork pattern. Use stitch markers to mark corresponding joining points on motifs for neat alignment.
Round 4 :
Decorative double net: *in each diamond space, ch3, sl st to opposing edge and chain 3 again to create an X effect* rep across runner sections
Round 5 :
Fasten off and weave in ends at several connector points to prevent stretching
— Joining Motifs (Detailed step-by-step assembly) :
Info :
Pin your motifs in the desired layout on a blocking mat. Use rust-proof pins and a ruler to keep spacing even. Joining is done with green yarn so joins blend into leafwork; you may also join with a neutral color if you prefer visible seams.
Round 1 :
Join first large daisy to adjacent daisy: align petal seams, holding motifs wrong sides together, insert hook through both base stitches at seam and sl st across 6 seam points (approx 6 sl sts per seam) to create a stable seam
Round 2 :
Bridge with chain connectors: at each junction between daisies add ch6 loops attached into petal gaps to later loop into leaf clusters (maintain 6 ch loops per seam)
Info :
When joining, sew along the anchors used in Round 11 and Round 14 of each daisy where the petals meet the center — these are strongest points for reliable joins.
Round 3 :
Attach small daisies: position in triangular voids created by larger daisies and secure by slip stitching through 3-4 petal bases so they bridge adjacent large motifs
Round 4 :
Attach leaf clusters: using slip st and short chains, join leaf clusters to junctions around daisies: at each leaf attach point make 3 sl st and a ch8 stem that attaches to a petal base on a nearby daisy
Round 5 :
Reinforce all joins: go back through each connection and add an extra sl st or sc to tighten and prevent sagging over time
Info :
Take time to pin and adjust join spacing — visual symmetry is key. Joining is as much assembly as crochet: small adjustments before final sewing make a huge difference.
— Edge and Final Border (Give runner a finished rim) :
Round 1 :
With green, join at one edge and work 1 sc evenly around the entire runner following motif edges, placing 2 sc at corners or petal tips to accommodate curvature (maintain count by eye)
Round 2 :
*(ch3, skip 2 sts, sc in next) rep around to create airy scallop net* (sc count will vary with runner length)
Info :
If your runner is long, break yarn and join fresh skeins with a neat join to avoid lumps. Work border evenly and try it on as you go to maintain consistent tension.
Round 3 :
Decorative shell: *in each ch3 sp work (2 dc, ch1, 2 dc), sl st into next sc* rep to end to create small shell scallops
Round 4 :
Picot finish: *sc into top of each shell, ch3, sl st into 3rd ch for picot, sc into next shell top* rep for neat finish
Info :
Fasten off, weave in all tails along the underside of the runner using a yarn needle. Trim any excess and re-block the runner flat if necessary.
— Alternate Joining Variation (Tighter & Decorative) :
Round 1 :
Create visible join: use white to single crochet through edges of adjacent petals to create a fine, visible seam between daisies for a continuous white line effect
Round 2 :
Overcast join: after sc joining, work a row of sl st around the whole runner in green to blend with leafwork and secure all joins
Info :
This method gives a slightly denser runner and can be used for a sturdier table runner that sees frequent use.
— Finishing Touches :
Info :
After sewing motifs together and tidying ends, press or lightly steam block the runner on a towel using moderate heat — do not iron directly on mercerized cotton. For extra stiffness, mist with diluted starch and pin to shape until dry.
Info :
Optional: add small decorative beads or a loop at one end to hang the runner as wall art rather than on a table.
Info :
Pattern note: counts for some openwork rounds vary with runner length and arrangement; when counts are approximate the visual spacing is the primary guide — maintain symmetry and even loop sizes rather than exact numeric counts for long chain networks.
This daisy lace table runner makes a lovely accent for any room — a little sunshine and texture for your tabletop! The modular motif construction makes it a relaxing, repeatable project that also allows for lots of creative freedom. Whether you make a short centerpiece runner or a longer table runner, you'll enjoy seeing each motif come together into a natural, floral composition. 🧶🌼 Add a light starch finish for a crisp look and display proudly on your favorite table. Happy stitching! ✨