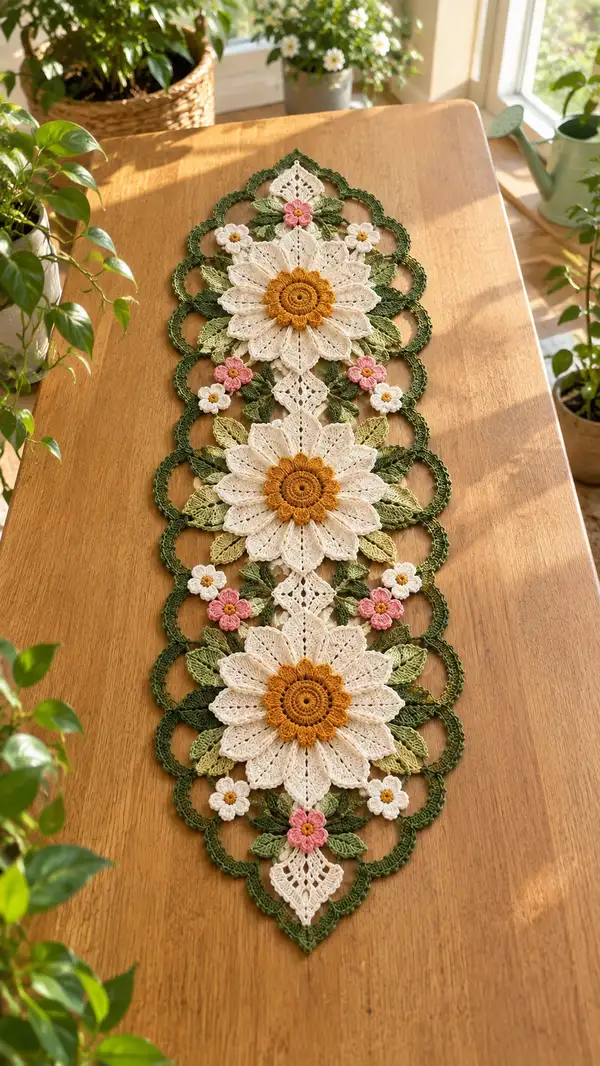
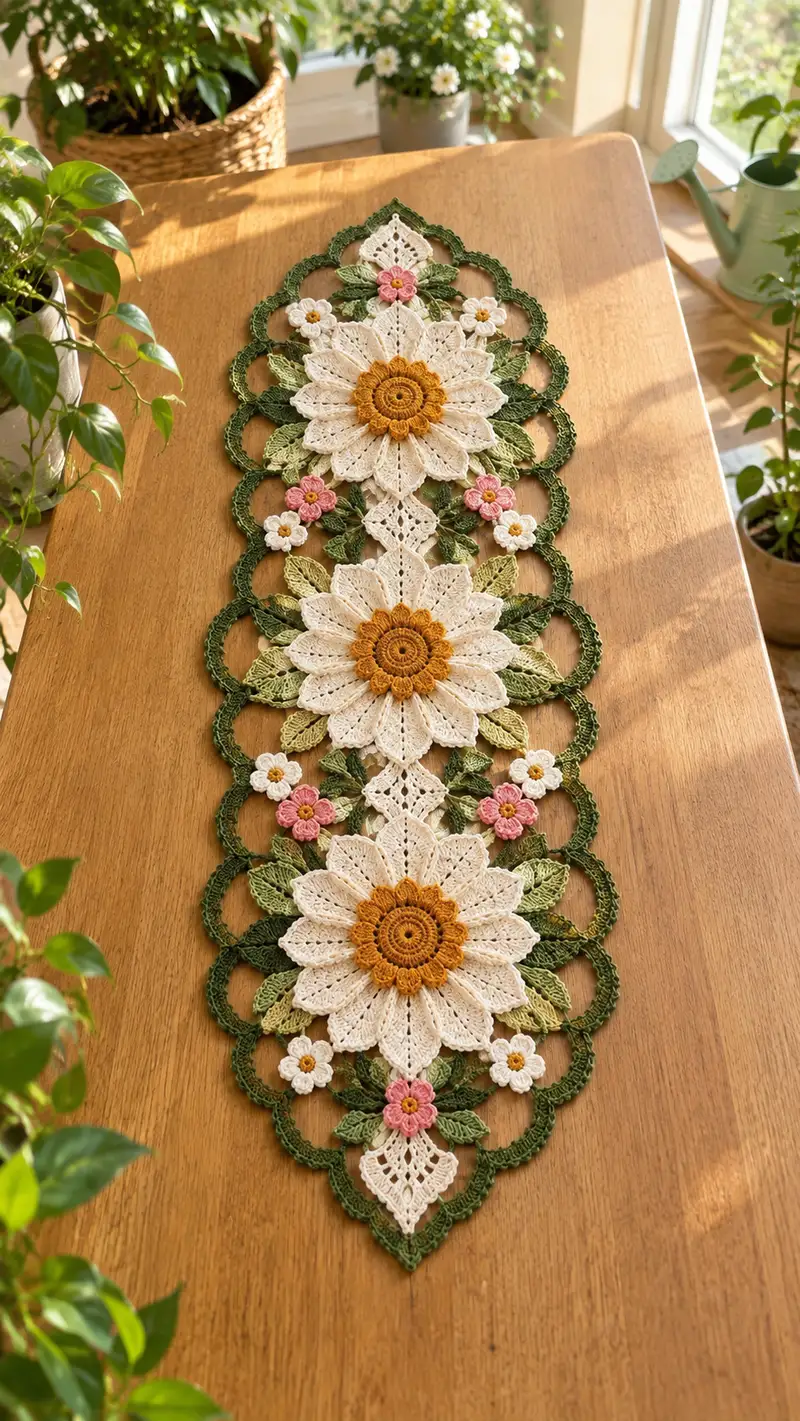
A delicate, vintage-inspired crochet table runner featuring three large daisy medallions connected by lacy diamond motifs, leafy sprays and tiny pink and white flowers. Worked in fine mercerized cotton, the runner has a scalloped green border and layered petals with a warm golden center. Perfect as a centerpiece for a dining table, sideboard or dresser — this pattern recreates the airy, hand-crafted look shown in the photo.
Progress Tracker
0% Complete
— Large Daisy Medallion (make 3 identical) :
Round 1 :
6 sc in magic ring (6)
Round 2 :
Inc in each st around (6 inc) (12)
Round 3 :
(1 sc, inc) x 6 (18)
Round 4 :
(2 sc, inc) x 6 (24)
Round 5 :
(3 sc, inc) x 6 (30)
Round 6 :
(4 sc, inc) x 6 (36)
Round 7 :
1 sc in each st (36)
Info :
This central disc gives a stable base for later petals. Use mustard/golden yarn for the center up through Round 11. Keep tension slightly firm so the center sits proud and doesn't collapse under petals.
Round 8 :
*1 sc in next 2 sts, ch 3, sk 1* around (12 ch-3 loops; base remains worked over 36 sts)
Round 9 :
Change to petal color (cream). Work into each ch-3 loop: (sc, hdc, 5 dc, hdc, sc) - complete petal. Work 12 petals total. (12 petals; base still 36 foundation sts)
Info :
When making petals, keep the first and last stitches of each petal neat; place a stitch marker at petal 1 so you can track rounds. After this round you will have 12 distinct petals radiating from the center.
Round 10 :
Work behind petals to stabilize: Join in base stitch between petals with sl st, ch1, *1 sc in base st, ch2, sk petal top edge, 1 sc between petals* repeat to go around (36 base sc spaces maintained in foundation)
Round 11 :
Into each petal top (work behind petals): join in base, *tr, dtr, tr* into top of each petal to create a slightly raised ring around center (12 clusters total). Fasten off mustard center if desired and weave in tail. (Structure: 12 clusters)
Info :
At this stage the center and first petal layer are complete. If you want a deeper center, add an extra round of mustard ruffles by working picot edges into the top of the round-11 clusters before continuing to outer petal shaping.
Round 12 :
Rotate work and rejoin cream at base between petals. *ch4, sl st in top of next petal (creates long lacy chain between petals)* Repeat around to form loops for second-layer petal anchoring (12 loops)
Round 13 :
Work second-layer petals into each ch-4 loop: *(sc, sc, hdc, 7 dc, hdc, sc, sc)* into ch-4 loop. This produces broader petals that will overlap first layer. Make 12 petals (structure: 12 outer petals)
Info :
Ensure petals are evenly spaced and not twisted. Adjust by sliding stitches along base if one petal seems too close to neighbor. Each petal is worked into its loop only so counts remain clear by petals (12).
Round 14 :
Turn placement round: Work 1 sc between petals (on base), then *ch 5, sl st into the center of next outer petal* around to create scallop foundation for leaf joins (12 ch-5 loops)
Round 15 :
Change to light green yarn. Work leaf-attachment chains: into each ch-5 loop: ch3, sl st to form small anchor, fasten off light green if you prefer to work leaves later separately. (12 anchors)
Info :
These anchors mark where the larger leaves will connect. For a layered, natural look make two types of leaves: long and short. This round prepares the bases for both types to be attached.
Round 16 :
Join cream in a hidden base spot and work a narrow decorative lace between petals: *sc in next 3 base sts, ch3, sl st in next base st* repeat around to add a delicate lacy web under petals (maintain base count equivalence)
Round 17 :
Edge stabilization: 1 sc in each base st around where not working petal elements to secure and tidy intersections. If gaps appear, add a picot (ch3, sl st in third ch) every 6 stitches for visual interest (36 base stabilizing sc)
Round 18 :
Optional second round of outer petal edging in cream: *sc, hdc, 3 dc in petal tip, hdc, sc* across each petal tip to give fuller, lacy edge. Work the sequence into each outer petal (12 petal tips)
Info :
At this point the medallion is approximately complete. Block the medallion flat to open petals before assembly. Make three identical medallions for the runner. Keep tails long for joining or leave long tails to sew each motif together later.
Round 19 :
Work a decorative chain loop around the entire medallion foundation: *ch7, sl st into a base st between petals* repeat to create 12 long loops around medallion for connector motifs
Round 20 :
Secure loops and form scalloped border join points: Into each ch-7 loop work *(sc, ch3, sc, ch3, sc)* producing small arches; fasten off cream if desired. (12 scallops)
Round 21 :
Change to dark green to begin external scalloped border. Join at one scallop and work *ch2, 5 dc in arch, ch2, sl st in next arch top* around to form deep scallops. Count: 12 large scallops formed.
Round 22 :
Work picot edge on scallops: Into each large scallop work *(sc, ch3, sl st in 3rd ch) x 3* to create three small picots across the top of each scallop for texture. The scalloped circumference is complete and forms the outer curve of the medallion.
Round 23 :
Bind points for joining: Work sl st along the underside of scallops every 3-4 stitches to create secure spots for later join-as-you-go connections. Fasten off and leave long tail for sewing if you prefer sewing joins rather than JAYG.
Info :
Repeat the entire Large Daisy Medallion sequence two more times to create three medallions. Number each medallion 1, 2, 3 in order from one end of the runner to the other so joining is consistent and symmetrical.
— Small Five-Petal Flower (make 12 total; pink and white) :
Round 1 :
6 sc in magic ring (6)
Round 2 :
Inc in each st (6 inc) (12)
Round 3 :
Change to petal color (pink for half, white for half). *ch3, sl st in next st* around to form 6 tiny loops (6 ch-3 loops)
Round 4 :
Work petals into each ch-3 loop: (sc, hdc, 3 dc, hdc, sc) = 6 petals. Fasten off and weave ends. Make 6 pink and 6 white flowers. (6 petals each)
Info :
Use a small crochet hook (1.25–1.5mm) to keep petals crisp. These tiny flowers are used as accents between medallions and near leaves — position them aesthetically during blocking and assembly.
— Small Round Center Accent (for tiny white flower centers) (make 12) :
Round 1 :
6 sc in magic ring (6)
Round 2 :
1 sc in each st (6). Fasten off leaving small tail to sew to pink flowers centers.
Info :
Sew these tiny discs to the center of each small five-petal flower or use a yellow thread knot to simulate a tiny button center. Make 12 small centers.
— Leaf (Make 18-24 assorted leaves; alternate light green and dark green) :
Round 1 :
Ch 12, sc in 2nd ch from hook, hdc in next, *dc in next 3, hdc in next, sc in next, sl st* to turn and work other side: sc, hdc, dc x3, hdc, sc across other side of chain; sl st to join. (approx 22 sts worked; leaf symmetrical)
Round 2 :
With same yarn, work BLO around entire leaf to create rib: 1 sc in each st BLO across (22 BLO sc). Fasten off and weave tail. Make long leaves by starting ch 16 instead of ch 12 if desired.
Info :
For more texture, embroider a central vein down the leaf using a length of contrasting green and a yarn needle with a chain stitch or surface slip stitch. Block leaves with a mild starch spray for a natural curve.
— Diamond Filler Motif (Make 4) :
Round 1 :
6 sc in magic ring (6)
Round 2 :
(1 sc, inc) x 3 around forming a small hexagon (9)
Round 3 :
*ch 4, sl st in next st* repeat to make 3 ch-4 loops spaced around (3 loops)
Round 4 :
Into each ch-4 loop work a triangular fan: (sc, hdc, 3 dc, hdc, sc) then sl st to next base; shape into a diamond edge using small picots at tip points. Fasten off and block into a diamond shape.
Info :
These small diamond filler motifs sit between medallions and help create a continuous central spine to the runner. Make 4 and position them between the three large flowers (one between medallion 1 and 2, and one between 2 and 3; use two half diamonds at ends if needed).
— Joining & Center Connector Rounds :
Round 1 :
Lay medallion 1 flat. Identify the ch-7 long loops (12) from Round 19 and the dark-green scallop sl st join points from Round 23. Place medallion 2 below medallion 1 aligned so petals mirror each other. Using dark green and working JAYG (join-as-you-go), attach by inserting hook through one long loop of medallion 1, chain 1, sl st into corresponding loop of medallion 2, then continue around to join at 6 evenly spaced points (approx every other long loop) forming a narrow connection. Secure and weave ends. This produces an interlocking chain of medallions.
Info :
Pin medallions in perfect alignment before joining. If you prefer sewing rather than JAYG, use a matching yarn tail and a mattress or whip stitch along the join points for a flat seam. Count base scallops so joins meet at symmetrical petals (join at petals 2, 5, 8 etc.).
Round 2 :
Attach diamond fillers in the center connection between medallions: using cream, sew diamond motif to join points so it sits flat between the two medallions. Reinforce by stitching through three points on each medallion and through diamond motif edges. Repeat for both connections.
Round 3 :
Lay out leaves and small flowers: tuck long leaves under outer petal bases (Round 14 anchors) so leaf tips point outward between scallops. Sew light-green and dark-green leaves alternately with 2-3 small stitches at their base to secure. Position small pink and white flowers between leaves and stitch centers with small round center discs. Add tiny white flowers as filler near scallops and edges.
Info :
Assembly is flexible — position accent flowers for a pleasing repeating rhythm. Use pins and step back frequently to check symmetry along the runner's length before permanent sewing.
— Outer Scalloped Border and Final Edge :
Round 1 :
With runner assembled but unblocked, join dark green at a corner scallop of medallion 1 and work along entire outer rim: *(ch2, 7 dc in next arch, ch2, sl st in next arch top), sl st across small join stitches* Continue around all medallions and connector diamonds until entire outer circumference is completed with large scallops. Count will equal number of scallops created earlier across medallions (approx 36 large scallops across full runner, depending on joins).
Round 2 :
Work second round on scallops: Into each large scallop work *(sc, ch3, sc, ch3, sc)* to create triple picot points across each scallop top. This will create small decorative peaks. Maintain consistency and count to ensure scallops across joins match.
Round 3 :
Edge finishing round: 1 sc evenly distributed around entire runner’s outermost edge and into spaces across diamond filler tips. If you encounter gaps between motifs, add extra sc or small ch-3 loops to fill and even the line. Fasten off and weave all tails beneath stitches to hide ends.
Info :
Blocking: wet-block the entire runner carefully. Pin each scallop and petal flat to open the lace. Allow to dry fully before removing pins. Light starch can be applied for a more rigid runner if desired. This is a delicate table runner best used under glass or as a decorative overlay.
— Additional Finishing Touches (embellishment rounds) :
Round 1 :
Create tiny embroidered veins and centers: With mustard thread, embroider tiny French knots in center of each small flower. With darker green, add a few dashed veins across longer leaves using a yarn needle and sl st technique.
Info :
These subtle embroidery touches add artisan detail. If gifting, consider tacking down any very mobile petals at one or two underside points to prevent catching during handling.
Round 2 :
Carefully press with a warm iron and damp cloth if necessary, but avoid direct high heat on mercerized cotton to preserve sheen. Once complete, measure runner across its widest point and length; typical finished size with specified thread and hook will be approximately 90–100 cm long and 22–26 cm wide, depending on blocking and tension.
Info :
Store runner flat folded or rolled. Avoid heavy objects placed atop to keep scallops and petals pristine. If you plan to use as a daily table runner, consider stitching a thin protective backing of organza or fine linen to underside to protect delicate motifs.
This lovely daisy lace table runner brings vintage charm and botanical beauty to any tabletop — each medallion, leaf and tiny flower is crafted with care to create a flowing, elegant centerpiece. The warm golden centers and cream layered petals pop against the deep green scallop border, creating a balanced and inviting piece. I hope you enjoy making and styling this runner as much as I enjoyed designing the pattern — it's ideal for gift-giving or a special treat for your own home. 🌼🧶