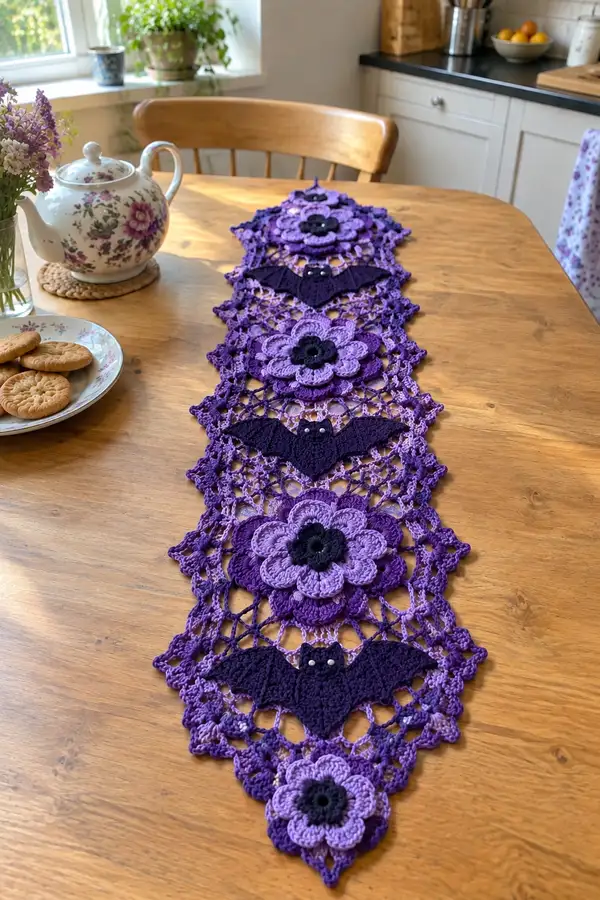
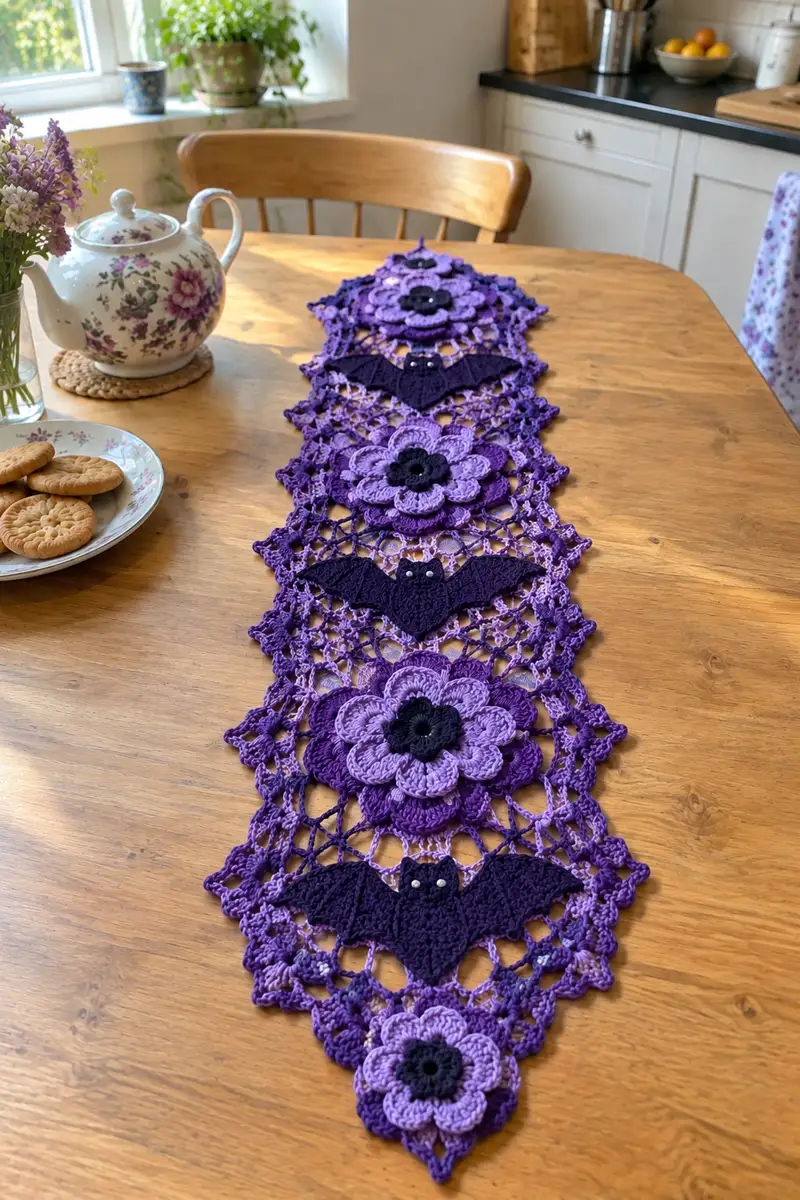
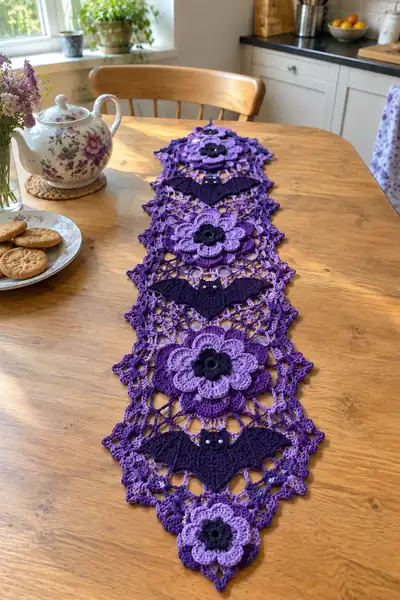
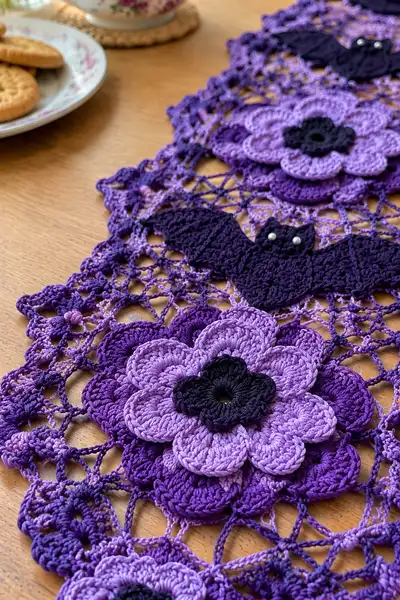
A lacy, detachable Halloween table runner featuring layered purple flowers and flat bat motifs joined by a delicate openwork lattice. This runner uses graduated shades of purple and deep plum accents to create dramatic flowers, with little beaded eyes on the bats for whimsical detail. The motifs are crocheted separately and joined with a decorative lace joinery, making it easy to wash or change components for seasonal flair. A striking centerpiece for autumn or Halloween tables, designed to lay flat and showcase the layered texture.
Progress Tracker
0% Complete
— Materials & Gauge :
Info :
Gauge is not critical for design but affects finished length. Sample 10cm square in filet/shell pattern = 12 dc and 8 rows using 3.5mm hook. Use cotton/worsted yarn for crisp lace and blocking behavior.
— Large Layered Flower (Make 3) :
Round 1 :
6 sc in magic ring (6)
Round 3 :
(1 sc, 1 inc) x 6 (18)
Round 4 :
(2 sc, 1 inc) x 6 (24)
Round 5 :
(3 sc, 1 inc) x 6 (30)
Round 6 :
(4 sc, 1 inc) x 6 (36)
Info :
Change to slightly lighter purple yarn if making two-tone petal layers. Fasten off color if changing; leave a short tail for weaving.
Round 7 :
1 sc in each st (36)
Round 8 :
*ch 3, sk next st, sl st into next st* around to create 12 ch-3 loops; join with sl st (36)
Round 9 :
In each ch-3 loop: (sc, hdc, 3 dc, hdc, sc) — 12 petals (12 petals/cluster)
Info :
Petal round forms first sculpted layer. Work petals evenly; push clusters outward to shape as you work.
Round 10 :
Ch 1, sc in top of first petal cluster, ch 5, *sc between next two petals, ch 5* around, join (12 ch-5 loops)
Round 11 :
In each ch-5 loop: (sc, 2 hdc, 5 dc, 2 hdc, sc) — 12 larger petals
Round 12 :
Ch 2, dc in each of next 5 dc of petal, *ch 4, skip to next petal point, dc 5 across next petal* — creates scalloped link (60 dc total across petal rims)
Info :
At this stage you have an inner layer and a second larger layer creating depth. Block lightly to ensure petals lay flat before continuing further layers.
Round 13 :
(1 sc in each st around edge and across petal tops) — approx 72 sc (adjust to fit petals evenly)
Round 14 :
*ch 3, sk 2 sc, 1 sc in next sc* around to create 24 ch-3 picot spaces; join (24)
Round 15 :
In each ch-3 space: (sc, hdc, 3 dc, hdc, sc) — 24 tiny outer petals (24 petals)
Round 16 :
Sc evenly around petals working 2 sc in base of some petals to preserve round count — approx 96 sc
Info :
Now prepare center embellishment: work small round separately in deep plum or black for contrast. This will be sewn to the center.
Center Round A :
Using deep plum/black, mr, ch1, 8 sc into ring (8), sl st to join
Center Round B :
(1 sc, inc) x 4 (12)
Center Round C :
1 sc in each st around (12); fasten off leaving long tail for sewing
Round 17 :
Sew center rounds to middle of flower securely with long tail, stitching through back loops only of center to create small depression and fastening so petals cup slightly.
Round 18 :
Optional surface crochet row: pick up outer edge and work crab stitch (reverse sc) around to give a finished oriented edge (approx 96)
Info :
Fasten off and weave in ends. Block flower flat, shaping petals outward in a pleasing layered arrangement. Make 3 identical flowers, alternating shades as pictured (dark, medium, light for petal layers).
— Small End Flower (Make 2) :
Round 1 :
mr, ch1, 6 sc (6)
Round 3 :
(1 sc, inc) x 6 (18)
Round 4 :
*ch 3, sk 1, sc* around creating 6 ch-3 loops (18)
Round 5 :
In each ch-3: (sc, hdc, 3 dc, hdc, sc) — 6 petals
Round 6 :
Sc around petals evenly, adding small picots at petal tips if desired — approx 36 sc
Info :
These small flowers form the pointed ends of the runner. Block and press to create triangular points. Sew or join at specific lace join points in final assembly.
— Bat Motif (Flat; Make 3) :
Round 1 :
Using deep plum/very dark purple: ch 8, join with sl st to form loop (8)
Round 2 :
Ch1, work 16 sc evenly around loop (16)
Round 3 :
Ch3 (counts as tr), tr in next st, (2 tr in next st) x 2, ch3, skip 2, 5 tr across to shape left wing, ch3, 2 tr in next 2 sts to create central head and right wing mirror, sl st to base — shape bats symmetrically (exact counts will vary; end approx 40 sts)
Round 4 :
Work in rounds of DC clusters to flesh wings: in each wing edge work (dc, tr, dtr) clusters into wing curves, using ch-3 arches to define scallop points — maintain symmetry left to right
Info :
The bat is worked flat; shaping relies on variable height stitches to create wing arcs. Keep stitch counts mirrored. Use a stitch marker at center top to maintain orientation.
Round 5 :
Turn piece and work a row of sc around entire bat silhouette to neaten edge, adding 2 sc in concave corners to prevent pucker (approx 48 sc)
Round 6 :
Create small ear tabs: at head area ch3, sl st across 3 sts to make ear point; fasten off. Repeat mirror ear on other side. Add small dab of glue and stitch seed beads for eyes, or use tiny embroidered French knots (2 beads per bat).
Info :
When attaching eyes, secure beads by sewing through motif and tying multiple knots at back side, then melt a very small dab of glue for security. Alternatively embroider eyes before blocking to avoid shifting.
Round 7 :
Edgestitch in BLO around bat with sc to create a defined wing ridge if desired (approx 48)
Round 8 :
Fasten off and block bats flat, pinning wings to desired curve. Make 3 bats to alternate between large flowers.
— Diamond Lace Connector Motif (Make 6) :
Round 1 :
Ch 6, sl st to form ring, ch3 (counts as dc), 11 dc into ring (12 dc)
Round 2 :
Ch 4, *sk 1 dc, (dc, ch 2, dc) into next dc, ch 4* around to create 6 loops; join with sl st (6 dc clusters/loops)
Round 3 :
In each ch-4 loop: (sc, ch5, sc) — 6 long chain arches forming diamond sides
Round 4 :
Join arches: sl st into center of next arch, ch 3, dc into center of arch across, ch3, sl st into next arch center — creates inner lattice (approx 12 dcs across)
Info :
These units are the geometric diamonds that sit between flowers and bats. Keep tension even to maintain flat diamonds. Make 6 units for the runner layout in the photo.
Round 5 :
Round of shells: *ch2, 5 dc in ch5 loop, ch2, sl st to next arch* around to give the diamond a scalloped perimeter (6 shells)
Round 6 :
Sc evenly around shells and join with sl st. Fasten off leaving long tails for joining (approx 72 sc)
Info :
Blocking these diamonds on a square template will make joining easier. Pin to exact diamond shape measuring same height as flower petals for even joins.
— Joining Layout & Preparation :
Info :
Layout sequence (from pointed end to the other): small flower (point) — diamond — bat — diamond — large flower — diamond — bat — diamond — large flower — diamond — bat — diamond — large flower — diamond — small flower. See photos for spacing. Ensure all motifs are blocked and identical orientation before joining.
Info :
Before join, pin motifs to blocking board or towel over the table to match spacing exactly. Use additional chain-join pieces if you need to lengthen or tighten the runner to desired length.
— Joining Motifs (Lace Join Stitch Method) :
Round 1 :
With matching yarn, join at a corner point where two motifs meet using sl st, ch5, sc into corresponding loop on opposite motif, ch5, sl st into next join point — repeat across join to create even 5-ch arcs between motifs
Round 2 :
Once initial chain arcs are in place, go back and sc into each ch-5 arc on both motifs alternating to make a secure visible lace bridge (approx 4-6 sc per join depending on motif spacing)
Info :
Use matching yarn color so joins are unobtrusive. Tension on chain joins determines how open or tight the final lace will appear; test a small join first.
Round 3 :
After joining motifs in pairs, reinforce joins by working a small shell (sc, hdc, 3 dc, hdc, sc) centered on each chain arch to mimic the lace pattern and even out weight across the runner.
Info :
Work slowly and pin after each major join so the runner stays perfectly flat. Weave tails into back so joins remain tidy.
— Decorative Mesh Fill Rounds (Between Motifs) :
Round 1 :
Working in spaces between joined motifs, ch7, sl st into next open point to create elongated net loops that echo the photo's diamond mesh. Repeat across each open interval (these are decorative only)
Round 2 :
Return on second pass: sc into top of each ch7 loop, *ch4, sc into next loop* across to create triangular lacy spans. Work evenly to maintain geometry.
Info :
These mesh spans form the airy structure you can see between flowers and bats. Make sure to keep them consistent so the runner edges are straight.
— Outer Edge & Pointed Tips (Runner Ends) :
Round 1 :
With medium purple, join at outermost perimeter point and sc evenly around runner edges, adding 3 sc clusters into concave inside corners to keep edges flat (approx 200-220 sc total depending on join density)
Round 2 :
*ch3, sk 2 sc, 1 sc* around to create a scalloped perimeter repeat; join (approx 60 scallops)
Round 3 :
In each scallop: (sc, hdc, 3 dc, hdc, sc) to accent outer edge and to create pointed tip shapes at runner ends (60 scallops)
Info :
For pointed ends where a small flower sits, work a slightly larger last scallop with extra dc cluster to create a triangle shape; pin and block to sharpen the point.
— Decorative Surface Stitches & Finishing Touches :
Round 1 :
Optional surface slip-stitch ridges: with contrasting darkest shade, surface sl st along petal ridges and wing tops to accent details; secure ends and weave in thoroughly
Round 2 :
Sew bat beads or embroider two tiny eyes per bat using small beads or french knots. Secure beads with a drop of fabric glue behind the knot for added hold.
Info :
Weave all tails into the back side of the runner so the front shows only neat stitches. Trim stray fibers and lightly steam-block the entire runner by pinning to shape, using a steam iron held a few inches away or wet-spray and air dry.
— Extra Decorative Edge Option (Picot Fringe) :
Round 1 :
With contrasting light purple, sc around outermost edge, *ch3, sl st into base to make small picot* repeat to add delicate fringe (approx 60 picots)
Info :
This optional fringe gives a delicate finish and helps visually frame the table runner. Use small, consistent picots for uniform rhythm.
— Final Blocking & Care :
Info :
Wet-block entire runner flat to exact dimensions, pinning petals and wings out to natural shape. Allow to dry completely. For washing, delicate machine cycle in a mesh bag or hand wash cold and lay flat to dry to preserve blocking and beads.
— Notes on Adjusting Size and Motif Count :
Info :
To adjust runner length, add or subtract diamond connector motifs and alternate with flowers/bats. Each additional diamond + motif unit increases length by approximately 12-14 cm depending on blocking and tension.
When the last stitch is woven in and the beads glint at each bat's face, this runner will feel like a handmade heirloom — perfect for seasonal display. The layered flowers catch the light and the lace bridges create an airy, elegant flow down your table. You can mix and match colors and motifs for endless variations, and the detachable approach makes upkeep easy. 🧶🎃 I hope it brings a touch of cozy, spooky charm to your home — enjoy every stitch! ✨