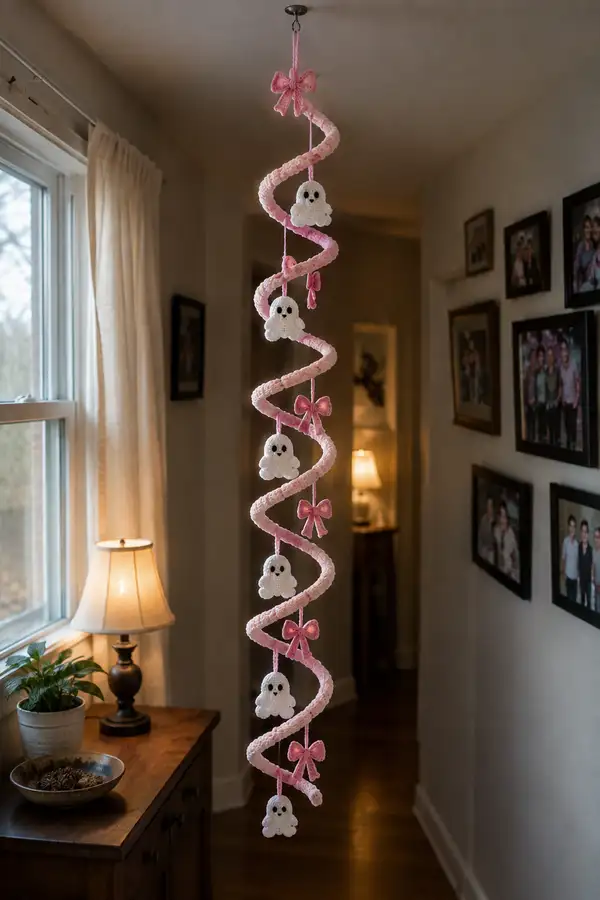
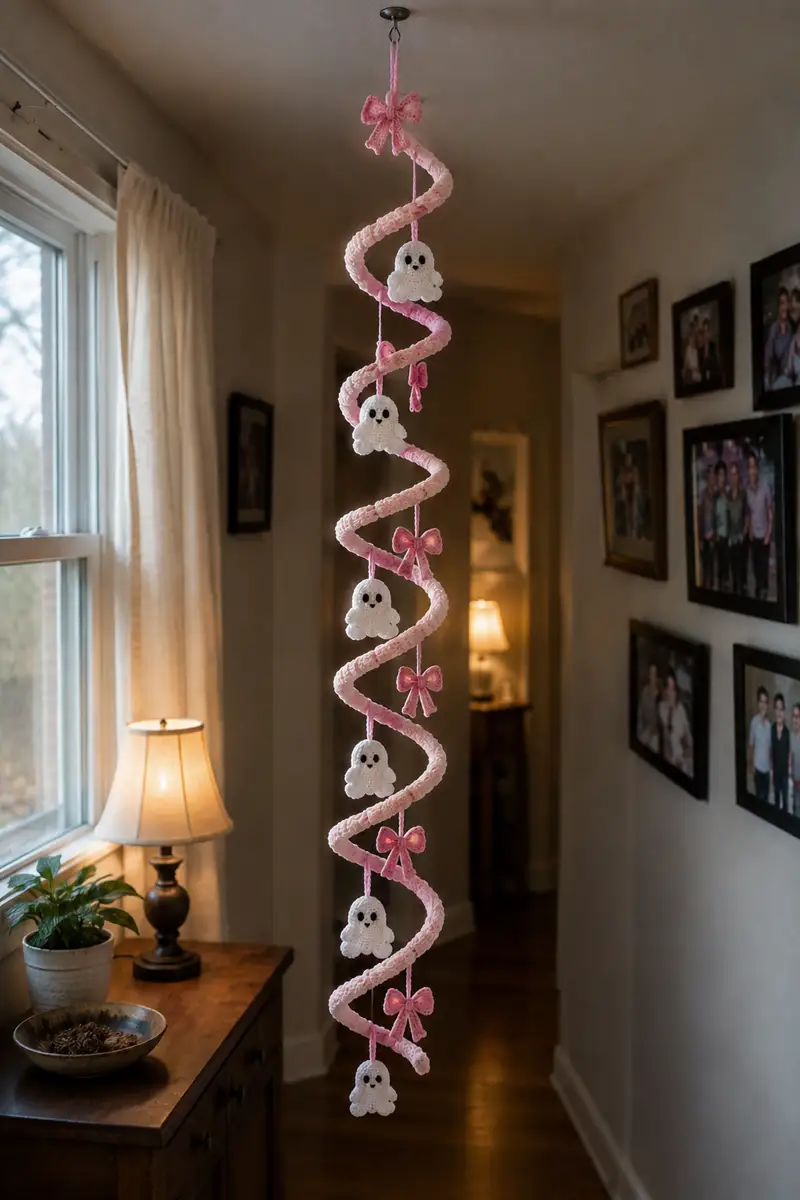
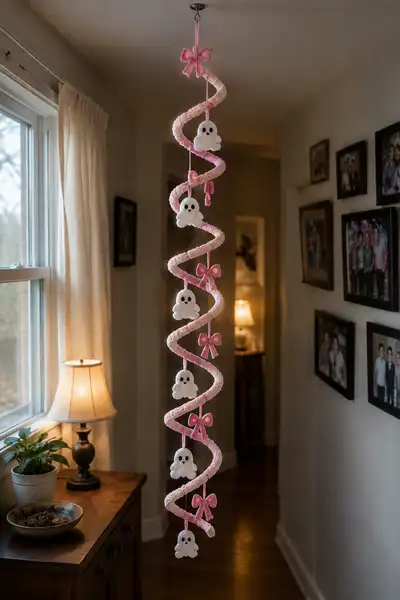
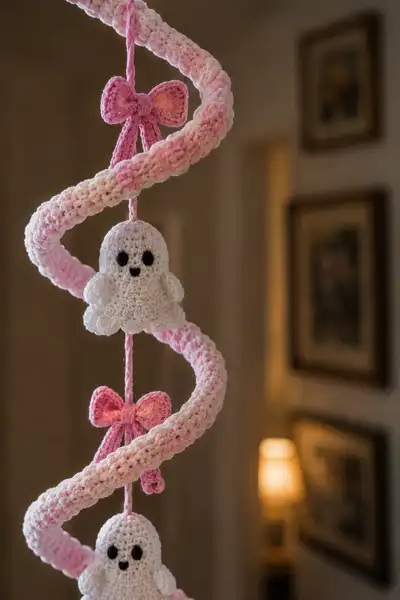
A charming pink spiral garland threaded with five tiny white amigurumi ghosts and soft pink ribbon bows. This hanging mobile blends soft pastels with classic Halloween motifs — perfect for nurseries, doorways, or seasonal decor. The spiral tube is lightly wired for shape and the ghosts are sweetly scalloped with embroidered faces.
Progress Tracker
0% Complete
— Overview :
Info :
This pattern builds a long spiral tube that is lightly stuffed and fitted over a flexible core (wire or clothesline) to hold a corkscrew shape. Five small ghosts hang from an inner cord inside the spiral, with pink bows positioned between them. All parts are crocheted separately then assembled. Work tightly for amigurumi density so stuffing does not show through.
Gauge :
Gauge is not critical but use a hook slightly smaller than the yarn label suggests to produce firm fabric. 18 sc x 20 rows = 10cm in worsted weight with 3.5mm hook as reference.
— Ghost (Make 5 identical) - Head/Dome :
Round 1 :
6 sc in magic ring (6)
Round 3 :
(1 sc, inc) x 6 (18)
Round 4 :
(2 sc, inc) x 6 (24)
Round 5 :
(3 sc, inc) x 6 (30)
Round 6 :
(4 sc, inc) x 6 (36)
Round 7 :
(5 sc, inc) x 6 (42)
Round 8 :
(6 sc, inc) x 6 (48)
Round 9-20 :
1 sc in each st around (48)
Info :
Place safety eyes between rounds 13 and 14, spaced approximately 8 stitches apart for the cute wide-eyed expression. If embroidering eyes, work satin stitch circles starting at round 13. Mark center front with a removable stitch marker before placing eyes.
Round 21 :
(6 sc, dec) x 6 (42)
Round 22 :
(5 sc, dec) x 6 (36)
Info :
Begin stuffing the head firmly but not rock-hard. Use small amounts of fiberfill and press evenly with a stuffing tool or the end of your hook to avoid lumps. Keep the opening accessible for joining to the skirt section later.
Round 23 :
(4 sc, dec) x 6 (30)
Round 24 :
(3 sc, dec) x 6 (24)
Round 25 :
(2 sc, dec) x 6 (18)
Round 26 :
(1 sc, dec) x 6 (12)
Info :
Fasten off leaving a long tail for sewing. Finish stuffing as needed. The head dome should be rounded and firm; the small opening left will be closed and joined into the skirt section so do not overstuff beyond the seam area.
— Ghost Skirt & Scalloped Base :
Info :
Work the skirt as a separate piece and sew to the head rim, or continue directly from head before closing for a seamless finish. This pattern shows the skirt worked separately for clarity. Make sure the skirt's top opening is large enough to fit over or be sewn to the head base.
Round 1 :
6 sc in magic ring (6)
Round 3 :
(1 sc, inc) x 6 (18)
Round 4 :
(2 sc, inc) x 6 (24)
Round 5 :
(3 sc, inc) x 6 (30)
Round 6 :
(4 sc, inc) x 6 (36)
Round 7 :
(5 sc, inc) x 6 (42)
Round 8 :
(6 sc, inc) x 6 (48)
Round 9-12 :
1 sc in each st around (48)
Info :
If you are joining the skirt to the head, fold the head opening slightly inward and use the final rounds of the skirt to stitch the two parts together with mattress or whip stitch; match stitches and keep seam invisible.
Round 13 :
(1 sc, ch 3, sl st in same st, sl st in next 5 sts) x 8 to create picot loops for scallops (48 base sts, 8 picot scallops across)
Round 14 :
Working into the ch-3 picot loops: *sl st in ch-3, 3 sc in same loop, sl st into next base st* rep around to emphasize scallops (48 stitches formed along top of scallops)
Round 15 :
1 sc in each st around working over foundation of scallops (48)
Info :
If finishing the ghost as one piece, align the scalloped skirt edge to the bottom of the head and sew evenly; the scallops should dangle freely and create the classic ghost skirt look.
Round 16 :
Work a decorative round: *sc in next 4 sts, picot (ch 3, sl st into first ch)* rep around (48)
Round 17 :
Fasten off leaving a tail for joining. If desired, add a second row of scallops for a fuller skirt by repeating rounds 13-16 on top edge offset by half a scallop.
Info :
Embroider mouth and eye detail now if using surface embroidery: use 2-3 strands of black yarn or embroidery floss. Small satin-stitched ovals for eyes placed between head rounds 13-14 give the sweet look seen in the picture.
— Ghost Arms / Tiny Flippers (Make 10, 2 per ghost) :
Info :
The ghosts have small curved side flaps that are optional but add charm. These are tiny oval pieces sewn to each side of the head around rounds 15-18 for a hugging look.
Round 1 :
6 sc in magic ring (6)
Round 3 :
(1 sc, inc) x 6 (18)
Round 4-8 :
1 sc in each st around (18)
Round 9 :
(1 sc, dec) x 6 (12)
Info :
Fasten off leaving a long tail for sewing. Stuff lightly or leave flat as a small tab. Sew the flaps to the sides of the ghost head between the rows where eyes are placed for balanced symmetry.
— Spiral Tube (Single long tube worked in continuous rounds; finished length approx. 100-120cm depending on number of rounds) :
Info :
The spiral tube is a long crocheted cylinder that slides over a flexible core (floral wire looped or soft clothesline). Choose a core you can shape and that will hold the spiral without poking through the yarn. Wrap and tape wire ends before inserting.
Round 1 :
Make a starting chain of 18 and join to form a loop carefully with sl st (do not twist) then 18 sc in the round across chain (18)
Round 2 :
1 sc in each st around (18)
Round 3 :
1 sc in each st around (18)
Round 4-10 :
1 sc in each st around (18)
Info :
Maintain consistent tension. Work the tube as a long continuous spiral of rounds rather than many short pieces to avoid visible seams. If your work becomes too heavy to handle, keep the core beside you and crochet the tube in segments, then slip the tube over the core and seam the segments together invisibly.
Round 11-20 :
1 sc in each st around (18)
Round 21-30 :
1 sc in each st around (18)
Info :
Lightly stuff the tube using polyfill every 10-15cm to give softness and maintain tube roundness. Do not overstuff — the tube must compress slightly to wrap around the core and create a crisp spiral edge.
Round 31-40 :
1 sc in each st around (18)
Round 41-50 :
1 sc in each st around (18)
Round 51-60 :
1 sc in each st around (18)
Info :
When tube length is reached (measure against desired hanging length — the pictured spiral extends roughly 1 meter/3 feet), leave an open end for the core insertion. Insert taped wire or clothesline core fully, fold or loop the top end around a small metal ring or wrapped loop for hanging, and continue stuffing the tube lightly to the top before closing with final rounds.
Round 61-70 :
1 sc in each st around (18) — use these additional rounds to extend length as needed
Round 71 :
Fasten off leaving long tail for closing. Slip the finished tube over the core and adjust spacing of stitches so the seam is hidden along the inner curve when spiral is shaped.
Info :
To help the tube hold a neat spiral, pre-shape the core into a corkscrew using a cylindrical form (a tin can or tube) and then slide the tube over it. Secure ends of wire with tape or end caps and glue if necessary to prevent poking through yarn.
— Decorative Bows (Make 6 or adjust to taste) :
Info :
Small structured bows are created in two halves (loops and tails) then assembled and firmly stitched to the hanging cord between ghosts. Use a slightly smaller hook for a neat finish so bows sit crisp against the spiral.
Loop Round 1 :
Make a starting chain of 10, sc into second ch from hook and across (9 sc). Fasten off and make a second matching strip. Join ends to form two small loops that will be stacked as the bow's wings.
Loop Round 2 :
With right sides together, work 1 round of sc around each loop edge to neaten (9 sc per side, closed loop overall 18 sc). Fasten off and leave tail for sewing.
Center Knot :
Make a small I-cord: ch 6, sc in 2nd ch from hook and across (5), sc in BLO for 4 rounds until a short knitted look is formed, fasten off leaving long tail. Wrap this piece tightly around the two loops in the middle to form bow center; sew ends securely behind bow.
Bow Tail (Optional) :
Ch 6, sc in 2nd ch from hook and across for a narrow strip, fasten off. Use two tails per bow if pictured, fold slightly and sew under the bow loops.
Info :
Make 6 bows in total and arrange them evenly between ghosts. Use the darker pink for the outer edge and lighter pink for an inner accent if you want the two-tone look seen in the photos.
Edge Round (Optional) :
For a finished look, go around each bow with 1 sc in contrasting pink to accent edges and make the bow look firm and tidy. Fasten off and weave in ends.
— Hanging Cord (make 1 long inner cord to suspend ghosts & bows) :
Round 1 :
Chain desired length for spacing of ghosts (approx. 100 cm total length for five ghosts with ~18-20 cm spacing). Fasten off leaving long tail to weave through tube core or to tie at hanging loop.
Info :
You can make the cord as a twisted cord (3 strands plied) or a crocheted chain covered with SC to create a sturdier inner cord. Securely knot around the top ring and let the cord run inside the spiral; glue or tape the top knot to prevent slippage.
Alternative :
For a cleaner look, work an I-cord or crochet a tube (6 sc around) and thread through the spiral so knots are hidden inside the ghosts and bows.
— Assembly & Spacing :
Info :
Arrange ghosts and bows along the inner cord. The pictured piece has five ghosts spaced evenly with small bows between each ghost and one bow at the very top and bottom. Recommended spacing: 16-20 cm between the centers of ghosts for an airy look.
Step 1 :
Attach the hanging ring or loop to the top end of the core. Secure with tape or glue. If using a metal ring, wrap it in yarn for a finished look.
Step 2 :
Slide the long spiral tube over the pre-shaped core. Make sure the seam of the tube sits on the inner curve to be less visible when viewed from the outside.
Step 3 :
Thread the inner hanging cord through the center of the spiral from top to bottom before inserting ghosts so you can position them freely along the cord and slide them into place.
Step 4 :
Sew each ghost to the inner cord by stitching through the top center of the head base, or tie the cord through a loop sewn to the ghost's top. Ensure the ghost hangs centered in the spiral cavities.
Step 5 :
Sew bows to the cord in between ghosts, adjusting height until the spacing looks balanced. Use pins to temporarily position bows and step back to evaluate spacing before final stitching.
Info :
For extra security, dab a little fabric glue inside the knot where the ghost meets the cord, then cover and sew over it. This helps the pieces remain stable if the garland is moved or touched frequently.
Step 6 :
At the bottom end of the core, secure the tube with a few tight whip stitches and tuck the end of the cord into the tube. Add a final bow or small ghost to create a neat finish.
Step 7 :
Trim and weave in all tails and tidy up the seam lines. Test the hanging balance and adjust attachments if spiral leans to one side; a small weight inside the bottom section can help center the garland.
Final Info :
Hang the garland by a small ceiling hook or nail. Keep out of reach of small children if any loose small parts like safety eyes are used; consider embroidering eyes instead for baby-safe decor. Enjoy your soft, whimsical pink Halloween spiral garland!
This adorable pink spiral garland brings a playful, modern twist to seasonal decor with tiny scalloped ghosts and soft bows. Each element — from the wired spiral tube to the embroidered ghost faces — is made with care and a little bit of whimsy. The finished piece is a beautiful balance of structure and softness, perfect for gifting or hanging in a cozy corner. 🧶👻💖