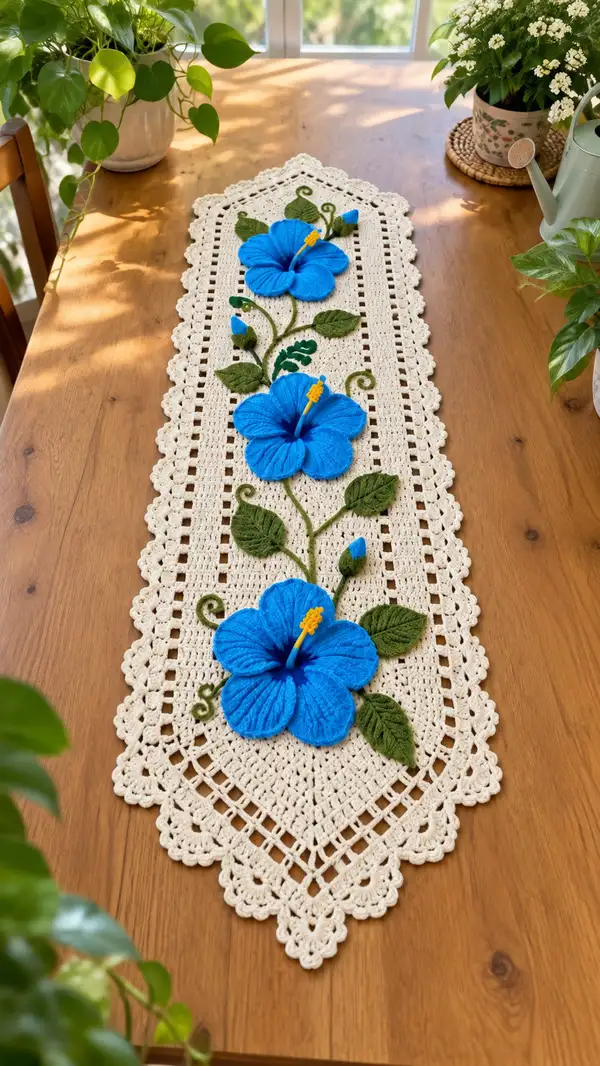
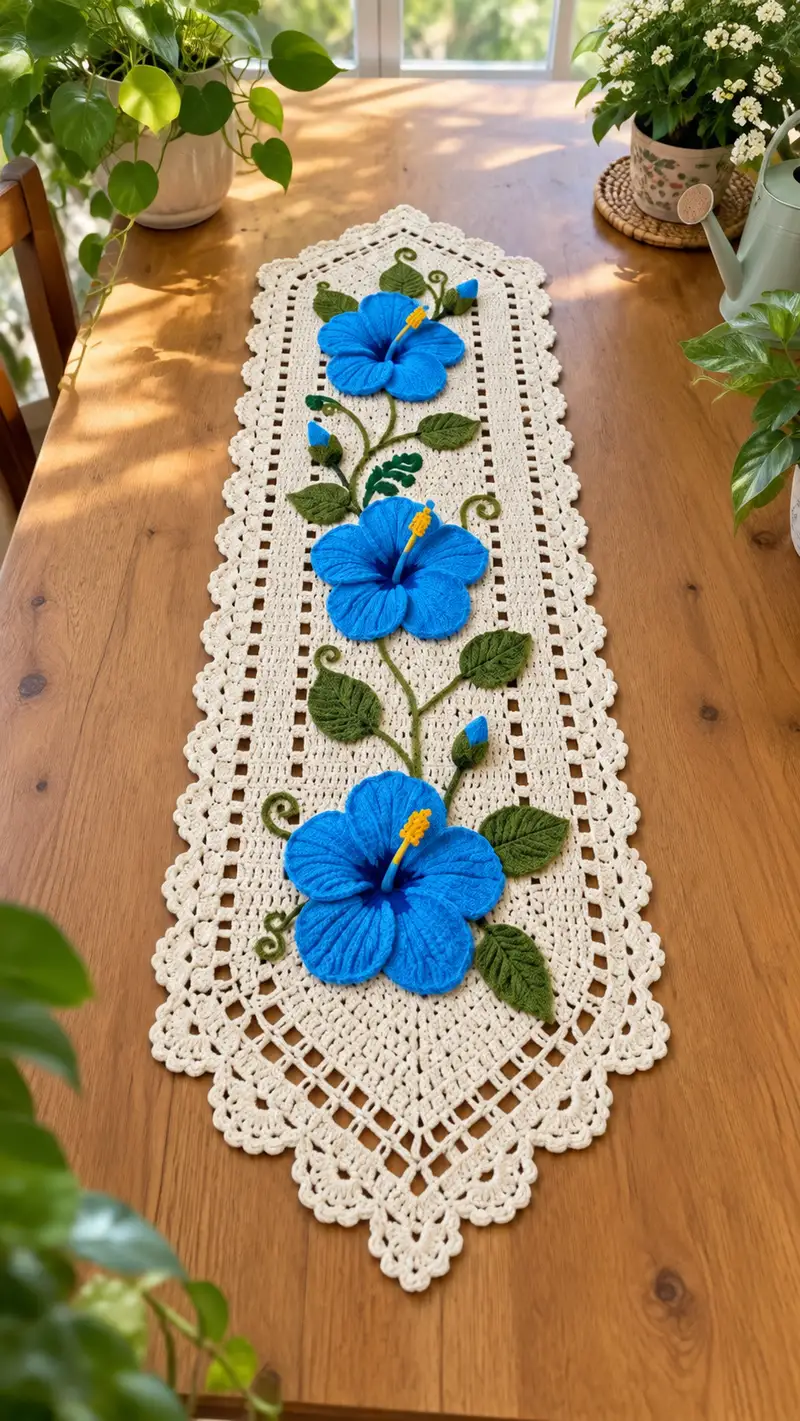
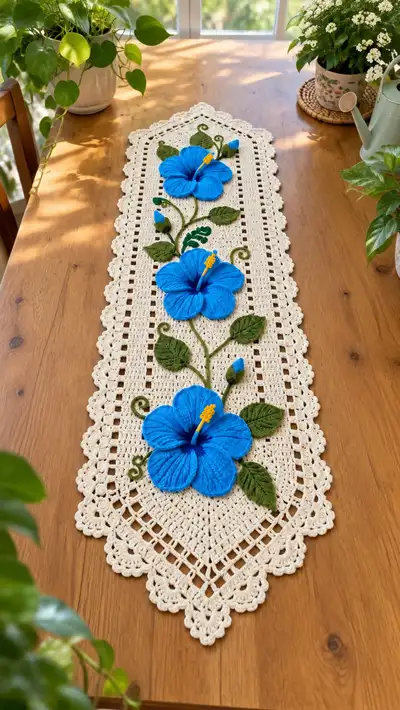
A long, elegant table runner featuring a lacy cream filet base edged with scalloped borders and three dimensional bright blue hibiscus appliques with rich green leaves and curling tendrils. The runner combines an openwork rectangular filet center with ornate scalloped edges and layered floral appliques that sit on top for dramatic dimension. Perfect as a dining centerpiece or dresser accent, this pattern uses cotton yarn for crisp stitches and vibrant colorwork to make the floral motifs pop.
Progress Tracker
0% Complete
— Base Runner :
Round 1 :
Foundation: Using cream yarn and 3.5mm hook, ch 85 (this creates the center spine length for a runner approximately 30-32 inches long before edging). Turn; this chain will be Row 1 of filet grid (work row-counts as Rounds below to keep pattern structure consistent)
Round 2 :
Row 1 (Round 2): Dc in 4th ch from hook (counts as dc + ch1 space), *ch1, skip 1 ch, dc in next ch* rep across until last st, finish with dc in last ch. (This sets up the dc grid foundation)
Round 3 :
Row 2: Ch3, turn; *dc, ch1, sk next dc base space, dc in next dc* across keeping the ch1 spaces even to create a ladder/filet look (repeat pattern across whole length).
Round 4-8 :
Continue working even rows in the filet grid: Ch3, turn; dc in each dc and dc into each ch1 space, creating an alternating open/solid filet pattern. Work 5 rounds to establish base grid (length and height). (Each round keeps same stitch count as established; no increases)
Info :
Measure your runner at this stage; if you want a longer runner add multiples of 2 chains to the foundation and work extra filet rows accordingly. Keep tension even for a flat ground. Use stitch markers at ends of rows to prevent accidental stretching.
Round 9 :
Center Panel Establishment: Ch3, turn; work 8 dc, ch2, sk 2 spaces, *dc in next 10 sts, ch2, sk 2 spaces* across to create framed squares every 10 dc; finish with dc to end. (This begins the framed box areas where florals will be anchored later)
Round 10-18 :
Repeat Round 9 pattern for nine more rounds total (work even to create a central rectangular panel approximately 6.5–7 inches wide depending on tension). Keep counts even; each round maintains the established number of total stitches.
Info :
At the end of Round 12, mark the center points for each floral placement. The finished runner has three floral zones spaced equally: near each end and one in the center. Use pins to mark the center rows and columns so appliques align symmetrically.
Round 19 :
Begin side rail: Ch3, turn; work 4 dc, then *[dc, ch2, dc] in next corner box, continue dc across the edge boxes to create a defined rail of solid and open squares*, maintain the same stitch count as row baseline
Round 20-30 :
Work ten more even rounds repeating the framed box rail pattern, alternating ch2 windows and dc batches as before. This builds height for the appliques and gives a sturdy grid for sewing. (Even rounds: counts unchanged)
Info :
Block the base flat at this point. Wet block or steam block on a flat surface flattening the filet grid and aligning squares. Pin edges straight; allow to dry fully before continuing to edging or attaching appliques.
Round 31 :
Transition Row to Edgework: Ch1, turn to work in sc around outer edges for 1 round. Sc evenly along sides and ends inserting 3 sc in each corner to keep edges neat; total stitch count will expand slightly along the turning points but aim for even spacing
Round 32 :
Edge Lattice Setup: Ch4 (counts as tr+ch1), *sk 2 sc, tr in next sc, ch1* across the sides forming a lattice visual; in corner continue lattice with ch3 turning chain; maintain visual spacing.
Round 33-36 :
Work additional 4 rounds of alternating tr and ch1 lattice across the edges to build a raised border frame. These rounds will create the diamond grid at the ends when combined with later rounds.
Info :
Keep the same tension when you transition from DC body to TR edge — change of stitch height can create puckers. If pucker occurs, adjust by adding or removing one small sc evenly around the perimeter prior to the scallop round.
Round 37 :
Begin scalloped edging foundation: Ch3, *[5 dc shell in next ch1 space, ch1, sl st in base between shells]* repeat around corners, spacing shells evenly. This forms points for final scallop shaping.
Round 38-42 :
Work 5 more rounds building the scallop texture: alternate shell rows using 3-dc and 5-dc shells worked into the shell apex, and use picots in corner shells for a delicate lacy edge. Maintain consistent spacing for symmetry. (Counts vary per round depending on shell counts; allow shells to dictate counts; keep visual balance)
Info :
At Round 40 evaluate the scallops: blocking pins can help set the scallop shape. Use spray starch lightly if you prefer a rigid finish; otherwise leave soft for a drapier look.
— Border Scallop :
Round 1 :
Scallop Round A: With cream yarn, join at a corner shell tip, ch1, work 1 sc into shell base, ch3, *5 dc into next open space (shell), ch3, sl st in next base* repeat around to form strong scallop foundation
Round 2 :
Scallop Round B: Turn shells into raised petals by working (sc, hdc, 3 dc, hdc, sc) into each apex from previous round; this yields pronounced scallop arcs. Repeat around. (This round creates the ornamental edging visible in photo).
Round 3 :
Finishing Round: Work a slip-stitch trim around the edge, inserting small picots of ch3 and sl st into the top edge of each scallop to give the delicate looped border. Fasten off and weave in ends. Block scallops to final shape.
Info :
Scallop depth can be increased by using 5-dc shells instead of 3-dc if you want a fuller edge. Keep all scallops identical by counting stitches carefully during shell placement.
— Large Hibiscus Flower (Make 3) :
Round 1 :
Center Cup: Using royal blue (flower main) and 3.0mm hook, make a magic ring, ch1, 8 sc in ring (8). Pull ring tight
Round 2 :
Inc Round: 8 inc (16). (Work evenly into each sc from previous round: 2 sc in each st)
Round 3 :
(1 sc, inc) x8 (24) — slight expansion to form a shallow bowl that will become the flower throat.
Round 4 :
Even Round: 1 sc in each st around (24). Fasten off color or continue with same to shape inner cup. Use a small amount of stuffing to shape the cup slightly; do not overstuff.
Info :
Use a dark navy or deep teal accent in the center cup by surface slip-stitching a few radiating lines into Round 4 to suggest depth at the throat. Alternatively, work one round of navy sc around the inner edge to deepen the center.
Round 5 :
Petal Base Join: Join royal blue to a stitch on the cup rim with sl st, ch1. For each petal you will work an individual petal piece starting from this rim. Make 5 petals evenly spaced around the cup (work a petal into every 4th stitch to place 5 petals around 24 sts)
Round 6 :
Petal (template - make 5 per flower): Ch5, sc in 2nd ch from hook, hdc in next ch, dc in next ch, tr in next ch (this short chain forms petal tip), work back down chain on other side as dc, hdc, sc, sl st into cup rim to anchor. This chain-loop petal gives an initial narrow petal. Repeat for all 5 petals to create an anchored loop outline.
Info :
Spacing is critical: place petals at approx every 4th stitch around the 24-st rim to yield five evenly spaced petals. Use pins to hold petals in place before working the shaping rounds that add volume to each petal.
Round 7 :
Petal Shaping Round 1 (worked on each petal individually): With the petal loop pinned, rejoin yarn at base of petal, sc across base (3 sc across the short chain underside), ch1, turn; make 1 sc in each sc across to form a small foundation row (approx. 3-5 sc depending on your chain length)
Round 8 :
Petal Increase Row: (1 sc, inc) across petal base to widen the petal: if base is 5 sts, work (1 sc, inc) x 2-3 to arrive at 7-8 sts. This yields a broader petal foundation for the shaping rounds.
Round 9 :
Petal Body Row: Ch2, turn, work across in 2 dc clusters in each base stitch across petal (dc2tog clusters create a ribbed look). You should have about 14-18 clusters depending on increases (counts will vary by yarn tension). Do not fasten off.
Round 10 :
Petal Height Row: Ch2, turn; work fpdc and bpdc alternating across the petal to create raised ridges: *fpdc in next st, bpdc in next* across. This creates the deep ribbing veins visible on each petal.
Round 11 :
Petal Outer Edge Round: Ch1, turn; work (sc, hdc, 3 dc, hdc, sc) into each end stitch across to round the petal tip. This shapes the petal edge and thickens the border for a sculpted look. Fasten off and weave tail through the petal base, pulling slightly to form natural curvature. Repeat this entire petal sequence for all five petals per flower.
Info :
Petal shaping uses post stitches to create visible veins. The pattern uses a combination of chain-loop foundation, layered increases, and alternating post stitches for realistic petal texture. Adjust the number of clusters and fpdc/bpdc repeats to match the size in the picture — wider petals use additional increases in Round 8.
Round 12 :
Petal Final Sculpt: Lightly stuff the base of each petal with a small tuft of fiberfill where it joins the cup. Arrange the petals overlapping slightly (petal 2 overlaps petal 1 by 2-3 sts, petal 3 overlaps petal 2, etc.) to create a flower with natural overlapping lobes. Whip stitch each petal base to the cup rim with matching yarn, anchoring at several evenly spaced points.
Round 13 :
Assemble Flower: After all petals are attached, place one round of invisible joining sc around the cup rim to tidy attachments and fill any gaps (sc around and through petal bases into cup rim). (The round will have 24 sc if worked evenly)
Info :
Pin petals into position before stitching to check overall shape. Use a small amount of shaping water spray and pin to block petals into a slightly concave shape if desired, then leave to dry to set curvature.
Round 14 :
Decorative Surface Veining: With a tapestry needle and a strand of navy, use surface slip stitch lines radiating from the cup outward across the petal faces to form deeper veins. Work 4-6 surface lines per petal, tapering as they reach the tip. Fasten off and weave ends behind petals.
Round 15 :
Flower Center Accent (optional): Embroider a shallow ring of navy stitches into the deep center of the cup to create shadow and visual depth. Use a smaller hook or needle to avoid widening the center.
Info :
Create three identical large flowers in total, adjusting slight variations by changing petal overlap and angle so each flower has a unique, natural appearance on the runner.
— Flower Pistil / Stamen :
Round 1 :
Stamen Tube: Using yellow for pollen and a short length of blue for the style, ch 12 with 3.0mm hook, sl st to form a narrow tube or work 12 hdc into ch foundation and join to make a short tube approx 1-1.5 inches long. (Tube will be attached at flower center)
Round 2 :
Pollen Tip (make a small tuft or embroidered segment): With yellow, make 6 sc in magic ring (6), inc round (12). Work 1 round of 12 sc even then gather slightly and close, leaving a tail. Sew this tuft to the end of the tube or surface-embroider small french knots directly onto the tube surface to mimic pollen knobs.
Round 3 :
Attach Pistil: Insert the blue style into the flower center cup and secure from the underside with several stitches. Sew the pollen tuft to the exposed style tip and secure. The stamen should be upright when sewn into the center cup so it stands above petals.
Info :
To make the pistil stiffer, run a small stiff core (a short piece of plastic cord or thick cotton thread) through the tube before sewing, ensuring ends are wrapped to prevent sharpness. For safety and washability choose a flexible fiberfill core if desired.
— Leaves (Make 9 - assorted sizes) :
Round 1 :
Leaf Base (small): With leafy green and 3.0mm hook, ch8, sc in 2nd ch from hook, hdc, dc, hdc, sc across to last ch; then work other side of chain: sc, hdc, dec to meet center; sl st to close. (This creates a small flat leaf approx 2.5-3 inches)
Round 2 :
Leaf Veining Round: Ch1, turn; working in FLO of leaf surface, work alternating fpdc and bpdc to create raised veins: *fpdc in next st, bpdc in next* across both sides. Fasten off leaving long tail for sewing. (Vein effect will be visible)
Round 3 :
Leaf (medium): For larger leaves ch12 foundation, create a tapered almond shape by increasing to midline then decreasing symmetrically: MR 6 pattern to expand to 18–22 sts then decrease to shape tip; use fpdc ribs on final round for realistic venation. Fasten off leaving long tail.
Round 4 :
Leaf Details: Use olive yarn to embroider central vein with long straight stitches from base to tip. Add small lateral veins using shorter stitches branching outward. This gives the textured leaf look seen in the photo.
Info :
Create a mix of 3 small leaves, 4 medium leaves and 2 large leaves per runner and position them around each flower for layered foliage. Vary direction and slightly curl edges with light blocking to mimic natural leaves.
Round 5 :
Leaf Final Shape: Pin each leaf to a blocking surface and spritz lightly. Use pins to curl the leaf edges slightly upward for depth. Allow to dry fully before sewing to base.
— Flower Buds (Make 3) :
Round 1 :
Bud Start: With royal blue, make a magic ring, ch1, 6 sc in ring (6)
Round 2 :
Inc Round: 6 inc (12) — work evenly to expand to 12 sts
Round 3 :
Shaping Round: (1 sc, inc) x6 (18) — creates an ovoid bud base
Round 4 :
Even Round: 1 sc in each st (18). Do not overstuff yet.
Round 5 :
Closing Round: (1 sc, dec) x6 (12) — begin closing bud tip slightly but leave an opening to insert a small stuffing tuft
Round 6 :
Final Round: 6 dec (6). Stuff lightly, thread tail through remaining sts, pull closed and fasten off. Attach a short green calyx (3 sc into a MR and small leaves) to the bud base, then sew bud along stem placement near each flower.
Info :
Sew a short sliver of green chain beneath the bud and tack it to create a natural calyx and to secure the bud to the stem with a couple of stitches.
— Stems & Tendrils :
Round 1 :
Stem Backbone: Using leafy green and a 3.5mm hook, ch 40-60 for each long vine segment (length varies to connect flowers). Work back along the chain with sc in BLO to create a slightly raised rope (sc in back loops only gives a neat cord-like stem). Repeat to create stems connecting each floral cluster.
Round 2 :
Stem Thickness Round: Work an additional round of sc around the base chain on both sides to make the stem thicker: *2 sc in each end st across the chain foundation* — this results in a narrow tubular stem that lies flat when sewn.
Round 3 :
Tendril Curls: For decorative curly tendrils ch 12, in 2nd ch from hook work sc, hdc, dc, tr, tr, tr into successive ch to create a spiral. Alternatively work 3-4 sl st into each of the next ch to curl naturally. Make several curls in assorted lengths for visual interest.
Info :
Arrange stems and tendrils on the blocked base before sewing; use pins to set gentle S-shaped curves and curls. Sew only at anchoring points to preserve the raised vine look rather than flattening stems completely.
Round 4 :
Surface Slip Stitch Details: To create vine textured lines, with a tapestry needle do surface sl st along the top of each stem from base to flower. This reads cleanly on the cream background and ties the leaves visually into the vine.
— Assembly & Placement :
Round 1 :
Layout Prep: On the blocked runner, mark three floral zones equidistant from each other: near each tapered end and at the center. Place the largest flower toward the center and the slightly smaller one near the far end (or replicate sizes equally for symmetry). Layout leaves and buds around each flower to mimic photographic composition.
Round 2 :
Pin Arrangement: Using rust-proof pins, pin each flower cup, leaves, buds and stems onto the runner. Arrange stems so they appear continuous between floral groups. Place leaves beneath and slightly overlapping petals to create layered depth.
Round 3 :
Sewing Flowers: With a matching thread and a blunt needle, whip stitch through the underside of each flower cup into the filet grid only at several secure points (approx 6–8 tacking points per flower) so the flower is held in place but can still present a lifted petal profile. Avoid sewing through full petal faces to preserve shape.
Round 4 :
Attach Stems: Sew stems to the runner at their base points and at a few midpoints with small invisible ladder stitches; anchor the ends inside or behind scallops to hide tails. Sew tendril bases with small stitches then allow the curl to lie free.
Info :
When sewing leaves, use only a few secure stitches under leaf base; do not flatten the leaf completely — allow a slight lift where it overlaps petal edges. Stitch buds with a few tight stitches at their base to ensure they stay upright.
Round 5 :
Final Touches: Add a few embroidered pollen dots and surface veins in deeper navy and olive where needed. Trim any visible tails and weave ends to the underside of the runner for a clean finish. Re-block lightly if needed to reset shapes after sewing.
Info :
For a washable runner, use cotton threads and secure all attachments with multiple passes; hand wash gently and re-block while damp to maintain shape.
This elegant table runner combines vintage lacework with bright, sculpted hibiscus appliques, creating a show-stopping centerpiece you27ll be proud to display. The mix of open filet work, scalloped edgings, and three-dimensional flowers makes for a beautiful and rewarding crochet journey. Each flower and leaf is a small project in itself, coming together to create a dramatic, handmade accent for your home. 🧶🌺 Give it as a gift or keep it for yourself — either way your table will look gorgeous! ✨