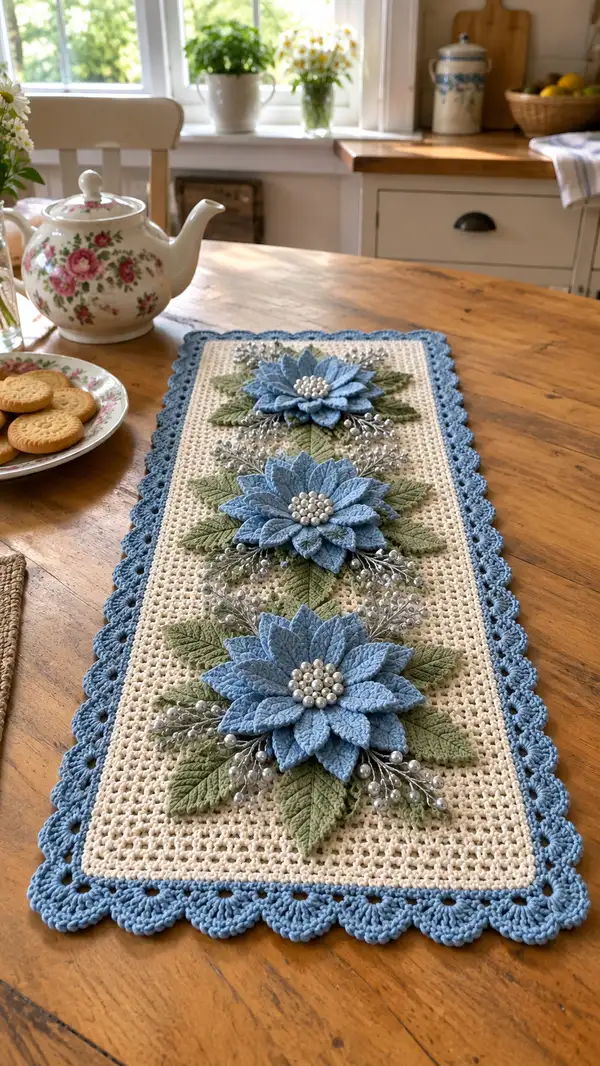
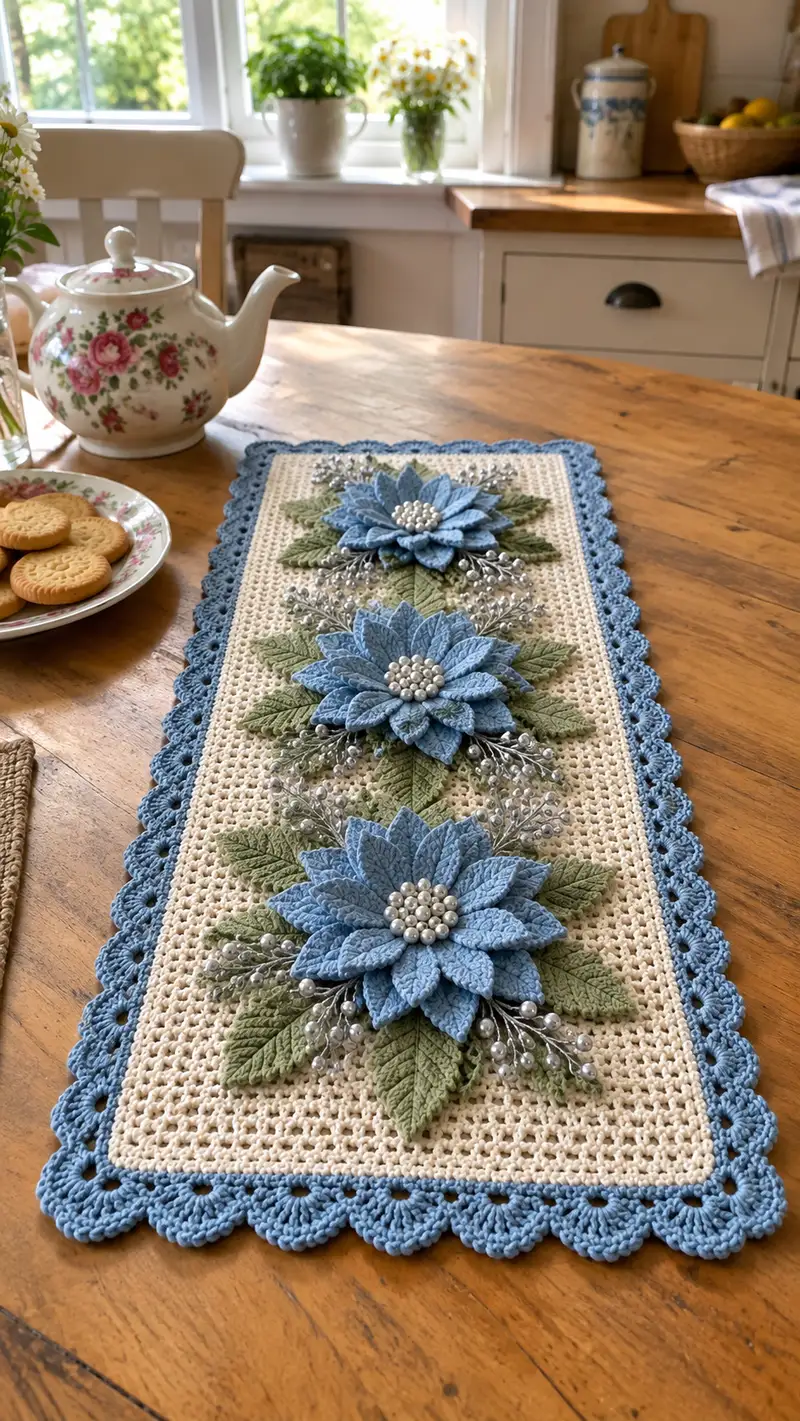
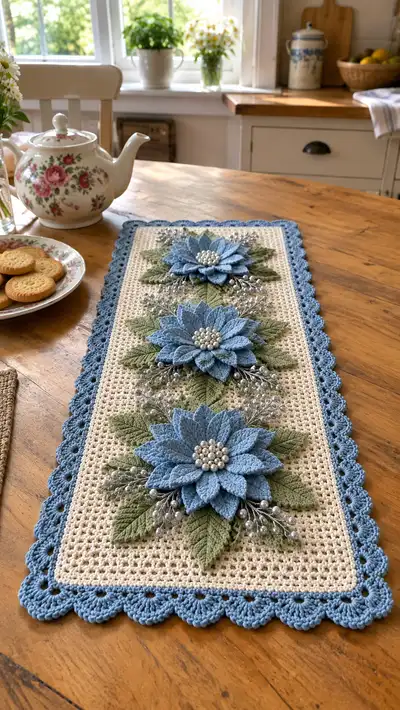
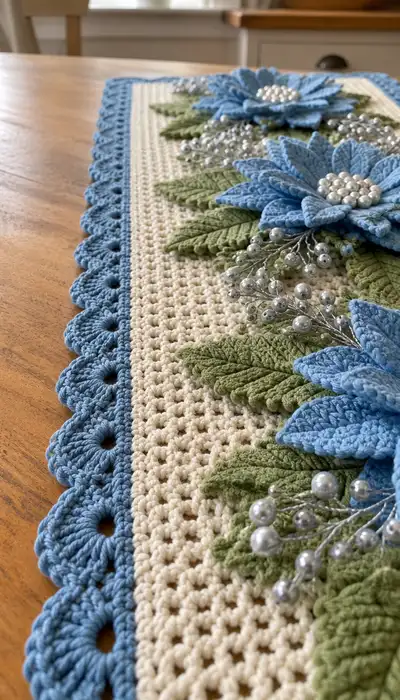
A refined rectangular table runner featuring three layered blue floral medallions with textured green leaves, pearl cluster centers and a delicate scalloped blue border. The cream mesh background creates a soft, vintage-inspired canvas for the raised flowers. This pattern uses small motifs assembled onto a worked panel and finishes with a lacy scallop edge for a polished, heirloom look.
Progress Tracker
0% Complete
— Materials & Gauge :
Info :
Gauge is not critical for this table runner but will affect final measurements. Using worsted cotton and a 3.5mm hook, 10 x 10 cm (4 x 4 in) = approx. 14 sts x 16 rows in single crochet. Finished runner pictured measures approx. 95 cm x 28 cm (37.5 x 11 in). Adjust foundation chain and number of rows if you want a different size.
— Abbreviations & Notes :
Info :
All rounds below are written as continuous rows worked back and forth for the flat panel and as small rounds for motifs. Whenever a set of rounds is worked repeatedly for multiple motifs (flowers/leaves), the instructions will specify 'Make 3' or 'Make 18' etc. Use stitch markers to mark the first stitch of each row when working large rectangle panels.
— Background Panel (Cream) :
Info :
This cream panel is the canvas for the flowers. Work a long rectangular panel in rows using a small textured mesh that looks like tiny uniform squares. Foundation chain should be 101 ch (adjustable in multiples of 2 to change width). Each row will be worked back and forth; counts below assume 100 sc across (after turning chain).
Round 1 :
Chain 101. Sc in 2nd ch from hook and in each ch across. (100 sc)
Round 2 :
Ch 1, turn. *Sc in next st, ch 1, sk next st* across ending with sc in final st. You will still work into 100 sts but create ch-1 spaces for a small open texture.
Round 3 :
Ch 1, turn. Sc in each sc and each ch-1 space across (100 sc). This evens the row so the stitch count stays 100.
Round 4 :
Repeat Round 2 to continue the textured mesh. This two-row repeat creates a tight even grid while keeping small, uniform holes.
Round 5-12 :
Repeat Rounds 3-4 four times (8 rows total) to stabilize the panel. (100 sc per right-side row)
Info :
Place stitch markers in both corners after Round 12 to help keep the edges square during long row work. If your edges begin to slope, weave in an extra sc at the beginning of the next right-side row and adjust tension.
Round 13-24 :
Continue the mesh repeat: Odd numbered rows (Right Side): sc in each st and ch-spaces; Even rows (Wrong Side): *sc, ch1, sk1* across. Work 12 more rows to reach a stable center. (100 sts measured on filled rows)
Round 25 :
Ch1, turn. Sc in each st across. (100 sc)
Round 26-36 :
Repeat Rounds 2-3 five times (10 rows) to build length. Keep stitch markers at the long edges and check that the panel remains straight. (100 sc at each RS count)
Info :
Measure your panel now — this is a good time to decide final length. The pictured runner uses a total of 80 rows. If you want a shorter piece make fewer repeats; longer piece add more repeats in multiples of 2 rows to maintain the mesh.
Round 37-60 :
Continue the established mesh pattern (alternate row types as shown) until you have 80 total rows (this set covers rounds 37-60). Keep edge tension consistent. (100 sc on filled rows)
Round 61-72 :
Finish the panel with 12 more rows of mesh to mirror the beginning, keeping the panel balanced. (100 sc on filled rows)
Info :
Fasten off leaving a long tail (approx. 80 cm) for sewing the border if you prefer to join later; alternatively, pick up stitches around the panel for a worked-on border (instructions below assume you pick up and work the border directly on to the panel).
— Scalloped Border (Blue) :
Info :
Border is worked in rounds around the rectangle. Pick up and work evenly around the edges. For corners you will make small increases to keep the border flat. Use blue yarn colour shown in photos. Begin at one short end center to keep symmetry.
Round 1 :
With RS facing, join blue yarn at center of one short side with sl st. Ch1, work 1 sc into each visible edge stitch evenly around. Work 3 sc into each corner stitch to maintain shape. Work 1 sc into each st along entire perimeter. (Count will vary – ensure even tension and even stitch distribution)
Round 2 :
Ch1, sc in each st around, placing 3 sc in corner scs made previous round to keep corners square. (Same count as Round 1)
Round 3 :
Ch3 (counts as first dc), dc in next 2 sts; *sk 2 sts, 5 dc in next st (shell made)*, sk 2 sts, dc in next 3 sts; rep across to corner. In corners work (dc, ch1, dc) into corner sc to keep shell alignment. This begins the scalloped shell motif.
Round 4 :
Sl st to center of first shell. Ch1, sc in center of each shell and in the small gaps between shells. Sl st to join and fasten off. Weave in ends and block edge flat for perfect scallops.
Info :
If your scallops ripple, go back and add or remove a dc in shells near corners, or adjust spacing in Round 1 so shells sit evenly. Blocking is essential to open the scallops and make the border crisp.
— Flower Petals (Sky Blue) — Make 3 :
Info :
Each flower is built from layered petal rings. There are three concentric petal layers per flower (outer, middle, inner). The technique uses short petal units worked into a foundation ring and then joined to form a full flower. Make 3 flowers identical in construction. Petal counts per layer: Outer 12 petals, Middle 10 petals, Inner 8 petals. Petals are worked in rows rather than continuous rounds for crisp texture.
Round 1 :
Make a magic ring. Ch1, work 8 sc into magic ring. Pull tight and join with sl st to first sc. (8)
Round 2 :
Ch1. *Ch6, sl st into next st (create loop) - repeat around to form 8 loops. After last loop sl st to base and fasten off tail if needed to switch colours.* You will have 8 petal loops for inner construction (this initial loop system sets petal placement).
Info :
These loops are guides. Petals will be worked into each loop to make layered 3D shape. Keep loops evenly spaced using a stitch marker for the first loop to track orientation.
Inner Petal (Make 8 petals - repeat per loop) Round 3 :
Into first ch-6 loop, rejoin yarn at base. Ch2 (counts as hdc), (hdc, dc, tr, dc, hdc) all into the loop. Sl st to base. Fasten off and repeat for each loop to create 8 full inner petals. After completing all 8 petals, join into a small ring shape by weaving tails under the petal bases and tightening to form inner layer.
Info :
Work inner petals tightly and keep stitch heights consistent so the inner circular profile remains even. Use a smaller hook (3.25mm) here for tighter petals if you prefer a more sculpted center.
Middle Petal Foundation Round 1 :
Make a new small loop foundation around the base of the inner petals by working sl st behind each inner petal base around to form 10 evenly spaced attachment points. Ch6 loops for 10 positions. (10 loops)
Middle Petal Round 2 :
Work into each ch-6 loop: Ch2, (hdc, dc, dc, tr, dc, dc, hdc). Sl st to base. Repeat for all 10 loops to form middle petals. Fasten off and weave ends. (10 petals)
Info :
Gently overlap middle petals over inner petals so they sit between inner points and create full bloom. Pin to keep their flare while you continue to add the outer petals.
Outer Petal Foundation Round 1 :
Create 12 ch-6 loops spaced behind the middle petal bases by working sl st around the base of the middle petals, spacing 12 points. (12 loops)
Outer Petal Round 2 :
Into each ch-6 loop work: Ch2, (hdc, dc, dc, tr, tr, dc, dc, hdc). Sl st to base and fasten off. Repeat for all 12 loops to create large outer petals. (12 petals)
Round 12 :
Weave and tidy all loose ends. Lightly steam-block or damp-block the three petal layers to open them into a soft, curved petal shape. Stack layers: outer then middle then inner, staggering petals so they sit offset to look full. Temporarily pin stack to hold shape for sewing.
Info :
For extra petal texture, use FLO on the last petal row to create a fine ridge. If desired, work an additional slip-stitched ridge around base of each petal layer to strengthen the join before sewing to the panel.
— Flower Center (Beaded Cluster) — Make 3 :
Round 1 :
Thread 9-12 faux pearls (6-8 mm) onto a length of strong beading thread or thin yarn. Arrange them in a tight cluster and secure with several wraps of thread through the beads. Tie off and leave tails for sewing. This cluster will be sewn to the center of each flower.
Info :
Sew bead clusters through the base of the inner petal ring using the bead thread and a yarn needle. If using hot glue, apply sparingly to the base only — sewn is preferable for washability and durability.
— Leaves (Olive Green) — Make 18 :
Info :
Leaves are textured with a central ridge and defined veins using front post and back post stitches. Each flower in the pictured runner has six leaves arranged around it: three larger leaves and three smaller leaves. Make a total of 18 leaves (6 per flower).
Leaf - Round 1 :
Make magic ring. Ch1, 6 sc into ring; sl st to first sc. (6)
Leaf - Round 2 :
Ch1, (inc) x 6 around. Join. (12)
Leaf - Round 3 :
Ch1, (1 sc, inc) x 6. Join. (18)
Leaf - Round 4 :
Ch1, sc in first 2 sts, hdc in next 4 sts, dc in next 6 sts, hdc in next 4 sts, sc in last 2 sts. (18) This elongates the leaf and gives a tapered profile.
Leaf - Round 5 :
Ch1, turn work to create a pointed tip: sc2tog, sc across until 2 sts remain, sc2tog. (approx 14 sts) Adjust by working decreases evenly to form a tapered tip.
Leaf - Round 6 :
With RS facing, along center line of leaf work fpdc across central stitches to create raised vein: ch1, fpdc around next 6 sts, then continue sc at edges to maintain shape. Fasten off leaving long tail for sewing. Block leaves slightly to open vein texture.
Info :
For larger leaves, after Round 4 repeat Round 4 once more before shaping the tip to produce a broader leaf (these become your 'large leaves'—make 9 larger and 9 smaller total). Vary the number of dc in Round 4 to change leaf size.
— Small Filler Berry Sprays & Pearl Stems — Make 6 Sprays :
Round 1 :
Use pre-made wired pearl sprays or make your own: thread small faux pearls onto florist wire in clusters of 6-10 beads per spray. Wrap the wire stems with silver floral tape and trim to approx. 6-8 cm lengths. These will be tucked beneath each flower for shimmer.
Info :
If you prefer washable runner, stitch-on small crocheted bead clusters instead: make tiny clusters of 3-5 beads on thread and sew firmly through base layers.
— Leaf Vein Embroidery (Optional Detail) :
Round 1 :
Use leftover green yarn and a yarn needle to stitch raised veins on each leaf: from base to tip, make several straight stitches and then a few angled stitches to either side to mimic natural vein pattern.
Info :
Use loose slips of yarn and a sharp yarn needle so the embroidery sits slightly raised. This step adds realism and depth when leaves overlap under petals.
— Attaching Flowers & Leaves (Placement Plan) :
Info :
The pictured runner contains three floral medallions centered along the runner length. Measure and mark the centers: place one cluster at 1/6, one at 1/2 and one at 5/6 of the runner length for even spacing. Each flower is surrounded by 6 leaves placed at 30-degree intervals around the flower center: 3 larger back leaves and 3 smaller front leaves layered for depth.
Round 1 :
Pin the outer petal layer first to the panel at the marked center — sew through the base of the outer layer only using matching yarn and a whip stitch to attach. Then pin and sew middle layer, and finally sew the inner layer. Use small anchoring stitches through the petal bases, not through the petal tips.
Info :
Do not secure bead cluster yet — pin it in place to check visual effect before final attachment. When sewing petals, take care to hide ends under the petal layers. Use thin thread to minimize bulk in the flower center area.
Round 2 :
Arrange three large leaves behind each flower, evenly spaced. Sew each leaf through its base to the panel and to the underside of the outer petal layer to secure. Add three smaller leaves interleaving the gaps and sew them lightly to achieve layered fullness.
Info :
Pin everything firmly and step back to check symmetry. If leaves look flat, add a small gather at the base by placing a tiny stitch of overcast through the leaf base and pulling lightly to create a curve; anchor to runner and under petal base.
Round 3 :
Sew bead cluster into the center of each layered flower: using beading thread or yarn needle, pass thread through base of inner petals and through beads several times to lock cluster in place. Tie off securely on the underside and weave in ends. Trim any visible threads.
Info :
Tuck wired pearl sprays beneath leaf layers and sew stems in place with a few stitches around the wrapped wire. If not comfortable with wired stems, use multiple small sewn bead clusters to mimic the pearly spray effect.
— Final Finishing & Blocking :
Round 1 :
Pin the entire runner to blocking mat and steam lightly or wet-block until completely dry. Pay special attention to scalloped edge and flower placement so they lay flat and look uniform. Use T-pins at each shell of scallop to encourage crisp bite in the curve.
Round 2 :
Check all sewn attachments for security. Reinforce where necessary by sewing extra small invisible stitches from petal base to panel. Trim any remaining tails and weave ends deep into panel fabric to hide.
Info :
For a machine washable runner, use securely sewn-on crocheted bead clusters rather than glued or wired stems. Spot clean decorative beadwork when possible to prolong appearance.
— Alternative Colourways & Size Adjustments :
Info :
To change size, adjust foundation chain by increments of 2 and add or remove mesh rows in sets of 2 to maintain balanced borders. To change look, use cream background with burgundy or rose petals. Metallic thread in center beads adds a festive sheen.
Round 1 :
If you prefer a continuous tapestry look instead of detached flowers, substitute embroidered appliques or work the floral shapes in Tunisian crochet and applique them similarly. The structure of the panel supports many techniques.
Info :
Pattern can be scaled up to a table runner for a longer table by increasing the number of mesh repeats and adding more flower medallions spaced evenly. For a square centerpiece, reduce foundation chain and work fewer rows; place one central floral medallion.
— Troubleshooting & Tips :
Info :
Keep a small pair of embroidery scissors and a blunt yarn needle nearby for tidying loops and tucking threads. If outer petal tips curl up too much, steam-block slightly from RS with gentle pressure to relax fiber. If they droop, add a row of contrasting slip stitch around the petal base to stiffen and add definition.
Completing this runner is such a satisfying, calming project — each flower blooms as you stack the layers and the pearls add a lovely vintage glint. The scalloped border gives a finished, heirloom feel that looks beautiful on any wooden table. This piece makes an elegant centerpiece for seasonal gatherings or a thoughtful handmade gift. 🧶🌿✨