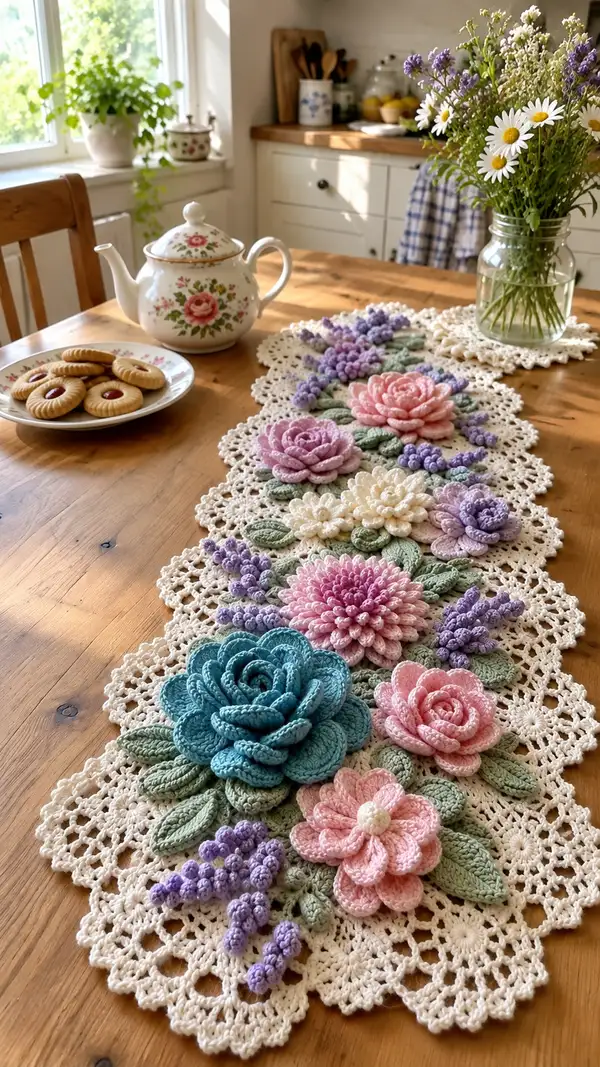
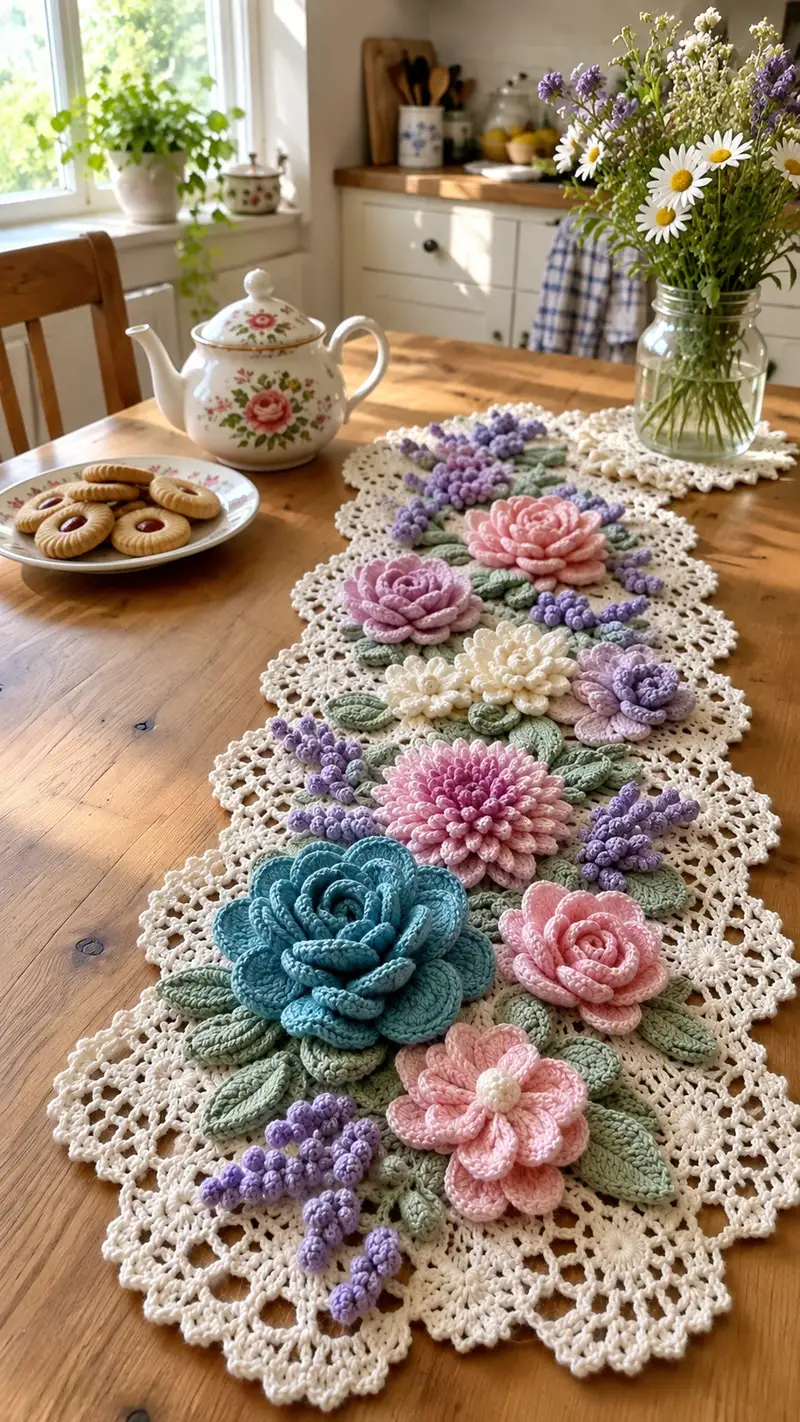
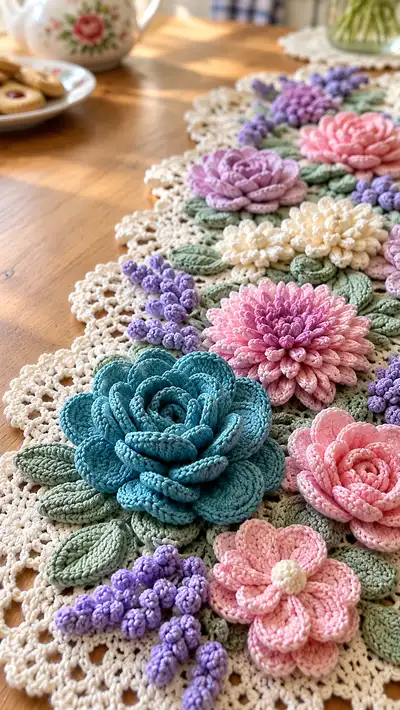
Create a romantic, highly textured table runner inspired by cottage florals and vintage lace. This pattern features layered 3D roses, chrysanthemum-style blooms, tiny lavender sprigs, and sculpted leaves worked in soft pastels on a delicate cream lace background. The finished runner sits beautifully on a wooden table and makes a striking centerpiece for tea, gifts, or seasonal decor. Techniques include layered petal construction, bobble clusters, motif joining, and a scalloped lace edging.
Progress Tracker
0% Complete
— Lace Background Motif (Make 10-12 motifs depending on table length) :
Round 1 :
Make a magic ring, ch2 (counts as first dc), 11 dc into ring, pull ring closed (12)
Round 2 :
Ch3 (counts as dc), 1 dc in same st, 2 dc in each st around (24)
Round 3 :
Ch3, *dc in next st, 2 dc in next st; rep from * around (36)
Round 4 :
Ch3, *dc in next 2 sts, 2 dc in next st; rep from * around (48)
Info :
Work all dc rounds loosely for an open lace look. Use stitch markers at quarter points so joining later is easier
Round 5 :
Ch1, sc in same st, *ch3, sk 2 dc, sc in next st; rep from * around to create picot points (16 ch3-spaces and 32 sc total)
Round 6 :
Turn motif to work shell-row: *into each ch3 sp work (2 dc, ch2, 2 dc), sk sc; rep around (16 shells)
Round 7 :
Ch1, sc in top of shell, *ch5, sc in top of next shell; rep around (16 ch5 loops)
Info :
These ch5 loops will form the joining points between motifs. Make 10-12 motifs and block flat before joining to keep edges equal
Round 8 :
Work decorative scalloped picots: into each ch5 loop work (sc, hdc, 3 dc, hdc, sc) to form scallop edging (16 scallops)
Round 9 :
Ch1, sl st into each st around to smooth edge; fasten off leaving long tail for joining
Info :
Make motifs in cream/ivory. Block motifs to measurements: aim for approximately 12cm diameter after blocking. Accurate blocking helps motif joins align easily
— Join Motifs into Runner Base :
Info :
Layout motifs in staggered long row pattern alternating slight offsets so petals nest. Join motifs using mattress stitch or crocheted join through ch5 loops with slip stitches for invisible seam
Round 1 :
With right sides up, align two motifs. Using cream yarn, insert hook in ch5 loop of motif A and ch5 loop of motif B and sl st through both, *ch1, sl st in next ch5 pair; rep across joint. Repeat to join all motifs lengthwise (joining through all ch5 loops)
Info :
Ensure motifs are joined with consistent tension to avoid puckering. Use pins to hold motifs in place while joining
Round 2 :
Once motifs joined into a central panel, work a continuous round of sc across the exposed inner edges to tidy seams: 1 sc evenly into spaces and across sl st joins
Round 3 :
Work a border around the entire assembled panel: *ch4, sk 2, sc in next; rep to form a lacy chain edging following motif scallops
Info :
Final runner base should be rectangular/oval depending on motif count. Aim for a neat scalloped outer edge to echo the floral overlay
— Large Layered Rose (Make 1-2 focal roses) :
Info :
This rose is built in three petal tiers: base leaves, medium petals, and top tight petals. Work petals as separate petal strips then attach in a spiral. Use teal for main focal
Round 1 :
Ch8, sc in 2nd ch from hook and across: 7 sc (foundation strip)
Round 2 :
Ch1, turn, 2 sc in first st, 1 sc in next 5 sts, 2 sc in last st (9)
Round 3 :
Ch1, turn, 1 sc in each st (9)
Round 4 :
Ch3, turn, in first st work (dc, tr, dc) to create a petal shell, skip next st, sl st in next; rep across to create 4 large loops (4 petal loops)
Info :
These loops will be the base supports for petals. Make sure petal loops are consistent in size; adjust ch length if needed for a fuller rose
Round 5 :
Working in back bump or along edge, attach yarn to first loop, into loop work (sc, hdc, 3 dc, hdc, sc) to make a single large petal; rep for each loop (4 large petals)
Round 6 :
Make a new petal strip: ch10, sc across (8 sc); turn and work 2 sc in first and last st to flare edges (10)
Round 7 :
Ch3, turn, in first st work (dc, dc, tr, dc, dc) for full rounded petal; repeat across to create 5 medium petal loops (5)
Round 8 :
Work medium petals onto loops: into each loop (sc, hdc, 5 dc, hdc, sc) (5 petals)
Info :
Pin large petals in place around base, then layer medium petals offset, tacking each with a few tiny stitches at the base. This creates staggered layered look
Round 9 :
Make tight top petal strip: ch6, sc in 2nd ch from hook and across (5 sc)
Round 10 :
Ch1, turn, 2 sc in first st, sc across, 2 sc in last st (7)
Round 11 :
Ch2, turn, in first st work (hdc, dc, hdc) to make small petal; rep across to form 7 small petal loops
Round 12 :
Work small petals: into each loop (sc, 3 dc, sc) (7 small petals)
Info :
To assemble spiral: sew base of petals starting with large petals around a small felt circle or small tight coiled round of yarn. Overlap petals by about 20-30% of their width for fullness
Round 13 :
Form center tight roll: ch4, sl st into first ch to form a small ring, then work 12 sc into ring and pull closed (12)
Round 14 :
Use long tail to sew the center roll to the top small petal row; continue sewing each tier around center, attaching medium, then large petals. Secure with small hidden stitches
Info :
If desired, insert a tiny pinch of fiberfill under first petal tiers to lift center slightly. Avoid overstuffing for a natural look
Round 15 :
Finish base of rose by working several sc rounds underneath to create a neat underside for sewing onto runner: join yarn under rose and work 2 rounds of 1 sc in each st, fasten off (approx 28 sc)
Info :
Make 1-2 large roses. Use teal for one focal, soft pinks for others. Block lightly by pinching petals into shape while damp and allow to dry
— Chrysanthemum/Mum Bloom (Make 1) :
Info :
This dense bloom uses many small petal units (clustered bobble petals) worked in rows then sewn in concentric circles to form a voluminous pompom-like flower
Round 1 :
Ch6, sl st to join to form ring, ch2 (counts as dc), 11 dc into ring (12)
Round 2 :
Ch2, 2 dc in each st around (24)
Round 3 :
Ch1, sc in same st and each st around (24)
Round 4 :
Petal-row: ch3, turn, in next sts make front-post loops by working 2 dc around same st to make a pronounced petal base; alternate fpdc clusters to create 12 raised bases (12)
Round 5 :
Make bobble petals into each base: into each base work (ch1, 5 dc bobble, sl st) to create small raised petal; continue around to make 24 small bobbles
Info :
Use a slightly smaller hook (3.0mm) for these bobbles to make them tight and defined. Work many rounds of bobble petals to build height
Round 6 :
Form inner ring by working 24 sc between bobbles to stabilize base (24)
Round 7 :
Repeat bobble-round: into each sc from previous round work (ch1, 4 dc bobble, sl st) (24 bobbles)
Round 8 :
Work 2 rounds of sc in between rows to compact structure: Round A: 1 sc in each st (24). Round B: 1 sc in each st (24)
Round 9 :
Repeat bobble-round again but stagger bobbles so they sit between previous ones; into every other st work (ch1, 4 dc bobble, sl st) making 24 more bobbles
Round 10 :
Work final stabilizing round: 1 sc in each st (24), finish off and shape by trimming small tucked stitches for a full dome
Info :
Pin bloom dome to a flat surface and steam lightly to set bobbles. Trim stray ends and secure center tightly to prevent petals from relaxing outward
— Medium Rose (Make 2-3) :
Round 1 :
Ch7, sc in 2nd ch from hook and across (6 sc)
Round 2 :
Ch1, turn, 2 sc in first, sc across, 2 sc in last (8)
Round 3 :
Ch3, turn, *dc, tr, dc into next st to form loop; rep across to make 4 loops
Round 4 :
Into each loop work (sc, 3 dc, sc) to form modest petals (4 petals)
Round 5 :
Make a second petal strip with ch8 foundation to create 5 slightly larger petals; attach them staggered to the first set
Round 6 :
Form center by rolling a strip of 10 sc into a tight coil and sewing in place; tack petals around coil in overlapping fashion
Info :
These medium roses can be made in blush, pink, and lavender. Pin each layer exactly before sewing to create a symmetrical bloom
— Small Layered Blossom (Make 4-6) :
Round 1 :
Ch5, join to ring, ch1, 10 sc into ring (10)
Round 2 :
Ch2, into each st work (hdc, dc, hdc) making 10 round petals (10)
Round 3 :
Work centre bobble: ch1, in centre make 6 dc bobble stitches clustered together and sl st to secure; fasten off (1 bunched centre)
Info :
Use cream for centers to match runner; these small blossoms are excellent fillers between larger motifs
— Lavender Sprig (Make 8-12 sprigs) :
Round 1 :
Ch20 for stem, sc in 2nd ch from hook and across (19 sc stem)
Round 2 :
Ch1, turn, sc in each st (19)
Round 3 :
Working down the stem: starting 3 sts from tip, make clusters of 5 mini bobbles into alternating stitches to form lavender buds: *sk1, into next st work (ch1, 3 dc bobble, sl st); rep along tip area to make 6-8 bobble buds per sprig
Info :
Use a smaller hook (3.0mm) for tight little buds. Make multiple short sprigs and vary lengths for a natural effect
Round 4 :
Fasten off and leave a long tail for sewing. Lightly steam to set bobbles upright
— Leaves (Make 20-30 assorted sizes) :
Round 1 :
Ch10, sc in 2nd ch from hook and across (9 sc)
Round 2 :
Ch1, turn, 2 sc in first st, sc across, 2 sc in last st (11)
Round 3 :
Ch2, turn, in first st work (hdc, dc, tr, dc, hdc) to shape leaf tip; continue down opposite side of chain working symmetric decreases to mirror start; sl st to join (approx 20 sts total in round)
Round 4 :
Work a single round of sc around leaf edge to neaten (around 20 sc)
Info :
Create leaves in 2 sizes by altering starting chain (ch8 for small leaves, ch12 for larger). Add a central ridge by working 3 sc down center BLO on wrong side if desired
Round 5 :
Optional vein detail: With a contrasting stitch of same color, embroider a central vein using stem stitch or working tiny sl st along center back
— Finishing Edge and Decorative Collar :
Info :
Once all flowers, leaves, and sprigs are prepared and blocked, plan their placement on the runner base. Lay them out with a focal composition and take a photo as a reference before sewing
Round 1 :
With cream yarn, work a delicate scalloped collar around entire runner: Join at side, *ch4, sk 2 sts, sc in next st; rep across edge to form airy loops
Round 2 :
Into each ch4 loop work (sc, hdc, 3 dc, hdc, sc) to form pronounced scallops; make one continuous round around whole piece
Info :
Keep edge smooth by easing yarn across tight spots. If the assembled runner pulls in at edges, add occasional increases in sc round to flatten
Round 3 :
For a vintage raised bead detail: into the valley between scallops, work small picots by making (sc, ch3, sl st) optionally every third scallop
Info :
Block final assembled piece flat. Use steam or wet blocking and shape petals and scallops as you pin. Allow full drying time before storage
— Assembly & Sewing Placement :
Info :
Arrange flowers in a pleasing asymmetric cluster pattern: large teal near one end, chrysanthemum slightly up the centre, medium roses and small blossoms interspersed with leaves and lavender sprigs
Round 1 :
Position large rose: place rose on runner base, align its underside center over one scallop motif. With matching yarn and yarn needle, use small whipstitches around underside to tack rose center through lace base every 4-6 mm to secure (approx 12-16 stitches)
Round 2 :
Sew chrysanthemum next: center dome slightly overlapping edge of a motif. Use invisible ladder-style stitches around base and extra stitches across bottom to secure bobbles so they do not droop (20-24 stitches)
Info :
Sew medium roses and small blossoms next, tucking leaves under petals and sewing leaves only at their base so they can lift slightly for 3D effect
Round 3 :
Position lavender sprigs: place sprigs so tips extend outward from clusters and tack at two points along stem to hold shape; do not fully flatten sprigs to preserve bobbles (4-6 stitches each)
Round 4 :
Once all elements are sewn, weave ends through underside of runner and trim. Use small glass head pins to hold delicate petals while sewing for extra stability
Info :
If any pieces feel loose, secure them with a few extra hidden stitches. A dab of fabric glue on the underside can add reinforcements, but stitching is preferred
Completing this floral table runner is such a joyful process — every petal you sew on adds more life to the piece! The layered roses and tiny lavender clusters create a beautiful, tactile centerpiece that feels like a bouquet that will never wilt. Blocking and careful assembly make all the difference, and the final runner is a keepsake you can use or gift. 🧶🌸✨