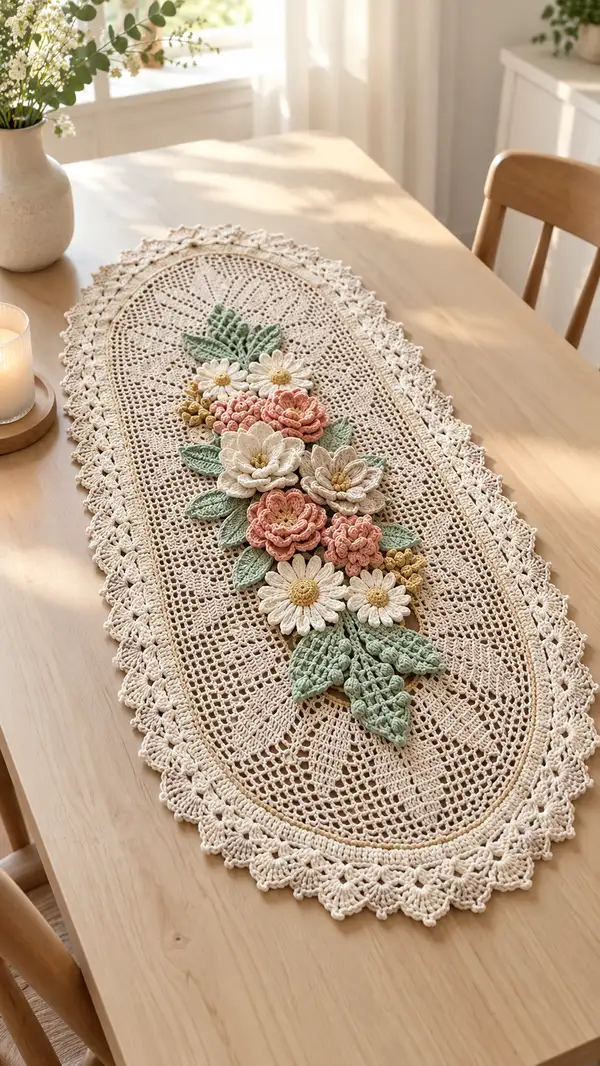
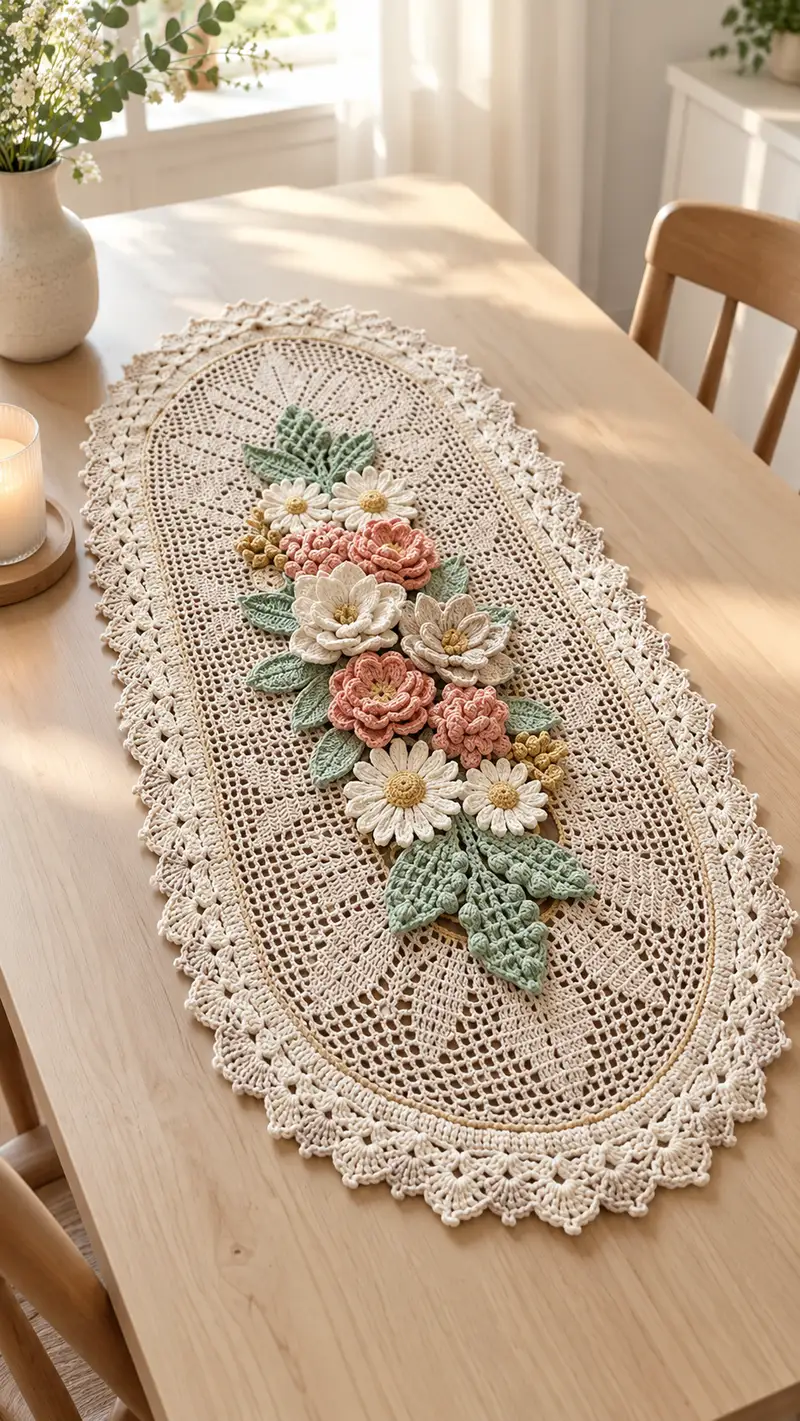
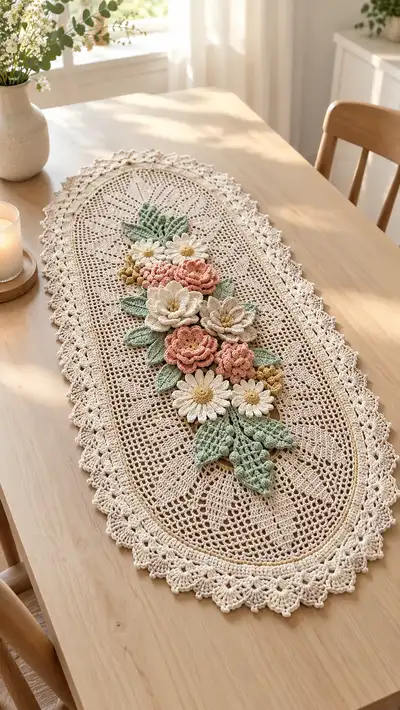
Create a beautiful oval crochet table runner with a delicate lace base and dimensional floral appliques. This pattern features a soft ivory lace foundation, scalloped edging, layered roses, daisies, textured leaves and tiny bobble accents in muted green, coral, cream and mustard. Step-by-step instructions guide you through each round, stitch count, and assembly detail so you can recreate this elegant centerpiece for your dining or console table.
Progress Tracker
0% Complete
— Foundation Base (Oval Lace Center) :
Info :
This runner base is worked in rounds from a long foundation chain to create an elongated oval. The sample uses a foundation chain of 88 to achieve a runner roughly 30 x 85 cm in DK cotton. Adjust chain length in multiples of 4 to change final length proportionally. Work a row of filet-style mesh rounds (dc and ch spaces) built around a symmetrical increase at each short end of the oval. Keep stitch markers at the increases for orientation. Gauge and blocking will affect final size.
Round 1 :
Ch 88, join with sl st to first ch to form a ring being careful not to twist chain. Ch 3 (counts as first dc), 1 dc in same ch, 1 dc in each of next 85 ch, 3 dc in last ch; continue working along the opposite side of foundation chain: 1 dc in each of next 85 ch, 2 dc in first ch (including ch3 count) — adjust so you end with (88 + 8) stitches approx (exact count 188 dc). (188)
Info :
Place markers at the center of each rounded short end (the 3-dc clusters). These will be your reference for shaping later. For evenness, double-check the number of dc you have on each long side between end clusters; they should match.
Round 2 :
Ch 3, turn work so you are working in rounds around the oval: 1 dc in same st, *1 dc in each of next 6 sts, ch 1, sk 1, 1 dc in each of next 6 sts* along long side until you reach the end cluster; in end cluster: 3 dc in top of cluster, then continue along opposite side mirroring long side repeat: (1 dc in each of next 6, ch1, sk1) etc. Work last st as 1 dc in top of starting ch3. Approximate stitch geometry preserved; mesh pattern begins. (188)
Round 3 :
Ch 3, 1 dc in same st, continue filet grid: *2 dc, ch1, sk ch-1 sp, 2 dc* across long sides maintaining counts and preserving 3-dc clusters at each short end. Keep same overall stitch count. (188)
Round 4 :
Ch 2 (counts as hdc), 1 hdc in same st, *1 hdc in each dc for 10 sts, ch1, sk next ch-sp* across; in round ends work 3 hdc around the top of the 3-dc clusters to preserve oval shape. (188)
Info :
These early rounds set the lace rhythm. Keep tension even and count each repeat at least twice. If your chain was different, ensure your long-side repeats divide evenly by the chosen repeat (here 8-stitch mesh groups). Use stitch markers at every 20 repeating units for long counts.
Round 5 :
Ch 3, dc in same st, *dc in next 2 sts, ch2, sk 2, dc in next 3 sts* along long side. At short end: 3 dc in top of cluster; continue opposite side mirroring. Fill any gap at seam with an extra ch-sp where needed to keep mesh even. (188)
Round 6 :
Ch 1, sc in same st, sc in each st around maintaining the lace geometry but switching to sc to provide a firm foundation row for further filet rounds. Work 3 sc in each end cluster to maintain curve. (188)
Round 7 :
Ch 3, dc in same st, *1 dc, ch1, sk1, 1 dc in next 2 sts* repeat across long side; form 3-dc end clusters as before. (188)
Round 8 :
Ch 1, sc in same st, sc in each st around to tidy the row; this creates a visible ridge and stabilizes the mesh. (188)
Info :
At this point the mesh grid is established. From round 9 onward we will alternate filet mesh rounds and stabilising sc/hdc rounds to build height without substantially increasing width. Use a stitch marker at the seam where you joined to keep orientation.
Round 9-12 :
Repeat rounds 2-5 sequence (filet dc patterns) maintaining 188-stitch geometry and preserving 3-dc clusters at the oval ends. This creates a gradual stylized fan motif inside the mesh. (188)
Round 13 :
Ch 1, sc in same st, sc in each st for a clean line (188)
Info :
At round 14 we introduce brief increases every 24 stitches along the long sides to nudge the oval into a slightly more elongated silhouette (this is optional depending on your initial chain length and desired curve).
Round 14 :
Ch 3, dc in same st, *dc in next 11 sts, 2 dc in next st (increase), repeat across long side, 3 dc in end cluster; mirror on opposite side*. This adds 2 sts per increase point per long side: if inserted every 12 sts across each long side (approx 7 increases per long side) total stitch count increases by 28 sts making new total: 188 + 28 = 216. (216)
Round 15 :
Ch 1, sc in same st, sc in each st around (216)
Round 16-20 :
Work filet mesh rounds similar to rounds 2-5 but with the increased stitch count (216) preserving lace repeats. Maintain the 3-dc end clusters with 3 dc into top of each end cluster to keep the oval shape. (216)
Info :
At this stage you should begin to visualize the plate for the floral bouquet placement. Mark the central axis with removable stitch markers or contrasting yarn so you know where appliques will be arranged later.
Round 21-30 :
Continue alternating filet mesh motif rounds with stabilising sc/hdc rounds. Suggested alternation: odd rounds filet lace (dc/ch-sp motifs), even rounds sc/hdc tidy rows. Keep stitch count stable at 216. This builds the flat center section with airy texture. (216)
Info :
Begin integrating decorative fan motifs near each short end: the next 6 rounds create a radiating fan of trebles and chains to echo the scalloped edging that will be added later. Place a temporary marker at each fan center (the end clusters).
Round 31 :
Ch 3 (counts as dc), *dc in each of next 6 sts, ch 2, sk 2, tr in next st, ch 2, sk 2, dc in next 6 sts* across long sides, maintaining end cluster fans: in the 3-dc end area work (tr, ch3, tr) in top of the center dc to form a fan peak. (216)
Round 32 :
Ch 1, sc in same st, sc across each st including into chain spaces as single sc to give contrast and stability. (216)
Round 33-38 :
Work filet pattern rounds that gradually reduce open mesh density toward the center where appliques will sit. Keep overall stitch count 216. (216)
Info :
Start checking width every few rounds. If the fabric begins to ripple or cup, adjust tension or add an extra stabilising sc round. Blocking after completion will help flatten the runner but try to work evenly.
Round 39-46 :
Work 8 rounds alternating: odd rounds filet lace (dc & ch mesh) and even rounds sc/hdc tidy rows as previously established. Maintain 216 stitches. (216)
Info :
The center area of the runner between rounds 30-46 is the recommended placement zone for your bouquet. If you prefer a longer bouquet, extend the number of mesh rounds before the border. Place a removable marker at the middle round of the runner to help align large central flower placement later.
Round 47-54 :
Begin narrowing slightly for the transition to the decorative border: work four rounds with a combination of dc rows and occasional (dc, sk 1, ch1) repeats to prepare for edged fans. Keep stitch count constant at 216. (216)
Round 55 :
Ch 2, hdc in same st, *hdc in each of next 4 sts, hdc2tog over next 2 sts* across long sides to remove 1-2 stitches evenly if desired for slight taper; if you prefer to keep exact width, work sc round instead. If decreasing here by 8 sts total, new count becomes 208. (208 or 216 depending on your choice)
Info :
If you decreased, track new stitch count carefully for border repeats. This is a good time to wet-block the base flat before continuing with border rounds; pin edges to a blocking mat and allow to dry to stabilize shape.
Round 56-60 :
Work 5 rounds of tidy sc/hdc across all stitches to create a firm edge base for the lace scallop border. (208 or 216)
Info :
After round 60, fasten off and weave in any long tails that will interfere with later assembly. Keep the base blocked and flat; appliques are best sewn on to a stable surface.
— Scalloped Lace Border :
Info :
The scalloped border is worked in rounds along the outer edge. Use a slightly smaller hook (3.0–3.25mm) for crisper shell definition. Work clusters of shells separated by ch-sps; add picot points for vintage detail. Border rounds assume your current stitch count is 208; if you retained 216 modify repeats accordingly (use formula 208/8 = 26 shell repeats approx).
Round 61 :
Join with main color at any edge stitch. Ch 1, sc in same st, *ch 3, sk 2, sc in next st* around to create spacing for shells. (208)
Round 62 :
Join with sl st to first ch-3 sp, ch 3 (counts as dc), 4 dc in same ch-3 sp (forming 5-dc shell), *sk next sc, sl st into next ch-3 sp, 5 dc in that ch-3 sp* repeat around to form shells at each spacing. At the seam work sl st to top of starting ch3. (Approx 26 shells)
Round 63 :
Ch 1, sc in first dc, *ch 5, sc in center dc of next shell* repeat to create tall picot arches. (26 sc, 26 ch-5 sps)
Round 64 :
Into each ch-5 sp: sl st, ch 3, 3 tr, ch 3, sl st (picture-point shell); into each sc between arches work sc to anchor. This creates a layered scallop. (26 points)
Round 65 :
Edging refinement: work picot border: *ch 3, sl st into next tr peak, sc into sc between peaks* to add small points. Fasten off and weave ends. The scalloped edge should now be crisp and slightly raised. (Finishes border)
Info :
Option: Add another decorative round of tiny shells or clusters if you want a larger scallop. If your runner is slightly smaller, reduce the number of shells by adjusting the frequency of initial ch-3 anchors in round 61.
— Large Layered Rose (Make 2) :
Info :
These roses are layered spiral petals worked in rounds with increases to create a compact, dimensional bloom. Work with coral or blush yarn. Two roses of different sizes create depth: make one larger (R1) and one medium (R2).
Round 1 :
With coral, mr, ch 2, work 10 hdc in magic ring. Pull ring closed. (10)
Round 2 :
(Inc in each st) x 10 — working 2 hdc in each st. (20)
Round 3 :
*1 hdc in next st, inc* around (30)
Round 4 :
*1 hdc in next 2 sts, inc* around (40)
Info :
Begin shaping petals now by working petals into the front loops only for the next round to create a ridge. Keep center slightly cupped by not over-stretching.
Round 5 :
FLO: *1 hdc in each of next 3 sts, inc* around (50)
Round 6 :
Ch 2, *(3 dc, ch 2, 3 dc) in next st, sl st in next st* repeat around to start forming petal scallops. Fasten off coral if changing to a lighter shade for inner petals. (25 petals)
Round 7 :
With lighter coral or blush, join into base of a petal, ch 2, work 7 dc into petal crest, sl st to base; repeat into each petal to form a second layer. Fasten off leaving long tail for sewing. (25 petals)
Info :
Stack the second layer offset to the first so petals alternate. You can make the larger rose one round deeper (add Round 8 petals with 9 dc each) for more fullness.
Round 8 :
Optional fullness round: join same as Round 7 and work 9 dc per petal crest for a fuller bloom. Fasten off and weave ends. (25 petals larger)
Round 9 :
Securely sew the layered rounds together through the hdc foundation to create a firm bloom. Add a small center knot of mustard yarn (6 sc in mr) for a stamen cluster if desired. Assemble two roses: one R1 with extra Round 8, and R2 without.
Info :
Lightly stuff the flower center with tiny amount of fiberfill before sewing the final rounds closed if you want a domed center. Block petals using a pinboard or small cups to shape them slightly outward for a natural look.
— Medium Rosette / Pom Flower (Make 3) :
Round 1 :
With cream yarn, mr, ch 2, 12 hdc in ring. (12)
Round 2 :
*1 hdc in next st, inc* around (18)
Round 3 :
Ch 1, sc in same st; *ch 3, sl st in next st* around creating petals comprised of ch-3 loops. (18 loops)
Round 4 :
Into each ch-3 loop: (sc, 5 dc, sc) to create individual rosette petals, sl st to base and continue around. Fasten off and leave tail for sewing. Make 3 rosettes in varying sizes by reducing or expanding the number of dc per loop (3–7 dc).
Info :
Rosette petals can be stacked and offset to create a small bouquet cluster. Trim and block lightly as needed for shape consistency.
— Daisy (Make 4) :
Round 1 :
With cream, mr, ch 2, 10 hdc in ring. Pull tight and join. (10)
Round 2 :
Ch 1, sc in same st, *ch 6, sl st in next st* around 5 times to form 5 tall loops. (5 loops)
Round 3 :
Into each ch-6 loop: *sl st, ch 1, (dc, hdc, sc, hdc, dc)* repeat in each loop to form petals. Fasten off. (5 petals)
Round 4 :
Make center: with mustard, mr, 8 sc in ring. Fasten off leaving long tail to sew center onto daisy. (8)
Info :
Daisies are flat and sit atop the runner; sew centers on securely with small running stitches. Slightly pull petals up so daisies appear dimensional.
— Tiny Bud Clusters (Make 6 clusters) :
Round 1 :
With mustard, mr, ch 1, 6 sc in ring. Fasten off leaving tail. (6)
Round 2 :
Make three tiny clusters of 3–5 buds by joining several 6-sc units with short connecting stitches to form a grape-like cluster. These will be sewn near roses to add texture.
Info :
Use small amounts of fiberfill if you want the buds slightly inflated; otherwise leave flat. Secure cluster backs with a few stitches for stability.
— Leaves (Make 10–12) :
Info :
Leaves are worked flat and slightly textured using back loop and post stitches for veins. Use muted sage green. Make a variety of sizes: small (7 rounds), medium (9 rounds), large (11 rounds).
Round 1 :
Ch 11, sc in 2nd ch from hook and across to last ch, 6 sc in last ch, continue on opposite side of foundation chain sc across to first ch, 3 sc in first ch to close forming an elongated leaf foundation. Total approx 26 sc depending on chain used. Fasten off and weave tail for shaping. (Approx 26)
Round 2 :
Join green at center base, ch 1, sc in same st, *hdc in next 4 sts, 3 hdc in top of tip (to shape), continue down opposite side hdc*; fasten off. Leaves will cup slightly—wet-block them flat or curl slightly depending on desired look.
Round 3 :
Veining round: with contrasting or same green, embroider central vein using sl st or back-stitch across the leaf center. Add two or three smaller veins using a yarn needle and surface slip stitches.
Info :
Make leaves in three sizes: small (ch 9, shorter rounds), medium (ch 11), large (ch 13). Make 4 large, 4 medium, 4 small for the bouquet layout shown.
— Assembly Applique Placements and Final Detail Flowers :
Info :
Before assembly, lightly block each applique to shape petals and leaves as you like. Pin appliques on top of blocked runner to test layout. The sample arrangement centers a large rose cluster slightly offset from the exact center, with daisies and smaller rosettes cascading above and below forming a vertical bouquet centered on the runner.
Step 1 :
Layout your appliques: place the largest rose at approximate round 38 along the runner axis (middle zone), then offset a smaller rose 8–10 rounds above it. Arrange 3 daisies and 3 rosettes interspersed with leaves and mustard bud clusters to create a natural cascading look. Keep about 1.5–2 cm spacing between pieces so edges overlap slightly for a cohesive bouquet.
Step 2 :
Sewing method: Use a yarn needle and working yarn color to whip or ladder stitch through the base rounds of each applique. Anchor petals with 6–8 secure stitches for larger blooms and 4–6 for smaller flowers. Sew through base fabric rows only; avoid pulling through delicate open mesh too tightly to preserve lace holes.
Step 3 :
Sew leaves under and around flowers. For a layered, organic look, sew leaf edges in by passing the needle through the center sc-row of the leaf and into the runner fabric, securing firmly with small hidden stitches. Use matching green yarn and hide knots in the underside of the runner.
Info :
For extra security on a frequently used table, add a few small hidden stitches around high-stress points (where heavy flowers meet runner or near center where hands might adjust decor). Use tiny, tight stitches to avoid visible bunching on the right side.
Step 4 :
Sew mustard bud clusters into small gaps between petals with matching yarn. Use a few tight stitches per bud cluster to keep them from catching on tableware. Optionally secure with a small dab of fabric glue at the back of each cluster for extra permanence (test glue on scrap first).
Info :
Once all pieces are sewn, gently steam or lightly spray-block the entire runner on the blocking mat to marry the appliques to the base; allow to dry clipped in position so petals retain their arranged shapes.
— Optional Decorative Extras (Fringe, Beads, Ribbon) :
Round 1 :
If desired add short fringe loops between scallops: join yarn at picot points, ch 12, sl st back to picot to create looped fringe, repeat around. Or sew on small pearlescent beads in centers of daisies for subtle shimmer using beading needle and thin thread.
Info :
Beads add weight — if using beads on multiple daisies, consider reinforcing underside with small felt circles to protect table finish from abrasion.
— Final Finishing :
Info :
Weave all ends into the back of the base, and trim close. Give the whole runner a final block and steam to set the lace and ensure the bouquet sits smoothly. If storing, roll carefully around acid-free tissue to avoid crushing petals.
Round :
Enjoy displaying your completed elegant floral table runner — it can be personalized with color swaps and larger or fewer appliques as you prefer.
This elegant floral table runner is a rewarding project that blends delicate lacework with sculptural appliques for a truly timeless centerpiece. Each petal and leaf is shaped and blocked to create a layered bouquet that sits beautifully on your table. I hope you enjoy the meditative pace of the filet work and the creative freedom of arranging your flowers — every runner will tell its own story! 🧶🌸