🧶 Beautiful ✨ Detailed 💝 Adorable

Scandinavian Inspired Floral Table Runner Pattern

Scandinavian Inspired Floral Table Runner Pattern
4.2★ Rating
5-7 Hours Time Needed
1.9K Made This
✂️

Intermediate Level

Ideal for those with basic crochet experience, featuring slightly more advanced stitches and techniques to expand your skills.

⏱️

Weekend Treat

Takes 5-7 hours, making it an enjoyable project to finish over a couple of days.

🏡

Cozy Accent

A warm touch for your space that transforms ordinary corners into inviting nooks filled with handmade charm.

🧶 Jump to Pattern ↓

About This Scandinavian Inspired Floral Table Runner Pattern

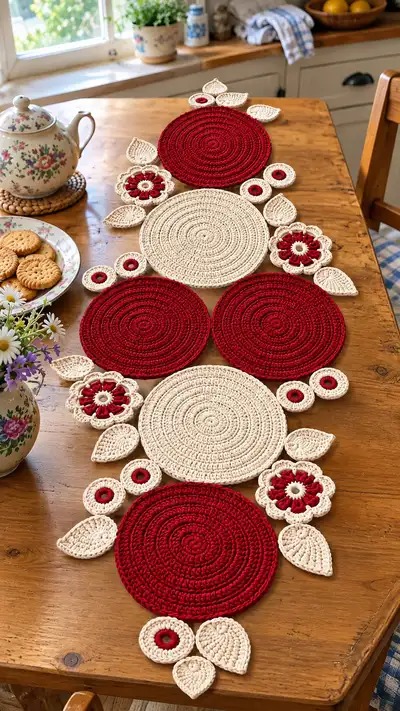
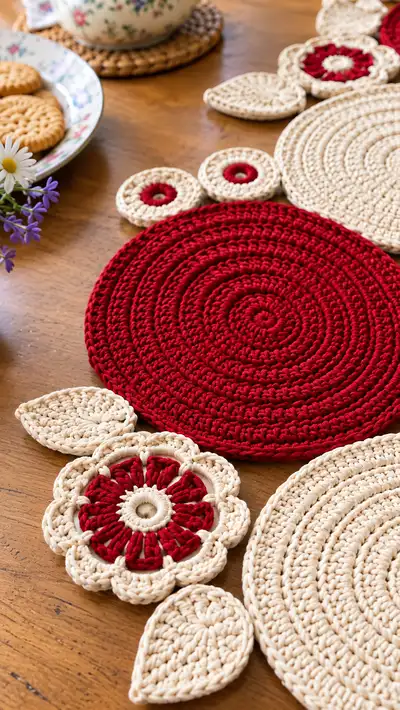
This pattern creates a decorative table runner built from a repeating language of large concentric discs in red and cream, small ring accents, scalloped flower medallions, and leaf-shaped motifs. The runner is worked flat using bulky cotton/rope-style yarn and a firm gauge to produce structured, heat-friendly placemats and decorative connectors. Visible details include raised spiral texture on round mats, puffed petal stitches in floral medallions, and pointed teardrop leaves that frame the runner for a balanced organic look.

Scandinavian Inspired Floral Table Runner Pattern crochet pattern - detailed view of completed project

The motifs are crocheted separately and sewn together, so you can easily change color placement or scale the runner by adding or removing discs. The pattern is ideal for a mid-sized table centerpiece and scales well with different yarn weights.

Why You'll Love This Scandinavian Inspired Floral Table Runner Pattern

I love this pattern because the bold contrast of deep red and creamy natural makes a striking yet cozy centerpiece that feels handmade and timeless. I appreciate how each individual motif is satisfying to make — the concentric rounds grow quickly, while the flower petals add a lovely tactile puff. Sewing the pieces together is calming and rewarding; the final runner looks like a carefully arranged floral installation on the table.

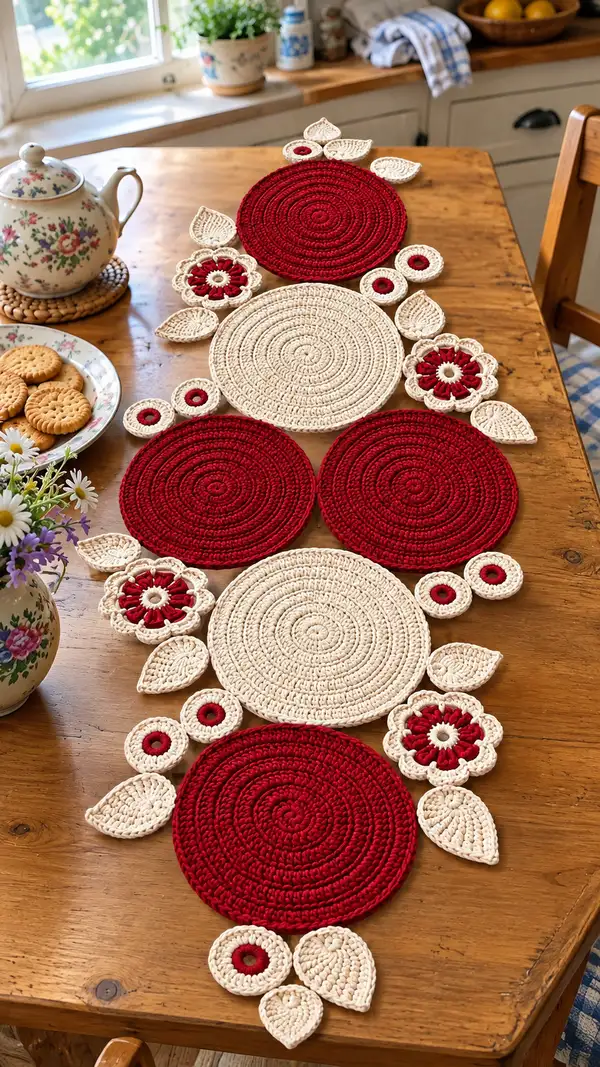
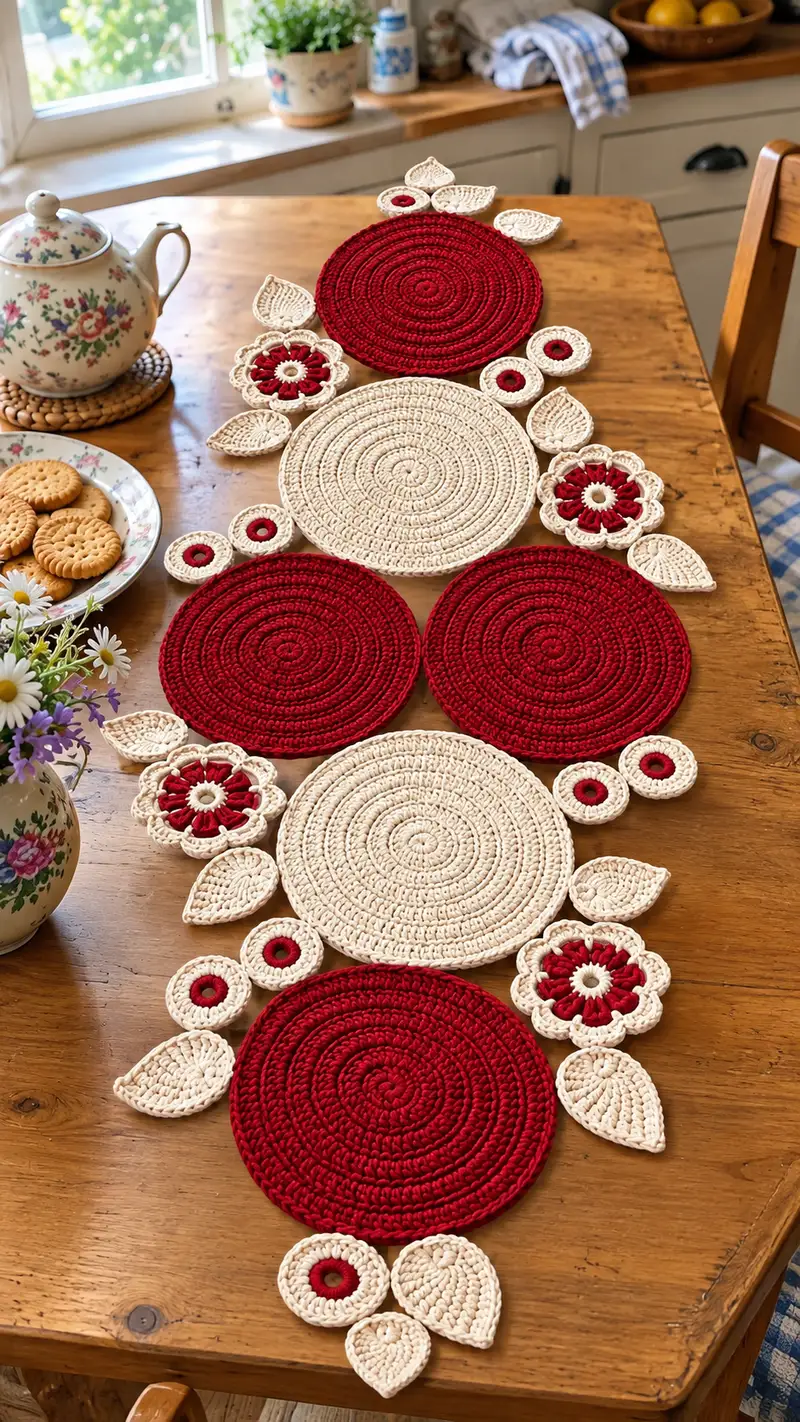
Scandinavian Inspired Floral Table Runner Pattern step 1 - construction progress Scandinavian Inspired Floral Table Runner Pattern step 2 - assembly progress Scandinavian Inspired Floral Table Runner Pattern step 3 - details and accessories Scandinavian Inspired Floral Table Runner Pattern step 4 - final assembly and finishing

Switch Things Up

I absolutely loved creating the layout for this runner because the separate motifs make it so easy to customize — you can change the color of every second disc or swap the flower centers for a different pop of color.

I often experiment with scale: using a thicker rope yarn and a 6.0mm hook gives a more dramatic, oversized runner, while finer cotton yarn and a 4.0mm hook produces a more delicate look. You can also simplify by removing the connector strip and sewing the discs edge-to-edge for a tighter, more compact runner.

Finally, try mixing in metallic cotton for a subtle shimmer on special-occasion runners, or add wooden beads between seams for a rustic accent — the modular construction makes these tweaks straightforward and fun.

Common Mistakes & How to Fix Them

✗ Skipping stitch markers at the start of each round can cause misalignment between rounds; use a marker and move it every round. ✗ Changing tension between circles and leaves will make seams look puckered; maintain consistent tension and gauge across motifs. ✗ Not weaving ends in before sewing motifs together can create bulky knots; weave long tails into the inside of each motif neatly. ✗ Using a hook too large for bulky cotton rope will make floppy motifs; use a slightly smaller hook for dense, structured fabric. ✗ Rushing decreases or increases causes visible ripples; count stitches carefully after each increase round. ✗ Not blocking flat circles after finishing can leave uneven spirals; gently steam or press with a damp cloth to flatten motifs if needed.

Scandinavian Inspired Floral Table Runner Pattern

A warm, rustic table runner made from concentric circular motifs, floral medallions and teardrop leaves in deep red and natural cream. Designed with chunky cotton rope yarn for a sturdy, heat-resistant surface — perfect as a centerpiece runner, layered over a wooden table. Includes detailed step-by-step stitch rounds for each motif, textured petal work and a decorative connecting trim to sew everything together.

Intermediate 5-7 Hours

Materials Needed for Scandinavian Inspired Floral Table Runner Pattern

— Main Fabric

  • 01
    Bulky cotton rope / T-shirt yarn (approx equivalent to super bulky) — about 300-400g in natural cream (main accent and connectors)
  • 02
    Bulky cotton rope / T-shirt yarn — about 200-300g in deep red (primary circle color)
  • 03
    Small amounts (10-20g each) of contrasting colors for optional embroidered details (e.g., beige or dark brown for tiny accents)

— Tools Required

  • 01
    5.0mm (H) crochet hook for main work (use 4.5mm if you want denser fabric)
  • 02
    4.0mm (G) crochet hook for smaller details and tighter small circles (optional)
  • 03
    Yarn needle for sewing and weaving ends
  • 04
    Scissors
  • 05
    Stitch markers (at least 4)
  • 06
    Measuring tape or ruler
  • 07
    Pins for blocking and assembly
  • 08
    Optional: blocking mats and T-pins for flattening circular motifs
  • 09
    Optional: fabric glue for reinforcing joins (use sparingly)

Progress Tracker

0% Complete

— Large Round (Make 6; alternate colors red and cream) :

Round 1 :

6 sc in mr (6)

Round 2 :

6 inc (12)

Round 3 :

(1 sc, inc) x 6 (18)

Round 4 :

(2 sc, inc) x 6 (24)

Round 5 :

(3 sc, inc) x 6 (30)

Info :

For bulky cotton rope yarn you'll get a very firm, structured motif. Work tight sc and place a stitch marker at the first stitch. Continue in continuous rounds or join and ch1 depending on preferred spiral look.

Round 6 :

(4 sc, inc) x 6 (36)

Round 7 :

(5 sc, inc) x 6 (42)

Round 8 :

(6 sc, inc) x 6 (48)

Round 9 :

(7 sc, inc) x 6 (54)

Info :

Check the circle lies flat after round 9. If you see cupping, work one extra even round before continuing increases. If ruffling occurs, skip the next increase round and proceed to even rounds instead.

Round 10 :

(8 sc, inc) x 6 (60)

Round 11 :

(9 sc, inc) x 6 (66)

Round 12 :

(10 sc, inc) x 6 (72)

Info :

At 72 stitches the disc is usually large enough for a placemat element; measure diameter. If you want a slightly larger disc, continue with one more increase round following the same pattern (11 sc, inc) x6 = 78.

Round 13-18 :

1 sc in each st (72)

Info :

Working several even rounds beyond your final increase strengthens the surface and creates the raised spiral texture visible in the photos. For a firmer edge, work these rows in BLO to create a subtle ridge.

Round 19-24 :

1 sc in each st (72)

Info :

Fasten off leaving a 20-25 cm tail for sewing. Weave tail through the back of several stitches for a tidy finish. Block lightly if needed by pinning flat and steaming from a distance; do not over-stretch rope yarn.

— Medium Round (Make 3; cream centers) :

Round 1 :

6 sc in mr (6)

Round 2 :

6 inc (12)

Round 3 :

(1 sc, inc) x 6 (18)

Round 4 :

(2 sc, inc) x 6 (24)

Round 5 :

(3 sc, inc) x 6 (30)

Info :

Medium rounds serve as focal points between large discs. Keep tension consistent with large rounds so joins are even when sewn together.

Round 6 :

(4 sc, inc) x 6 (36)

Round 7-12 :

1 sc in each st (36)

Info :

Fasten off leaving long tail for assembly. Optional: Add a final decorative slip-stitch round in contrasting color for a defined rim.

— Small Ring (Make 12; inner color red, outer cream) :

Round 1 :

6 sc in mr (6)

Round 2 :

6 inc (12)

Round 3 :

(1 sc, inc) x 6 (18)

Info :

These little rings are worked in two colors for the bullseye look. Work rounds 1-3 in red. Fasten off and change to cream with an invisible join to begin the outer ring.

Round 4 :

Join cream with sc in any st, ch1, 1 sc in same st, (1 sc, inc) x 6 (24)

Round 5 :

1 sc in each st (24)

Round 6 :

sl st to next st and fasten off leaving tail for sewing

Info :

Small rings are used as decorative connectors between larger discs and around flowers. Make a few extra in case of placement adjustments.

— Tiny Disc (Make 6; cream) :

Round 1 :

6 sc in mr (6)

Round 2 :

6 inc (12)

Round 3 :

1 sc in each st (12)

Info :

Tiny discs are perfect fillers between leaves and small rings. Work tight stitches so discs remain tidy and dimensional.

Round 4 :

fasten off, leave tail for assembly

— Flower Motif (Make 3) :

Round 1 :

6 sc in mr (6)

Round 2 :

6 inc (12)

Round 3 :

(1 sc, inc) x 6 (18)

Round 4 :

Join contrasting color (red) with sl st into bloom center for petal foundation, ch3 (counts as first dc), (dc, ch1, dc) in same stitch, *(skip 1 st, (dc, ch1, dc) in next st)* rep around to make 8 petal bases, sl st to top of ch3

Info :

Petal foundation uses dc pairs separated by a ch1 loop; the negative space will be filled with post stitches in the next round to create puff-like petals.

Round 5 :

Change to cream, working behind the dc pairs: *(in ch1 space: 7-tr puff stitch anchored in the space, sl st in next dc pair center)* rep around to create raised petals (8 petals total)

Round 6 :

ch1, 1 sc around each petal edge to define petals (16 sc total if placing 2 sc per petal edge)

Info :

Puff technique: yarn over, insert hook, yarn over pull through, repeat to collect 7 loops on hook, yarn over and pull through all loops, ch1 to secure. Work consistently for uniform petal height.

Round 7 :

sl st around edge to tidy, fasten off leaving long tail for sewing

Info :

Optional: Add a small cream ring behind the flower before sewing the petals into place for a layered look, or embroider a tiny dot center with leftover red yarn.

— Leaf Motif (Make 12) :

Round 1 :

ch6, sc in 2nd ch from hook, hdc, 2dc, hdc, sc, turn to work other side of chain: sc, hdc, 2dc, hdc, sc (10 sts each side including turning) — create a teardrop shape

Info :

This chain-base leaf is worked flat. For a more sculpted leaf work increases along the center spine (work 2 sc in center ch at the tip) on the return row for a fuller point.

Round 2 :

Join at base with slip stitch and sc around both edges working evenly: 1 sc in each st along one side, 3 sc at tip to round the point, then 1 sc in each st along other side; sl st to join (approx 16-20 sc depending on spacing)

Round 3 :

Work a second round of sc in BLO to create a defined raised edge: 1 sc in each st BLO (same count)

Info :

Work the leaves slightly loosely to give a flatter, softer appearance that lays nicely against the table. You can add an optional central raised vein by working a row of hdc down the center before the edging round.

Round 4 :

fasten off leaving 15 cm tail for sewing

— Connector Trim (Make 1 long strip of motifs to join circles) :

Round 1 :

With cream, ch 60 (or length matching distance between adjacent large discs), 1 sc in 2nd ch from hook and sc across (59 sc)

Round 2 :

ch1, turn, 1 sc in each st BLO to create a cord-like ridge (59)

Round 3 :

ch1, turn, sc in each st (59)

Info :

This narrow strip is optional; you can instead sew discs directly edge-to-edge. The strip provides extra decorative space to attach small rings and leaves for an organised layout.

Round 4 :

fasten off leaving long tail to stitch the strip to discs

— Decorative Edge (Optional scallop round for discs) :

Round 1 :

Join cream with sl st to outer round, *(skip 2 sts, 5 dc in next st, skip 2 sts, sl st in next)* rep around to make scallops; adjust spacing to fit stitch count (approx 12-16 scallops)

Info :

Scalloped edges add a floral finish to each disc and tie in with the petals of the flower medallions. Work the scallops loosely and keep the tension relaxed so they sit flat.

Round 2 :

sl st around scallops to tidy and fasten off

— Assembly Prep and Finishing :

Info :

Lay out all motifs on a flat surface in the desired order (in the photos large and medium discs alternate with clusters of leaves, small rings and flower medallions). Play with spacing before pinning and sewing so the composition feels balanced.

Step :

Weave tails to the back of motifs and leave long tails for sewing. Use the same color yarn for invisible joins or use contrasting cream on red for decorative whip-stitching.

Info :

Sew motifs with a yarn needle using whip stitch or mattress stitch for a discreet join. Place pins to hold pieces in place; sew through the backbone of stitches (not the front loop only) for added strength.

Step :

Attach small rings and tiny discs first to large discs at intervals, then sew leaves and flowers around the medium discs so clusters form naturally. Reinforce high-stress joins with an extra pass of yarn to avoid separation over time.

Info :

If you want the runner to be washable, use a tight, secure seam with hidden ends and handwash on a gentle cycle or spot clean. Avoid machine drying for rope yarn; instead reshape and lay flat to dry.

Assembly Instructions

  • Arrange all motifs on a flat surface in the desired order, alternating large red and cream circles with medium cream circles centered, leaving space for flowers and leaves as shown in the image; pin each piece lightly to hold layout.
  • Attach small rings and tiny discs to the edges of large discs first using the long tails from each piece. Sew with a yarn needle through back loops and match placement to photo for clustered groups of three where applicable.
  • Sew flower medallions to the sides of medium discs at rounds corresponding to the outermost edge (after round 12 of medium disc). Use an invisible whip stitch and reinforce with a second pass if needed.
  • Position leaves around each cluster, spacing them 8-12 stitches apart along the outer edge of large and medium discs. Sew through the base of the leaf and the disc edge, curving the leaf slightly upward for dimensionality.
  • If using the connector trim, pin the strip to the underside of adjacent discs aligning the center of the strip with the seam between discs; sew through the strip's foundation row and the disc edge with short, secure stitches.
  • Weave in all sewing tails by threading the yarn needle and running tails through several stitches on the underside of the runner; trim close to work. Block the assembled runner lightly with pins to ensure motifs sit flat.
  • Add optional decorative top-stitching using running stitch in cream around the red discs to secure the edge and create an outlined look if desired.
  • Finish by checking all joins for security and trimming any stray fibers. For extra stability, add small hand-sewn stitches at high-traffic points beneath each large disc.

Important Notes

  • 💡Use stitch markers consistently at the beginning of each round to avoid counting errors and maintain proper shaping.
  • 💡Work tight enough to avoid gaps between stitches with bulky rope yarn so stuffing or surface texture does not show through.
  • 💡When changing colors, leave a tail of 20-25 cm to make sewing and joining easier and more secure.
  • 💡Block flat circles lightly if they curl; pin them flat on a blocking board and steam from a distance or dampen and shape, then air dry.
  • 💡Sew pieces together on the back side using the same color yarn as the motif for invisible joins, or contrasting yarn for decorative seams.
  • 💡Make extra small rings and tiny discs while you have yarn out — they’re quick to work and allow you to tweak spacing easily.
  • 💡Measure as you go to keep the runner symmetrical; adjust the number of even rounds to scale the diameter of circles uniformly.
  • 💡If you plan to machine-wash the runner, use tightly secured seams and a gentle cycle; air dry only to prevent shrinking or deforming the rope yarn.

This floral-inspired table runner brings cozy, handmade charm to any table. Layered discs, delicate petals and sculpted leaves create a beautiful centerpiece that's both practical and decorative. The chunky cotton rope yarn gives a tactile, durable finish ideal for everyday use. I hope stitching this pattern brings you as much joy as arranging the motifs together — each cluster feels like adding a small piece of art to your home. 🧶🌿
You ask,

we answer.

FAQs

What is the finished size of this runner?

The finished runner in the sample photos measures approximately 90-110 cm in length and 25-30 cm in width depending on spacing. Adjust number of discs or rounds to scale the runner larger or smaller.

What yarn is best for this pattern?

Bulky cotton rope or T-shirt yarn produces the rigid, textured look seen in the photos and is best for heat resistance. You can substitute bulky cotton blend yarn, but adjust hook size for density.

Can I change colors or sequence of motifs?

Absolutely — the runner is modular. Swap color placement of large discs or flowers, add contrasting rims, or insert more tiny rings to make a different rhythm.

How do I keep discs flat and even?

Work consistent increases, check after rounds 9-12, and adjust by adding an extra even round if cuping occurs. Light blocking will also help flatten the motifs.

Is it washable?

Handwash or gentle machine wash in a mesh bag is possible with sturdy seams; reshape and air dry flat. Avoid hot dryer heat which can distort rope yarn.

Can I make the runner longer or shorter?

Yes. To lengthen, add more large or medium discs and additional connector strips. To shorten, remove a disc cluster and re-balance the layout.

Do I need to use the connector trim strip?

No — it's optional. You can sew discs directly to each other or use the trim for a more linear, secure connection.

How much yarn will I need?

Approximately 300-400g of cream bulky rope yarn and 200-300g of red bulky rope yarn for the sample runner; amounts vary with scale and yarn brand.