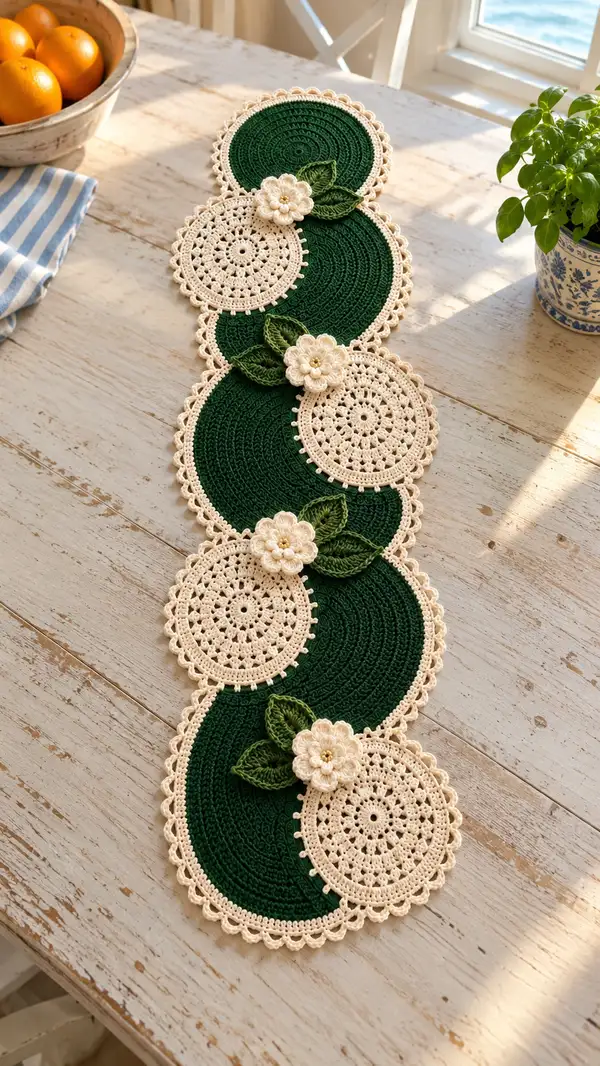
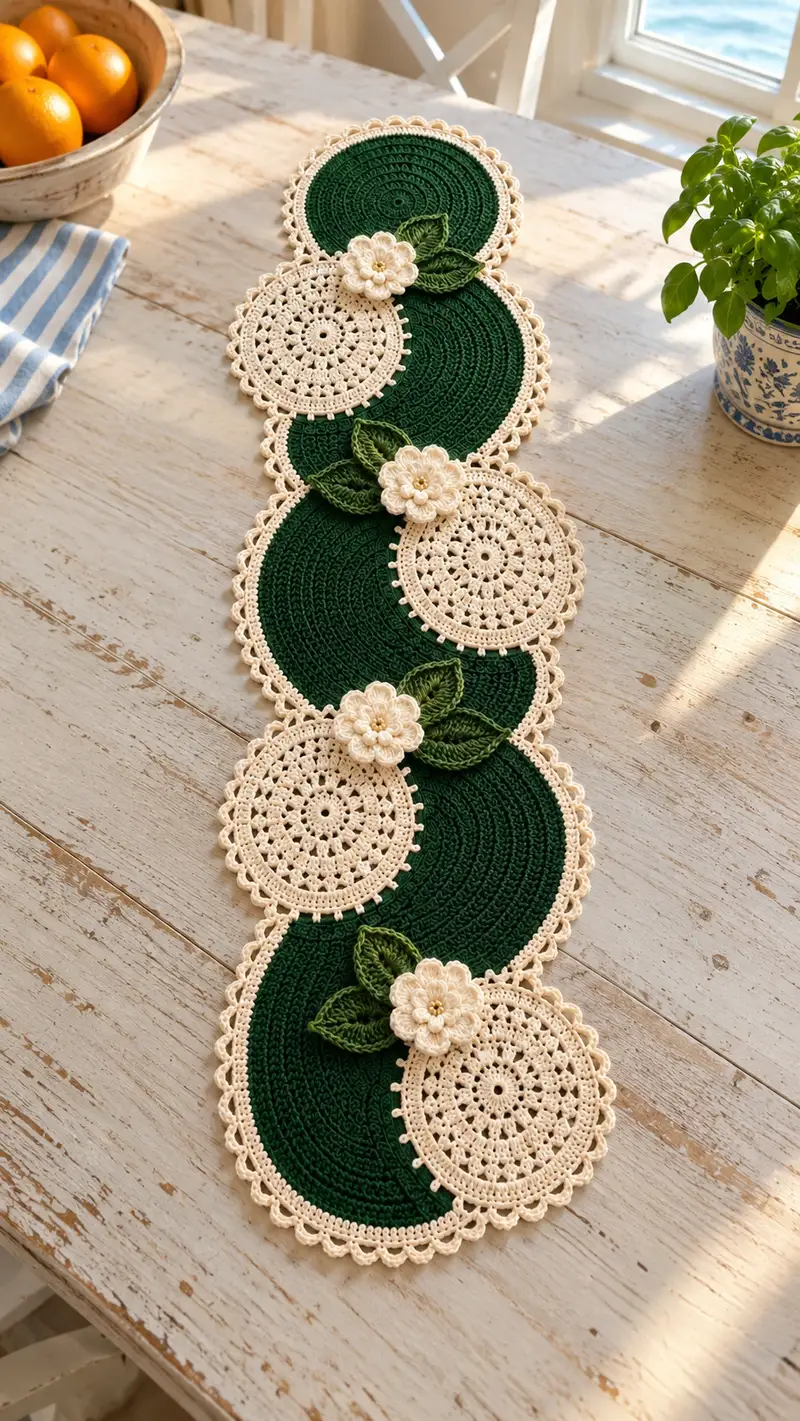
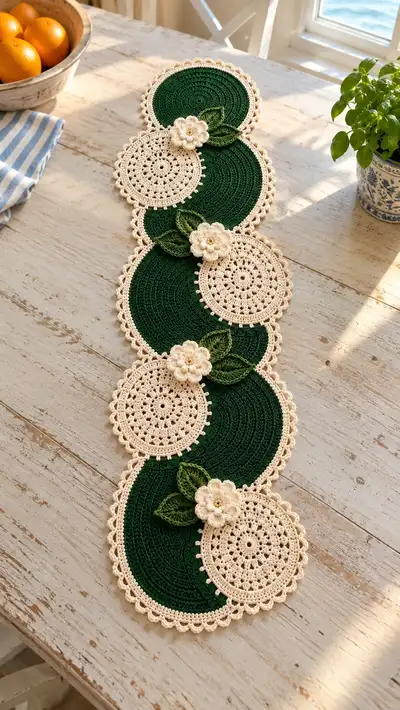
Create a stunning floral table runner featuring rich forest-green circles interlaced with delicate cream lace medallions, scalloped edging, and layered crochet flowers with leafy accents. This detailed pattern guides you through each motif, join and finishing step, producing a long, elegant runner perfect for dining tables or sideboards. The finished piece showcases textured single crochet panels, openwork lace discs, and raised three-dimensional flowers for a handcrafted heirloom look.
Progress Tracker
0% Complete
— Overview & Gauge :
Info :
This pattern creates a long runner composed of alternating large solid discs and smaller lace medallions, joined in an overlapping chain and finished with scalloped edging and floral accents. Gauge is not critical but will affect the finished size; aim for a firm fabric. Sample gauge: 12 sc x 12 rows = 10 cm using 3.5mm hook in DK cotton.
Info :
Finished size estimate: Each large green disc measures approximately 18-20 cm (7-8 in) in diameter. Each cream medallion measures approximately 11-12 cm (4.5-5 in). The pictured runner uses 4 large discs and 4 small medallions overlapping to create a runner about 80-95 cm (31-37 in) long; adjust by adding/removing units.
— Large Solid Green Circle (Make 4) :
Round 1 :
6 sc in magic ring (6)
Round 3 :
(1 sc, 1 inc) x 6 (18)
Round 4 :
(2 sc, 1 inc) x 6 (24)
Round 5 :
(3 sc, 1 inc) x 6 (30)
Info :
Work the first five rounds firmly; single crochet rounds create a dense, stable base. If your circle cups, check tension or skip one increase round; if it ruffles, you may be increasing too much.
Round 6 :
(4 sc, 1 inc) x 6 (36)
Round 7 :
(5 sc, 1 inc) x 6 (42)
Round 8 :
(6 sc, 1 inc) x 6 (48)
Round 9 :
(7 sc, 1 inc) x 6 (54)
Info :
If your yarn or hook differs, measure the circle now: you are aiming for about 9–10 cm radius for the final green disc before the decorative border. Adjust number of rounds to match desired diameter.
Round 10 :
(8 sc, 1 inc) x 6 (60)
Round 11 :
(9 sc, 1 inc) x 6 (66)
Round 12 :
(10 sc, 1 inc) x 6 (72)
Round 13 :
(11 sc, 1 inc) x 6 (78)
Info :
Rounds 10-13 expand the disc so it lays flat under light tension. Count your increases carefully—each round increases by 6 stitches total if following the (n sc, inc) x6 formula.
Round 14 :
(12 sc, 1 inc) x 6 (84)
Round 15 :
(13 sc, 1 inc) x 6 (90)
Round 16 :
(14 sc, 1 inc) x 6 (96)
Info :
At 96 stitches the circle is broad and will be the solid portion of the runner. If you prefer a slightly smaller diameter, stop at round 14 or 15; for larger, continue increases in the same pattern.
Round 17-22 :
1 sc in each st (96)
Info :
Work 6 even rounds to build a little height to the disc; these rounds provide a broad, flat area that contrasts nicely with the lace medallion. Keep tension consistent to avoid ripples. Place a stitch marker at the beginning of each round.
Round 23 :
Work 1 sc in BLO in each st around (96)
Info :
Working in the back loop only (BLO) creates a subtle ridge which helps the decorative border sit neatly. This round prepares the edge for the picot and scallop rounds to follow.
Round 24 :
*1 sc, ch 3, skip 2 sts, 1 sc* repeat around placing 32 chain-loop posts (96 sts worked, 32 ch-3 loops)
Round 25 :
In each ch-3 loop work: (sc, hdc, 3 dc, hdc, sc) to create a small shell. Join with sl st to first sc.
Info :
These shells form a small scalloped edging that will nestle under the cream scallop border. Make sure shells are evenly placed — they should match the 32 ch-3 loops made in Round 24.
Round 26 :
Working behind shells: sl st to base of each shell, ch 1, sc around shell base, sl st — this secures the shell row and flattens the edge (96)
Round 27 :
Optional: Picot round. *ch 3, sl st into 3rd ch to form picot between shells* repeat between shells for delicacy. Fasten off and weave ends.
Info :
Make 4 identical large discs. Block or steam each disc flat before joining to ensure uniform diameter and tidy edges. Label them as A, B, C, D to follow the joining order in the assembly stage.
— Small Cream Lace Medallion (Make 4) :
Round 1 :
6 sc in magic ring (6)
Round 3 :
(1 sc, 1 inc) x 6 (18)
Round 4 :
(2 sc, 1 inc) x 6 (24)
Info :
The medallion begins with a small solid center to anchor the lace. Work these rounds loosely enough for openwork to bloom in later rounds but tight enough to avoid gaps between motifs.
Round 5 :
*ch 4, sk 1 st, sc in next st* around creating 12 chain-4 loops (24 worked)
Round 6 :
In each ch-4 loop: (sc, ch 2, 3 dc, ch 2, sc) to make a petal-like cluster — 12 clusters around (24 base points)
Round 7 :
*sl st to next space, ch 5, sc in tip of cluster* repeat 12 times forming small arch loops
Round 8 :
In each ch-5 arch: (sc, 2 dc, ch 2, 2 dc, sc) — 12 shell arches (count measured as 12 shells)
Info :
Rounds 6-8 create the open lace pattern; block these rounds as you go if you can pin the loops to shape. Use slightly smaller hook (3.0mm) if your loops look sloppy.
Round 9 :
*ch 3, skip to base of next arch, sc* repeat around to form connecting loops (12)
Round 10 :
In each ch-3 loop: (sc, hdc, 3 dc, hdc, sc) — 12 defined lace shells
Round 11 :
*ch 2, sl st into next space, ch 2* repeat around to form 24 small chain-2 picot anchors
Round 12 :
Working into chain-2 anchors: sc into anchor, picot (ch 3, sl st in 3rd ch), sc into same anchor — repeat for 24 picots creating an outer decorative ring
Info :
This medallion has a lacy openwork ring with outer picots that will visually match the scallop edge of the larger green discs. Make 4 medallions and block them flat and circular for easy joining.
Round 13 :
Optional scallop: *in next picot space work (5 dc, sl st)* repeat around to form small scallops (24 scallops)
Round 14 :
Fasten off leaving a long tail for sewing to the large disc. Weave in ends after joining.
Info :
Because the small medallions are openwork, use a finer hook or slightly looser tension in early rounds to avoid puckering. Pin to blocking board in round shape and spray or wet-block to set lace.
— Decorative Cream Scalloped Edge (Unified Edge Round) :
Info :
This outward scallop is worked after all motifs are joined; it unifies the runner visually and hides small join imperfections. You will work a connecting round that stitches through motif edges to create a continuous border.
Round 1 :
With cream yarn and working around the outer most edge of the assembled runner: join with sl st to any shell base, ch 1.
Round 2 :
*sc in next 3 sts, 5 dc in next stitch (scallop), sc in next 3 sts* Repeat around working evenly across each motif edge so scallops fall over large disc shells and small medallion picots. Count scallops as you go to keep symmetry, approximately 64-72 scallops depending on runner length.
Info :
Place scallops so they align across all discs. If a scallop lands unevenly on a seam, reposition by sewing the motif slightly or by spacing stitches (sc 2, sc 4) to absorb the difference.
Round 3 :
Optional: In each scallop work: sl st to center dc, ch 3, picot, sl st to center dc for a tiny raised picot in each scallop. Fasten off and weave ends.
— Flower Motif (Make 4) :
Round 1 :
6 sc in magic ring (6)
Round 3 :
(1 sc, 1 inc) x 6 (18)
Info :
This small center forms a strong foundation for the layered petals. Use the cream yarn and a 3.0-3.5mm hook for crisp petals. Do not fasten off yet—petals are built on Round 4 and beyond.
Round 4 :
*ch 2, (2 dc, ch 2, 2 dc) in next st, ch 2, sl st in next st* — create 6 petals spaced over the 18-st round (6 petals)
Round 5 :
Working behind the first petal row: attach yarn in the base between petals, *ch 3, (3 dc, ch 3, 3 dc) in base for larger outer petal* repeat 6 times to create a second petal layer (6 large petals)
Round 6 :
Optional bead center: sew a small gold bead or make a small French knot with yarn and secure at center. Fasten off leaving tail to sew flower onto medallion overlap point.
Info :
For depth, lightly block each flower by pinning petals into shape and spraying with water; allow to dry. Make 4 flowers for the runner; position them where the small medallions overlap the green circles as shown in the photo.
— Leaf Motif (Make 8) :
Round 1 :
ch 8, sc in 2nd ch from hook, hdc in next, dc in next 2, hdc in next, sc in next, sl st in last ch to form base (work along chain back to starting ch) (approx shaping)
Round 2 :
Turn leaf: working on opposite side of foundation chain: sc in first st, hdc, (dc, tr, dc) at leaf tip, hdc, sc — fasten off leaving tail for sewing (visible leaf shape approx 8-10 sts)
Info :
Leaves are tapered and slightly cupped. For texture, work a tapestry-style vein: use a threaded darning needle and contrast yarn to stitch a center vein down each leaf after blocking. Make 8 leaves to cluster in pairs with each flower (two leaves under each flower in the photo).
Round 3 :
Optional: Edge leaf with slip stitch or single crochet to firm up the shape and prevent curling during use. Use same green yarn and 3.0mm hook for a neat edge.
— Joining Motifs (Detailed Overlap Join) :
Info :
Lay out large discs and small medallions in the overlapping arrangement: each small cream medallion overlaps the edge of neighboring green discs by approximately 40-45% of its diameter. Use pins to hold positions. Joining will be done with whip stitch or sewing through surface loops and corresponding picots to create a secure and nearly invisible join.
Step 1 :
Place Large Disc A flat. Position Small Medallion 1 overlapping the right-hand edge of Disc A by ~40% and pin. Using matching cream yarn tail from medallion, use a yarn needle to sew medallion to disc by stitching through the edge picots of medallion and the shells/picots of the green disc. Use 6-8 evenly spaced stitches around the overlap area. Fasten off and weave end.
Step 2 :
Place Large Disc B so it overlaps Small Medallion 1 on the opposite side, creating an A–small–B chain. Join the medallion to Disc B in the same manner, ensuring alignment so the runner stays straight.
Info :
Repeat the A–small–B pattern for the length of the runner. Each join should overlap by the same proportion; measure 40% visually or use a small ruler to mark the overlap points on the discs before pinning.
Step 3 :
Once all motifs are joined in a row, check symmetry and adjust tension if any units pull in. If a unit pulls on one side, release a few joining stitches and redo with less tension.
Info :
For extra stability, run a reinforcement stitch along the interior join (where motifs meet under the seam) using matching thread. This keeps the runner lying flat with regular use.
— Reinforcement Rounds & Decorative Lid (Optional) :
Round 1 :
After joining, with cream yarn, work a sl st seam along interior connection points: insert hook through both motifs’ adjacent stitches and sl st across overlapping seam to create a tidy inner line. This usually requires about 1 sl st for every 3 original stitches across the seam length; work evenly lengthwise across each join.
Round 2 :
Optional: If slight gaps remain, work a small decorative picot scatter: *sc into gap space, ch 3, sl st into first ch to make picot* insert between motif edges wherever needed. This is purely decorative and helps hide minor join imperfections.
Info :
These reinforcement and decorative passes are subtle but important for longevity. Use a matching yarn color and small, even stitches for a professional finish.
— Final Edging & Unifying Scallop (Detailed) :
Round 1 :
With cream yarn, join at a junction point between motifs on the outside edge. Ch 1, sc evenly around entire outer perimeter of the runner to create a clean working edge. You will work approximately 300–360 sc total depending on runner length; distribute stitches evenly around curves and straight parts (work 2 sc in tight inside curves, and sc 1 in long straight sections).
Round 2 :
*sc 3, 5 dc in next st (scallop), sc 3* repeat around aligning scallops over previous shells and picot points. The number of scallops should be even and consistent; count as you go and adjust spacing to finish neatly at your starting point. Fasten off and weave ends.
Info :
If your runner has more or fewer motif repeats than the sample, adjust scallop spacing to maintain symmetry. Blocking the final assembled runner will help scallops open evenly.
— Flower & Leaf Placement and Sewing :
Step 1 :
Position each flower where a small cream medallion meets the green disc (see image reference). Typically the flower sits centered on the overlapping seam to visually join the two motifs. Place two leaves under each flower at a slight angle to mirror the photo.
Step 2 :
Sew flowers on using long tails left from the flower rounds: bring the yarn up from underneath the runner so knots are hidden. Secure through several base stitches and tie off neatly. Sew leaves beneath the flower using the longer tails from the leaves, anchoring at the flower base and a few stitches into the green disc for stability.
Info :
Attach beads only after confirming flower placement to avoid accidental holes. If using beads, secure both with thread and a few small stitches through the flower center. Clip excess yarn tails close after weaving them through several stitches to hide them.
— Blocking & Finishing Touches :
Info :
Wet-block each medallion and the large discs flat. Pin to a blocking board in circular shapes until fully dry. Once motifs are joined and flowers sewn on, block the entire runner gently to ensure scallops open evenly and the runner lies flat.
Step 1 :
Weave in all ends securely using a yarn needle. For cotton yarn, run ends through several rows and trim close.
Step 2 :
Optional: Lightly starch the scallop edge for a crisp finish. Apply fabric stiffener according to product instructions if desired and allow to dry fully.
Info :
If the runner will be used under hot dishes, consider adding a heat-resistant liner or using it for decorative centerpieces only. Cotton yarn can scorch if exposed to direct heat.
Finishing this runner is such a rewarding moment — seeing the green discs, cream lace, and delicate flowers come together is pure joy. The scalloped border frames the piece beautifully and blocking really lets the lace shine. Whether brightening a windowsill or creating a stunning table centerpiece, this handmade runner will draw compliments for years to come. Enjoy every finishing stitch and share your creation proudly! 🧶🌿