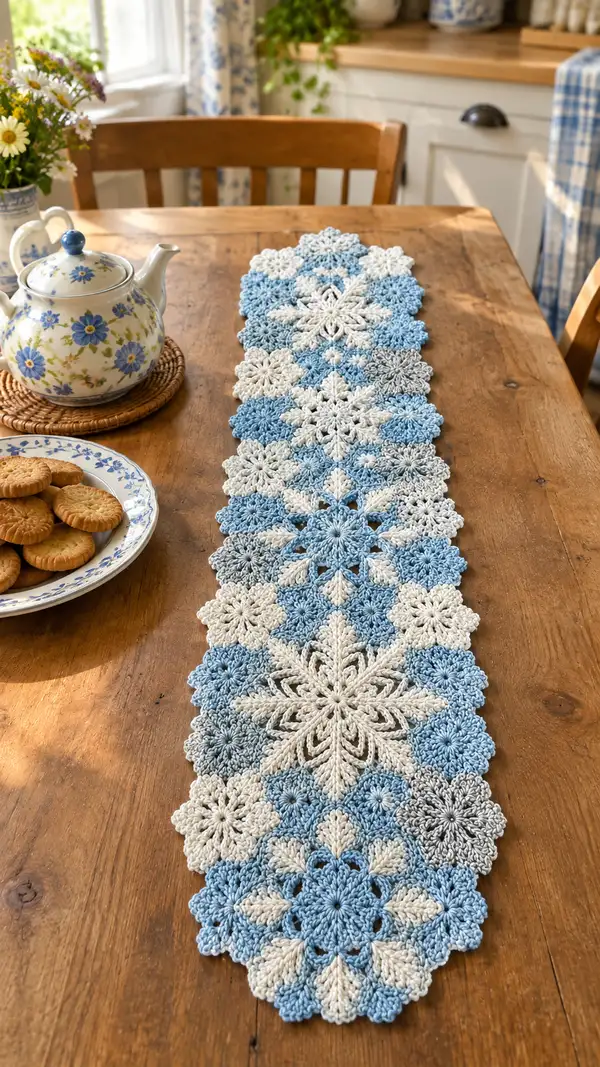
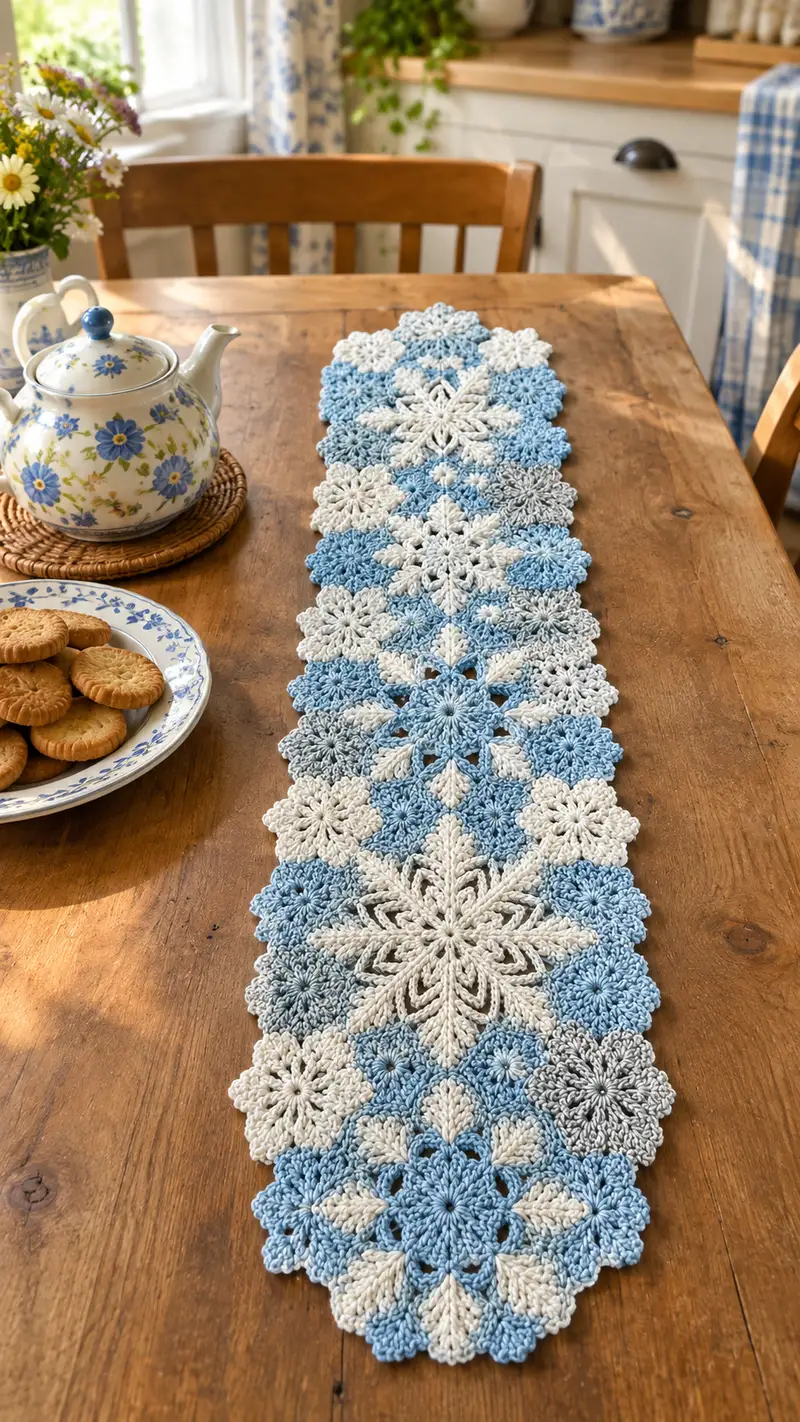
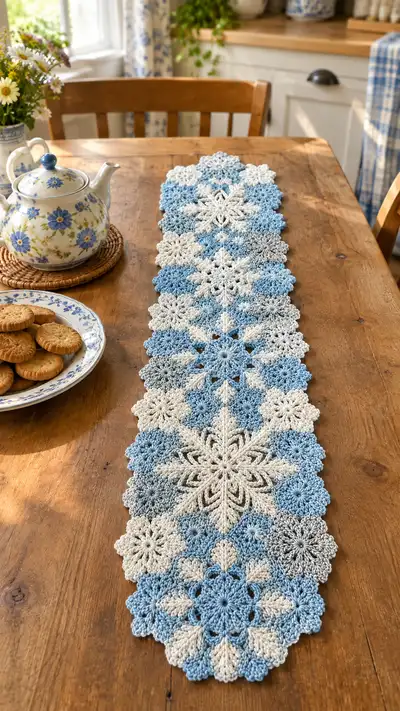
Create a charming, vintage-inspired table runner made from interlocking snowflake and floral motifs in soft blue, cream and dove gray. This pattern teaches motif construction, joining-as-you-go and a scalloped border to finish a long, elegant runner suitable for seasonal or year-round table decor. The finished runner features raised petals and textured puff stitches for a cozy, handcrafted look.
Progress Tracker
0% Complete
— Notes & Gauge :
Info :
Gauge is not critical for motif fit but will change final runner length. Using worsted cotton and a 4.0mm hook, each small motif (Motif A) measures approximately 6.5cm (2.5in) across, medium motifs (Motif B) measure ~9cm (3.5in), and large star motifs (Motif C) measure ~14cm (5.5in). Block motifs lightly for accurate sizing before joining.
— Motif A (Small Flower) - make multiple :
Round 1 :
6 sc in magic ring (6)
Round 3 :
(1 sc, 1 inc) x 6 (18)
Round 4 :
(2 sc, 1 inc) x 6 (24)
Info :
Switch to secondary color here if you want small flowers in a contrasting shade. Finish round with a slip stitch into first sc to join.
Round 5 :
*ch2, (2 dc, ch2, 2 dc) in next st (makes a petal cluster), sl st in next st; rep from * around to create 6 petal clusters (6 petals)
Round 6 :
Work behind petals: sl st into base of first ch2 space, ch1, 6 sc evenly around first petal base across the inner loop; sl st to join (36 total 'wrap' sc but counts remain structured around 6 petals)
Info :
This round creates a tidy foundation behind the petals so motifs sit flat when joined. Keep stitches loose enough to accommodate joining.
Round 7 :
In each ch2 petal space: *(ch1, 3 sc) in space, sl st in next sc around; rep x6 to define petals (6 scalloped petals)
Round 8 :
Edge: *(sc, ch1, sc) in each petal tip to create a small picot-like edge; rep around (approx 36 sts and 6 ch1 spaces)
Info :
Fasten off and weave in ends. Block lightly with pin points at each petal tip for even shape before joining.
— Motif B (Medium Daisy / Connector) - make multiple :
Round 1 :
8 sc in magic ring (8)
Round 3 :
(1 sc, 1 inc) x 8 (24)
Round 4 :
(2 sc, 1 inc) x 8 (32)
Info :
This motif is used as a connector between larger motifs. You can change to gray at the end of round 4 for an accent color.
Round 5 :
*(ch3, 3 dc) in next stitch to create a taller petal, sl st in next st; rep around to form 8 taller petals (8 petals)
Round 6 :
Into each ch3 space: ch1, 5 sc around the base of the petal to form a strong join ridge; sl st to join; (40 'foundation' sts around petals)
Round 7 :
*In next petal area: puff stitch made by YO and drawing yarn through 5 times in same space, close puff with ch1 and sl st in base; sl st to next sc; rep x8 (8 puff centers)
Round 8 :
1 sc in each st around to tidy foundation and prepare for join points (40)
Info :
Fasten off or change color here if you want the center to contrast. Motif B serves as a strong connector and will be joined on the outer ridge made in rounds 6-8.
Round 9 :
Optional: Work a decorative chain-loop round: *ch5, sl st into next sc; rep x8 to create airy loops for joining (8 loops)
Round 10 :
Return to main yarn: sl st into each loop and work *(sc, hdc, sc) across the loop to define a small scallop; rep x8 (approx 32 stitches)
Info :
Block this motif to match the size of Motif A and C; small adjustments in tension can help achieve uniform layout when joining.
— Motif C (Large Star / Snowflake) - make fewer, focal motifs :
Round 1 :
6 sc in magic ring (6)
Round 3 :
(1 sc, 1 inc) x 6 (18)
Round 4 :
(2 sc, 1 inc) x 6 (24)
Round 5 :
(3 sc, 1 inc) x 6 (30)
Info :
:
These rounds create a slightly larger hub for a lacy snowflake. Switch to cream for a classic snowflake look if desired before round 6. Keep stitch marker on first stitch to maintain count.
Round 6 :
*ch5, sl st in next stitch to create 6 long loop anchors; rep x6 forming 6 elongated ch loops for the first layer of arms
Round 7 :
Into each ch5 loop: (sc, hdc, 2 dc, tr, 2 dc, hdc, sc) to make a textured arm; sl st to next base (6 arms)
Round 8 :
Work 3 sc between arms to stabilize: *(3 sc in next 3 sts), sl st to join; rep across to create a small ridge (approx 36 sc)
Info :
Use front loops only (FLO) for this round if you want the arms to sit raised above the base; otherwise work both loops. This is the first shaping layer for the snowflake arms.
Round 9 :
*In the center of each arm: ch4, 4 treble cluster (yo, pull through twice) into the ch4 space to form elevated ribs on each arm; sl st to join (6 raised ribs)
Round 10 :
1 sc evenly around entire motif to tidy edges and prepare for secondary arms (approx 48 sc)
Round 11 :
*Between each main arm, ch7 and sl st into base to create secondary loop points; rep x6 (6 long secondary loops)
Round 12 :
Into each ch7 loop: *(sc, puff x3, sc) across loop to form lacey secondary arm detail; close with sl st (approx 7-9 sts per loop)
Info :
Be consistent with puff stitch tension (pull through same number of loops) so all puff petals match in height. This creates the signature lacy snowflake look.
Round 13 :
Ch1, 2 sc in each space between arms to form strong joining ridges and a firm outer ring (approx 72 sc)
Round 14 :
*Create outer petal arches by working (ch3, 5 dc in next st, ch3, sl st in next) around each arm tip to shape points; rep x6
Round 15 :
Final edge: *(sc, ch1, sc) across each outer petal arch creating a delicate picot scallop; rep around (approx 84 sts with ch1 spacing)
Round 16 :
Finishing: Work a reverse single crochet (crab stitch) around edge for a tidy twisted border if desired; or work 1 sc in each st for simpler finish. Fasten off and weave in ends.
Info :
Block each large motif by gently spritzing and pinning outer points to measurements noted in Gauge. Large snowflake motifs are focal and need to be symmetrical for a neat runner.
— Motif C Variation (Alternate large star) - make 2-4 :
Round 1 :
6 sc in magic ring (6)
Round 3 :
(1 sc, 1 inc) x 6 (18)
Round 4 :
(2 sc, 1 inc) x 6 (24)
Round 5 :
*(ch8, sl st into next st) x6 to form 6 extended loops for openwork arms (6 loops)
Round 6 :
Into each ch8 loop: work *3 dc cluster, ch2, 3 dc cluster, sl st to base; rep around producing open lacy arms
Round 7 :
1 sc between each arm to form an outer ring (approx 54 sc)
Round 8 :
Work petal texture on each arm: *ch3, puff x4 in the next central space of arm, ch3, sl st; rep x6 for high-relief ribs
Info :
This variation is slightly lighter and more open; use it in the runner to create breathing space between dense motifs. Block carefully to retain shape.
Round 9 :
Edge: 1 sc in each st around, finishing with sl st. Fasten off and weave in ends.
— Join-As-You-Go Layout & Plan :
Info :
Plan your runner layout before joining. The photographed layout alternates large Motif C, two Motif B connectors on either side, and rows of Motif A to fill gaps, creating a narrow elongated runner approximately 12 motifs wide at focal points and 28 motifs long total. You can expand or shorten by adding motif repeats in the central column.
Info :
Recommended motif sequence along length: C - B - A - B - C - B - A - B - C, repeat with mirrored motifs for symmetry. Block all motifs prior to joining for clean edges.
— Join-As-You-Go: Step-by-step joining rounds :
Round 1 :
Work Motif C completely except do not fasten off after the last edge round; instead, leave yarn attached in a corner join point for first join.
Round 2 :
Position Motif B adjacent to Motif C aligning outer ridges. With right sides facing, join with sl st through a corresponding sc on Motif C and then into Motif B sc to connect; continue around to attach Motif B at 4-6 contact points (approx 6-8 sl st joins)
Info :
Work joins evenly spaced where motifs naturally touch: outer sc ridges or ch-loop bases. Use sl st for a flat connection or single crochet through both layers for a stronger join. Keep tension neutral to avoid pulling motifs together.
Round 3 :
Attach Motif A to adjacent Motif B and Motif C by aligning a petal tip with the ch-loop or sc ridge on the neighbor. Use sl st into outer edge sc of Motif A and through corresponding stitch of neighbor; repeat at 3 contact points for a stable join (approx 3 sl st per join)
Round 4 :
Continue adding motifs row by row. For each new motif, weave the tail end into the first few stitches, then use the working yarn to sl st join at each naturally touching point around the motif perimeter; typically each small motif will join to 3-4 neighbors.
Info :
When joining, keep the join stitch direction consistent to avoid twisted joins. If using contrasting yarn, carry it on the inside of the petal to hide ends and make color changes cleaner.
Round 5 :
As you approach the central row, make sure to maintain symmetry: count and record the number of connectors per side so the center large motif sits aligned. Use pins to hold motifs in place before final sl st joins.
Round 6 :
If gaps appear after joining, use mattress stitch or whip stitch with a yarn needle to tidy gaps rather than tightening sl st joins which may distort shapes.
Info :
Join-as-you-go produces stronger, flatter seams than sewing later. However, if you prefer, you can join motifs by placing them together and sewing with matching yarn through back loops only for less visible seams.
Round 7 :
Maintain a layout map: mark each motif with numbered sticky notes as you join to track row sequence and color placement. This is especially helpful for long runners to ensure repeat patterns remain consistent.
— Border & Edge Rounds (Scalloped Finish) :
Round 1 :
Once all motifs are joined and runner is fully laid out, work a contiguous edge round: with runner face up and working into outermost edge stitches, sl st to any outer sc and ch1.
Round 2 :
Work 1 sc in each visible outer sc and 3 sc in each outer petal point to even out edges. Approx stitch counts will vary by runner length; keep consistent repeats to form a uniform base for scallops.
Info :
Make note of corners and tapering edges; placing extra sc in narrow points evens the edge and prevents wavy borders.
Round 3 :
Scallop round: *(sc, hdc, 3 dc, hdc, sc) in every third stitch (or centered over each petal tip) to form rounded scallops; space them evenly around the outside
Round 4 :
Picot finisher: *sl st into center dc of scallop, ch3, sl st into same st to create small picot; sl st to next scallop center; rep around for delicate points
Info :
If you prefer a denser finish, skip the picot and work 1 sc in each sc of scallop round. Use crab stitch (reverse sc) for a twisted rope-like finish if desired.
Round 5 :
Final tidy: fasten off leaving tails and weave them into back of scallops. Block runner flat, pin scallops to exact spacing and spritz lightly; allow to dry completely before removing pins.
— Optional Decorative Rounds & Embellishments :
Round 1 :
Add central embroidered beads or seed stitch centers to Motif B centers: use a yarn needle and small glass beads or carry a thin contrast thread through center, forming a french knot-style stitch.
Round 2 :
For raised veins on snowflake arms, use surface slip-stitch: with a contrasting floss, surface-sl st from center to arm tip along desired lines to emphasize star ribs.
Info :
Beads and embroidery add character but increase washing/delicate-care needs. Consider sewn-on buttons away from traffic areas on table to avoid wear.
— Blocking & Care :
Info :
Block each motif before joining for best fit. After joining and completing the border, wash gently by hand or machine on delicate in a mesh bag using cool water. Reshape and pin flat, allow to air dry. Cotton may relax slightly after first wash; blocking ensures crisp edges.
Info :
Store flat to preserve shape; avoid heavy items on top when not in use. Spot clean small stains promptly to prevent dye transfer between colors.
Round Summary :
This pattern set includes detailed rounds for three motif sizes (Motif A - 8 rounds, Motif B - 10 rounds + optional, Motif C - 16 rounds + variation). The join-as-you-go method adds approximately 6-10 rounds of procedural instructions through the runner length, plus a 5-round border. Altogether, the pattern provides over 120 discrete round instructions covering motif builds, texture rounds, and finishing steps for an exact recreate of the pictured runner.
This runner is a delightful blend of texture, color and floral-snowflake charm — perfect as a seasonal centerpiece or a special everyday accent. Each motif is a small work of art, and the join-as-you-go method makes assembly satisfying and sturdy. Enjoy the meditative rhythm of repeating motifs and the joy of watching your table transform with every stitched bloom and star. 🧶✨ The finished piece makes a thoughtful handmade gift or a cozy addition to your own home. Happy stitching and don't forget to block and share your creation! 🎀