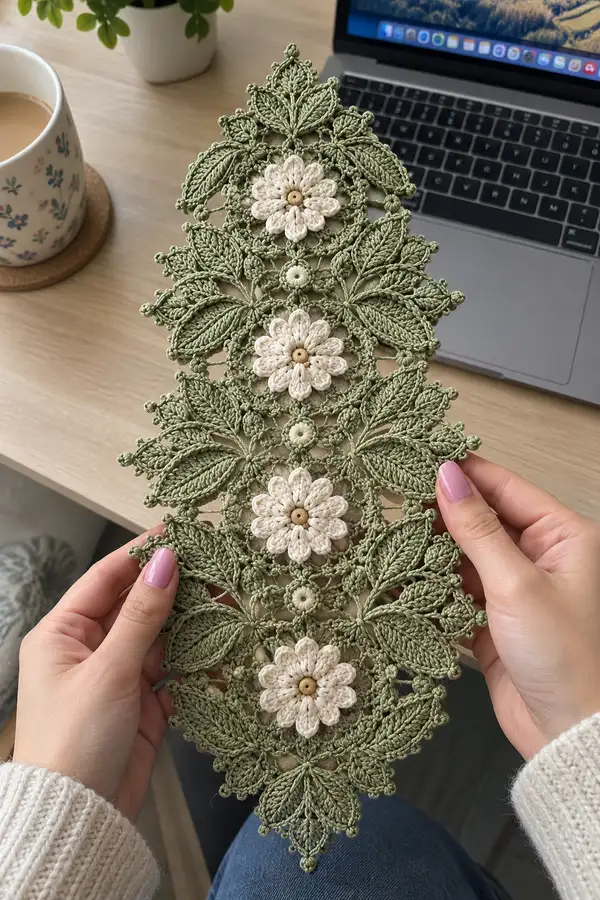
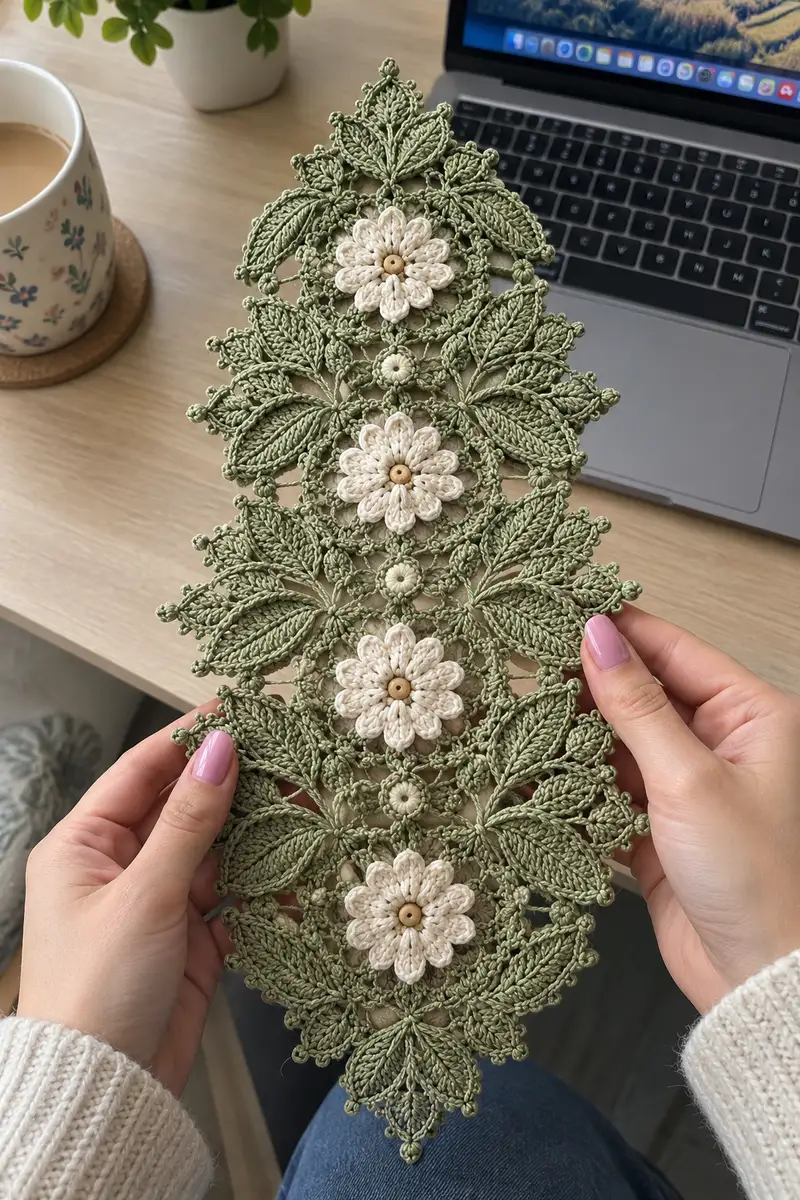
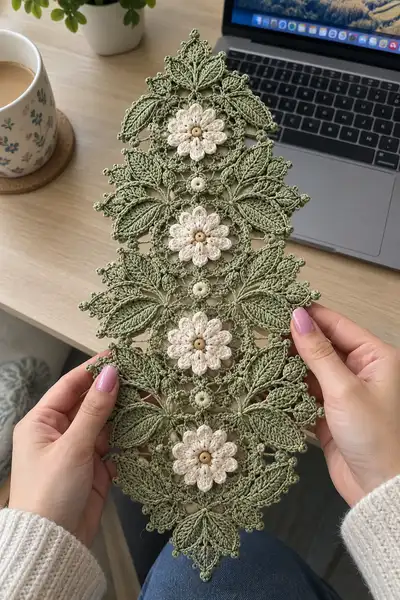
A delicate, hand-crocheted floral lace table runner featuring layered cream daisies set in a sage-green leaf lattice. This lightweight cotton runner combines textured leaves, raised bobbles and openwork connectors for a vintage-inspired centerpiece. Amiable for intermediate crocheters who enjoy lace shaping and join-as-you-go assembly. Finished piece measures approximately 11 x 28 inches depending on yarn and blocking.
Progress Tracker
0% Complete
— Notes & Special Stitches :
Info :
This pattern is worked in modules: Daisy motifs (cream centers), Small round connector motifs, Leaf motifs (sage green) and finishing edge bobbles. Motifs are joined-as-you-go using slip-stitch connections and short chains to keep the open lacy look. Work tightly enough that stitches don't gap; mercerized cotton will show texture vividly. Block motifs flat before final assembly for best drape.
Info :
Puff stitch (puff): yo, insert hook into stitch, yo, pull loop (do this 3-5 times as specified to create 3-5 loops on hook), yo, pull through all loops on hook, ch1 to close puff. For larger petals this pattern uses 5-loop puffs unless otherwise stated.
Info :
Bobble (bp): 5 partial double crochet loops: *yo, insert in stitch, pull up loop, yo, pull through 2 loops* repeat 4 more times so there are 6 loops on the hook, yo and pull through all loops, ch1 to secure. Bobble height is about same as dc cluster used in edge.
— Daisy Motif (Make 3) :
Round 1 :
With cream yarn, mr, 8 sc into ring (8)
Round 2 :
Inc in each st around (16)
Round 3 :
(1 sc, inc) x 8 (24)
Round 4 :
1 sc in each st (24)
Round 5 :
*Ch3, skip 1 st, sc in next st* around to create 8 ch-3 loops for petals, join with sl st to first loop (24 base sts remain under loops)
Info :
Petal foundation: the ch-3 loops around the center create spaces to work petals in front of the center. Keep tension even so petals sit neatly.
Round 6 :
Work petals into each ch-3 space as follows: attach yarn in space, (5-loop puff, ch1, sl st into ch-space) x 8 petals. Complete each: puff (5 loops), ch1 to close, sl st into same ch-space to secure each petal. After last petal, sl st to base round to fasten (center now has 8 raised petals).
Round 7 :
Work a decorative edging round: *sc in base stitch behind petal, ch3, sc in next base stitch* x 24 around to create a small picot-like chain around petals; join with sl st (24 sc + chain spaces)
Round 8 :
Using cream yarn, sc around working into both petals and base as you like to tidy edges: 1 sc in each sc and 1 sc in each ch-3 space (24)
Round 9 :
Fasten off leaving a long tail for sewing the bead center and for join-as-you-go. Sew a small wooden bead into the center through the back, secure and weave in ends.
Info :
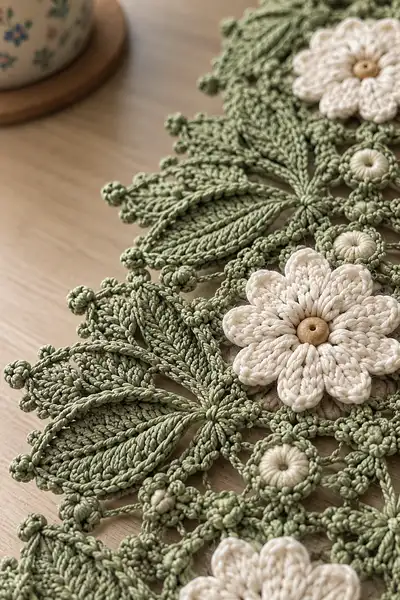
For the look in the photo use 8 petals with substantial 5-loop puffs; this gives a chunky, raised petal. Attach bead to hide the magic ring and give a natural center.
— Small Round Connector Motif (Make 6) :
Round 1 :
With cream yarn or sage (as desired for contrast), mr, 6 sc into ring (6)
Round 2 :
Inc in each st (12)
Round 3 :
Slip-stitch around to create a wrapped look: *hdc in next st, sl st in next st* around (12 textured stitches)
Round 4 :
Work 12 sc around to tidy, then ch5 and join to each other to create connection loops as needed when joining motifs
Info :
These small rounds become the central connectors between daisies and leaf clusters. You will use them as anchor points for join-as-you-go chains in the panel rounds. Make 6 total for the pictured layout.
— Leaf Motif (Make 18) :
Round 1 :
With sage green, ch8, sl st into 2nd ch from hook and in each ch back along to create a small tube foundation, join to first ch with sl st (7 foundation sts)
Round 2 :
Rotate and work along one side of chain: *sc in first st, hdc in next, dc in next, tr in next, dtr in last* then continue across to form symmetrical spine, sl st to base (5 elevated stitches per side)
Round 3 :
Work 5 fpdc along the central spine to create raised rib: fpdc around the post of each of the central foundation stitches across the center (5), turn and work back on the opposite side with matching fpdc (10 fpdc total)
Round 4 :
Edge the leaf: sc evenly around entire leaf working 2 sc at the pointed tip to maintain shape (approx 30 sc, adjust to fit curvature)
Round 5 :
Along the margin create raised veins: *ch2, sc in next st, ch2, sl st into outward edge* repeat along both sides to mimic veining effect; finish with small picot at tip: (ch3, sl st into base of last sc)
Round 6 :
Work decorative bobble cluster along outer edge: *sc, ch2, bp in next st, ch2, sc* repeat around; finish and fasten off leaving long tail for joining
Info :
Each leaf uses a tubular chain foundation to create a natural curve. The fpdc central rib lifts the leaf and gives the sculpted texture visible in the photo. Adjust sc counts to preserve symmetry.
Round 7 :
For larger leaves (edge leaves in photo) repeat rounds 1-6 but extend initial ch to ch12 to increase length and repeat the fpdc ribs (approx 14 ribs across both sides). Fasten off and block flat.
— Panel Center & Joining Rounds (Make 1 triangular panel by joining motifs) :
Info :
We will build the triangular panel from the bottom upward: start with a central pair of small connectors and two side leaf clusters, then add daisies with surrounding leaf motifs, joining components as you go using sl st into loops and small ch bridges to maintain openness.
Round 1 :
Lay out three daisies aligned vertically with three small connector rounds between them. Join two small connectors side-by-side with 5 ch chain, join with sl st to connector loop, creating a small base. This is setup; no formal stitch count.
Round 2 :
Attach sage yarn to one connector and sl st around connector edge to tidy then ch6 and sl st to petal back of first daisy at a stable point, creating a bridge. Repeat on opposite side to anchor daisy to connectors (creates triangular stability)
Round 3 :
Place two leaf motifs on either side of the bottom daisy. Using sage yarn, from the connector point sl st into leaf picot edge, ch4, sl st into the daisy base (work through both layers) to attach. Continue around the bottom daisy attaching four leaves total (2 on each side) to form a layered wreath under the daisy.
Info :
Use join-as-you-go with sl sts through back loops of petals and edge loops of leaves to keep joins subtle. Pin motifs before sewing to ensure symmetry. The pictured piece stacks three plateaus: bottom, mid, top daisies with graduated leaf clusters.
Round 4 :
After anchoring the bottom daisy, add two more leaves offset and attach two small connectors above the daisy using ch-5 bridges to maintain airy space between rows. Each connection uses 1 sl st into connector, ch5, sl st into daisy or leaf edge.
Round 5 :
Working upward, attach the middle daisy to the two small connectors above the bottom daisy using the same ch-bridges and sl st technique; secure with an extra round of sc in sage around each connector circle to merge it more firmly (12 sc around connector after join)
Info :
The triangular silhouette is shaped by progressively reducing the number of side leaves near the tip. Keep a consistent spacing: roughly 10–12 mm between ornament centers depending on yarn thickness; adjust ch-bridge lengths accordingly.
Round 6 :
Repeat the leaf wreath construction for the middle daisy: attach 4 leaves around it (2 larger, 2 smaller) using sl st into leaf picots and sc into daisy base. Reinforce connections with single crochet over the sl st joins (work sc through both motif layers).
Round 7 :
Build the top daisy in the same fashion but reduce leaves to 3 (two side leaves and one top accent leaf) so the top tapers to a point. Use ch3 bridges between connector motifs to tighten the triangle tip.
Round 8 :
Once daisies and leaves are joined, tidy the internal joins by working sc around the internal perimeter where motifs meet: sl st to first join, sc in each stitch across the join seam (about 40 sc across entire inner seam total) to flatten and secure seams.
Info :
At each join, maintain tension so there is no puckering. Use a contrasting stitch count description to keep mathematical consistency: if you make 4 joins around a daisy and add 12 sc around each connector, you will accumulate approximately 48 sc of perimeter reinforcement; distribute evenly to preserve shape.
— Decorative Edge and Bobble Border :
Round 1 :
With sage green, pick up at the bottom tip of the triangular panel and sc evenly along the outermost stitches and picots of leaves; aim for 1 sc per visible ridge stitch (approx 140–170 sc depending on layout)
Round 2 :
*sc 3, ch3, bp in next st, ch3, sc 3* repeat around corner points and along sides to create spaced bobbles (approx 28 bobbles total). At pointed tip work sc2, ch5, bp, ch5, sc2 to accent the point.
Round 3 :
Work a delicate picot scallop on the outermost edge: *(sc, ch3, sl st into first ch of ch3 to create picot), skip 2 sts, sc* around to form decorative points between bobbles. Fasten off neatly and weave in ends.
Info :
Bobble spacing is aesthetic—place bobbles at leaf tips and junction points to echo the organic structure seen in the photo. Keep bobbles small and evenly distributed; do not overfill bobbles with stuffing—use yarn wraps only.
— Finishing Touches & Blocking :
Info :
Lightly wet-block the entire piece: pin to shape on a blocking board following the triangular silhouette, stretching gently so leaf tips and daisies are well spaced. Allow to dry fully. This step is crucial to open the lace and flatten petals and leaves.
Round 1 :
Sew wooden beads into the center of each daisy using the long tail left from round 9 of the daisy motif; secure with several stitches through the bead and back into the center, knot on the back and weave ends into the runner.
Info :
For a more dimensional center you can wrap a small amount of cream yarn tightly into a tiny disc before sewing bead on top. This will create the raised donut center visible in the image.
Round 2 :
Weave in any remaining tails on the reverse side, trimming flush. Optionally spray with a light starch solution for extra stiffness to keep vertical leaf ridges crisp.
Info :
If you plan to launder the runner, hand-wash gently in cool water and re-block when damp. Avoid hot water or agitation to preserve the shape and avoid felting mercerized cotton's sheen.
This elegant floral lace runner is a joy to make and a beautiful accent for any table or shelf. The layered daisies and sculpted leaves bring a handcrafted botanical charm to your home. Carefully blocking and join-as-you-go assembly produce a refined finish you will be proud to display. Enjoy the meditative rhythm of petals and leaves coming together, and share your finished runner as a cozy gift or centerpiece. 🧶🌿