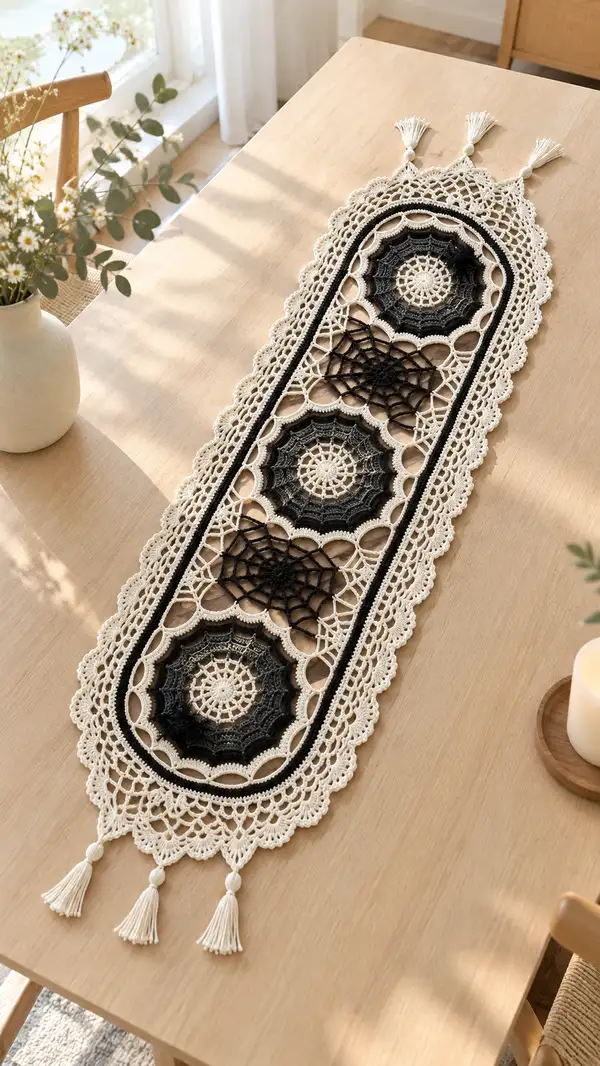
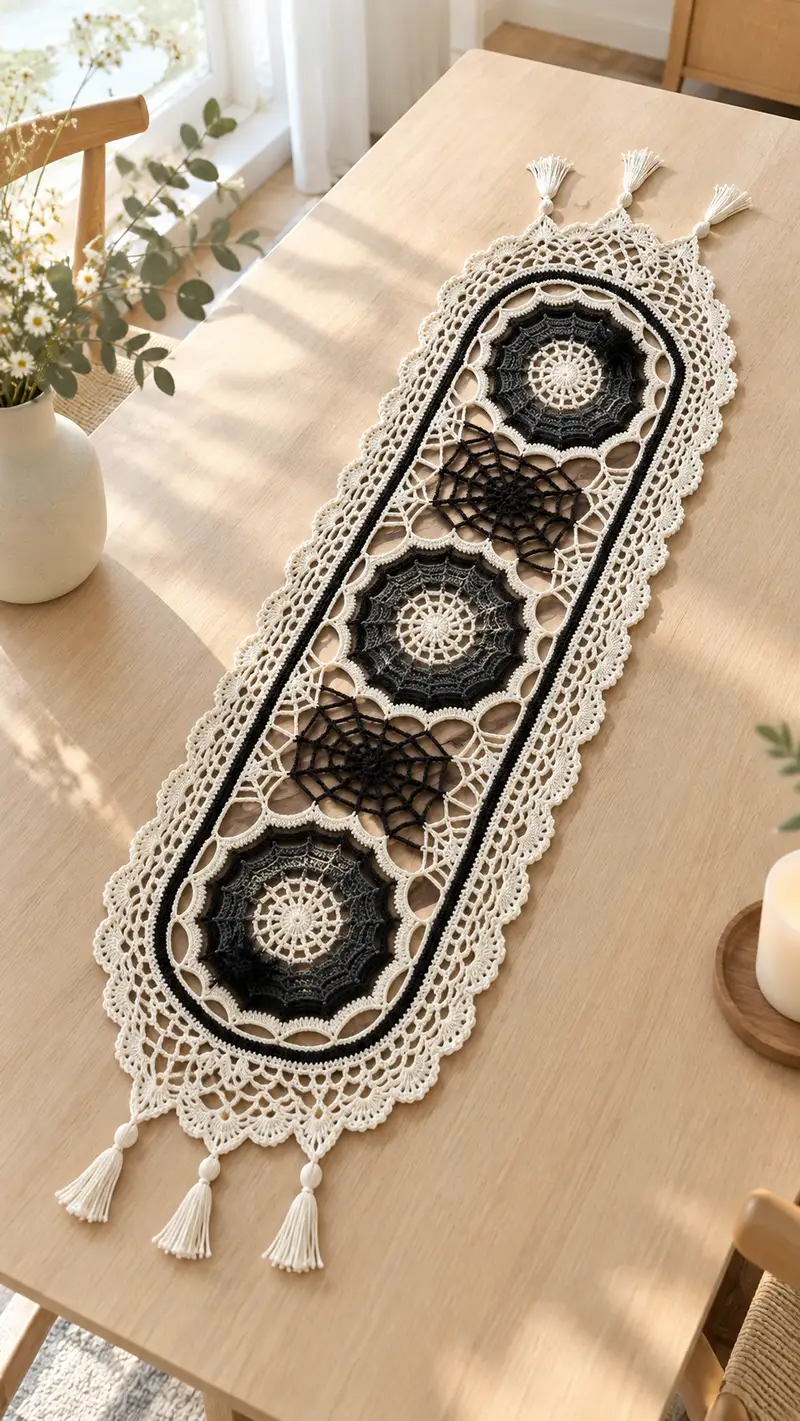
Create a stunning oval lace table runner featuring three openwork mandalas, spiderweb-style connectors, and a delicate scalloped border with tasseled ends. Worked in contrasting ivory and charcoal, this runner brings sophisticated, handmade charm to any dining table or sideboard. The pattern uses cotton thread for crisp stitch definition and includes clear, step-by-step lace construction and joining instructions. Perfect for gifting or as a beautiful centerpiece for seasonal decor.
Progress Tracker
0% Complete
— Center Mandala (Make 3) :
Round 1 :
Make a magic ring. Ch1, work 12 sc into ring. Pull ring tight. (12)
Round 2 :
Inc in each st around (2 sc in each st). (24)
Round 3 :
(1 sc, inc) x12. (36)
Round 4 :
(2 sc, inc) x12. (48)
Info :
Switch to mid-gray yarn at the end of Round 4 if you want a subtle gradient from the ivory center toward the darker outer rounds. Carry yarn neatly behind stitches if you prefer not to fasten off.
Round 5 :
(3 sc, inc) x12. (60)
Round 6 :
1 sc in each st around. (60)
Round 7 :
*Sc 2, ch3, sk 2* across, anchoring ch3 spaces into every third stitch to create 20 ch-3 spaces. Work so there are 20 shell anchors around the round. (60 anchor points)
Info :
When creating ch-3 spaces, count carefully so the pattern lines up. Use a stitch marker at the start of the round and recount after completing the first half to ensure spacing remains even.
Round 8 :
Into each ch-3 space: (sc, ch3, 3 dc, ch3, sc) to build scalloped petals; sc into the anchor point between spaces. This produces 20 petal arches. (remain balanced to 60 anchors)
Round 9 :
Ch3 (counts as first dc), *skip to center of next petal arch, work 7 dc into arch, sl st to base between petals; rep* to end. Work 20 clusters of 7 dc separated by sl st anchors. (20 clusters)
Info :
This round creates a raised textured ring. Keep tension even so each cluster has a uniform appearance. If needed use FLO for the round to emphasize ridges.
Round 10 :
Switch to charcoal (optional) by joining with a sl st in the top of a cluster. Ch1, sc in same st, *ch5, sc in middle of next cluster* repeat around to create open lace loops between clusters. (20 ch-5 loops)
Round 11 :
Into each ch-5 loop: (sc, 3 dc, sc) forming arch motifs. Between each arch sc in sl st anchor. This reinforces the lace and maintains an approximate 60-anchor rhythm.
Round 12 :
Ch1, *sc 2, picot, sc 2 into the top of each arch*, repeat around. (20 decorative picot-topped arches)
Info :
Picots add a delicate vintage touch. To make neat picots, ch3 (or ch2 for smaller picots) and sl st into the first ch; adjust to match your desired look.
Round 13 :
Ch3, work 1 dc into the top of each arch and 2 dc into each picot base to start a raised scalloped band; work evenly so there are 60 dc placed across previous anchors. (60)
Round 14 :
1 sc in each st BLO around to create a defined ridge at the edge of the medallion. (60)
Round 15 :
Switch to charcoal or dark gradient here for a dramatic outer band. Info: Join charcoal with a sl st then ch2 to begin. Work *(ch3, sk 1, sc) repeat across* to form chain-loop spaces - create 30 ch-3 loops. (count by loops rather than anchors)
Round 16 :
Into each ch-3 loop: (sc, 5 dc, sc). This builds a pointed scallop that will be emphasized on the runner. Keep an even number of repeats (30 loops) so outer motif matches connector placement.
Info :
At the end of this round, flatten each medallion and block lightly to maintain flatness and shape. Pin each medallion into position on a blocking mat matching the finished diameter (approx. 12–14 inches depending on your tension and thread).
Round 17 :
Ch1, sc in each st around to unify the outer edge and create stable anchor points for joining to the oval frame. (approx. 120 anchor points including small loops; keep consistent tension)
Round 18 :
Optional decorative row: *(sc, ch3, sl st into outer dc of next scallop) repeat around* to create small lacy arches. Fasten off if you are carrying color, leaving long tails for joining. Finish three identical medallials. (approx. 60 arguments for baseline stitches)
Info :
Make three medallions of identical size; the finished diameter should be consistent. Block them now and allow to dry fully before assembly to ensure they remain flat and even.
— Spiderweb Connector (Make 2) :
Round 1 :
Make a magic ring. Ch1, 10 sc into ring. (10)
Round 2 :
Inc in each st around (20). (20)
Round 3 :
(1 sc, inc) x10. (30)
Round 4 :
Ch1, *sc in next 2 sts, ch5, sk 2* repeat around to form 10 ch-5 spokes spaced evenly. Anchor with sc into the anchor points. This creates the web formation base. (30 anchors)
Info :
Spiderweb connectors should be slightly smaller than mandalions and flatter. Work this part in charcoal to match the contrast bands, and keep tension loose for airy openwork.
Round 5 :
In each ch-5 space: join charcoal and ch1, work *(sc, ch3, sc)* to create a loop. Then sl st into the next anchor. Repeat around to create an inner ring of loops. (10 loops)
Round 6 :
Working from center outward: Ch1, sc into each anchor, then ch7, sl st into the center of the web (to create radiating chains) repeat around 10 times to form the skeleton of a web. (10 ch-7 spokes)
Round 7 :
Into each set of radiating chains work a web spiral: join at base of a spoke, ch3, *(sk 2 chains, sl st into next chain) repeat across the spoke* to produce a neat spiral that gives the spiderweb look. Connect each spiral to the next with sl st across anchors so web forms a continuous square-ish lozenge. (web complete)
Info :
The web connectors will be joined to the medallions and frame; leave all rounds with yarn tails long for weaving and secure joining. Pin web connectors to blocking board to hold shape while you construct the oval frame.
Round 8 :
Finish with a round of sc around each web to provide stable join points: sc evenly across outer anchors; target approximately 40 sc for a full round. Fasten off leaving a long tail for joining.
— Long Oval Frame (Join as You Go) :
Info :
This section creates the long oval frame that holds the medallions and webs. Work the oval as one long continuous piece so you can position medallions and webs and then join them. Use ivory as main color and start by crocheting an oval foundation chain to fit the layout.
Round 1 :
Using ivory, ch 76 (this length creates a long oval that will accommodate three medallions and two web connectors with even spacing; adjust chain by increments of 8 if you desire a different overall length). Join with sl st to first ch to form ring, being careful not to twist. (76)
Round 2 :
Work 1 sc in each chain around. When you reach the short ends (first and last 6 sts), work 3 sc into the same chain at each end to create a rounded end. Continue across making 3 sc in the end chain again (this creates the oval curve). Total will increase slightly due to end clusters approx. (approx. 82-88 depending on increases at ends).
Info :
Keep track of the two short ends (centered on rows) — these are where the medallions will be centered later. Place stitch markers at the centers of both rounded ends and at the midpoint of each long side to help with alignment.
Round 3 :
Ch2, dc in each st around worked in BLO to create a subtle ridge on the inner side of the oval. Where you made triple sc clusters on the short ends, work 3 dc into the same stitch to preserve the curve. (approx. 82-88 dc)
Round 4 :
Change to charcoal for a thin raised stripe: Join charcoal with sl st at one long side marker. Ch1, work 1 hdc in each dc around for one full round. This creates the dark inner ridge seen in the runner. Fasten off charcoal if you will not carry it. (same count as previous round)
Info :
Work the next rounds in ivory to re-establish the main frame. If you prefer a continuous stripe, carry the charcoal behind stitches and crochet over it when working the ivory rounds for neater finish.
Round 5 :
In ivory: Ch1, 1 sc in each st around, working 2 sc in the top of each dc cluster at the rounded ends to keep the shape smooth. (approx. 82-88 sc)
Round 6 :
Ch3, (dc, ch2, dc) into every 4th stitch around to create elongated open stitches that will later allow the medallion arches to slip through and be joined. Keep consistent spacing so there are 30–40 ch-2 spaces depending on your starting chain. (openwork frame ready)
Info :
Pin the three medallions to the oval frame to determine exact placement. Aim for equal spacing with one medallion centered on each rounded end and the third centered in the middle. Use the stitch markers placed earlier as guides and allow 2–3 open loops between medallion join points on the long sides.
Round 7 :
Join medallions and web connectors as you go: Position first medallion on the short end so outer scallops align with ch-2 spaces on the frame. Join by slip-stitching through the outer anchor points of the medallion and the ch-2 space on the frame every 1–2 stitches to create a secure but invisible connection. Continue around oval to attach each medallion and web in sequence. (join completed for first pass)
Info :
When joining, keep tension loose enough that lace lies flat but tight enough that there is no sagging. Pin everything securely before joining. If the medallion scallops sit slightly outside the frame, adjust by moving join-in points by 1–2 stitches either direction.
Round 8 :
Once all medallions and two spiderweb connectors are positioned and joined, work one round of sc evenly across the entire frame including joins to unify the surface. Work sc into every visible stitch on medallion edges and frame. (count will vary; aim for uniform coverage)
Round 9 :
Ch2, *1 dc in next 3 sts, ch3, sk 2* repeat around to create a decorative inner scalloped ring within the oval. This ring reinforces the medallion joins visually. (pattern works across full perimeter)
Info :
At this stage the runner should look like a single assembled oval with medallion and web inserts. Do not fasten off — continue to build the outer scalloped border by working additional rounds outward from the frame to create a dramatic lacy edge.
— Outer Scalloped Lace Border :
Round 1 :
Ch1, sc in each existing stitch around the outer perimeter (including medallion scallop tips that protrude). Work 2 sc into each ch-3 loop and 3 sc into each very outer scallop curve so the border has a stable base. (count will expand significantly; maintain evenness)
Round 2 :
Ch3, 2 dc in same st, *sk 2, 5 dc in next st (shell), sk 2, (2 dc, ch2, 2 dc) in next st (fan)* repeat around to form alternating shells and fans. This is the first decorative lace row forming the scallop rhythm. (repeat sequences around)
Info :
To make the border visually match the inner medallion, alternate shell and fan motifs evenly. If the number of repeats doesn't fit exactly, adjust by adding one extra sc in the base prior to a join to rebalance the round.
Round 3 :
Ch1, sc evenly across bases and into the top of each fan to firm the border. Work picots at the top of each fan if you like: *(sc, ch3, sl st to base) across fan tops.*
Round 4 :
Ch4 (counts as first tr), *(2 tr, ch2, 2 tr) into fan tops to create pointed scallops; sl st into the valley between fans; rep* around. These raised tr fans produce the airy, open scalloped edge seen in the runner. (repeat count matches fans)
Info :
Block the runner again after completing these rounds — the scallops need pins set at each point to open up the lace. Let the piece dry under tension to set the shape before adding final tassels.
Round 5 :
Ch1, sc in each st across to anchor the tr fans. At every second fan base, work a decorative chained loop: *sc, ch6, sl st into next fan base* to echo the inner oval's openwork. This gives a delicate net effect between scallops.
Round 6 :
Optional final decorative edging: into each tr fan point work *(sc, ch3, pic, ch3, sc)* to create a refined border with tiny picots along the very outer edge. Fasten off and weave in ends neatly. (edge complete)
Info :
For a more delicate look, use a ch2 picot or simple sc peaks instead of larger tr fan points. Choose the finish that best matches your decor and tension preferences.
— Tassels (Make 6, 3 per end) :
Round 1 :
Create tassels using ivory thread. Wrap thread around a 3.5–4 cm wide card roughly 60–80 times for a medium-thick tassel. Slip a 12 cm piece of thread under the wraps and tie tightly to form the tassel head. Cut through the loops on the opposite side and trim evenly.
Round 2 :
Form a small wrapped neck: wrap additional thread around the top of the tassel 6–8 times to create a neat neck. Insert a small wrapped bead of yarn inside the head for the round bead seen in the finished runner (wind a small 4–6 mm yarn ball and wrap over it to set shape), or use small wooden beads for a mixed-material look. Attach a long tail to sew the tassel to the runner.
Info :
Attach three tassels evenly spaced on each short end of the oval. Use the marked center point on the short ends to center the middle tassel; space the side tassels approximately 2.5–3 cm away either side. Sew securely through the tassel knot and runner loops with strong thread and weave ends into the body.
Round 3 :
Sew tassels in place by threading yarn needle through the tassel's tied knot and through the edge of the runner at the center scallop. Fasten by sewing multiple times and finish with a neat knot and woven tail. Trim tassels to even length (approx. 6–7 cm) so they hang uniformly.
— Finishing, Weaving & Blocking :
Info :
Once all pieces are joined and tassels attached, weave in all loose tails with a tapestry needle. Use small, even stitches to bury ends inside the body of the lace. Do not cut tails too short until you have woven them securely for a clean finish.
Round 1 :
Block entire runner: pin into final oval shape on a blocking mat. Use plenty of pins along scallop points and around medallion outer edges. Mist lightly and allow to dry completely to set the lace openwork. For a crisper, sturdier finish, spray lightly with diluted fabric stiffener and allow to cure per product instructions.
Info :
Final pressing and blocking is essential for this lace runner. Adjust pin spacing to correct minor asymmetry and ensure that the runner lies flat on a table without buckling. The runner should be photographed or stored flat to preserve shape.
Round 2 :
Optional: If you want a slightly raised inner ridge similar to the photo, weave a thin cord of leftover yarn and insert it under the inner charcoal band then tack it down with small stitches every 1–2 cm to create subtle dimensionality along the oval's inner seam.
Info :
Store runner flat or rolled with tissue to prevent creases. Hand wash gently in cool water and re-block after washing to restore crisp lace if needed.
This elegant lace oval runner is a timeless centerpiece that mingles delicate crochet techniques with bold contrast for an unforgettable finish. Each medallion, web connector, and scallop has been designed to harmonize while offering a satisfying construction journey. Enjoy the meditative rhythm of lacework and celebrate the reveal when you pin and block the final piece — the transformation is always magical. 🧶🌿 Add tassels for the finishing touch and share your handcrafted pride with loved ones. Happy stitching! ✨