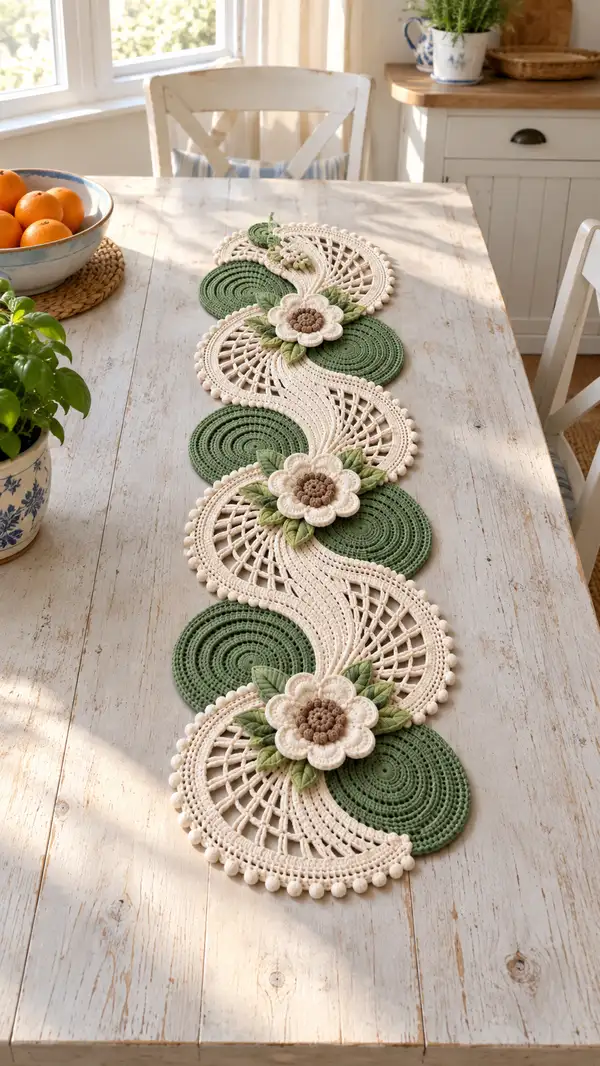
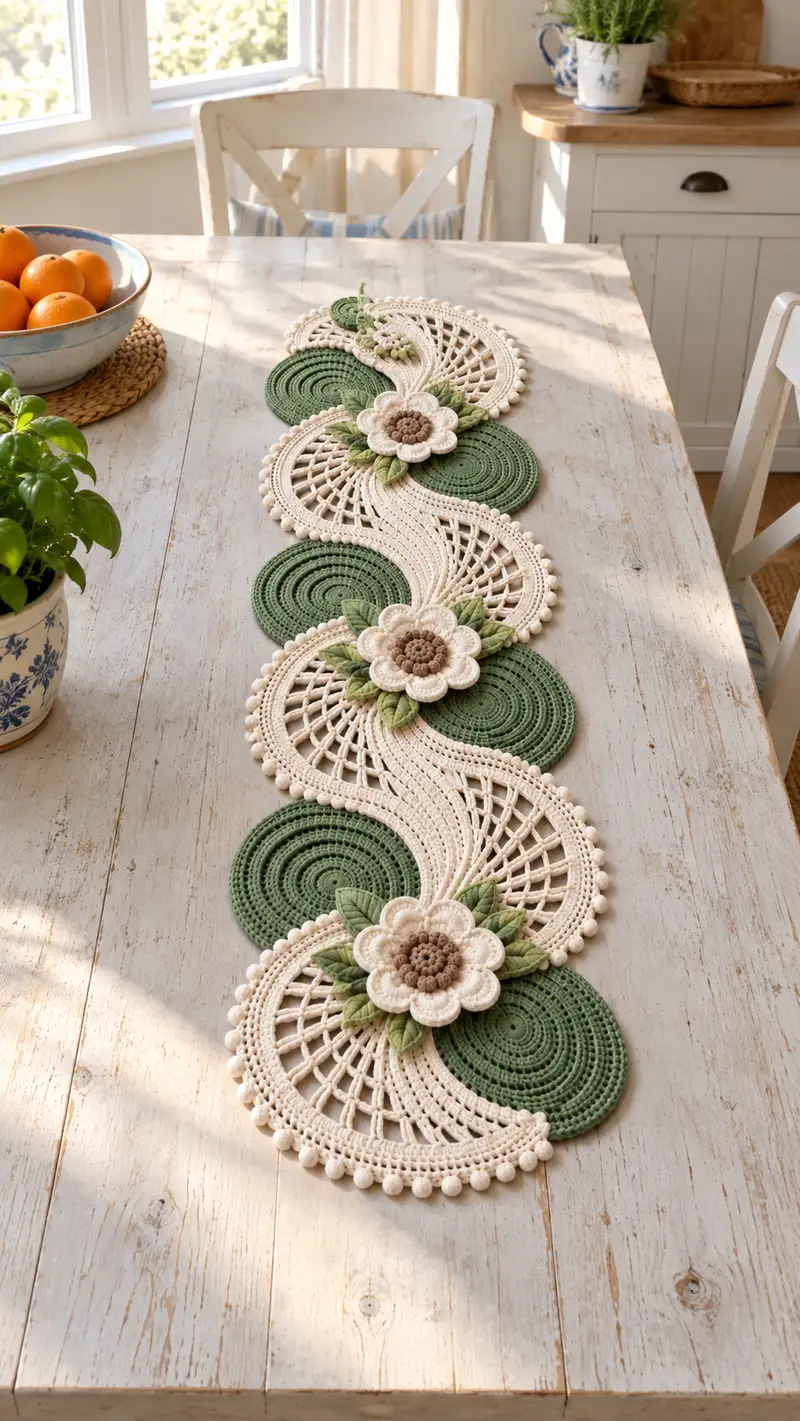
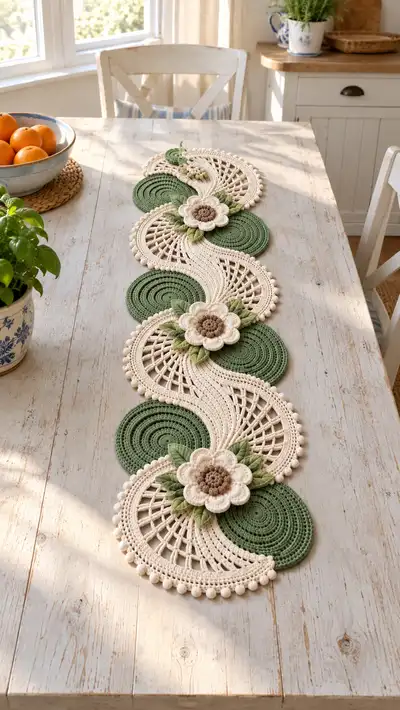
This elegant table runner features alternating solid green round motifs and flowing cream lace fans joined into an S-shaped layout, finished with layered three-dimensional flowers and textured leaves. The design combines dense spiral work, open lace arches, and a bobble edge for a charming, vintage-inspired centerpiece. Perfect for a sunny farmhouse table, it showcases detailed join-as-you-go construction and decorative elements that add both texture and visual rhythm.
Progress Tracker
0% Complete
— Notes & Gauge :
Info :
Gauge is not critical for width but important for motif scale. With 3.5mm hook and worsted cotton, a completed green round motif measures approximately 10-12 cm (4-4.7 in) across; the cream fan spans approximately the same radius so paired motifs form a continuous runner. Make a small swatch of spiral rounds to match tension and swap to 3.0mm for tighter fabric if needed.
Info :
Work right-side-out (RS) unless otherwise specified. Use stitch markers at the beginning of each round for accurate round counts. Block each motif and panel flat before assembly to ensure a neat S-curve join and consistent seam lengths.
— Green Solid Round Motif (make 5 or more; quantity depends on runner length) :
Round 1 :
6 sc in magic ring (6)
Round 3 :
(1 sc, inc) x 6 (18)
Round 4 :
(2 sc, inc) x 6 (24)
Round 5 :
(3 sc, inc) x 6 (30)
Round 6 :
(4 sc, inc) x 6 (36)
Round 7 :
(5 sc, inc) x 6 (42)
Round 8 :
(6 sc, inc) x 6 (48)
Info :
By Round 8 you should have a flat circle of 48 sts. If your circle cups, switch to a slightly larger hook or relax tension; if ruffling, switch to a smaller hook or tighten slightly. Adjust number of increase rounds if you prefer a larger or smaller diameter.
Round 9 :
1 sc in each st (48)
Round 10 :
1 sc in each st (48)
Round 11 :
1 sc in each st BLO (48)
Round 12 :
1 sc in each st (48)
Info :
Work rounds 9-14 evenly to develop a sturdy, dense base that will sit flat under the lace. The BLO round creates a subtle ridge for visual definition between concentric circles.
Round 13 :
1 sc in each st (48)
Round 14 :
1 sc in each st (48)
Round 15 :
(6 sc, inc) x 6 (54)
Round 16 :
1 sc in each st (54)
Round 17 :
1 sc in each st (54)
Round 18 :
1 sc in each st BLO (54)
Info :
If you prefer a slightly smaller solid round for tighter overlap under the lace, stop increases at Round 8 and work even rounds until the equivalent diameter is reached. These instructions assume a medium-large motif to match the photo proportions.
Round 19 :
*(2 sc, bobble) in next st, 2 sc in next 2 sts*, rep from * to * around (54) - see bobble technique below
Info :
Bobble: YO, insert hook, pull up loop, YO, pull through 2 loops twice until you have 5 partial loops on hook, YO and pull through all loops; ch1 to secure. Work bobbles evenly as decorative ridge around the final solid rounds to echo the bobbles on the cream fan edges.
Round 20 :
1 sc in each st (54)
Round 21 :
sl st around to finish and fasten off, leaving long tail for join-as-you-go (54)
Info :
Block each green round flat to the desired diameter. Use pins around the edge and lightly spray with water to set. Allow to dry completely before joining.
— Cream Lace Fan Panel (make matching number to pair with circles) :
Round 1 :
Ch 8, join with sl st to form a ring, ch 2 (counts as first hdc), 11 hdc into ring, join (12 hdc)
Round 2 :
Ch 2, 1 hdc in same st, 2 hdc in each st around, join (24 hdc)
Round 3 :
Ch 2, *(1 hdc, inc hdc) repeat across to increase flat arc* work increases evenly to expand into semicircle shape until end of round (36 hdc)
Round 4 :
Ch 3 (counts as dc), dc in next 2 sts, *(ch 2, sk 2, 3 dc) rep across whole arc to create base arches*, end with dc, join (36 dc including ch3)
Round 5 :
Ch 1, sc in same st, *(5 ch, sc into top of next 3-dc group) across to create chain-lattice foundations*, end sc, join
Round 6 :
Working into chain spaces: *(sc, ch 3, tr, ch 3, sc) in each 5-ch space*, this creates a fan of tall stitches, join
Info :
These foundation rows form the radial lattice of the fan. Keep stitch tension even—openwork looks best when chains are neither too tight nor too loose. If stitches pull inward, use a slightly larger hook for the lace rows only (3.75mm)
Round 7 :
Ch 2, hdc around top of each fan petal and in each 3-ch space to form a smoother curve (work 1 hdc per small space) to total approximately 54 hdc
Round 8 :
Ch 3, dc in each st around working evenly; at very outer edge increase by placing (2 dc) in wide spaces to widen outer rim (approx 60 dc)
Round 9 :
Ch 1, sc in each st BLO across the arc to create a defined edge (60)
Round 10 :
Ch 3, *(sk 2, dc cluster of 3 over next 3 sts, ch 2) rep to create lacy diamond trellis across arc*, end dc, join
Round 11 :
Work into chain and dc spaces: *(ch 5, sl st into top of trellis, ch 5, sl st into next trellis)* to form larger open diamond motifs along fan (approx 18 big diamonds)
Info :
At this stage the fan should have a flowing open lattice. If your diamonds appear too tight, gently tug chains until they relax and block to shape.
Round 12 :
Ch 1, sc evenly across base of large diamonds and into dc spaces to stabilize (approx 60 sc)
Round 13 :
Ch 3, 1 dc in each st around creating a neat outer rim (60 dc)
Round 14 :
Ch 1, *sl st, sc, picot (ch3, sl st in first ch), sc* in each wide segment around to form small decorative picot clusters (60 clusters)
Info :
Picot clusters at the rim echo the bobble border and give a tactile edge—work slowly and count spaces to keep uniform spacing.
Round 15 :
Ch 2, hdc in each st for a compact outer band (60 hdc)
Round 16 :
Ch 1, 1 sc in each st (60)
Round 17 :
*(ch 2, sk 1, sc) around to create subtle scallops along the outer rim*, join (approx 30 scallops)
Info :
Fasten off leaving a long tail for joining to the green round motif. Block the fan flat into a semicircular shape that matches the radius of the green circle; pins should align the fan rim to the circle's edge.
Round 18 :
Optional decorative round: rejoin and work a round of small bobbles spaced evenly around outer edge to mirror green motif bobbles. *(sc in next 2 sts, bobble) x around* fasten off leaving long tail
— Bobble & Picot Edge (decorative, applied to both fans and circles) :
Round 1 :
Join yarn at desired edge point, ch 1, sc evenly around edge to provide base for bobbles (count should match base circumference)
Round 2 :
*(sc in next 2 sts, bobble in next st) rep around* maintain equal spacing so number of bobbles divides evenly into circumference
Info :
Bobble technique: YO, insert hook, pull up loop, YO, pull through 2 loops twice; repeat 3 times into same stitch so 5 partial loops remain on hook, YO and pull through all loops, ch1 to close. This creates tight ornamental bumps that echo the photo's edging.
Round 3 :
Ch 1, 1 sc in each st around to create a clean finish; fasten off and weave in ends
— Flower Center and Petals (Make 3 large layered flowers) :
Round 1 :
With brown, 6 sc in magic ring (6)
Round 3 :
(1 sc, inc) x 6 (18)
Round 4 :
(2 sc, inc) x 6 (24)
Round 5 :
Ch 1, *bobble in next st, sc in next st* repeat around to give textured center (24)
Info :
Lightly stuff center with a tiny pinch of fiberfill at Round 4-5 to lend a firm textured center; do not overstuff. Fasten off brown and join cream for first petal base.
Round 6 :
With cream, ch 1, sc in each st around to even out join (24)
Round 7 :
For small inner petals: *(ch 3, sl st in next st) rep around to make 8 loops; fasten off leaving tail for positioning (8 mini-loops)
Round 8 :
Next, make medium petals: join cream in between loops, *(ch 4, sc into same sp, ch 4, sl st into next space) rep around to make 8 medium petal arcs
Round 9 :
Fasten off cream and join another round of cream or slightly lighter shade to create large sculpted petals: *(sc, hdc, dc, hdc, sc) across petal base, sl st into next space* repeat for 8 full petals (counts vary by petal width)
Info :
Sculpt each petal by working slightly taller stitches in the center (dc or tr) and decreasing stitch length toward the edges to produce a concave petal. Pin petals flat while assembling flowers to maintain consistent shape.
Round 10 :
Edging for petals: sc around petal edges, adding 1-2 picots between petals for definition. Fasten off leaving long tail for sewing onto runner.
Round 11 :
Optional extra dimension: Make a second layer of petals in cream offset between the first layer; follow Rounds 8-10 but work petals slightly larger and attach under the first layer to create 3D effect.
— Leaves (Make 6 leaves per flower; make 18 total) :
Round 1 :
With light green, ch 10, sc in 2nd ch from hook, hdc, dc, tr, dc, hdc, sc across, ch 1, turn to work on opposite side of foundation ch and sc back along chain to starting base; join to first sc (approx 18 sts total)
Round 2 :
Ch 1, sc in each st around leaf shape ensuring you fill the edges evenly; at the point (tr) place 2 sc to create defined tip, continue back down opposite side; join
Round 3 :
Ch 1, 1 sc in next st, *(1 hdc, 2 dc, 1 hdc) in center top for veining effect, sc across other side* fasten off leaving long tail for sewing
Info :
To create realistic curl, block leaves with a small wash and pin slightly cupped. You may press with your fingers while damp to set a subtle 3D curl. Vary leaf sizes slightly for a natural look.
Round 4 :
Optional surface stitch: Using darker green, embroider a simple central vein with running stitch through the leaf center for definition.
— Joining & S-Shape Construction (Join-as-you-go and sewing combined) :
Info :
Layout planning: Arrange alternating green rounds and cream fans in layout: green round, cream fan overlapping so fan covers half of adjacent green circle creating an S-sinuous path across table. The pattern in the photo shows 5 green circles and 4 fans, with 3 large flowers at the overlapping junctures. Adjust counts to fit table length.
Round 1 :
Start with a green round as worked above. Place a cream fan against the round so their edges overlap by approximately 12-16 stitches (a quarter of circumference). Use pins to hold them in position while joining.
Round 2 :
With yarn tail from fan, and facing RS of both pieces, join with sl st into the edge st of green round at overlap point, ch1, then work sl st through corresponding fan edge st and next green st alternating to create an invisible join. Continue along overlapped edge until the arc is secured.
Info :
Join-as-you-go tip: Slip stitch joins should be fairly tight to prevent gaps, but not so tight that the seam puckers. Use matching yarn and hide tails by carrying them into the next few rounds of adjoining motif before weaving in.
Round 4 :
After joining first two pieces, position another green round on the opposite side of the fan so the fan becomes the shared arc between two circles. Repeat the join-as-you-go step to secure the fan between both circles forming the first S-curve unit.
Info :
When joining a fan between two circles, ensure the fan lays flat and both circles are tensioned to the same degree; pin generously and join in short segments to maintain flatness and shape.
Round 6 :
Continue alternately adding fans and circles, always joining with sl st along the overlapped arcs. For each completed S unit (circle-fan-circle), place a flower at the central overlap: position 3-4 leaves under flower base and sew flower center to both adjoining motifs at 8-10 evenly spaced stitches so flower appears centered.
Info :
Sewing flowers: Use the long tail from the flower and a yarn needle to stitch through multiple layers—fan rim, green circle edge, and optional edge rounds—pulling gently to flatten layers so flower sits flush without puckering.
Round 8 :
After entire runner is joined, add a round of sc through the outer edges of fans and circles (work in the outermost edge stitches) to create a unified outer band. Work 1 sc in each st going around the full runner, making slight increases only where seams create tension.
Round 9 :
Finish with decorative bobble edging along the runner outermost curve: *(sc in next 3 sts, bobble) repeat around entire runner outer rim,* keeping bobbles evenly spaced to mirror motifs’ sizes; fasten off and weave in ends
Info :
Blocking final runner flat is important—pin to full length on a blocking surface and steam or spray lightly then let dry to set shape. Attach felt or non-slip pads underneath at intervals if runner will be used on slick surfaces to prevent slipping and preserve shape.
— Alternate Joining Method (Sewing for stronger seams) :
Round 1 :
Instead of sl st join-as-you-go for high-use tables, sew overlapping edges by whipstitching through both motif edges using matching yarn and a darning needle. Use 6-8 passes along each overlapped arc for strength.
Info :
Sewing method provides stronger hold at the cost of a slightly more visible seam; hide stitches within the underside of the fan lattice when possible for a neater finish.
— Finishing Touches :
Round 1 :
Sew additional leaves around flower bases in layered groups of 3-4. Stagger leaf points so they radiate naturally from beneath flower petals.
Round 2 :
Weave in all ends at least 5 cm into motifs, trimming close. Ensure all seams are secure and re-sew any loose points. Use small dots of fabric glue behind flower centers for extra security if runner will be handled frequently.
Info :
Final blocking ensures flatness and uniform shape. Avoid washing frequently; instead spot clean and occasionally hand-wash and re-block to keep runner crisp. If using on dining table, consider a thin protective layer underneath to prevent stains and wear on delicate outer rims.
This floral table runner brings a touch of timeless elegance to any table with its flowing S-shape and textured 3D flowers. Each concentric motif and lace fan is a little act of handmade care, combining stable dense rounds with airy openwork for contrast. The join-as-you-go construction keeps the runner flat and durable while the bobble edges and layered leaves add charming detail. Place it on a sunny farmhouse table, share as a gift, and enjoy the sense of warmth and style it brings. 🧶🌿