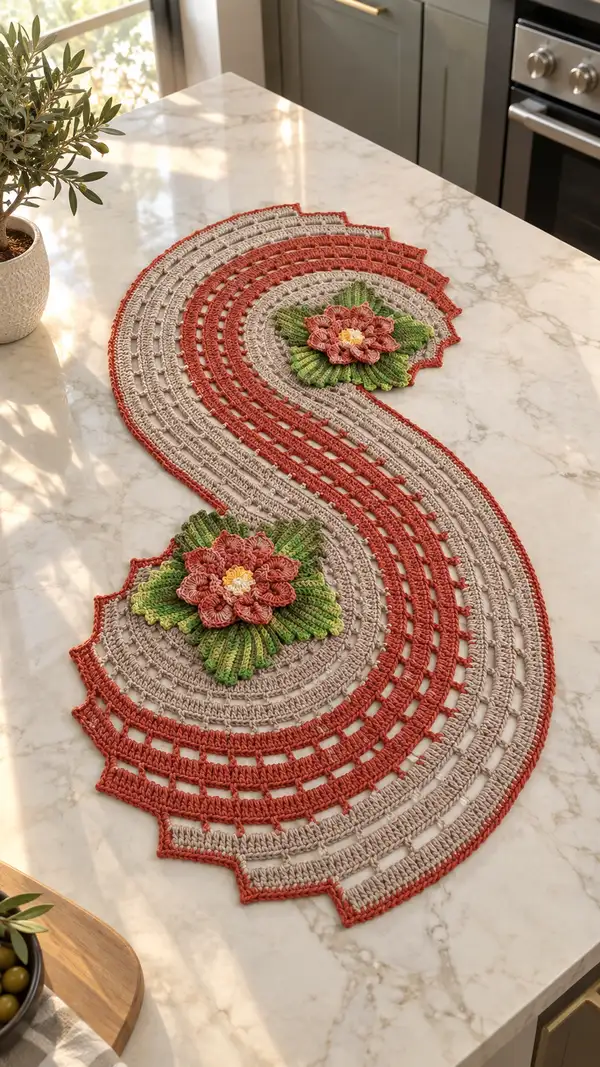
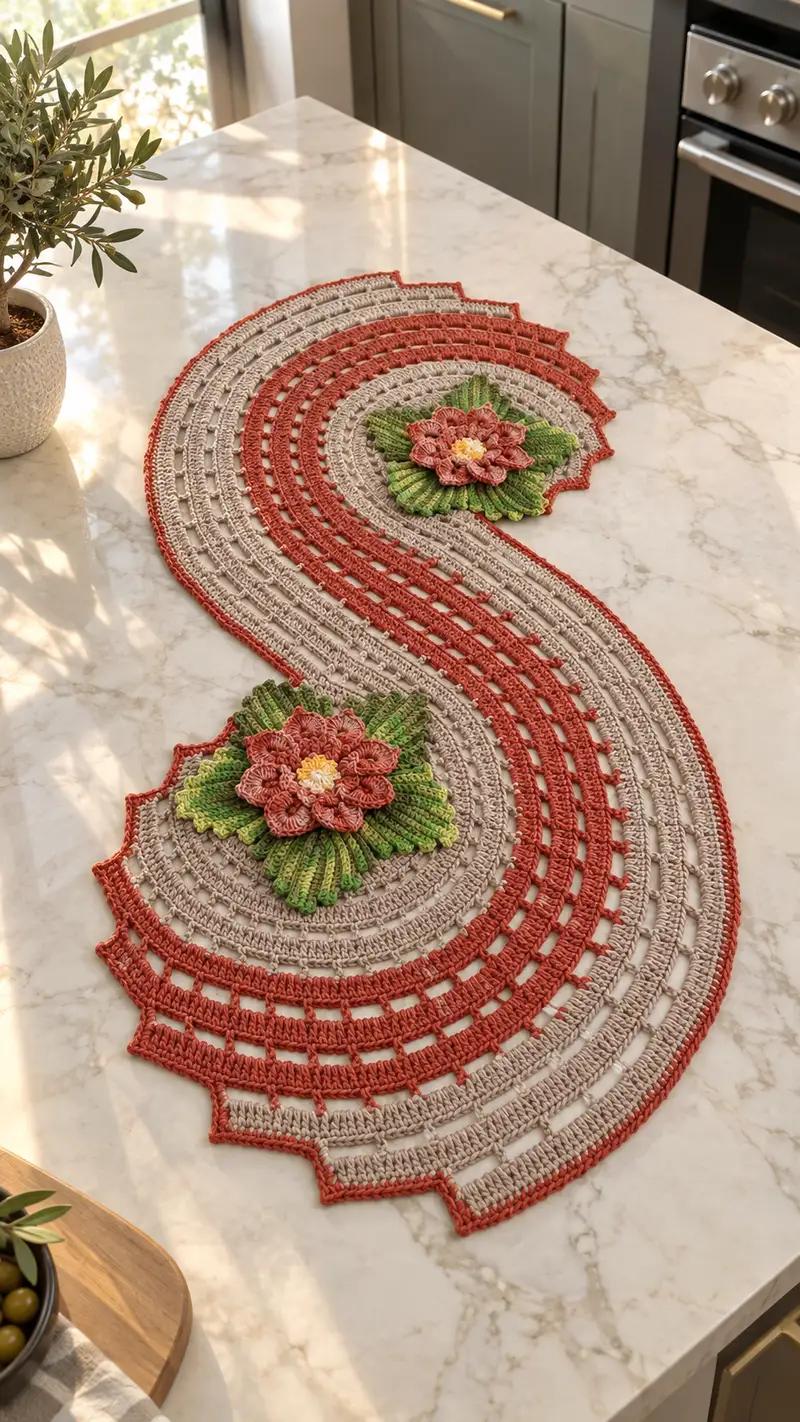
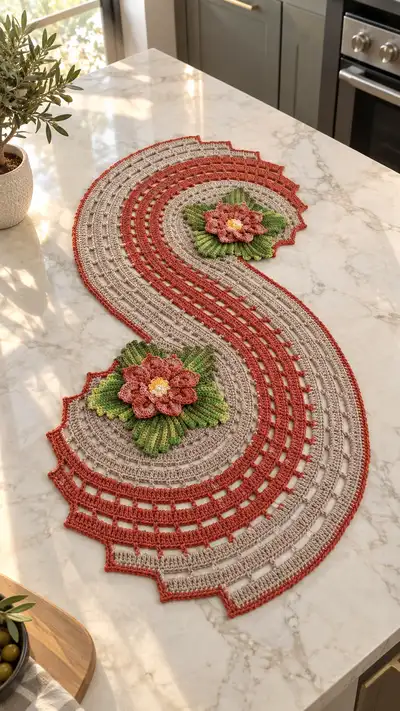
Create a stunning S-shaped table runner featuring concentric openwork bands and two layered floral motifs with sculpted petals and ribbed leaves. This pattern uses contrasting rust, warm beige, greens and a sunny yellow center to create a modern vintage look that lies flat on tabletops. Suitable for creating a statement centerpiece for a dining table or console, the runner combines rounds of solid work with airy chain-space rows and a scalloped edging for a professional finish.
Progress Tracker
0% Complete
— Runner Base (Make the two arcs that form the S-shape) :
Round 1 :
6 sc in magic ring (6)
Round 3 :
(1 sc, inc) x 6 (18)
Round 4 :
(2 sc, inc) x 6 (24)
Round 5 :
(3 sc, inc) x 6 (30)
Round 6 :
(4 sc, inc) x 6 (36)
Round 7 :
(5 sc, inc) x 6 (42)
Info :
This first circle becomes the circular base where the flower motif will sit. Work tightly to create a firm base. If your tension is loose, go down one hook size for these rounds.
Round 8 :
(6 sc, inc) x 6 (48)
Round 9 :
(7 sc, inc) x 6 (54)
Round 10 :
(8 sc, inc) x 6 (60)
Round 11 :
1 sc in each st around (60)
Info :
Change to warm-beige if you started with a contrast. These rounds are the innermost solid rounds of the circular base. Maintain consistent stitch height and tension.
Round 12 :
1 sc in each st around (60)
Round 13 :
1 sc in each st around (60)
Round 14 :
Change to rust color: ch3 (counts as dc), *skip 1 st, dc in next st, ch1* repeat around to create a light openwork band; join with sl st to top of beg ch3 (approx 30 dc, 30 ch-1 spaces)
Info :
The rust open band is worked in dc/ch-1 spaces around the circular base to create the first stripe. Adjust repeats if your counts differ; aim for even spacing of the chain spaces.
Round 15 :
Change to beige: ch2 (counts as hdc), hdc in each dc and in each ch-1 space around (60 hdc)
Round 16 :
1 hdc in each st around (60)
Round 17 :
Change to rust: ch3, *dc in next st, ch1, sk next st* repeat around (approx 30 dc, 30 ch-1 spaces); join (60)
Info :
These alternating dc + chain rows create the airy rectangular bands seen in the runner. Keep stitch counts even by checking that the number of chain spaces matches the number of dc repeats.
Round 18 :
Change to beige: ch2, hdc in each st and ch-1 space around (60)
Round 19 :
Repeat Round 17 (rust) to build the stripe band (60)
Round 20 :
Repeat Round 18 (beige) (60)
Info :
At this stage you have a large circular segment with alternating solid and open bands. Create enough concentric bands so that the circular base reaches roughly 8-9 inches diameter for each flower base. Continue alternating until you have 6-8 total concentric stripes depending on desired size.
Round 21 :
Repeat open dc/ch band in rust (as Round 17) (60)
Round 22 :
Repeat solid hdc in beige (60)
Round 23 :
Repeat open dc/ch band in rust (60)
Round 24 :
Repeat solid hdc in beige (60)
Info :
Make a second circular base exactly the same to form the other end of the S. Alternatively, make two identical bases now and set aside for assembly. Keep labels: Base A and Base B.
Round 25 :
Work an extended arc around one side only to begin shaping the semicircular arm that will become part of the S: ch1, sc in next 30 sts (30), turn and work rows rather than rounds to create an arc.
Round 26 :
Row 1 (arc rows): ch3 (counts as dc), dc in each of next 29 sts across (30 dc). Do not join; turn for next row (30)
Round 27 :
Row 2: ch3, dc in each st across (30)
Round 28 :
Row 3: ch3, dc across (30)
Info :
Working rows rather than rounds flattens and extends the arc. These rows will be the foundation of the long arm; keep the turning chains consistent so edges are tidy. Place stitch markers at arc ends every 6 rows while building long arms to keep track.
Round 29 :
Row 4: ch3, dc across (30)
Round 30 :
Row 5: ch3, dc across (30)
Round 31 :
Row 6: ch3, dc across (30)
Round 32 :
Row 7: ch3, dc across (30)
Round 33 :
Row 8: ch3, dc across (30)
Info :
Alternate a rust stripe every 3rd row: after two beige dc rows, switch to rust and work a dc row in rust to create the vertical banding. Carry yarn neatly along the edge or break and weave ends later.
Round 34 :
Row 9: Change to rust: ch3, dc across (30)
Round 35 :
Row 10: Change to beige: ch3, dc across (30)
Round 36 :
Row 11: beige: ch3, dc across (30)
Round 37 :
Row 12: rust: ch3, dc across (30)
Info :
Work approximately 18-24 rows for each long arm to match the photographed proportions. One arm will curve inward toward the runner center. The other arc is made similarly and later joined offset to create the S-flow.
Round 38 :
Row 13: beige: ch3, dc across (30)
Round 39 :
Row 14: beige: ch3, dc across (30)
Round 40 :
Row 15: rust: ch3, dc across (30)
Round 41 :
Row 16: beige: ch3, dc across (30)
Round 42 :
Row 17: beige: ch3, dc across (30)
Info :
To create the stepped scalloped edge visible at each large arc's outer edge, work a picot-style edging later. For now keep the arm width consistent. Make the arm length equal on both semicircles so both ends look symmetrical in the S-shape.
Round 43 :
Row 18: rust: ch3, dc across (30)
Round 44 :
Turn your arc rows into rounds along the outer curve by joining the last dc to the nearest outer round on the circular base with sl st every 3-4 sts, creating a smooth transition (approx 10 sl st joins along the seam).
Round 45 :
Once arc is attached, continue working concentric rounds around the joined area to even out the outer curve: 1 sc in each available st around junction and along arc edge until the outer diameter reaches the photographed width (work until you have 84–90 sts around the outer curve).
Info :
Repeat the above construction to make the opposite semicircle and arc. Leave a long tail on one semicircle for later joining (this is how you build the S: join the two semicircles with a connecting band in the center using rows).
Round 46 :
Connecting band (join A to B): With right sides facing, align the inner edges of the two semicircles offset to create an S. Starting at the inner edge, join yarn and work rows of dc across the gap bridging the two halves: ch3, dc evenly across connecting length — approx 40 dc (adjust to fit gap).
Round 47 :
Row 2 of connector: ch3, dc across (40)
Round 48 :
Row 3 of connector: ch3, dc across (40)
Info :
Make sure the connecting band lies flat and shape it as you go. If it pulls too tight, work less decreases on either end. If it is too loose, reduce the number of chains in the base row when joining.
Round 49 :
Turn connector Row 4: ch3, dc across (40)
Round 50 :
Turn connector Row 5: ch3, dc across (40)
Round 51 :
With connector in place, work 2 rounds of hdc in beige around the entire outer edge of the assembled S-runner to even the join (hdc in each st around)
Round 52 :
Repeat Round 51 (hdc in each st around) to produce a firm edge (counts will vary depending on joining; maintain even stitch spacing)
Info :
At this point the S-shaped runner is structurally complete. You should have alternating solid and open rows running concentric from the two flower bases out towards the edges. Now add the decorative border and scallops to emulate the photographed stepped outer edge.
Round 53 :
Scalloped border setup: Change to rust. *sc in next 4 sts, (5 dc in next st), sc in next 4 sts, sl st in next st* repeat around to create pronounced scallop clusters; adjust counts to keep scallops even (approximately 12-16 scallops around each outer semicircle outer curve)
Round 54 :
Refine scallop points: In each 5-dc shell from previous round, sl st to center dc, ch3, picot (ch3, sl st into top of ch3) or single picot variation for sharper points, then sl st back to shell center; this creates the stepped pointed edge visible in the photo
Round 55 :
Edge finishing: 1 sc in each st around the remainder of the runner border to tidy edges and bury ends (counts will reflect full assembled runner circumference)
Info :
Block the assembled runner flat to ensure scallops open fully and the S-shape lays flat across the tabletop. Use pins and a damp cloth or steam lightly. Allow to dry completely before attaching floral motifs.
— Flower Motif (Make 2 identical flower assemblies) :
Round 1 :
Using dusty coral: 6 sc in magic ring (6)
Round 3 :
(1 sc, inc) x 6 (18)
Round 4 :
(2 sc, inc) x 6 (24)
Round 5 :
1 sc in each st around (24)
Info :
This small circle will form the base under the petal layers where leaves attach. Work tightly and fasten off with a long tail for sewing to the circular base on the runner.
Round 6 :
Rejoin dusty coral to any st: ch1, sc in same st, *ch3, sk next st, sc in next st* around to create 12 ch-3 loops for petals (24 spots effectively)
Round 7 :
Petal row 1 (small petals): In each ch-3 loop work: (sc, hdc, 3 dc, hdc, sc) - fasten off after completing 12 petals. These are the inner small petal layer (each petal is sculpted).
Info :
Petal pattern uses front-post or working over the loop to get petals to stand up. Hold petals flat as you stitch so they do not twist. Optionally use a 3.5mm hook for tighter petals.
Round 8 :
Rejoin coral in back of base: ch3 then sl st evenly around the base into the spaces between inner petals to prepare for the second larger petal layer (12 placement points)
Round 9 :
Petal row 2 (larger petals): In each placement point work: ch1, sc, hdc, (3 dc, ch2, 3 dc) in same point, hdc, sc. This elongated petal has a small ch-2 picot at the top to give a split petal look. Make 12 petals.
Round 10 :
Reinforce: Working behind the second petal layer, sc across the base between petal stems to hold petals upright (sc evenly around, approx 48 sc)
Round 11 :
Optional highlight: Using a very light coral or pale pink, slipstitch across petal tops for a soft highlight (weave in tails after).
Round 12 :
Flower dome center: Using sunflower yellow, make a small puff cluster center: in the center hole, *yo, insert hook, pull up loop 3x* repeat 6 times to make a 6-loop puff; yarn over and pull through all loops, ch1 and secure with sl st. Fasten off leaving tail to sew inside the petal ring (this gives the textured yellow center).
Info :
Stuff a tiny pinch of polyfill under the yellow puff before sewing it down to create the domed center. Use minimal stuffing to avoid bulging petals outward unnaturally.
Round 13 :
Sew petal layers together: Using matching coral yarn and tapestry needle, stitch through petal bases and the small base rounds to join layers. Weave tail through the back; hide tail under the flower when sewn to runner base.
Info :
Make two identical flowers. Block them lightly if petals curl; pin flat petals and mist lightly for shaping.
— Leaf Units (Make 6–8 leaves total: 3–4 for each flower cluster) :
Round 1 :
With variegated green or main leaf green: ch7, sc in 2nd ch from hook, hdc in next, (dc, tr, dc) in next, hdc in next, sc in next, sl st in last (leaf center chain-based pattern)
Round 2 :
Working on opposite side of foundation chain: sc in first st, hdc in next, dc in next, tr in next (center peak), dc in next, hdc in next, sc in last (mirror leaf shape)
Round 3 :
BLO ribbing: Change to lighter green (optional): In each st around working in BLO only, work hdc in each st to create a ribbed surface on the leaf back (approx 14 hdc)
Info :
For sculpted ribbed leaves as photographed, work a second BLO round using hdc or sc to form raised ribs. Block leaves over a slight curve to give them lift; pin to set shape.
Round 4 :
Veining detail: Using contrasting darker green, embroider a central midrib and two side veins with a tapestry needle using surface slipstitch or chain-stitched embroidery.
Round 5 :
Finish leaf: Fasten off leaving a long tail for sewing; make 3–4 leaves for each flower cluster depending on desired fullness (6–8 total leaves per runner).
Info :
Arrange leaves under each flower such that they radiate slightly offset behind the petals. Use pins to check placement before sewing permanently to the runner base.
— Petal Layer Alternative (Optional extra sculpted layer) :
Round 1 :
Using dusty coral: ch6, join to form a small loop. Round 1: 12 sc in loop (12)
Round 2 :
(1 sc, inc) x 6 (18)
Round 3 :
Make pointed petals: in each st: (sc, hdc, 3 dc, hdc, sc) repeat 12 times. This creates an outermost dramatic petal ring for additional depth.
Info :
If you prefer a fuller flower similar to the photo, add this third petal layer between the second petal layer and the yellow center. Adjust color for tonal variation.
— Flower Center & Finishing Touches :
Round 1 :
Using yellow: 6 sc in magic ring (6)
Round 3 :
Make texture: *in next st make 3-loop popcorn or puff* around to form a bumpy center (12 textured bumps)
Info :
Slip this center into the middle of the coral petal ring and sew through the back to anchor. Insert a tiny bit of stuffing beneath the center to lift it slightly and add dimension.
Round 4 :
Secure center with 6–8 small hidden stitches through the petal bases and the center ring; weave in ends through several stitches and cut close to fabric.
— Attaching Flower Assemblies to Runner :
Info :
Position Base A and Base B on the runner at the photographed offsets: each circular base sits centered on the large semicircular ends of the S. Pin in place at 4–6 points before sewing.
Round 1 :
Using long tail from base circles, sew Base A onto the runner by mattress or whip stitch around the inner ring (sew through runner base rounds into base circle foundation rounds). Use even tension to keep bases flat (approx 24 secure stitches).
Round 2 :
Attach leaf units: Using leaf tails, position leaves beneath the flower and sew each leaf base to the runner and the underside of the flower base; secure each leaf with 5–8 small stitches so leaves lie slightly tucked under petals.
Round 3 :
Sew flower: Position flower petals over base and sew through the base rounds and through inner petal layer foundation to anchor; use discreet stitches so thread is not visible on petal faces (12–18 stitches around).
Info :
Check that flowers are aligned symmetrically along the S-runner. The flowers should be offset from each other to follow a gentle S-curve rather than placed directly opposite.
— Optional: Surface Texture Rows for Runner (Add ribbing if desired) :
Round 1 :
With beige: 1 sc in each st around (entire runner circumference) to create a base ridge (counts vary)
Round 2 :
1 sc in BLO around to create a subtle ridged texture along the runner edge
Info :
Use BLO ridges selectively along inner arcs to echo the leaf ribbing and petal texture; this creates a cohesive look across the piece.
— Final Edge Tidying and Secure Weaving :
Round 1 :
Fasten any remaining yarn and weave tails through several rounds on the back of the runner. Ensure all color joins are secured with a few stitches before trimming.
Round 2 :
Give the runner a final blocking: Wet-block or steam lightly and pin scalloped edging into points; allow to fully dry before placing on table.
Info :
If the scallop edges remain slightly rolling, use blocking spray and pins to coax into shape. For a stiffer, more durable finish, lightly starch border edges and reshape while damp, then dry flat.
Round 3 :
Admire and place: Once dry, place the runner on your tabletop and position small decorative accents or centerpieces as shown in the inspiration photo. Enjoy!
This S-shaped floral table runner blends classic crochet techniques with sculptural floral elements to create a show-stopping centerpiece. Working the concentric open bands and delicate petal layers is deeply satisfying—each step adds dimension until you end up with a piece that elevates any table. The pattern is a delightful balance of structure and whimsy; blocking and careful assembly bring out the full beauty of the scallops and flowers. 🧶 Place it proudly and enjoy the compliments! 🌿