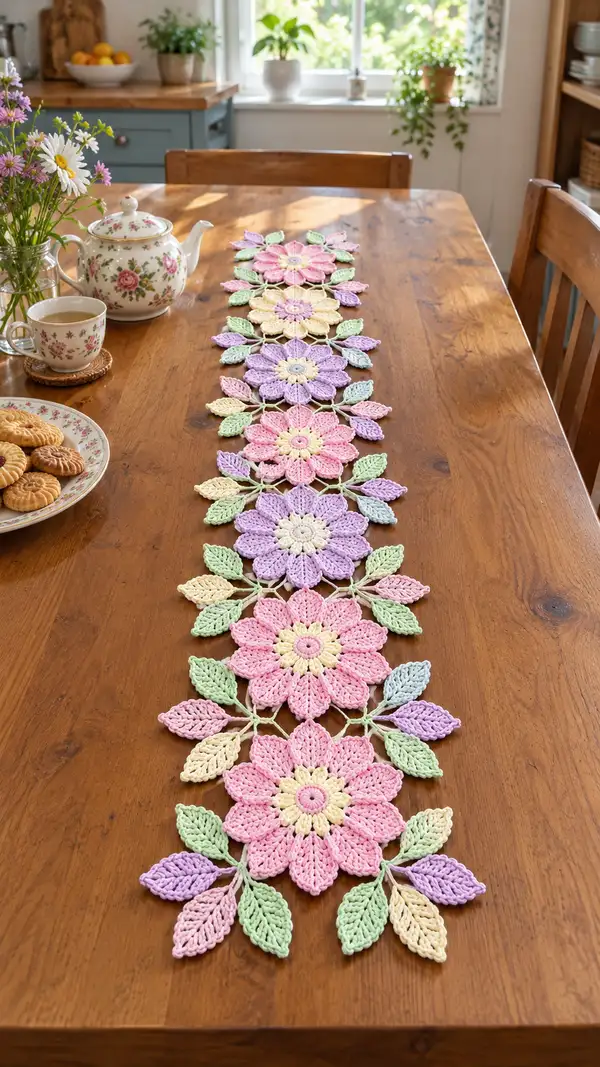
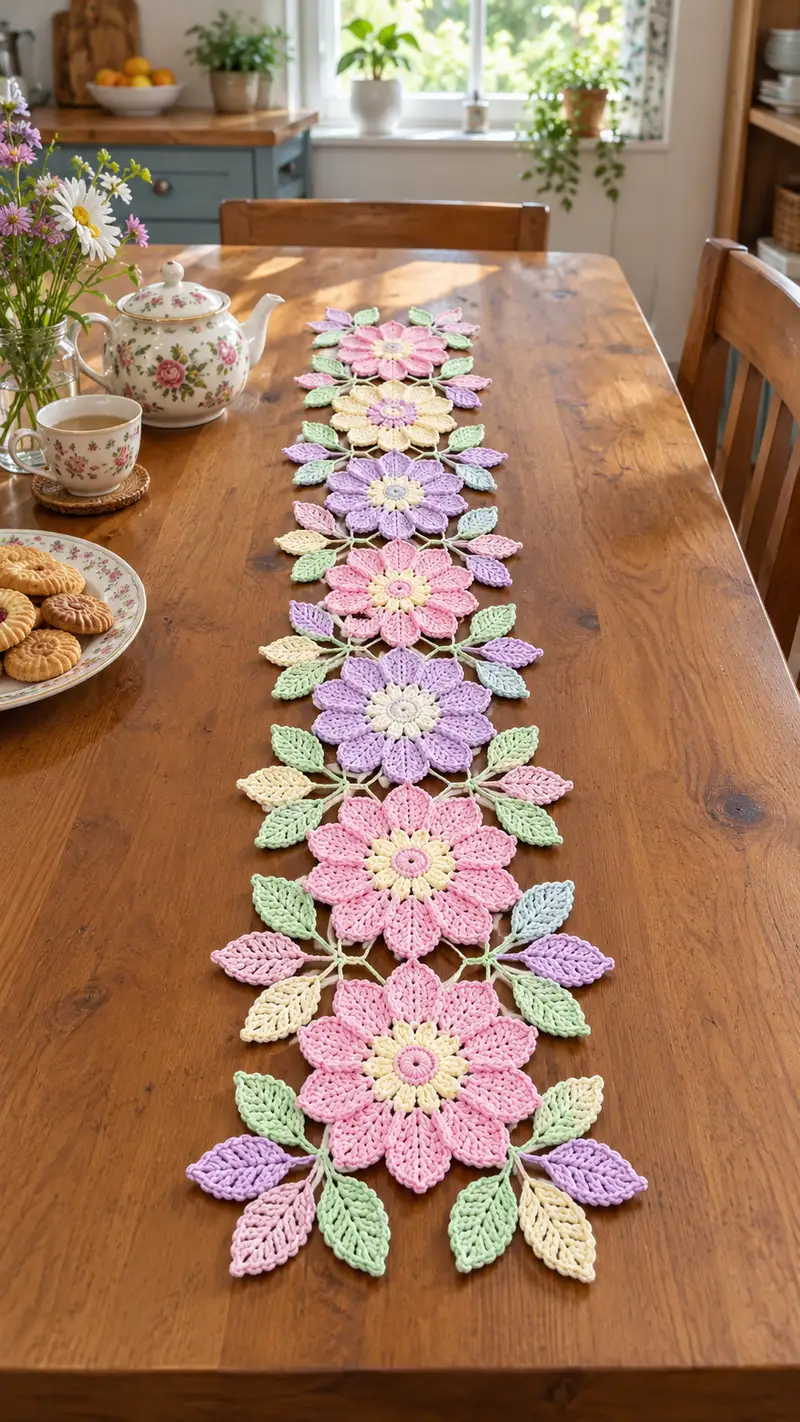
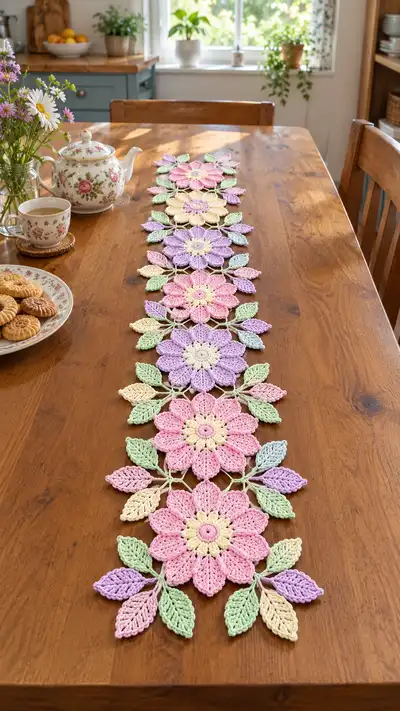
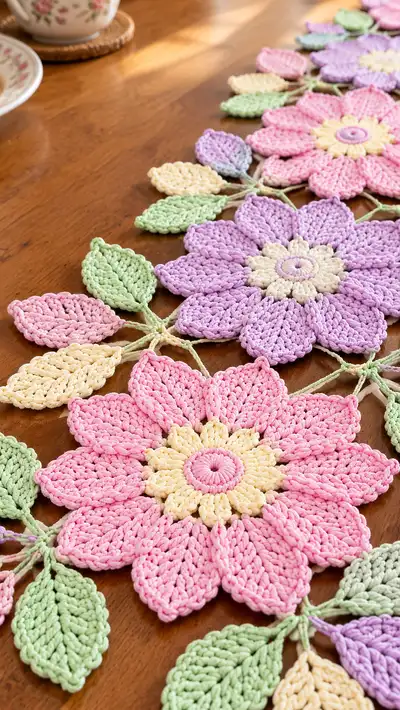
Create a charming pastel floral table runner made from large layered flower motifs and linked leaves. This pattern uses post stitches and petal shaping to achieve the raised, textured blooms and delicate leaf clusters shown. Finished runner is lightweight, decorative, and perfect for spring or afternoon tea settings.
Progress Tracker
0% Complete
— Overview :
Info :
This pattern constructs one flower motif and one leaf unit. You will make repeated flower motifs in alternating colors and link them by crochet chain stems and leaf clusters to form a long runner. Each flower motif is made flat with an inner small petal round and a larger outer petal round formed with post stitches for raised texture. Count stitches carefully and use stitch markers to mark round starts.
— Flower Motif (make 8 or more, repeat colors as desired) :
Round 1 :
Make a magic ring, ch1, 10 sc into ring. Pull tight. (10)
Round 2 :
(1 sc, inc) x 5 (15)
Round 3 :
(2 sc, inc) x 5 (20)
Round 4 :
(3 sc, inc) x 5 (25)
Info :
Change to the center-accent color on final pull-through of the last stitch if you want a contrasting center petal color. Keep tension firm to maintain a small, neat center.
Round 5 :
1 sc in each st around (25)
Round 6 :
(3 sc, inc) x 5 (30)
Round 7 :
1 sc in each st around (30)
Round 8 :
To form inner small petals: *ch 3, skip next 2 sts, sl st into next st; rep from * around to create 10 ch-3 loops. Join with sl st. (10 petals anchors)
Round 9 :
Working into each ch-3 loop: (sc, hdc, 3 dc, hdc, sc) in each loop. Fasten off inner petal color and change back to main petal color if using two colors. (10 petals)
Info :
Inner petals create a small scalloped ring. Block gently if petals look uneven—pin each petal to the same size before next rounds.
Round 10 :
Join main bloom color in a stitch between inner petals, ch1, 1 sc in same st, *ch5, skip to next petal base, 1 sc between petals; rep from * around, making 10 chain-5 loops. Join with sl st. (10 loops)
Round 11 :
Work large petal bases: Into each chain-5 loop work (sc, hdc, 5 dc, hdc, sc) anchoring to the base stitch at end with sl st. Keep petals uniform as you go. (10 large petals)
Round 12 :
Ch1, sc evenly in all stitches around petals and between petals to create a tidy round; work approximately 50 sc to encircle the base depending on your tension. (approx 50)
Info :
Check petal spacing now. If petals are too close, use a 6-ch loop next time; if too far apart, reduce to ch4. Tension and gauge can change the loop length required.
Round 13 :
Work one round of bpdc around each petal (work bpdc in each dc of the petal body) to create vertical ridges that will lift petals. This will be approximately (5 bpdc x 10 petals = 50 bpdc). (approx 50)
Round 14 :
1 sc in each st around to square the base and hide tails (approx 50)
Round 15 :
Begin shaping petal edges: *In the edge sc at the outer tip of a petal work (sc, ch2, sc) to create a pointed tip; move to next petal tip and repeat. There will be 10 pointed tips. (approx 50)
Info :
Use a contrasting thread or waste yarn marker at the stitch between petals so you can easily count petals and align joins later.
Round 16 :
1 sc evenly around to tidy points and base (approx 50)
Round 17 :
To add bulk to the petal and lift it further: work fpdc around the front side of the petal body (work fpdc around the mid dc posts of each petal). Maintain one fpdc per dc worked previously. (approx 50)
Round 18 :
1 sc around to lock post stitches in place (approx 50)
Round 19 :
For decorative outer edging, *ch2, sl st in outer tip point, ch2, sc in next base stitch; rep around. This forms small decorative picot-like loops between petals. (approx 50)
Info :
At this stage you should have a large layered flower with inner and outer petals. Fasten off and weave in ends leaving long tail if you plan to use it to sew motifs together.
Round 20 :
Optional firm edging round: join main color, sc in each st around working through both loops and pulling tightly to create a crisp rim. Fasten off. (approx 50)
Info :
Block each motif flat: dampen lightly and pin to desired diameter (approximately 18-20cm across depending on yarn) ensuring petals are evenly spaced. Allow to dry fully before joining motifs.
— Leaf Unit (make multiples to create clusters) :
Round 1 :
Make a magic ring, ch1, 6 sc in ring. (6)
Round 2 :
(1 sc, inc) x 3 (9)
Round 3 :
(2 sc, inc) x 3 (12)
Round 4 :
1 sc in each st around (12)
Info :
We will begin forming the leaf shape by working elongated stitches on one side then mirroring them on the other.
Round 5 :
Ch1, sc in next 3 sts, (ch6, sl st to same st) to form a small loop for the leaf tip shaping; sc in next 3 sts. (12 + 1 loop)
Round 6 :
Working into the long ch6, work (sc, hdc, 3 dc, hdc, sc) to create a pointed tip. Fasten off this side if you want a two-color leaf or continue in same color. (leaf tip formed)
Round 7 :
Turn to the underside and work sc evenly along the leaf edge to join tip to base, creating a symmetrical leaf shape (approx 18 sc around leaf). (approx 18)
Round 8 :
To create the central vein: work fpdc along the center of the leaf body—insert hook under the post of each center stitch and work 1 fpdc per stitch down the leaf to the tip, then reverse and work bpdc back down for a raised vein effect. This creates texture and a natural look. (approx 10-12 posts)
Info :
If you want a very flat leaf use only sc rounds; for sculpted leaves use fpdc and bpdc to create a raised center vein as shown in the photo.
Round 9 :
Finish with 1 sc around the entire leaf edge to tidy and secure ends. Fasten off leaving a 20-25cm tail for joining. (approx 18)
— Small Leaf / Connector (make many) :
Round 1 :
Ch6, 1 sc in 2nd ch from hook, 1 hdc, 3 dc, 1 hdc, 1 sc, sl st to finish chain to make a small leaf drop. Fasten off leaving long tail for joining.
Info :
These small leaves are used to form clusters between motifs and to connect flower motifs with short chain stems. Make a mix of small and medium leaves for a natural look.
— Joining Chain Stems and Joining Motifs :
Info :
Plan your runner layout: arrange flower motifs in a single row with roughly 8-10cm spacing between flower centers. Use chain stems and small leaf clusters to link them. The sample runner in the photo shows 7 large flowers joined by triplet leaf clusters at their meeting points.
Round 1 :
Work a 20-ch chain stem using the mint green color between two adjacent motifs: join yarn to the outer round of motif A with sl st, ch20, join to motif B with sl st. Adjust chain length to preference for spacing. (ch20)
Round 2 :
Along the chain stem, at positions ch5, ch10, ch15 make small leaf connectors by working: (sl st into chain, ch1, (sc,ch3,sc) into chain to form leaf loop) then work small leaf as earlier into loop and fasten off. Repeat at each position to create 3 small leaves along each stem.
Info :
When joining, try not to pull chains too tight; the joins should have slight slack so motifs sit flat on the table. Pin motifs in position before making permanent joins.
Round 3 :
To reinforce connections, with mint green, work a single crochet seam along the join point around the base of the adjacent petals (3-4 sc each side) to secure the chain to the motif edge. This creates a sturdy, decorative joint. (approx 6-8 sc per join)
Round 4 :
Repeat joining for all motif pairs in sequence until the runner is the desired length. Make sure to alternate motif colors for a balanced look.
Info :
For long runners, work in sections of 3-4 motifs and join these sections before joining sections together—this keeps layout manageable and prevents tangling of long chains.
— Decorative Edge Leaves and Finishing Touches :
Round 1 :
To create the decorative leaves that overhang the runner edges, attach mint green yarn to the outermost join points and work 5 leaves per motif end—2 small leaves and 3 medium leaves alternating. Use the Small Leaf / Connector pattern for small leaves and the Leaf Unit pattern for medium leaves. Fasten off and weave ends. (5 leaves per motif end)
Round 2 :
Where leaves meet at the edge, secure with a small invisible stitch through both leaf bases using the long tail. This keeps the overhang neat and prevents shifting when the runner is in use.
Info :
Check symmetry: flip the runner and ensure leaves are mirror-balanced left and right. Add or remove small leaves to reach your preferred look.
Round 3 :
Work a final slip-stitch tidy around the entire runner if you want a continuous round edge: join mint green at one edge, sl st evenly along the connecting chains and leaf edges, making 1 sl st approximately every 5mm to create a subtle frame. Fasten off and weave in all ends. (approx count varies by runner length)
Info :
Final blocking is essential: pin runner to desired final dimensions on a blocking mat and lightly mist or steam according to yarn care guidelines. Pin each petal tip and each leaf point to maintain shape while drying.
— Alternate Flower Variant (Optional extra texture) :
Round 1 :
Make same center as main flower up to Round 7. Then change to a textured stitch: (ch1, *sc in next 2 sts, popcorn in next st; rep * around) to add raised bumps behind petals. Count will be approx 30 sts with 10 popcorns.
Round 2 :
Form chain loops as in Round 10 of main flower and proceed to make larger petals, but on each petal work an extra fpdc row to create a higher ridge. Fasten off and block.
Info :
This variant creates a plumper bloom and is ideal if you want more sculptural center detail. Use sparingly to add variety along the runner.
— Gauge & Sizing Notes :
Info :
Using worsted weight cotton and 4.0mm hook, one finished flower motif measures approximately 18-20cm (7-8 inches) across when blocked. Leaves measure approx 6-8cm long. Adjust your hook size to change motif size: smaller hook yields smaller, tighter motifs; larger hook gives larger, looser motifs.
Info :
To make a longer or shorter runner, simply make more or fewer motifs and join them with the chain stems. For a table centerpiece length of 120cm make 5-6 motifs; for a long table as pictured, make 7-10 motifs depending on desired spacing.
This delightful floral table runner blends vintage charm with modern crochet texture for an eye-catching centerpiece. Each bloom and leaf is crafted with attention to detail and joined into a cohesive, elegant runner you'll be proud to display. The pastel palette pairs beautifully with casual or formal tableware—perfect for spring tea or bridal showers. 🌸🧶 Lay it out, sip your tea, and enjoy the handmade beauty you created. Happy stitching! ✨