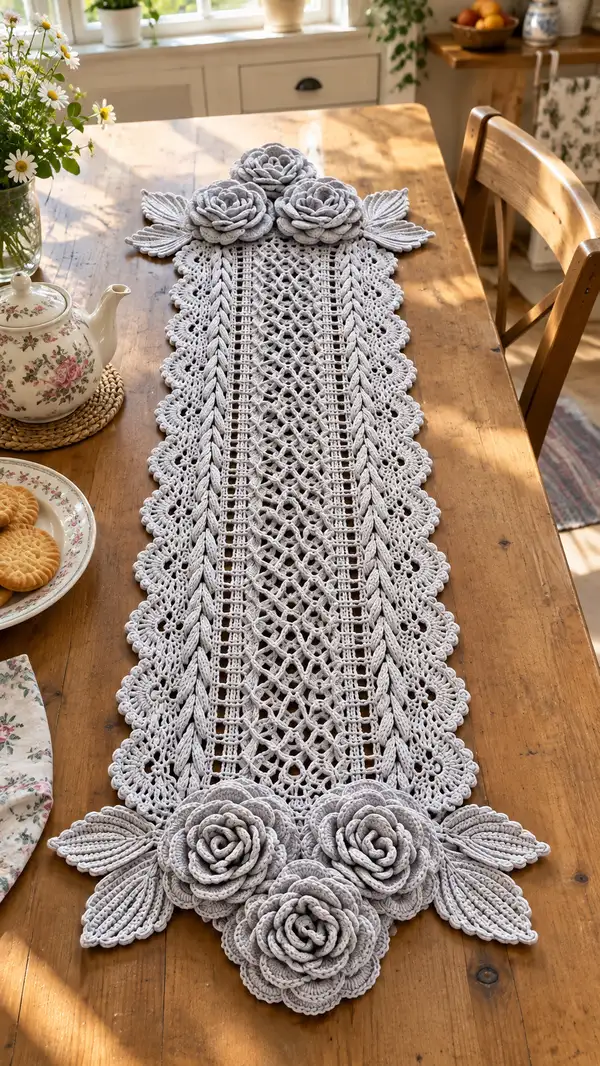
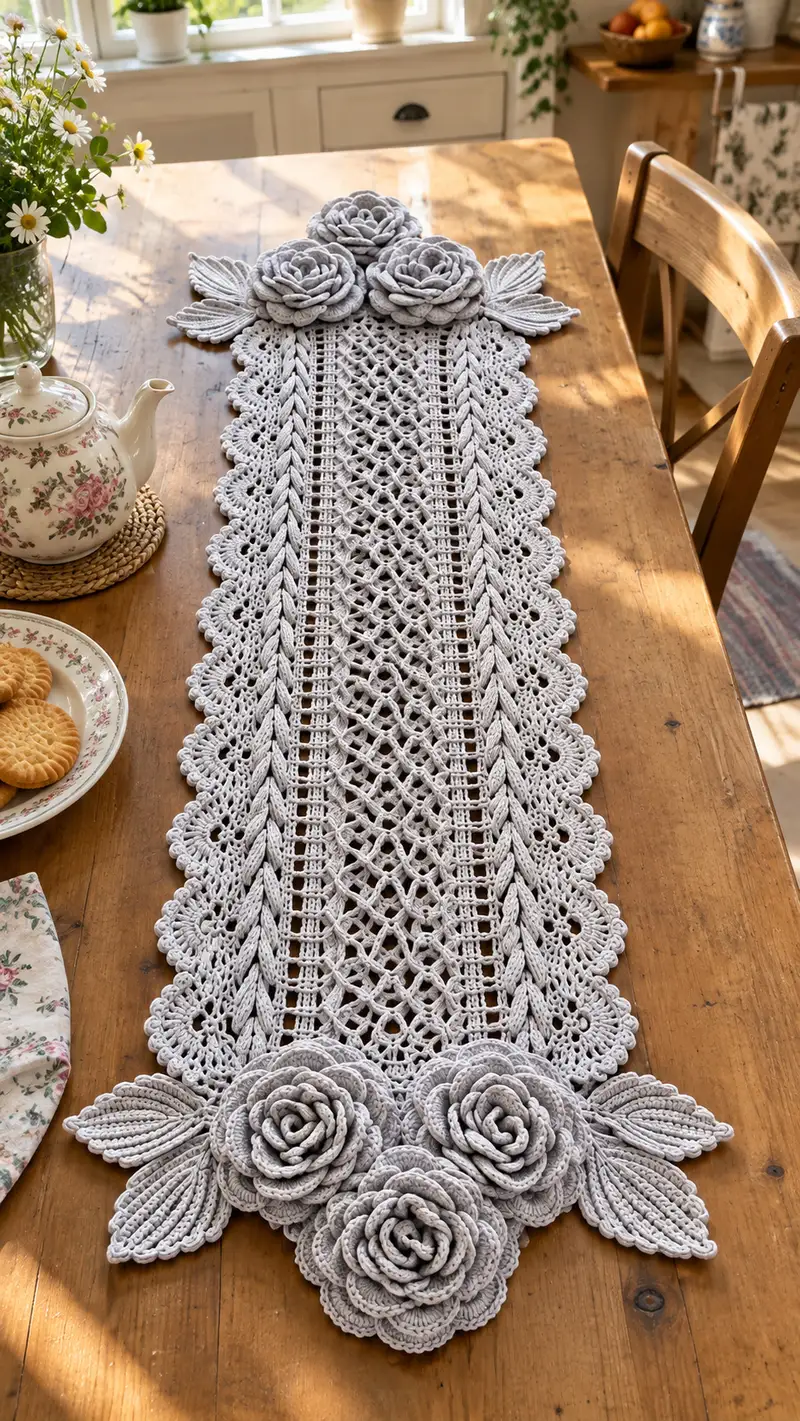
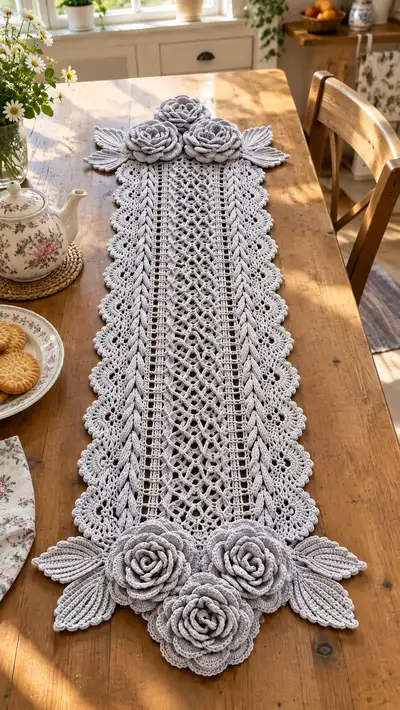
Create a timeless table runner inspired by vintage lace and rosettes — a long, elegant centerpiece with delicate lace mesh, braided columns and three-dimensional roses and leaves at each end. Worked in soft cotton rope for structure, this runner showcases scalloped edges, openwork lattices, and sculpted blooms for a romantic, farmhouse look. Detailed step-by-step instructions guide you through every section so you can recreate the textured motifs and assemble them into a stunning table accent.
Progress Tracker
0% Complete
— Notes & Gauge :
Info :
This runner is worked flat and assembled with decorative roses and leaves at each short end. Gauge is not critical but for best appearance, your fabric should be firm with well-defined stitches. Using 8mm t-shirt yarn with an 8.0mm hook yields approximately 10 sts x 8 rows = 4 in (10 cm) in solid single crochet — lace areas will be more open. Work tightly enough to prevent gaps showing through but not so tight that the runner becomes stiff.
Info :
All pattern sections are written in rounds/rows. When a motif is repeated across the length, the full set of rows constitutes a repeat. You will work the central panel the full length required, then add braid columns and scalloped edges along both sides, finishing with roses and leaves attached at each short end.
— Foundation Chain & Setup Row :
Round 1 :
Ch 121 (this gives a runner approx 100-110 cm long working length; adjust chain in multiples of 8 plus 1 to change width). Turn. (121)
Round 2 :
Sc in 2nd ch from hook and in each ch across. (120)
Info :
If you prefer an even firmer edge, work Round 2 with a 6.0mm hook. Place a stitch marker at the first stitch of each row for orientation and to keep track of repeats as you progress down the runner.
— Central Lace Lattice Panel (work center column over 41 sts) :
Round 1 :
Row 1: Work 1 sc in next 40 sts to create a central block (40). Mark the center of this 40-st block to help with panel symmetry.
Round 2 :
Row 2: Ch3 (counts as dc), *sk 1, dc in next st; rep from * across to last 2 sts, dc in last st. (40)
Round 3 :
Row 3: Ch1, sc in each dc across (40). (This evens the fabric and readies for mesh)
Round 4 :
Row 4: Ch4 (counts as tr), *sk 2, (tr, ch1, tr) in next st, sk2, tr in next st; rep from * across to end creating vertical tr clusters (40)
Info :
The lattice motif is created by alternating clusters and chains; ensure cluster placement is consistent by counting and using markers at the 10th and 30th stitch marks to keep symmetry.
Round 5 :
Row 5: Ch1, sc across working into ch-1 spaces and tr stitches as follows: sc in top of tr, sc in ch-1 space, sc in top of next tr. (40)
Round 6 :
Row 6: Ch5 (counts as tr + ch2), *sk next sc, (tr in next sc, ch2) x1; rep across ending with tr in last sc. This produces an open lattice of tr/ch2 arches. (40)
Round 7 :
Row 7: Ch1, sc in each tr and into each ch-2 space across (40). Fasten off if you wish to work center panel separately; otherwise continue. (40)
Info :
Repeat Rows 4-7 for length until central panel measures desired runner length minus the roses and leaves ends (approx. 70-80 cm for pictured size). For reference, repeat the 4-row mesh sequence 10-12 times for a long runner. Place a marker each time you complete the 4-row repeat to count repeats.
Round 8-47 :
Repeat Rows 4-7 twelve times (48 rows total including first set) maintaining 40 sts across. (40)
Info :
When your central panel reaches the target length, stop repeating and prepare to add the braid columns on either side. Count your repeats so the braid columns can be joined evenly.
— Twin Braided Columns (make two; work each along the side, 20 sts wide) :
Round 1 :
Row 1: With main yarn, ch 21 for one braid column. Sc in 2nd ch from hook and in next 19 ch. (20)
Round 2 :
Row 2: Ch1, sc in each st across (20). Turn.
Round 3 :
Row 3: Ch2, hdc in next 2 sts, work 5 front-post treble clusters to start the raised braid texture: *FPtr around next st, rep across next 10 sts, then hdc in last 5 sts. (20)
Round 4 :
Row 4: Ch1, sc across working into posts where possible to keep braid ridged (20)
Info :
The raised braided effect is created by alternating front-post treble clusters and regular sc rows. Keep tension even; if needed use a 7.0mm hook for these columns to allow posts to sit comfortably.
Round 5 :
Row 5: Ch2, *FPtr around next st, FPtr around next st, skip 1, rep across to create a 'rope' look (20)
Round 6 :
Row 6: Ch1, sc across (20)
Round 7 :
Row 7: Repeat Rows 5-6 to Row 28 so column reaches same length as central panel (28 rows total for each braid column). End with a sc row. (20)
Info :
Make two of these braid columns to mirror the left and right sides. You will join these columns to the central panel via slip stitches or whip-stitching after finishing the edge motifs. Keep both columns identical in repeats and length for symmetry.
— Joining Center and Braids (temporary join rows) :
Round 1 :
Row 1: Lay central panel flat. Position one braid column along the right edge so that outermost sc of center and inner sc of braid align. Join with slip stitch through both layers every 4th stitch for a spaced look, or sew later for invisible seam. Repeat on left side with second braid column. (Join along length)
Info :
I recommend pinning both braid columns in place with T-pins, lining up the start and finish rows precisely. Slip stitch join will create a neat seam and add stability. If preferred, sew with a darning needle for extra strength when the runner will be regularly handled.
— Side Lace Scallop Edging (work along both long sides; scallop motif width 8 sts repeat) :
Round 1 :
Row 1: With main yarn and starting at one short end, attach with sl st to the outer edge of braid. Ch3 (counts as dc), *skip 3 sts, (5 dc in next st), sk 3, dc in next st; rep across to create initial scallop placement. (Repeat across side length)
Round 2 :
Row 2: Ch1, sc around each dc and into spaces between scallops to anchor them. (This evens base for shell shaping)
Round 3 :
Row 3: Shell round — in each 5-dc shell work: *ch1, sl st in first dc of shell, 3 dc in next dc, ch1, sl st in last dc of shell; rep across forming layered scallop. (Spacing determined by shells counted)
Info :
The scallop uses layered shells to create the petal effect visible in the runner. Work these scallop repeats along both sides. If your runner width is wider or narrower, adjust the number of scallops by adding/subtracting repeats — each shell sits approx every 8 sts.
Round 4 :
Row 4: Edging round — ch1, sc into each stitch around the scallop shells, add picots: *(sc, ch3, sl st into base of ch3) in the peaks of each shell to create a dotted edge; rep across.
Round 5-12 :
Repeat Rounds 1-4 across both side edges twice to deepen scallop profile and produce the multi-layered shell edge. After finishing, fasten off and weave ends. (Edge repeats as needed)
Info :
Blocking at this stage will help the scallops sit evenly. Block gently by steaming or wet-blocking and shaping each shell to a consistent arc. Use pins to hold the scallops in a rounded shape while drying.
— Base Round to Prepare Rose Attachment Points :
Round 1 :
Row 1: With runner assembled, around each short end work 1 round of sc across the edge to create a stable base for roses. Sc evenly across short end and up the sides 2-3 sts to form a small border. Aim for uniform stitch counts at each short end so rose clusters align identically. Fasten off. (Counts vary depending on runner width)
Info :
Measure and mark three equal attachment points along each short end where the roses will sit. For the pictured runner place a center point, then two points 10-12 cm to either side. Pin small temporary stitch markers for rose placement.
— Rose (Make 6; each rose uses a layered disc method) :
Round 1 :
Row 1: Start with magic ring. 6 sc in magic ring. (6)
Round 2 :
Row 2: (1 sc, inc) x 3 around = 9 sc. (9)
Round 3 :
Row 3: (2 sc, inc) x 3 = 12 sc. (12)
Round 4 :
Row 4: (3 sc, inc) x 3 = 15 sc. (15)
Round 5 :
Row 5: (4 sc, inc) x 3 = 18 sc. (18)
Round 6 :
Row 6: (5 sc, inc) x 3 = 21 sc. (21)
Info :
We are making a small circle that will be used as a center. These early rounds expand the disc gently. Keep round joins continuous (do not fasten off) so you can start petal shaping in the next rounds and produce a spiral strip if desired.
Round 7 :
Row 7: Ch1, sc in each st around (21)
Round 8 :
Row 8: Petal round — *ch3, sk1 st, sc in next st; rep across making 7-8 shallow loops for petal anchors (work ends with sc). (21)
Round 9 :
Row 9: Working into ch3 loops: *(sc, hdc, dc, hdc, sc) in each ch3 loop to create a petal; rep across. (7-8 petals depending on loop count)
Round 10 :
Row 10: Continue spiral formation by making a second petal round offset from first: ch1, sc in top of first petal, *ch2, in next petal work (sc, hdc, 3 dc, hdc, sc); rep across producing larger outer petals. (This adds volume)
Info :
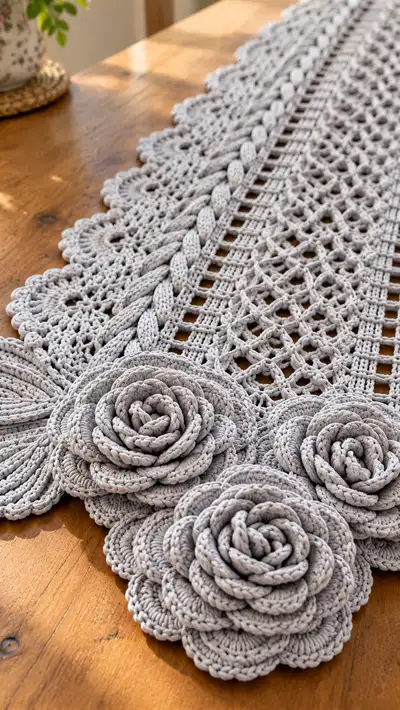
By increasing the petal height and width in each round, the disc will ruffle outward and can be spiraled and coiled by hand into a rose shape. You may choose to make fewer but deeper petal rounds for a more sculpted rose, or more shallow rounds for a flattened bloom. Keep the strip flexible by not overstitching tight petals.
Round 11 :
Row 11: Edge round — sc around each outer petal; add a picot on every other petal: (sc, ch3, sl st in base of ch3) to produce a scalloped outline. (Stitch count varies)
Round 12 :
Row 12: Secure and fasten off leaving a long tail for sewing. Roll the disc from one edge to form a spiral rose, stitching the base of each coil to the disc beneath with a yarn needle until rose is secure. Make 6 identical roses. (Rose complete)
Info :
Each rose can be made larger by adding two more rounds of petal building (repeat Round 10 style increases). For a flatter rose, stop at Round 9. Use a 6.0mm hook for rose rounds if you want tighter, neater petals. Leave long tails (approx 30-40 cm) to sew the rose securely to the runner base.
— Alternate Rose Spiral Method (optional; makes more ruffled roses) :
Round 1 :
Row 1: Ch 80 (adjust length for size). Turn, sc in 2nd ch from hook and across (79).
Round 2 :
Row 2: Ch1, 2 sc in each stitch across to create a ruffled strip. (158)
Round 3 :
Row 3: Edge round — *sc in next 2, (5 dc in next) repeat across to form repeated petal clusters along the strip. Fasten off leaving long tail and roll strip into spiral, sewing as you go. This method gives very dramatic ruffles and is ideal for a larger decorative rose. (Rose complete)
Info :
Either rose method produces lovely results. The layered disc method is more compact and textured, while the spiral strip produces dramatic ruffles. Use whichever suits your taste and yarn quantity. Make 6 roses total to mirror the pictured composition — 3 at each short end.
— Leaf (Make 12; 6 per end) :
Round 1 :
Row 1: Ch 12, sc in 2nd ch from hook and next 9 ch (10). Turn. (10)
Round 2 :
Row 2: Ch2, hdc in next 2, work 3 FPtr clusters across next 4 sts to form central ridge: *FPtr around next st, rep 3 times, then hdc in last 2 sts. (10)
Round 3 :
Row 3: Ch1, sc across working into posts to secure ridge (10)
Round 4 :
Row 4: Increase shaping — sc in next st, (hdc, dc, tr, dc, hdc) across the central 4 sts to form leaf body, sc in last st. (10)
Round 5 :
Row 5: Ch1, sc around leaf perimeter adding 3 sc in tip to round the point and 2 sc in base for fullness. (Perimeter count varies)
Info :
Leaves are worked flat and shaped by making taller stitches at the center (tr, dc) and tucking them by sc rounds. For a crisp ribbed look like the runner, use FPtr rows to make a raised midrib then sc around. Block leaves lightly to hold their curved shape before attaching to the runner.
Round 6 :
Row 6: Work a decorative ridge: *ch1, sl st in next st, rep across the central vein to emphasize texture. Fasten off leaving long tail for sewing. Make 12 leaves total. (Leaf complete)
— Detailed Attachment & Assembly Prep :
Info :
Pin roses and leaves into position on both short ends before sewing. For each end arrange 3 roses in a triangular cluster with a larger central rose and two slightly smaller roses on sides, tucking leaves underneath and around the blooms to imitate the photograph. Use pins to hold and step back to judge balance.
Round 1 :
Row 1: With yarn needle and matching yarn, sew the base of each rose in several places through the runner base — stitch from runner into the rose base, through the runner and back into the rose base to create secure 'X' stitches. Use upholstery thread for extra strength if needed.
Info :
Attach leaves by placing them under roses as offsets; sew through leaf bases into runner so leaves flare naturally. When sewing, take small invisible stitches through the thickness of rose base and runner so the seam remains hidden from top view.
Round 2 :
Row 2: After attaching, weave all tails to the underside and secure them with a small dab of fabric glue if the runner will be washable to prevent loosening. Block the entire runner again with pins to ensure scallops and roses sit evenly.
Info :
For a professional finish, stitch the outer base of each rose to multiple points on the runner base (at least 6-8 stitches per rose). This prevents flopping when the runner is moved or washed. Double-check symmetry by measuring distances from runner edges to rose centers before final sewing.
— Finishing & Care :
Info :
Weave in ends thoroughly on the underside. Lightly steam-block or wet-block the runner and roses to firm the shape: pin scallops into gentle arcs and slightly shape rose petals by hand while damp. For washing, hand wash cold and reshape while damp. Do not tumble dry; hang or lay flat to dry.
Info :
Optional: Add a spray of fabric stiffener lightly inside the underside of roses if you want a very stable, display-style runner that keeps petals rigid. Apply sparingly to avoid a plasticky look.
This elegant lace rose runner blends classic crochet stitchwork with sculptural florals for a truly special centerpiece. Each scallop, braid and rose is crafted with attention to texture and balance, creating a handmade piece that will be admired for years. Arrange it on your dining table, sideboard or dresser for an instant vintage-inspired accent. 🧶🌿 Enjoy the slow, meditative process of building the lace and watch the floral accents bring the whole runner to life. Don't forget to share a photo of your finished creation — it will be beautiful! ✨