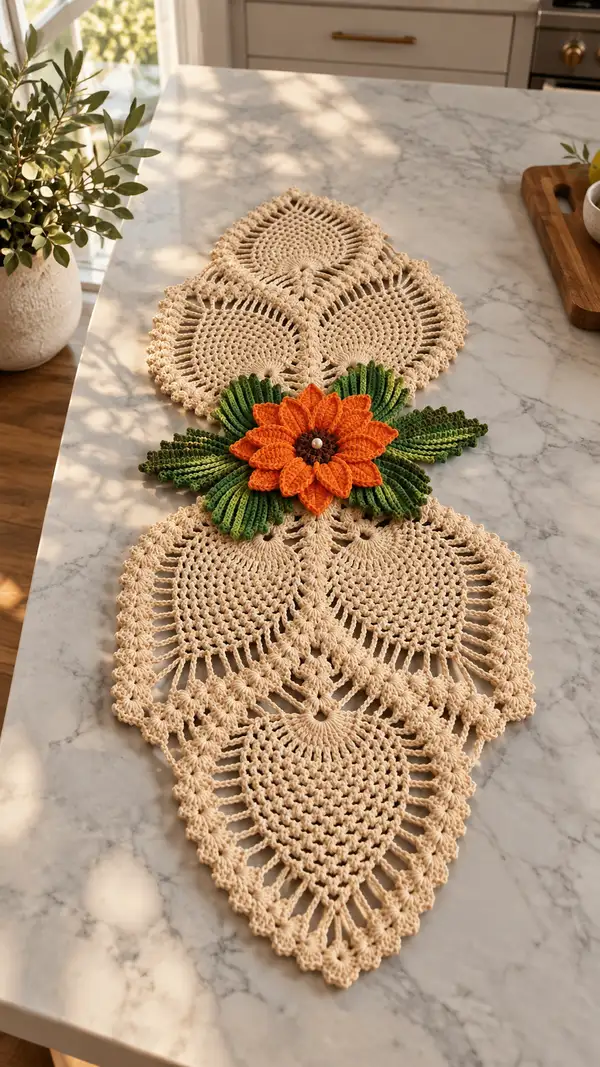
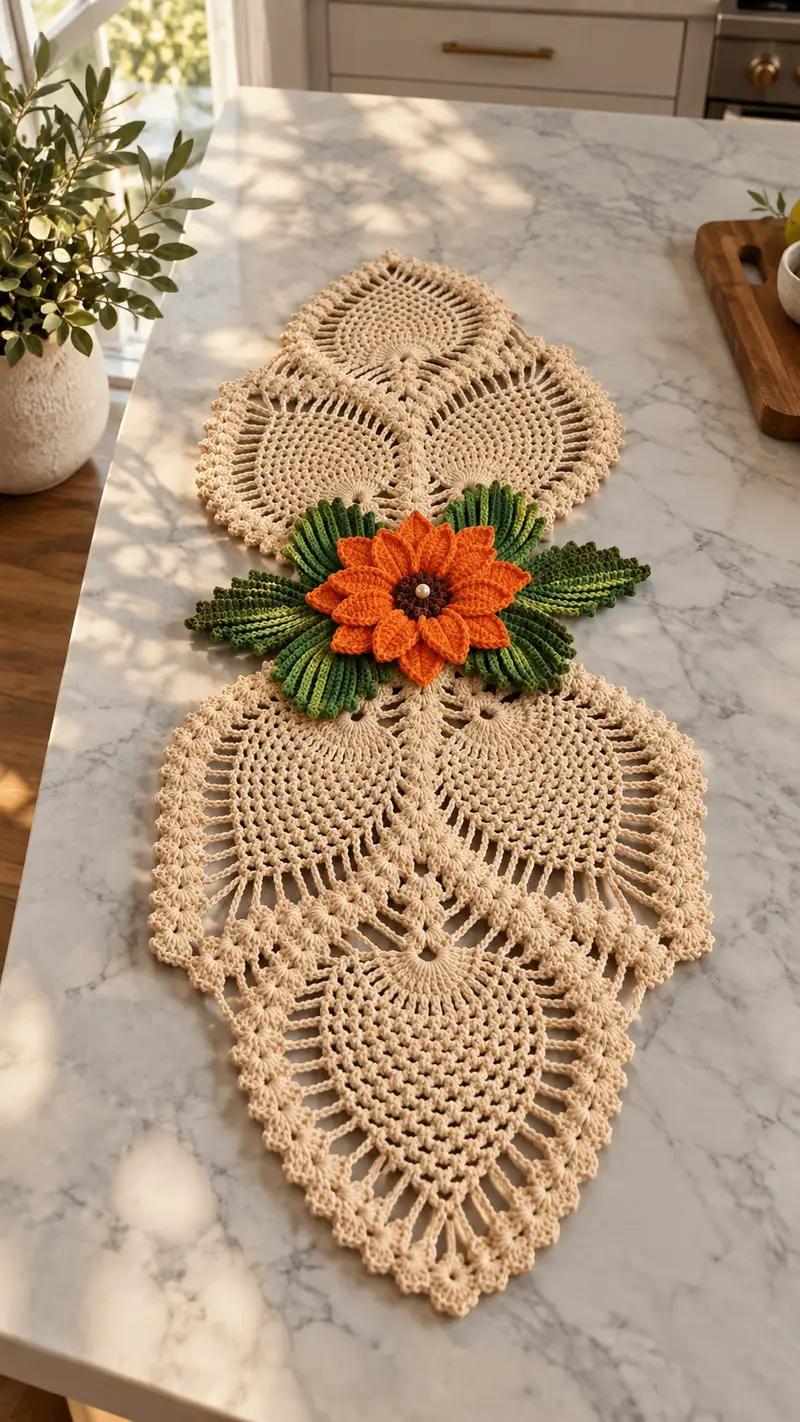
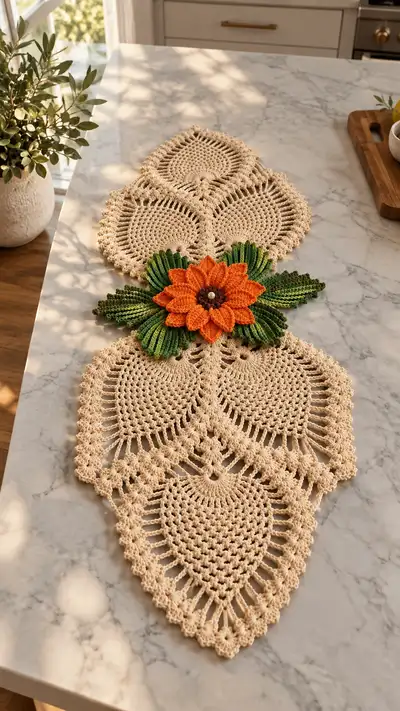
Create a beautifully textured table runner made of interconnected leaf-shaped lace motifs with a vibrant layered flower centerpiece. This pattern combines classic lace stitches, puff clusters and layered petal construction to form a refined runner ideal for a dining table or sideboard. The neutral base motifs let the bold orange flower and variegated green leaves pop, creating a stunning centerpiece that is both decorative and functional.
Progress Tracker
0% Complete
— Materials & Notes :
Info :
Gauge is flexible for lacework; however, for a similar finished size use worsted cotton and a 4.0mm hook and obtain approximately 8 dc and 6 rows = 4 in over solid double crochet. Work tightly enough that your lace remains crisp but not so tight that the openwork cannot bloom when blocked.
Info :
Pattern is worked in separate motifs: Leaf Motif (make 3), Center Flower (assembled from multiple petal rounds), Decorative Leaves (make 6), Joining panels and final Scalloped Edging. Read entire pattern before starting. Use stitch markers to mark beginning of round for motifs with many repeats.
— Leaf Motif (Make 3 identical motifs) :
Round 1 :
6 sc in magic ring (6)
Round 3 :
(1 sc, 1 inc) x 6 (18)
Round 4 :
(2 sc, 1 inc) x 6 (24)
Round 5 :
(3 sc, 1 inc) x 6 (30)
Info :
At this stage you have a small circular base. We will begin elongating the circle into a teardrop/leaf shape by working increases on one side and even rounds on the opposite side. Place a marker at the first stitch of Round 6 to denote the tip direction for consistent shaping.
Round 6 :
1 sc in next 15 sts, inc in next 6 sts, 1 sc in remaining 9 sts (36)
Round 7 :
1 sc in next 18 sts, (1 sc, 1 inc) x 6, 1 sc in remaining 12 sts (42)
Round 8 :
1 sc in next 21 sts, (2 sc, 1 inc) x 6, 1 sc in remaining 15 sts (48)
Info :
By increasing on only a concentrated segment you create the elongated shape. Keep the increased stitches grouped together to form the rounded back of the leaf; the non-increased side becomes the tapered tip.
Round 9 :
1 sc in each st around (48)
Round 10 :
ch3 (counts as dc), dc in next 47 sts (48)
Round 11 :
Change to pattern: *1 dc in next 6 sts, 1 ch2, sk next st* rep across the first half until you reach the grouped increased area, then continue 1 dc in each st to complete round (48)
Info :
Round 11 begins creating openwork channels on the tapered tip side. Work carefully and count chains to maintain symmetry. Use stitch marker at the start of the openwork segment to keep spacing consistent in following rounds.
Round 12 :
1 dc in each dc and ch-space around, working 2 dc in each ch2 space to maintain count (48)
Round 13 :
1 dc in next 12 sts, *ch4, sk 2 sts, 7 dc in next st (shell)*, sk 2, ch4, 1 dc in next 12 sts (still 48 but with shell and chain accents)
Info :
These shells and chain spaces begin to form the decorative inner ribs that mimic veins of the leaf. Keep shells centered over the widened portion created by grouped increases.
Round 14 :
1 sc in each st around working into shells as follows: 3 sc across each shell, sc in each dc and ch-space between (48)
Round 15 :
Switch to taller stitches for the lace ribwork: ch3, *1 tr in next 2 sts, ch2, sk 1, 1 tr in next 2 sts* across the tapered side; on rounded side continue 1 tr in each st to complete round (48)
Info :
Use this round to establish the vertical ribbed openwork that will elongate the motif further. On the tapered tip work fewer ribs so the tip remains pointy; on the rounded back work fuller ribs for breadth.
Round 16 :
1 dc in each st around (48)
Round 17 :
*(2 dc, ch2, 2 dc) in next ch-space (forming a small fan), 1 dc in each of next 4 sts* rep around (48)
Round 18 :
1 sc in each st around, working 3 sc across each fan to firm it up (48)
Info :
Turn the motif toward the future join edge. Decide which point will form the joining seam (the narrow tip or the rounded back). For this runner we will join at the narrow tip of each motif to create a flowing chain.
Round 19 :
Begin outer openwork: ch5 (counts as dc+ch2), *1 dc in next 6 sts, ch2* rep until you reach the tip area, then work ch6 across tip to create a long chain arch, continue pattern around to complete (48 approx loops)
Round 20 :
Work into previous ch-spaces: (1 dc, ch2, 1 dc) in each ch2 space, and (1 dc, ch4, 1 dc) over the ch6 tip arch to form an elongated lace ridge (48)
Info :
These two rounds form the long open looped border that is visible in the runner photograph (vertical elongated stitches). Adjust chain counts if you prefer more open or denser loops. Keep counts balanced so final stitch number will be even for joining.
Round 21 :
1 sc in each st around into existing dc and ch loops to firm the edge (48)
Round 22 :
Shell edging start: *sk 2, 5 dc in next st, sk 2, sl st in next st* repeat around (12 shells) (48)
Round 23 :
1 sc through back loops of previous round only to create a scalloped ridge (48)
Round 24 :
Final decorative picot round: *sc in next 2 sts, ch3, sl st in 3rd chain to make a picot, sc in next 3 sts* repeat around (48)
Info :
Fasten off leaving long tail for assembly if you prefer to sew motifs; otherwise join motifs with slip stitch later. Block motif gently to open lacy loops and ensure leaf shape lies flat. Repeat this entire Leaf Motif three times in identical orientation.
— Joining Motifs into Runner :
Info :
Layout the three leaf motifs end-to-end with narrow tips meeting the next motif's rounded back as in the photo (central motif inverted). Pin motifs in place to check alignment. The joining is done using slip-stitch seams worked through corresponding picot/loop points for a nearly invisible seam.
Round 1 :
With right sides facing, align motif A tip to motif B base. Using neutral yarn, insert hook through picot on motif A and matching picot on motif B, sl st to join; repeat along entire overlap every 6-8 stitches across the tip area (approx 10 joins per seam)
Round 2 :
Weave a second row of sl st through alternate loops between the first row to strengthen the seam. Keep tension even to avoid pulling motifs out of shape (seam should lay flat).
Info :
For a decorative ridge along the seam, after joining slip-stitch rows, work a single crochet ridge across both motifs into the seam area: 1 sc in each slipped-joined pair, working through both layers (approx 10 sc across each seam).
Round 3 :
Repeat joining process for the seam between motif B and motif C so all three motifs are joined consecutively. Block entire joined panel to ensure seams relax and motifs sit flat.
— Center Flower (Make 1 layered flower) :
Round 1 :
Magic ring, ch1, 8 sc in ring (8)
Round 2 :
Inc in each st around (16)
Round 3 :
(1 sc, 1 inc) x 8 (24)
Round 4 :
(2 sc, 1 inc) x 8 (32)
Info :
This small disc forms the flower center. Fasten off and weave in tail or continue to petal rounds. Optionally stitch a small bead to the center later.
Round 5 :
Join bright orange yarn to any stitch. Ch2 (counts as hdc), *hdc in next st, ch2, sk 1* repeat around forming ch2 loops between hdc (32 hdc and 16 ch2 loops total)
Round 6 :
Petal base: Into each ch2 loop work (sc, hdc, 3 dc, hdc, sc) to form a petal shell. Repeat for all 16 loops (16 petals)
Info :
Petals are first-layer medium petals. Keep consistent stitch height and tension in petals to ensure even bloom. Use a stitch marker to note start of round.
Round 7 :
1 sc in next st between petals to secure; *ch3, sl st at petal tip to create a small loop, 1 sc in base of next petal* repeat across for delicate tip shaping (16 small loops)
Round 8 :
Second petal layer: Join yarn behind first layer between petals, ch2, *work 1 sc in base of previous round, hdc in next st, 5 dc in next st (long petal), hdc in next st, 1 sc in next st* repeat to make 12 larger outer petals (12)
Round 9 :
Secure tops of second-layer petals by working sc across their bases and through the edge of the first layer where they overlap, creating a neat layered look (count 48 sc distributed across overlap points)
Info :
Stiffen petals slightly using light steam or fabric stiffener if you want petals to hold shape. Otherwise simply shape with your fingers and block lightly. Fasten off leaving a 12 inch tail for sewing to runner.
Round 10 :
Use dark brown yarn to embroider a textured center: 6 puff stitches evenly spaced into the center disc, forming a small textured eye (6 puff stitches)
Round 11 :
Stitch a bead or decorative button over the puff stitch center if desired, securing tightly and weaving in ends behind the bead for a clean finish
— Decorative Leaves for Flower Cluster (Make 6 leaves) :
Round 1 :
Ch10, sc in 2nd ch from hook, sc in next 3, hdc in next 2, dc in next 3, 3 dc in last ch (turn and work opposite side) dc in next 3, hdc in next 2, sc in next 3, sl st to first sc to close (approx 24 sts)
Round 2 :
Work along edge: *1 sc in next 2 sts, hdc in next 2, 2 dc in each dc across the tip, hdc in next 2, 1 sc in next 2* (maintain mirror) (approx 28 sts)
Info :
These leaves are sculpted with a central ridge. For ridge, work BLO on one side of next round to create folded ribbing.
Round 3 :
Ridge round: working in BLO only, 1 sc in each st around to create a raised ridge on one side (28)
Round 4 :
Vein shaping: Switch to FLO, *ch3, sk 1, 1 sc* repeated across center of the leaf to create veining ridges. Finish with sc around edge to firm shape (28)
Round 5 :
Edge finish: *sc, picot (ch3 sl st in 3rd ch), sc* repeat around to create decorative scalloped edge (28)
Info :
Make three leaves in darker green and three in lighter variegated green to mimic the photo. Steam-block leaves gently to shape them so they sit under and around the flower in a natural way.
Round 6 :
Lay the leaves flat and fold along the BLO ridge you created to give a slightly concave shape. Whip stitch a few tacking stitches along the fold to hold if desired (no numeric change)
— Assembling Flower & Leaves :
Info :
Arrange the flower in center of the joined motifs. Place three leaves to fan outward on each side (six leaves total) as in the photo. Pin the arrangement and step back to verify symmetry before sewing.
Round 1 :
Sew the flower to the motifs by stitching through the center disc and into the motif structure beneath using long tail yarn; use small stitches and stitch through both layers for stability (use the 12 inch tail left from Round 9 of flower).
Round 2 :
Sew leaves into position by sewing through the base of each leaf and into the runner fabric under the flower. Secure with several passes of thread and hide ends on underside of runner.
Info :
For a removable flower, instead of sewing permanently, make three small ties on the underside of the runner using yarn loops and attach the flower by threading ribbons or yarn ties through loops on the flower base. This allows you to remove piece for washing.
— Final Scalloped Edging Around Runner :
Round 1 :
With neutral yarn join at one seam intersection, sc evenly into the edge loops around entire runner spacing approx 1 sc per loop (estimate 120 sc around full runner)
Round 2 :
*sk 2, 7 dc in next st (shell), sk 2, sl st in next st* repeat evenly around creating scallops (approx 20 shells around runner)
Info :
Adjust shell counts to maintain symmetry—if your stitch count varies simply increase or decrease the number of shells slightly so shells end evenly at seams and edges. Mark seam intersections and count shells per panel for balance.
Round 3 :
Work 1 sc across each shell top to anchor shells (approx 120 sc)
Round 4 :
Decorative picot finish: *sc in next 2, ch3, sl st in 3rd ch to form picot, sc in next 3* across shells to form delicate edging (120 picots approx)
Info :
Fasten off and weave in all ends. Lightly steam-block the entire runner to open the lace and set the shells. Allow to dry completely before laying on table. If your runner is slightly asymmetric, gentle blocking will even small differences.
— Optional Variation: Smaller Accent Motifs :
Info :
To make the runner longer, add additional leaf motifs repeating the Leaf Motif section and rejoin in the same manner. To shorten, omit one motif. You can also change flower size by adding more petal rounds for a fuller bloom.
Info :
Use contrasting thread weight for a more delicate lace (e.g., sport weight and 3.5mm hook) to create a daintier runner, or heavier cotton for a more robust table accent. Adjust stitch counts proportionally when changing yarn weight.
This elegant table runner blends classic lacework with a bold floral focal point for a centerpiece that truly shines on any table. The neutral motif allows seasonal accents to stand out — swap the flower and leaves to match holidays or décor. I loved making each leaf bloom under the hook and placing the layered petals in the center felt like crafting a little garden on my tabletop. Enjoy every stitch and share the finished piece with pride — it makes a beautiful gift or heirloom accent. 🧶🌿