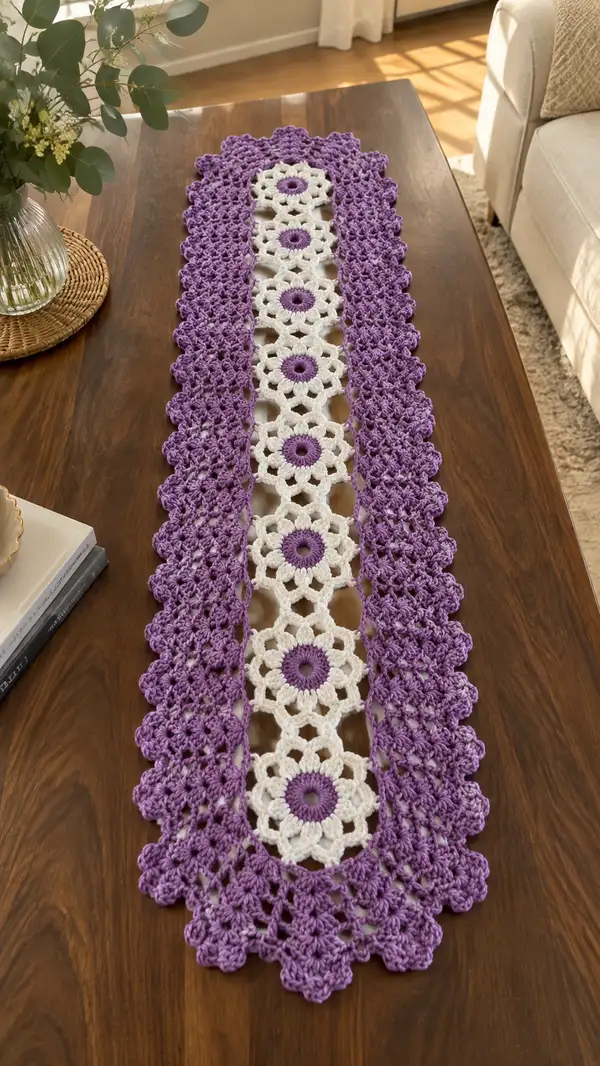
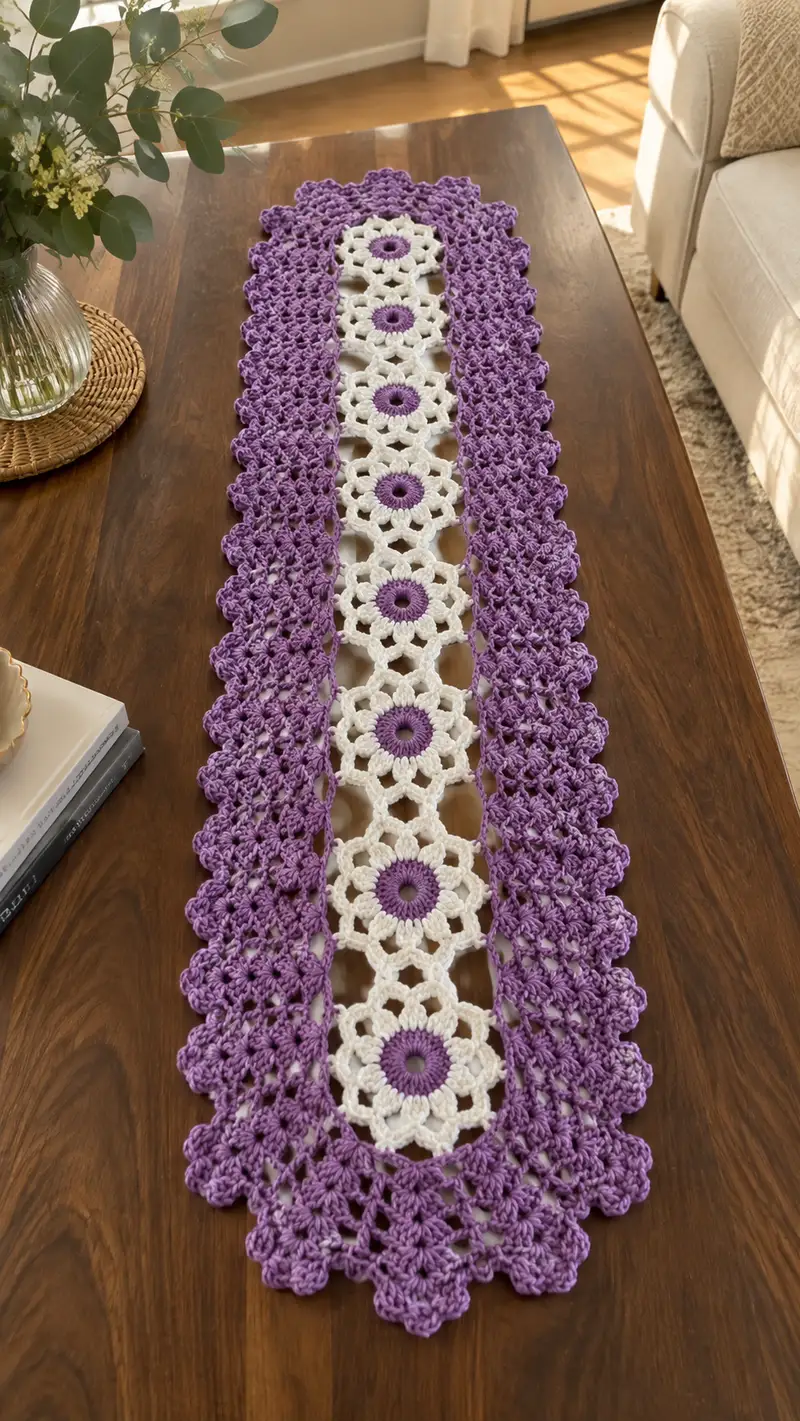
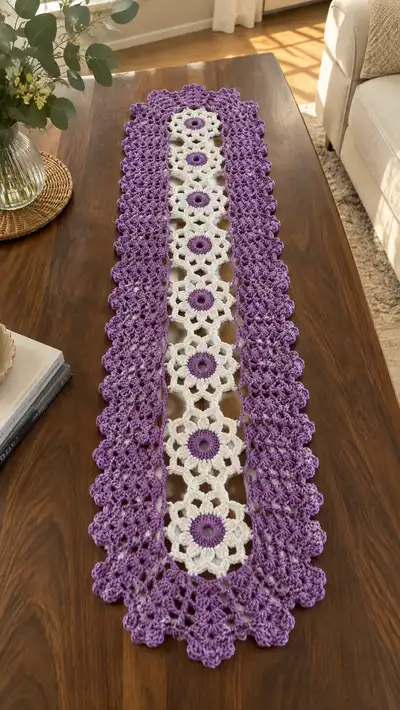
A long, elegant table runner featuring a central column of lacy daisy motifs in cream with lavender centers, framed by a scalloped lavender lace border. The runner in the image is made with a smooth cotton yarn for crisp stitch definition and a delicate drape. It sits beautifully on a wooden dining table and adds a handmade, vintage-inspired accent to any table setting. Suitable for gifting or dressing up your dining or console table.
Progress Tracker
0% Complete
— Materials & Gauge :
Info :
Suggested yarn: worsted weight cotton (#4). Gauge is not crucial for length but affects final runner width: aim for approx. 22 dc x 12 rows = 10 cm for reference. Use a 4.0mm hook and adjust to obtain firm lace definition. This runner in the photo uses 7 central motifs and a wide scalloped border.
— Central Daisy Motif (Make 7) :
Round 1 :
With lavender (center color) - make a magic ring, ch 2 (counts as first hdc), work 11 hdc into ring. Join with sl st to top of ch2. (12)
Round 2 :
Ch 3 (counts as dc), *1 dc in next st, ch 1; rep from * around returning to first st; sl st to top of ch3. You will have 12 dc separated by 12 ch-1 sps. (12 dc + 12 ch-1 sps)
Info :
These ch-1 spaces will be used to create the transition to the petal round. The lavender center should lie flat; press gently when blocking if you notice curling.
Round 3 :
Change to cream/white. Join in any ch-1 sp, ch 3 (counts as dc), (2 dc, ch 2, 3 dc) in same ch-1 sp — this forms a petal. *Skip next dc, (3 dc, ch 2, 3 dc) in next ch-1 sp; rep from * around. You will make 12 petals. Join with sl st to top of ch3. (12 petals)
Round 4 :
Ch 1, *sc in top of next dc (center of petal cluster), ch 5, sc in middle dc of next petal (space between petals), ch 3; rep from * around so you create an open ring of chain arches between petals. Join with sl st to first sc. (12 ch-5 arches and 12 ch-3 arches alternating)
Info :
Keep tension even. These arches create the lacy look that will allow motifs to be joined later. If an arch seems tight, ease it out with fingers before finishing the round.
Round 5 :
Working into each ch-5 arch: join with sl st into the ch-5 arch, ch 3 (counts as dc), 2 dc, ch 2, 3 dc in same arch (shell). Into each ch-3 arch: sl st, ch 1, 1 sc, ch 4, 1 sc. Rep around so each petal arch gets a shell and each smaller arch gets a small chain loop. Join with sl st. (12 shells + 12 small loops)
Round 6 :
Ch 1, sc in first dc of shell, *ch 3, sc in next shell center, ch 5, sc in next shell center; rep from * around. This creates alternating ch-3 and ch-5 loops around the motif. Join with sl st. (24 loops total alternating)
Info :
At this stage switch back to lavender for a subtle halo if you want the center color to echo through the motif edge. The photo shows lavender centers and a cream petal; I recommend changing back to lavender for a small finishing round to help the motifs sit visually linked to the border.
Round 7 :
Change to lavender. Join in any ch-3 loop, ch 1, (5 dc) in ch-3 loop to form a small puff-like cluster, sl st to next ch-5 loop, *(sc, ch 3, sc) in ch-5 loop, sl st to next ch-3 loop, (5 dc) in ch-3 loop; rep from * around. This alternates fans of 5 dc and mini picot-like arches across the motif edge. Join with sl st. (12 fans + 12 arches)
Round 8 :
Ch 3, 2 dc in same st, ch 2, 3 dc in same stitch (corner cluster) into each fan to create slight raised points; between corners, sc in the small arch and ch 4 to span to the next corner. Work evenly to create 12 rounded points. Join with sl st. Finish off and weave in tail. (12 corner clusters)
Info :
Fasten off lavender leaving a 20-25 cm tail if you prefer to use this tail for join-as-you-go. Otherwise, weave in ends and use join-as-you-go from the next motif. Make 7 motifs total for the runner shown.
— Layout & Join-As-You-Go Plan :
Info :
Arrange motifs in a straight column: motif 1 through motif 7. We will join motifs along the side arches (the ch-5/ch-3/loop area) using a join-as-you-go method that uses sl sts and sc into corresponding loops on the previous motif. Before joining, block motifs lightly to open arches and ensure accurate alignment.
— Joining Motifs (Repeat between each adjacent motif) :
Join Step 1 :
Place motif A (previous) and motif B (new) with right sides up and motif B in working position above motif A. Identify the 6 main shell-to-arch connection points on each side that will align. Start in the bottommost connection point of motif B.
Round J1 :
With lavender and motif B on hook, attach in the ch-5 loop that sits on the left side of motif B where it will meet motif A. Ch 1, sc in that ch-5 loop, then ch 3, *insert hook into corresponding ch-5 loop on motif A, sl st to join; back on motif B, sc in next ch-3 loop, ch 3; rep to join across 6 connection points. End with sc in motif B and sl st to finish. (6 joins)
Info :
Make the join snug but not tight so motifs sit flat. Work slowly the first time to line up the arches; later joins will be faster. Use the tail left at motif start for a neater join if preferred.
Round J2 :
Turn motif B and work a linen stitch border around the joined seam: ch 1, sc in each st around the motif edge, and where joins occur work sc through both motif B and motif A simultaneously to lock the join. Continue sc around entire edge of motif B to tidy the connection. Join with sl st. (sc count varies by motif size — work evenly to maintain shape)
Info :
Repeat these two join rounds for each adjacent pair (1-2, 2-3, 3-4, 4-5, 5-6, 6-7). For the runner with 7 motifs you will perform 6 joins. After all joins, allow the joined column to rest before working the outer border to ensure alignment.
— Inner Stabilizing Round (Work around completed column) :
Round S1 :
With lavender, starting at one short end of the column, join yarn in the ch-3 space on the edge of the end motif, ch 1, sc evenly in each visible stitch and chain space along the side of the column working down the length, across the opposite end motif, and back up the opposite side. Work sc in both loops of any seam where motifs are joined to create a stable inner band. Join with sl st. (Sts = variable; keep count consistent each side)
Info :
This stabilizing round evens the join-line and provides a foundation for the lace border. Aim for an even number of sc along each long side so scallops can be mirrored.
— Border Construction Overview :
Info :
The wide scalloped border is worked around the entire assembled column in continuous rounds. The border is composed of successive shell rounds and chain-lace rounds to build depth. The next set of rounds is long — each round expands or shapes the edge. Work carefully and place markers at the four corner transition points (the short ends) to keep scallops consistent.
— Border Rounds (Exterior Lace) :
Round B1 :
Join lavender in any side sc from Round S1. Ch 3 (counts as dc), 2 dc in same st, *skip 2 sc, (3 dc, ch 2, 3 dc) in next sc (shell), skip 2 sc, 3 dc in next sc; rep along entire edge placing shells spaced evenly. At corners work (3 dc, ch 3, 3 dc) to turn smoothly. Join with sl st. (Shell count depends on side length — mark corners)
Info :
Count shells on one long side; you will replicate the same number on the opposite long side for symmetry. The corner clusters with ch 3 will form the rounded short ends seen in the photo.
Round B2 :
Ch 1, sc in first dc, *ch 3, skip next 2 dc, sc in center of shell (between shell clusters), ch 5, sc in center of next shell; rep along edge. At corners sc in corner ch-3 and ch-5 as needed to keep curve. Join with sl st. (Creates open arches for next shell)
Round B3 :
Into each ch-3 arch work (3 dc, ch 2, 3 dc) to form smaller shells. Into each ch-5 arch work (5 dc, ch 2, 5 dc) to form larger shell fans at alternating positions. Continue around. Join. (Creates alternating small and large shells)
Info :
This alternation gives the border its layered scallop effect. The photo shows tighter clusters closer to the motifs and larger fans at the outermost edge; you can increase outer fan size to achieve a fuller border.
Round B4 :
Ch 1, sc in each dc and shell top around, placing additional sc into the peaks of the larger fans so that you have a smooth foundation for another round of shell stitches. Join with sl st. (Evening round)
Round B5 :
Ch 3, (2 dc, ch 2, 3 dc) in next peak to make deeper shells; between large shells work (3 dc) in smaller peaks. Make sure corner groups receive (3 dc, ch 3, 3 dc) again to retain shape. Join. (Deeper shells build depth)
Info :
Add a stitch marker to the first shell you work on the long side to track repeats. This round increases the visual weight of the border and begins the scalloped outer edge visible in the photo.
Round B6 :
Ch 1, sc across tops and into chain spaces to stabilize shells. Work 1 sc in each 2-dc group top, 2 sc in each ch-2 gap to avoid sagging. At corners work 3 sc in the central corner ch space to hold shape. Join. (Stabilizing round)
Round B7 :
Switch to a decorative raised scallop round: *in outermost shell work (sc, ch 3, sc) across the central ch-2 space; in smaller shells work (sc, ch 2, sc). Repeat around to add picot-like loops that will later receive the final scallops. Join. (Creates loops for scallops)
Info :
If you want a fuller scallop, increase the number of dc in the outermost shell on Round B5 from 3+ch2+3 to 5+ch2+5. Adjust later rounds to match increased stitch counts for symmetry.
Round B8 :
Ch 2, work 1 hdc in each loop from previous round; at corner loops work (2 hdc, ch 2, 2 hdc) to prepare for corner scallops. Continue around. Join. (Densifies loop foundation)
Round B9 :
For final scalloped edge: *In each loop work (sc, ch 3, sc, ch 3, sc) to create lobed scallops; rep across. At corners work extended scallops (sc, ch 4, sc, ch 4, sc). Join. Fasten off and weave in ends. (Scallop count equals number of foundation loops)
Info :
If you prefer a more delicate edge, substitute (sc, ch 2, sc) for the inner ch-3s. Blocking will open scallops evenly and is highly recommended to get the rippled edge shown in the picture.
— Alternate Border Breakdown (Expanded Detailed Rounds to Match Photo) :
Round B10 :
Working clockwise, ch 4 (counts as tr), 3 tr in same peak, ch 2, 4 tr in same peak to create a tall fan. Skip 3 sts, into next peak (4 tr, ch 2, 4 tr). Repeat around for a pronounced tall scallop row. Join. (Tall fans)
Info :
This tall fan round is what gives the outermost edge its strong scalloped profile. It is optional — if you want a more subtle runner skip to B12 instead.
Round B11 :
Ch 1, sc in top of each tr across the fan peaks to form a shelf for the final picot loops. On the long sides sc in each tr, on short ends do extra sc in the middle tr to maintain curve. Join. (Shelf created)
Round B12 :
Ch 3, dc into next st, ch 2, dc into same st (mini-shell), *skip 2, work (dc, ch 2, dc) into next shelf groove; rep across continuing to shape edge. Join. (Mini-shells aligned around)
Info :
Add an Info marker: if the edge looks wavy in the wrong direction, wet-block and adjust pins to curve the scallops outwards as in the reference photo.
Round B13 :
Ch 1, single crochet through each stitch and chain space to tidy. Between every two mini-shells, add (ch 2, sc) to stabilize spacing. Join. (Finishing foundation)
Round B14 :
For a small ornamental trim on top of the scallops work into each mini-shell: (sc, ch 3, sc) then sl st into the next st between shells. Continue around. Join and finish off. (Decorative picot loop)
Info :
Weave in all tails neatly along the back. Use matching yarn to make invisible joins. This layered border totals 14 distinct border rounds in this expanded description; you may repeat or skip rounds to adjust fullness.
— Detailed Corner Work (Short Ends) :
Round C1 :
At the short ends of the runner, where motifs terminate, treat the curve as a small semicircle. When you arrive at the corner marker, work (3 dc, ch 3, 3 dc) into the central corner chain to create a rounded end. Continue pattern across other side. (Corner cluster)
Info :
Place extra shell clusters at corners to mimic the rounded ends seen in the photo. Mirror clusters on both short ends for symmetry and pin each end while blocking to secure shape.
— Blocking & Finishing :
Info :
Soak the runner gently and pin it flat on a blocking board to the exact desired shape, emphasizing outer scallops and opening motif petals. Let dry completely. For a crisper finish, use light starch or spray starch and iron cautiously using a cloth over the runner.
Round F1 :
After blocking, inspect all joins and reinforce any loose areas with small hidden whip stitches using a tapestry needle and matching yarn. Trim and hide all tails. The runner is ready for use. (Finishing)
Info :
Optional: sew a lightweight fabric strip to the underside of the runner at the center under the motifs to protect delicate table surfaces and stabilize the runner on use.
— Variations & Sizing :
Info :
To lengthen the runner, add more central motifs and repeat border rows, keeping shell spacing consistent. To shorten, reduce motif count. Alternate colorways by using a single color for motifs or a gradient effect for the border; plan color changes in an Info round to carry yarn neatly inside arches.
Round V1 :
If making a longer runner add motifs before Round S1; join them as described and then continue the border keeping shell repeats equal along each long side. (Extending instructions)
Info :
Pattern rounds for motif and border are intentionally modular — once you master a motif you can scale the runner to any length by repeating motif and border repeats. Keep track of shell counts on one side and match them on the opposite side for even scallops.
This lacy daisy runner brings a beautiful handmade touch to your dining or console table — each motif and scallop is a little reward. With thoughtful joining and careful blocking you’ll achieve the crisp, vintage-inspired finish shown in the photo. Enjoy the meditative rhythm of petals and shells as you work — and know each stitch will become a seasonal heirloom. 🧶🌸