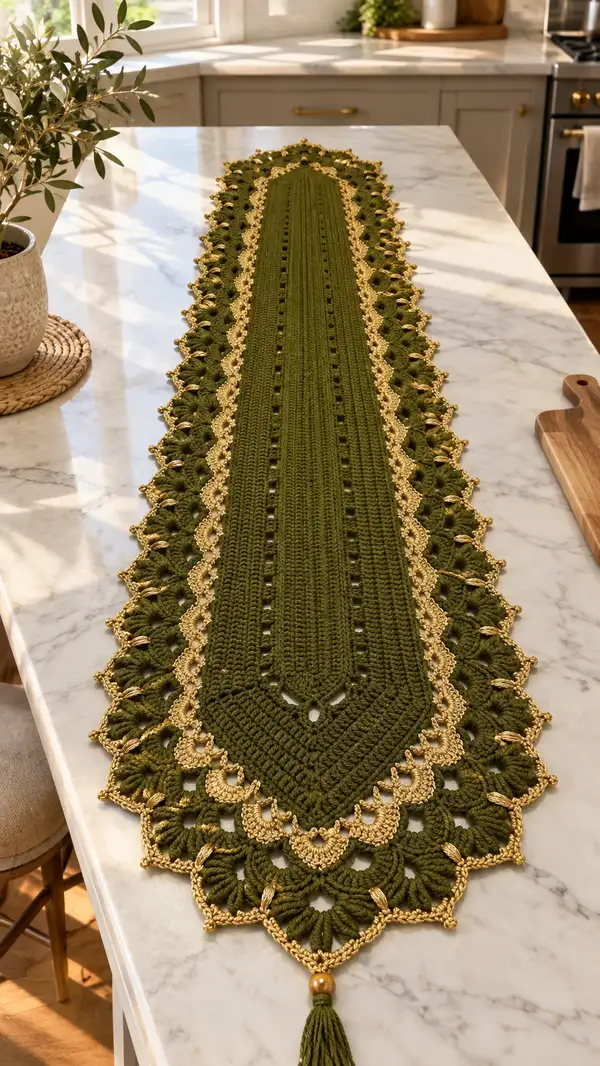
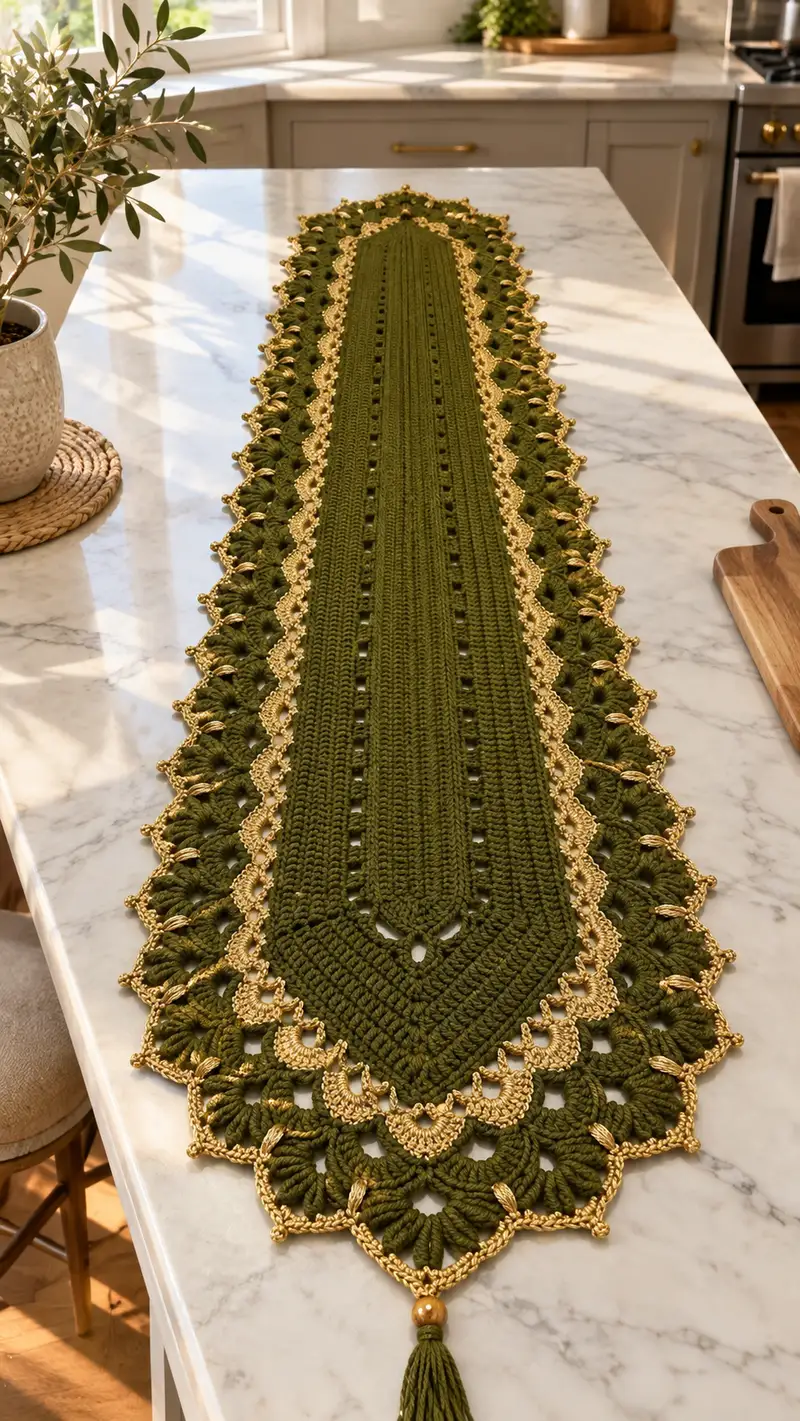
This long, elegant table runner features a deep olive cotton center with a delicate metallic gold scalloped border. The design combines crisp single crochet ribbing, evenly spaced eyelet rows, dramatic puff-shell clusters along the sides, and a refined gold picot edging finished with tasseled ends. Perfect for a dining table or kitchen island, this runner brings handcrafted texture and subtle shine to seasonal or everyday settings.
Progress Tracker
0% Complete
— Overview :
Info :
This runner is worked from the center outward in joined rounds to create a long oval with pointed ends. The pattern is built to produce a main band of single crochet with aligned eyelet rows, then enlarged with measured increase rounds to reach the width required for the side shell clusters. After the body is the multi-round puff-shell side border worked in olive, followed by a fine metallic gold scallop and picot edging worked with a smaller hook for crisp definition. Two tasseled ends with beads complete the piece.
Gauge :
10 sc x 10 rows = 4 in (10 cm) measured before blocking using 5.0mm hook and worsted cotton. Adjust hook size if necessary to match tension and drape.
Finished Size :
Approximately 12-14 in (30-36 cm) wide at widest point and 60-72 in (152-183 cm) long depending on number of central repeat rounds worked. The pattern below gives a runner about 68 in long (173 cm).
— Center Base (Rounds 1-8 : build base circle to establish stitch multiple) :
Round 1 :
6 sc in magic ring. (6)
Round 2 :
Inc in each st around (2 sc in each st). (12)
Round 3 :
(1 sc, inc) x 6. (18)
Round 4 :
(2 sc, inc) x 6. (24)
Round 5 :
(3 sc, inc) x 6. (30)
Round 6 :
(4 sc, inc) x 6. (36)
Info :
Make these rounds firmly but not tight; this base sets the symmetry for the runner. Place a stitch marker at the first stitch of Round 6 to mark the center back reference point.
Round 7 :
(5 sc, inc) x 6. (42)
Round 8 :
(6 sc, inc) x 6. (48)
Info :
At the end of Round 8 you have 48 stitches. This is your stable base and will remain divisible by 6 for the increase scheme used throughout the pattern. Keep a marker in the first stitch of each round so you do not lose track while working long rounds.
— Main Band — Straightwork & Eyelet Rows (Rounds 9-36 : build the central long band) :
Round 9-16 :
1 sc in each st around. (48)
Info :
Work evenly in single crochet for eight rounds to establish a firm center. Keep tension consistent to avoid warping. Place small markers at the mid-sides (stitches 12 and 36) to help align future puff-shell clusters and to identify side positions.
Round 17 :
1 sc in each st around. (48)
Round 18 :
Eyelet row: *Sc 5, ch 2, sk 2* repeat around — place the ch-2 eyelet spaces evenly. Adjust final repeat so that you still have 48 total working st spots (treat each ch-2 as one spacing). (48)
Info :
These small eyelets run lengthwise when repeated every 8 rounds; the pattern shown in the photo features two parallel eyelet tracks set toward the runner center. If you prefer, mark the two eyelet positions now: they are placed symmetrically on either side of the center axis, approximately 6-8 stitches from center depending on width.
Round 19-24 :
1 sc in each st around, working into ch-2 spaces as single crochets. (48)
Round 25 :
Increase round to begin controlled widening: (8 sc, inc) x 6. (54)
Info :
To widen the runner gradually, increase rounds are worked every so often. The formula for each increase round is (k sc, inc) x 6 where k = current stitch count / 6. This maintains even spacing of increases and keeps the shape balanced.
Round 26-30 :
1 sc in each st around. (54)
Round 31 :
Increase: (9 sc, inc) x 6. (60)
Round 32-35 :
1 sc in each st around. (60)
Round 36 :
Eyelet row: *Sc 6, ch 2, sk 2* repeat around aligning with earlier eyelet spacing toward the center. (60)
Info :
Keep your ch-2 eyelets aligned vertically by working eyelet rows every 18-20 rounds depending on how long you make the runner. Mark the eyelet stitches on the inside of your work with scrap yarn if needed to keep even spacing across rounds.
— Widening Phase & Central Ribbing (Rounds 37-60 : reach final width for shell border) :
Round 37-39 :
1 sc in each st around. (60)
Round 40 :
Increase: (11 sc, inc) x 6. (66)
Round 41-43 :
1 sc in each st around (66)
Round 44 :
Increase: (12 sc, inc) x 6. (72)
Round 45-47 :
1 sc in each st around. (72)
Info :
At this stage the runner is taking on its required width. Check your work across a flat surface to ensure the fabric lays flat. If a slight cup or ripple appears, alter the frequency of increase rounds for your gauge: more increases = wider curve; fewer increases = flatter edge.
Round 48 :
Increase: (13 sc, inc) x 6. (78)
Round 49-52 :
1 sc in each st around. (78)
Round 53 :
Increase: (14 sc, inc) x 6. (84)
Round 54-56 :
1 sc in each st around. (84)
Round 57 :
Increase: (15 sc, inc) x 6. (90)
Round 58-60 :
1 sc in each st around. (90)
Info :
We stop widening once the stitch count reaches 90; this provides ample width for the large puff-shell border seen in the photo. If you prefer a narrower runner, stop increases at 78 or 84 and proceed to the next section.
— Main Body — Continue to Desired Length (Rounds 61-80 : build length, repeating motifs) :
Round 61-68 :
1 sc in each st around. (90)
Round 69 :
Eyelet row center: *Sc 7, ch 2, sk 2* repeat around. (90)
Round 70-76 :
1 sc in each st around. (90)
Info :
Repeat the sequence of approximately 12 rounds of solid single crochet followed by one eyelet row until the runner reaches your desired length. The photo shows roughly 7 long repeats; the pattern below assumes you repeat the 12-round set four more times to approach 68 in total length. To customize length, add or subtract multiples of the 12-round repeat (12 rows ~ 6-8 in depending on tension).
Round 77-80 :
1 sc in each st around. (90)
— Shaping the Pointed End (Rounds 81-86 : form the tapered tip) :
Info :
The runner has tapered, pointed ends. These are formed by evenly working decreases on alternating rounds concentrated at two opposite sides of the oval (the previously noted side markers). You will perform decreases in four grouped spots (two per point) to pull each end into a point.
Round 81 :
(Work to side marker 1) Sc in each st until 6 sts before side marker 1, (1 sc, dec) twice across the next 6 sts, continue sc evenly to side marker 2, repeat decrease sequence at side marker 2. Finish round. (84)
Round 82 :
1 sc in each st around. (84)
Round 83 :
Repeat decrease round: work to 5 sts before each marker: (1 sc, dec, sc) across the designated 5 sts to tighten the point (78)
Round 84 :
1 sc in each st around. (78)
Round 85 :
Final taper round at each end: work to 3 sts before each point and dec over 3 sts to create a sharp angle: result (72)
Round 86 :
1 sc around. (72)
Info :
Fasten off the center band at this stage if you have reached desired length and are ready to add the side puff-shell border and scalloped edges. If you want a longer runner, continue the 12-round central repeat before shaping the last point.
— Side Puff-Shell Border (Rounds 87-106 : create bold scallop with puff clusters) :
Info :
Rejoin olive yarn at a side point where you marked earlier to begin the puff-shell border. Work along the long sides only, creating large puff clusters separated by chain loops that will later be edged with gold. This section forms the dramatic textured scallop visible in the image.
Round 87 :
Working in back loops only (BLO) around the main band to create a ridge: 1 sc in each st BLO around. (72)
Round 88 :
Set up row for puff clusters: *Ch 3, sk 2, 5-dc puff in next st, ch 2, sl st in next st* repeat along side edge until you reach the point; when you reach the other long side, mirror the repeats so both sides match. Work carefully across the ends so the repeats remain symmetrical. Count will vary depending on repeats; the base remains 72 working points.
Info :
Puff stitch (5-dc puff): Yarn over, insert hook, yarn over and pull up loop; repeat 4 more times (you have 11 loops on hook), yarn over and pull through all loops, ch 1 to close puff. Secure the puff bases in one stitch. Keep tension loose for full rounded puffs.
Round 89 :
One round of single crochet into each stitch and into the top of each puff to stabilize: 1 sc around including around puff tops and ch-3 loops. (approx 96-110 working points depending on number of puffs)
Round 90 :
Work picot base row along puff-work: *Sc 1 in each sc across, when reaching top of puff work: sc 1 in puff top, ch 3, sl st into 3rd ch (picot), sc 1 in next base stitch* Continue around. (count will match prior round)
Round 91-94 :
Alternate a reinforcement round of sc and a decorative cluster round: R91 sc around; R92 work (sc 2, ch 2, sk 2, 5-dc puff in next) around; R93 sc around; R94 reverse the puff placement to fill gaps and make the scallop uniform. These four rounds build depth to the scallop. (work counts will remain consistent as you place clusters into previously established puff bases)
Info :
Keep track of the number of puff clusters per side. If you desire larger scallops, add an extra increase in the earlier widening phase. The picture shows 12-14 puffs per long side on the full-length runner — count and space your puffs evenly between the pointed ends.
Round 95 :
Stabilize row: 1 sc in each st around; ensure puffs are fluffed and even. (working count same as previous)
Round 96 :
Edge shaping round before metallic change: *In puff top, sc 2, ch 1, sc 2 in same puff top; sl st in next base* repeat to create small peaks at puff tops that the metallic scallop will outline. (working count unchanged)
Info :
Fasten off olive yarn neatly and weave in tails along the inside so they are hidden under the border. Prepare metallic gold yarn and a 3.5mm hook for the fine scallop edge shown in the photo.
— Metallic Gold Scallop & Picot Edging (Rounds 97-110 : refined gold border) :
Info :
Switch to metallic gold thread and a 3.5mm hook. Work carefully into the peaks formed on the last olive round. Because metallic thread tends to be slippery and thinner, use a slightly smaller hook to keep stitches compact and to create a crisp, lacy edge.
Round 97 :
Join gold thread at a side peak: ch 1, sc around the peak stitches, working *3 sc in the ch-1 loop made at previous round peak, ch 3, sl st into base at the puff tip* repeat around each puff top to create a small gold scallop under each olive puff. (stitch count will reflect one scallop per puff)
Round 98 :
*Ch 4, sl st in the center of the ch-3 loop to form a delicate loop, sc in next gold scallop* repeat. This forms a lacy chain link between scallops. (repeat across scallops)
Round 99 :
Decorative shell round: *In the next scallop work 1 sc, 1 hdc, 3 dc, 1 hdc, 1 sc; sl st to anchor; ch 2* repeat around to create the delicate shell outlines seen in the image. (repeat across scallops)
Round 100 :
Picot round for crisp points: *Sc 1, ch 3, sl st in 3rd ch (picot), sc 2 into next stitch of shell base* repeat around the scallop edge. This gives the fine gold beaded look at each scallop tip. (repeat across scallops)
Info :
Work slowly with metallic thread: hold it with an extra finger to steady the thread and maintain tension. If metallic is too thin, consider holding a fine matching cotton strand with it for extra body while keeping the metallic shine visible.
Round 101 :
Reinforcement round in gold: 1 sc in each st around to lock picots into place, finish with sl st, fasten off and weave ends into border rows. (working stitch count will match the number of picots and shell stitches)
Round 102 :
Optional metallic bead finishing: using gold thread, work tiny loops to secure small beads at points between shells by *sl st to shell base, ch 4, thread bead, secure with sl st into next base* repeat at desired frequency. Fasten off and weave ends.
Info :
The photo shows small gold beads worked intermittently into the scallop tips. If adding beads, pre-string them on the metallic thread before joining the gold round and slide them into position as you crochet.
— Final Touches & Tassels (Rounds 103-120 : finishing ends and tassels) :
Round 103 :
Examine the runner and block lightly if desired: dampen and pin into shape on a flat surface to open the scallops and align edges, allow to dry fully. (Info)
Round 104 :
Make tassel loop at each point: fold 6-8 strands of olive yarn (each ~10-12 in long) and tie them at their midpoint to form a small loop. Secure loop to the very tip with slip stitches and reinforce with a few extra sc around the loop base. Trim ends evenly. (Tassels x2)
Round 105 :
Optional bead placement: thread a wooden bead onto the tassel loop and slide it down to rest above the tassel, secure with a small knot or glue inside the bead opening. (Info)
Round 106 :
Weave all ends: using a yarn needle, weave all tails into the inside of the runner across several stitches, trimming close. Block carefully if needed to flatten and even the scallops. (Info)
Round 107 :
Final inspection: check both sides for symmetry, even puff height, and bead placement. Reapply shaping on any puffs that appear collapsed by teasing them gently apart with the yarn needle tip and light steam if required. (Info)
Round 108 :
Light starch or fabric spray optional: if you want a slightly stiffer runner for formal use, apply a light textile stiffener sparingly to the underside so the scallops remain open without feeling plastic. (Info)
Round 109 :
Label your piece and store with care — fold gently along the length and avoid heavy stacking to keep scallops intact. (Info)
Round 110 :
Congratulations — your runner is complete. Enjoy styling it on a long dining table or island! (Info)
This elegant olive-and-gold runner adds a handmade luxury to any table with sculptural puff-shells and a glimmering scallop edge. Each section — the dense cotton center, the textured puff clusters, and the delicate metallic border — works together to create a piece that's both practical and beautiful. Enjoy the meditative rhythm as the runner grows and the satisfying shimmer of the final gold trim. 🧶✨ Place it on your table, add seasonal decor, and relish the warm handmade touch. 🎉