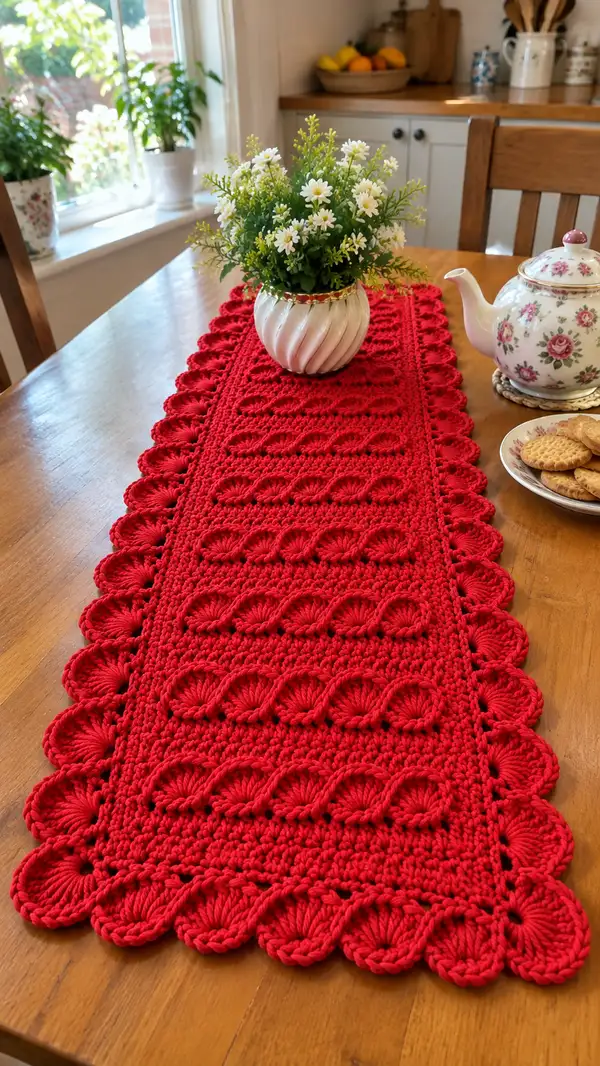
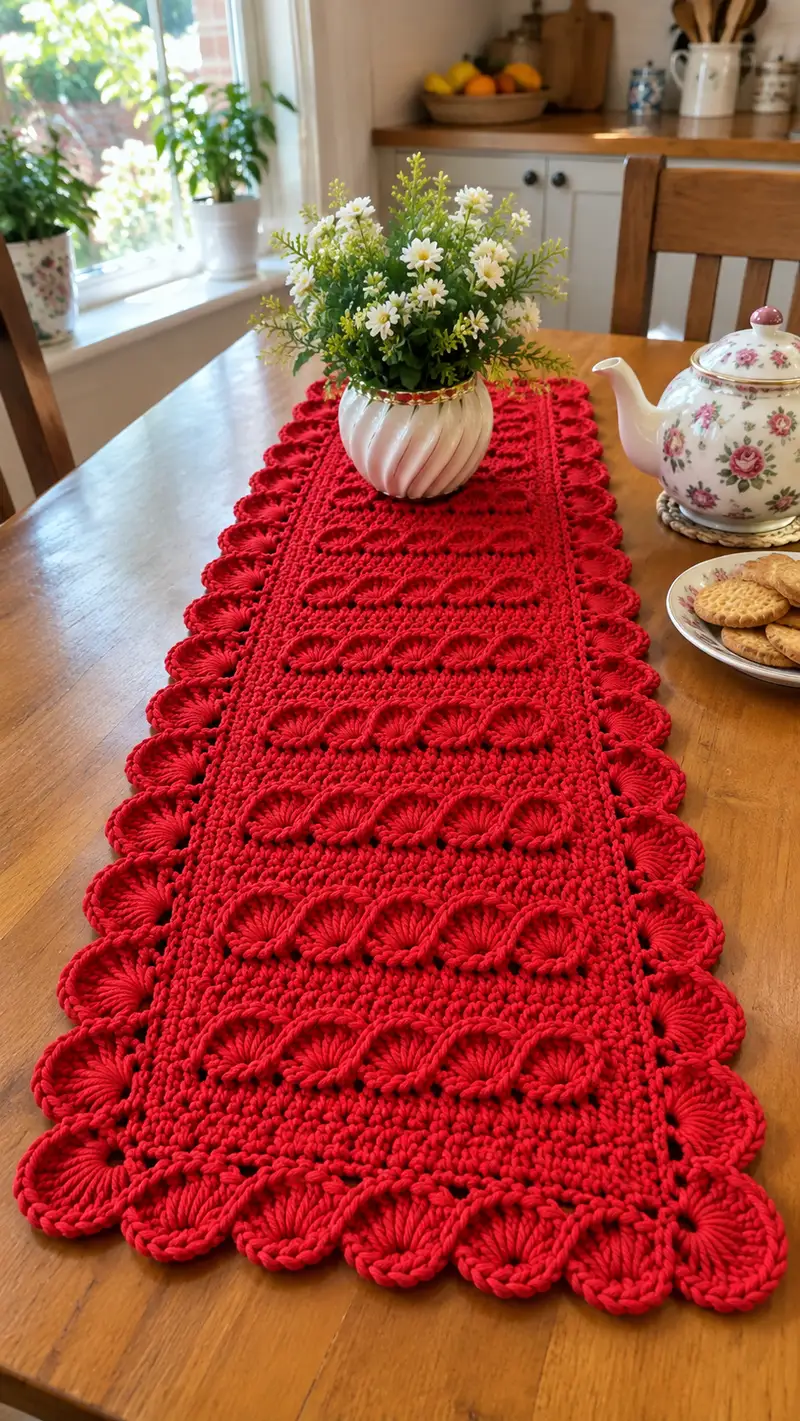
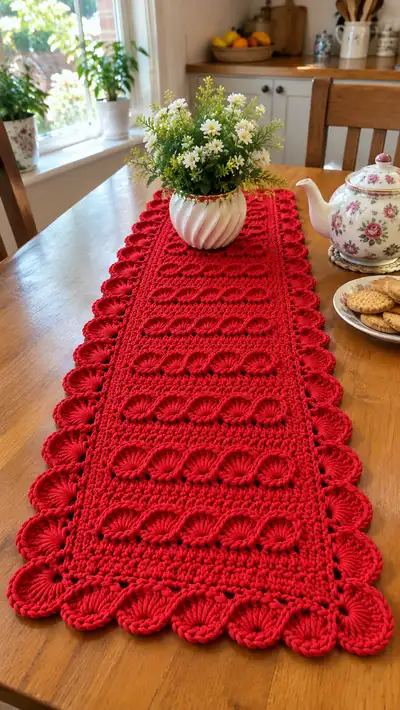
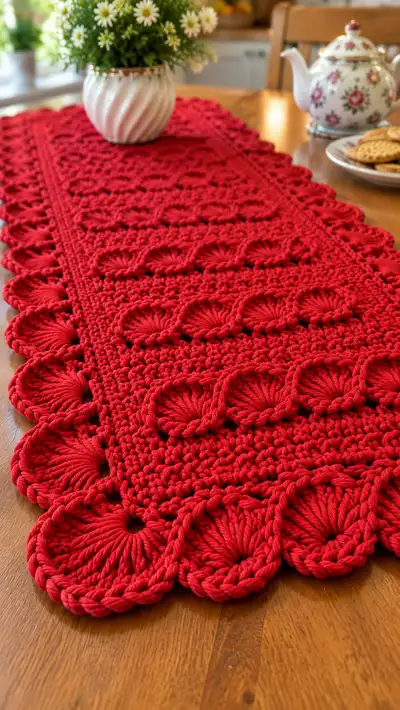
A luxurious, hand-crocheted table runner featuring bold scalloped edges and raised fan/shell motifs in a rich red yarn. This runner is worked flat with textured puff-shell rows separated by tidy single crochet ridges, producing a dramatic and classic table centerpiece. The pattern includes a repeating central panel and a sculpted scalloped border that frames the piece beautifully. Ideal for festive tables, seasonal decor, or as a special handmade gift.
Progress Tracker
0% Complete
— Gauge & Notes :
Info :
Gauge (recommended): 16 sc x 12 rows = 10cm with 5.0mm hook and aran/bulky cotton-blend yarn. The pattern is modular — width is fixed to the foundation chain below, length is determined by number of pattern repeats. Work tightly enough that the puff/fan loops are defined but not so tight that you cannot pull through the long loops when forming the scallops.
Info :
Terminology: this runner is worked flat in rows. 'Row' indicates the line of work; for clarity we number rows sequentially. Shell/fan motifs are anchored into single crochet base rows so stitch count remains constant across rows. Keep stitch count steady: after foundation, you will work 98 sts across each row unless otherwise stated.
— Foundation :
Row 1 :
Chain 99 (foundation chain). This number gives you 98 working chains across — the repeat is based on 7-stitch modules across width (98 = 7 x 14). If you want narrower/wider runner, adjust by increments of 7, plus 1 extra chain for turning.
Row 2 :
1 sc in 2nd ch from hook and in each ch across, turn. (98 sc)
Row 3 :
Ch 1, 1 sc in each st across, turn. (98 sc)
Info :
Place a stitch marker in the first stitch of each row for the whole project to avoid accidentally missing the first or last stitch. This keeps your edges neat for later border work.
— Base Panel (Rows 4-12) : Establishing texture and edge
Row 4 :
Ch 1, 1 sc in each st across, turn. (98 sc)
Row 5 :
Ch 1, 1 sc in each st across, turn. (98 sc)
Row 6 :
Ch 1, 1 sc in each st across, turn. (98 sc)
Row 7 :
Ch 1, *1 sc in next 6 sts, ch 1, sk 1* rep across to last 7 sts, 1 sc in final 7 sts, turn. (98 sc with ch-1 eyelet spacings)
Info :
Row 7 creates a subtle eyelet guideline that will help center the fan clusters. Count stitches between eyelets carefully — there should be eight eyelet spaces when using 98 stitches across (7-st modules).
Row 8 :
Ch 1, 1 sc in each st and ch-1 space across, turn. (98 sc)
Row 9 :
Ch 2 (counts as hdc), 1 hdc in next st and each st across, turn. (98 hdc)
Row 10 :
Ch 1, 1 sc in each st across, turn. (98 sc)
Row 11 :
Ch 1, 1 sc in each st across, turn. (98 sc)
Row 12 :
Ch 1, 1 sc in each st across, turn. (98 sc)
Info :
These first 12 rows create a sturdy, non-stretchy foundation for the dramatic fan rows to come. If you prefer a firmer runner, work additional sc rows here before beginning fan pattern repeats.
— Fan / Shell Row Set (Establishing Repeat Unit) :
Row 13 :
Ch 1, 1 sc in first st, *sk next 3 sts, in next st work [yo and pull up long loop around 3rd and 4th fingers to make tall loop] repeat 12 times into same stitch to form a large 12-loop 'fan' (see Info for technique), secure with sl st into same st, sk next 3 sts, 1 sc in next st; rep from * across to last st, end 1 sc. (14 large fans across, 98 sts anchored)
Info :
Technique for large fan: Insert hook into designated anchor stitch, yo and pull a long loop (approx 6-8 cm) through stitch. Repeat yo and pull long loop 11 more times into the same anchor stitch (12 loops total). Carefully lift loops back onto hook and pull through to create a closed fan base, then secure with a sl st or sc to the anchor stitch and a nearby tying stitch. Keep each loop the same length for uniform scallops.
Row 14 :
Ch 1, 1 sc in each st and in each fan anchor (treat the anchor stitch as one st), turn. (98 sc)
Row 15 :
Ch 1, 1 sc in each st across, turn. (98 sc)
Row 16 :
Ch 1, 1 sc in next st, *in next sc work small rope chain loop (ch 6, sl st in same stitch to create small raised chain), sk next 6 sts, 1 sc in next st; rep from * across, ending 1 sc. (98 sc and 14 small loop accents)
Info :
These small rope chain accents sit on top of the fabric and help the visual link between large fans. Work them firmly and consistently, and anchor them with sl st to prevent them from flattening out with use.
Row 17 :
Ch 1, 1 sc in each st across, turn. (98 sc)
Row 18 :
Ch 2, 1 hdc in each st across, turn. (98 hdc)
Row 19 :
Ch 1, 1 sc in each st across, turn. (98 sc)
Info :
Rows 13-19 complete one fan/shell module set. The foundation of sc/hdc rows above/below ensures fans are secure and gives a defined rectangular panel for the runner. Repeat this 7-row module down the length to create consistent texture.
— Module Repeat (Rows 20-83) : Repeat fan set down length
Rows 20-26 :
Repeat Rows 13-19 exactly (1 fan module). Maintain stitch counts and consistent loop sizes. (98 sts across each row)
Info :
Tip: Use a row counter or mark each completed module. The runner in photos shows 8 central modules between the border bands; make 6-10 modules depending on the final length you want (photos approx. 9 modules). Each module is 7 rows tall.
Rows 27-33 :
Repeat Rows 13-19 (2nd module). (98 sts)
Rows 34-40 :
Repeat Rows 13-19 (3rd module). (98 sts)
Info :
Check width after 3 modules and ensure fabric lies flat. If edges begin to ripple, adjust tension or add a sc row to even out before continuing.
Rows 41-47 :
Repeat Rows 13-19 (4th module). (98 sts)
Rows 48-54 :
Repeat Rows 13-19 (5th module). (98 sts)
Rows 55-61 :
Repeat Rows 13-19 (6th module). (98 sts)
Info :
If you prefer an extra-wide runner, increase foundation chain by 7-stitch repeats before beginning. Changing width mid-project will disrupt pattern repeat math.
Rows 62-68 :
Repeat Rows 13-19 (7th module). (98 sts)
Rows 69-75 :
Repeat Rows 13-19 (8th module). (98 sts)
Rows 76-82 :
Repeat Rows 13-19 (9th module). (98 sts)
Info :
The runner pictured contains 9 modules; for a longer runner, continue repeating the 7-row module. Always finish the series with the sc/hdc scaffold (Rows equivalent to 14-19) before moving to border setup to ensure neat edge joins.
— Transition Band before Border (Rows 84-88) :
Row 83 :
Ch 1, 1 sc in each st across, turn. (98 sc)
Row 84 :
Ch 2, 1 hdc in each st across, turn. (98 hdc)
Row 85 :
Ch 1, 1 sc in each st across, turn. (98 sc)
Info :
These rows stabilize the panel for the heavy scalloped edging. Work evenly and check that both long edges are parallel and flat. Add an extra sc row if you notice curling before continuing.
— Scalloped Edge Preparation (Rows 89-92) :
Row 86 :
Ch 1, 1 sc in first st, *ch 3, sk next 6 sts, 1 sc in next st; rep from * across, finish 1 sc in last st, turn. (14 ch-3 loops across edge; 98 st anchors)
Info :
The ch-3 spaces mark the anchor points for the large looped fans that create the scallop. Count carefully to get 14 spaces across; each scallop will occupy one module anchor point.
Row 87 :
Ch 1, 1 sc in each sc and ch-3 space across, turn. (98 sc + 14 visible chain anchors)
Row 88 :
Ch 1, 1 sc in each st across, turn. (98 sc)
Info :
These scaffold rows make sure each scallop attaches to a firm base preventing distortion. Lay the runner flat and ensure the edge will fit the scallop size visually before making the scallops — adjust by working one additional sc row if necessary.
— Large Scallop Fans (Right Side) (Rows 93-100) :
Row 89 :
Working along right long edge: Turn so edge faces you. Find first anchor ch-3 space; in the anchor sc (the sc to the right of ch-3 space) work: insert hook, yo and pull up very long loop 14 times into same stitch (14 loops total). After 14 loops are on hook, yarn over and pull through all loops, ch 1 to secure, sl st into same stitch to anchor. Move to next anchor point and repeat for each anchor across entire right edge, making 14 large looped fans. Return to main fabric and sl st to last working stitch. (14 large scallop fans)
Info :
Large scallop technique: The number of loops (14) used here produces the full petal look similar to pictures. Loop count can be adjusted down slightly for smaller scallops, but keep consistent around the entire edge. Keep loop lengths equal — measure with your fingers or use a cardboard template to maintain uniform size.
Row 90 :
Ch 1, 1 sc around each fan base anchor and around each intervening st across to the end, turn. (98 sc, fans secured)
Row 91 :
Ch 1, 1 sc in each st across, turn. (98 sc)
Info :
When anchoring large fans, use smaller stitches (sc) close to the fan base so the fan stands proud. If your fans droop, work hdc or sc tight in the base to pull them upright.
Row 92 :
Ch 1, *in next sc work 6 dc together as a closed cluster (work 6 partial dc into same st leaving last loop of each on hook, then yo and pull through all loops), sl st to next sc to create a scallop ridge; rep from * across right side edge to last sc. Turn. (14 scallop clusters)
Info :
Closed dc clusters create a thick petal-like effect. Work evenly and anchor clusters into the base sc's only — do not work into the long loops. This creates a double-depth scallop similar to the photos.
— Scalloped Edge (Left Side Mirror) (Rows 101-108) :
Row 93 :
Turn the runner and repeat Rows 89-92 on the left long edge to mirror the scallops. Work the same number of large looped fans (14) and anchor them with sc rows. (14 large scallop fans)
Info :
Mirror symmetry matters for appearance — mark the first anchor on left side by counting modules or eyelet spaces so both sides have identical scallop positions. Use pins to hold fan loops in position while securing if necessary.
Row 94 :
Ch 1, 1 sc across anchored fans, turn. (98 sc)
Row 95 :
Ch 1, repeat closed dc cluster ridge across left edge (6 dc cluster into anchor sc, sl st to next sc) across, turn. (14 scallop clusters)
Info :
After both sides are scalloped, gently steam-block or wet-block the entire piece to tighten and shape the scallops equally on both sides.
— End Bands and Short Ends Finish (Rows 109-116) :
Row 96 :
After scalloped sides are complete, turn to short end. Work 1 sc in each st across the short end for 6 rows to create a neat end band. (98 sc)
Row 97 :
Repeat Row 96 (2nd sc end band row). (98 sc)
Row 98 :
Repeat Row 96 (3rd sc end band row). (98 sc)
Info :
Short end bands stabilize the runner ends and give visual balance to the heavy scalloped long edges. Work 4-8 sc rows here depending on the thickness you prefer.
Row 99 :
Ch 1, *work a small rope chain decorative loop: in next sc ch 6 and sl st into same st to form raised loop; sk next 6 sts, 1 sc in next sc; rep from * across short end, turn. (14 small loop accents across end)
Row 100 :
Ch 1, 1 sc in each st and loop anchor, turn. (98 sc)
Info :
Short end accents echo the texture in the body and visually anchor the scalloped long edges. Keep them smaller than side scallops so they frame, not compete.
— Final Border Round (Rows 117-122) :
Row 101 :
Use 4.5mm hook if desired for a crisp edge. Ch 1, sc evenly around entire perimeter of the runner, placing 3 sc in each valley between scallops on long edges to round corners, and 1 sc in each short end st. Join with sl st to first sc. (approx. perimeter total ~320 sc depending on scallop distribution)
Row 102 :
Ch 1, 1 sc in each sc around, join with sl st, fasten off and weave in ends. This secures the edge and gives a finished look. (perimeter sc unchanged)
Info :
If you want an extra decorative finish, work a final picot or rope chain round: *ch 3, sl st in next sc* around to create a tiny raised edge between scallops for extra definition.
Row 103 :
Optional: With contrast color, work 1 sc in each st around to create a thin outline accent. Fasten off. (perimeter sc unchanged)
Info :
Weave in all ends neatly along the back of the runner. If any scallops are floppy, use blocking pins to nudge them into shape while damp and allow to dry fully before use.
— Finishing Touches & Blocking :
Info :
Lightly wet-block the entire runner: pin flat on blocking mat to desired dimensions and pin each scallop individually to obtain identical shapes. Spray with water or steam carefully with iron on low (do not press). Allow to dry fully. If using cotton yarn, a light starch or sizing will help scallops and fans hold their shape over time.
Info :
Weave in ends on the wrong side with long tails tucked through a few stitches to prevent fraying. Trim close. Double-check that scallops are secure; add a few extra invisible whip-stitches through fan bases into underlying fabric if necessary for extra durability during handling.
Info :
To lengthen the runner: add as many 7-row fan modules (Rows 13-19) as desired before starting the Transition Band and scalloped edge. Each additional module adds approximately 6-8cm in length depending on gauge.
Completing this scalloped table runner is wonderfully satisfying — the combination of compact single crochet rows and the dramatic, oversized scallops creates a striking centerpiece that instantly elevates a table. Each repeated fan gives rhythm and charm, while the sturdy cotton-blend yarn ensures it lies flat and withstands regular use. I hope you enjoy the meditative repetition of the modules and the final flourish of shaping the scallops. 🧶🌺 Set your tea pot on it with pride and share your handmade work — it makes a delightful gift or seasonal accent. Happy stitching! 🎀