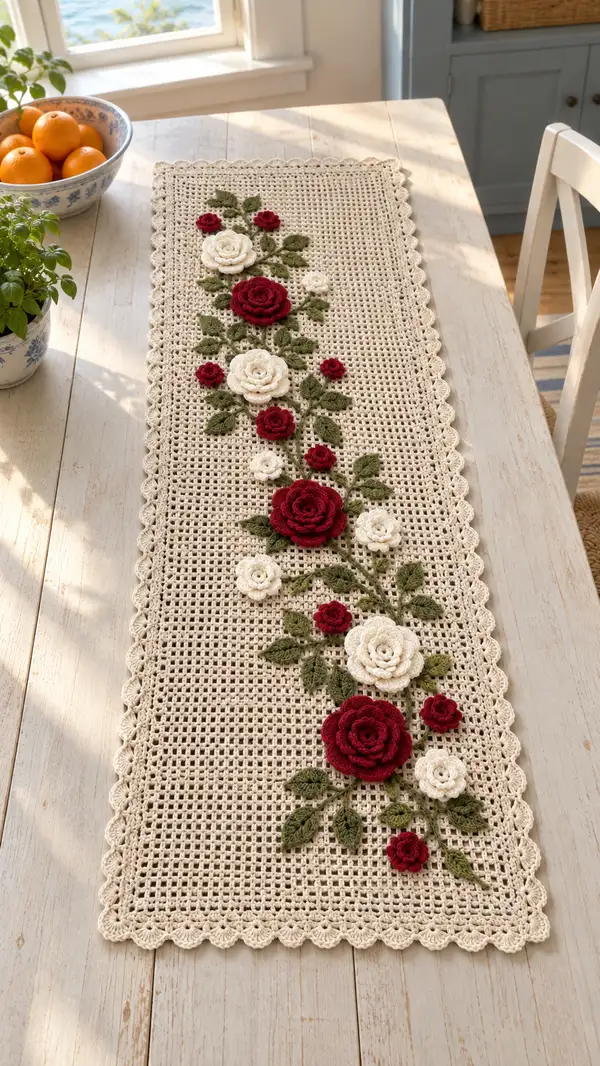
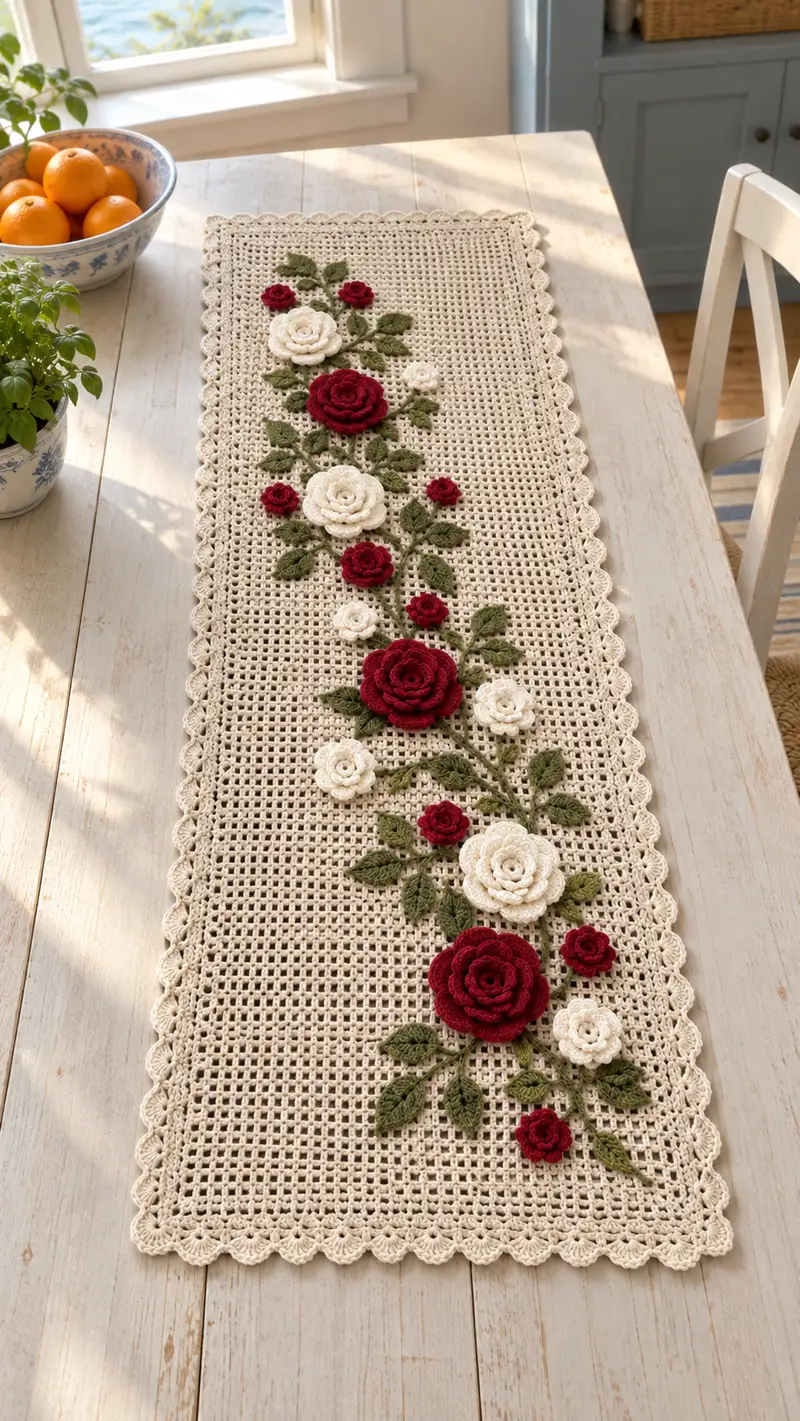
Create a long, elegant table runner with an airy filet mesh background, scalloped edge, and layered crocheted roses and leaves applique9s. This pattern uses classic filet stitches for the body and worked-flat floral motifs (large, medium and small roses) with leaf accents sewn on top. The neutral background pairs beautifully with deep red and cream roses for a timeless, vintage-inspired centerpiece.
Progress Tracker
0% Complete
— Notes and Gauge :
Info :
This pattern is written in US terms. The mesh background is worked in rows (foundation chain and turning rows); the floral motifs (roses and leaves) are worked separately and applique9d to the mesh. Gauge for the mesh: 10 mesh squares (pattern repeats) = approximately 4 inches across with a 3.5mm hook and worsted cotton yarn. Adjust hook size to achieve similar drape. Block motifs for best results.
— Materials and Preparation :
Info :
Before beginning, wind yarn into manageable cakes. Label your background yarn as MC (main color), rose red as CC1, cream roses as CC2, and green as LG (leaf green). Prepare stitch markers for row starts and a large measuring tape to check length while working.
— Main Panel (Filet Mesh Ground) :
Row 1 :
Foundation chain: ch 99 (this creates 48 mesh squares across; ch 3 counts as first dc). Turn. (99 ch)
Row 2 :
Dc in 4th ch from hook (counts as first dc), *ch 2, sk 2 ch, dc in next ch; rep from * across to last ch, end with dc in last ch. (48 dc + 48 ch2 spaces)
Row 3 :
Ch 3 (counts as dc), turn. Dc in each dc and ch2 space across by working: dc in top of dc, *ch 2, dc in next dc; rep from * across. (48 dc + 48 ch2)
Row 4-8 :
Repeat Row 3 for even open mesh in main panel. Keep tension consistent; place stitch marker in the first st of each row to mark the row start. (48 dc + 48 ch2 each row)
Info :
Work the main panel in straight rows until you reach the desired runner length. For the sample in the photo the panel measures approximately 36 inches long; this sample uses 60 total mesh rows (including the first textured rows). I recommend making a sample length of 60-70 mesh rows for a long runner. You can also adjust to fit your table by increasing or decreasing the number of rows.
Row 9-16 :
Continue repeating Row 3. Smooth any turning bumps by pulling the turning ch gently and maintaining consistent tension. (48 dc + 48 ch2 per row)
Row 17 :
Insert a subtle texture row: ch 2, turn. Hdc in each dc and ch2 across, working hdc into the ch2 spaces as a single hdc each. (96 hdc equivalent)
Info :
This hdc row creates a slight visual line to anchor motif placement. If you prefer an uninterrupted mesh, continue mesh rows instead. Use this line as a reference point when positioning flowers later.
Row 18-27 :
Return to filet mesh pattern: ch 3, turn, dc in each dc and ch2 across creating 48 dc and 48 ch2 per row. Work 10 rows to build height. Mark the center vertical axis with a temporary yarn tail or a stitch marker so you can place the floral vine symmetrically. (48 dc + 48 ch2)
Row 28 :
Start placement reference row: count 24 mesh squares in from left edge and mark that column with a removable clip - this marks the left edge of the floral panel zone. Count 24 mesh squares in from the right edge and mark - this marks the right edge. The floral vine will sit centered between these two marks (approximately 50% of the width). Continue mesh pattern.
Row 29-44 :
Continue filet mesh rows (ch 3, turn, dc in top of dc, *ch 2, dc in next dc; rep). Work 16 rows. Use the central axis marker placed earlier to guide placement of applique9s later. (48 dc + 48 ch2 each row)
Info :
At this stage, lay out your applique9s (unfinished) on top of the panel to trial placements. Adjust spacing to avoid dense clusters and to allow the scalloped border to show along the sides.
Row 45-56 :
Work a further 12 filet rows, keeping consistent gauge. This brings the length to approximately the sample length. If you prefer a longer runner, continue in multiples of the mesh rows until satisfied. (48 dc + 48 ch2 each row)
Row 57 :
Work one Hdc texture row as in Row 17 to mirror the top texture line, creating visual balance. Ch 2, turn, hdc in each dc and ch2 across. (96 hdc equivalent)
Row 58-60 :
Final 3 filet rows: ch 3, turn, dc across in mesh pattern for 3 rows. Fasten off leaving a long tail for the border join. (48 dc + 48 ch2 each row)
Info :
Block the mesh panel flat to exact dimensions now: pin corners and edges square, stretching gently. Let dry thoroughly. Blocking ensures the scalloped border will sit evenly and your applique9s will attach smoothly.
— Scalloped Border :
Round 1 :
With right side facing and using MC, join with sl st at lower right corner of the panel (turning chain edge). Ch 1, evenly sc along long side working 1 sc in each dc and 2 sc in each ch2 space across; when you reach the short side, work sc evenly around corner to next long side. Continue around entire perimeter. (Panel perimeter sc count dependent on final mesh rows; keep stitch count even across sides)
Info :
Place approx 1 sc per mesh vertical dc and 2 sc per ch2 across to create even base for scallops. Mark the middle of each short end with a stitch marker so scallops align symmetrically.
Round 2 :
Ch 1, *skip 1 sc, 5 dc in next sc (shell), skip 1 sc, sl st in next sc; rep along side to create scallops. At corners work 7 dc in corner sc to allow curve. Work shells evenly along every sc pair. Join and fasten off. (Number of shells will match panel length; distribute evenly and adjust as needed)
Info :
If shells are too wide or tight, adjust by changing shell size to 3 dc or 4 dc per shell. Blocking will help shells relax into a soft scallop.
— Large Rose (Make 4) :
Info :
Large roses are worked as a long spiral strip that is then rolled and sewn into a layered bloom. Use CC1 (deep wine) for large blooms. For a more compact rose, use a smaller hook (3.0mm).
Round 1 :
Ch 60. Turn. (60 ch)
Round 2 :
Sc in 2nd ch from hook and in each ch across (59 sc). This creates a base strip with an odd number of stitches for easier petal shaping. (59 sc)
Round 3 :
Turn, *sc in next st, hdc in next st, 3 dc in next st, hdc in next st, sc in next st; rep across forming a repeating petal cluster. End with last cluster balanced. Fasten off leaving a long tail for sewing. (petal clusters across 59 sts)
Info :
Petal cluster math: each cluster uses 5 sts. 59 sts produce 11 full clusters with remainder. Close the final cluster by adjusting last cluster to fit; the spiral will hide slight irregularities.
Round 4 :
Lay strip flat with RS facing; starting at one short end, roll strip to form center. Use the long tail to sew through bottom loops of the spiral, catching 2-3 stitches each time to hold shape. Sew tightly for a compact center and more loosely for a more open rose. Secure end and weave in tail. Rose diameter approximately 2.5-3.25 inches depending on tension.
Info :
Create 4 large roses. Block each lightly by flattening and steaming if desired to set petals. Vary tightness slightly between flowers to create a natural look.
— Medium Rose (Make 4) :
Round 1 :
Ch 44. Turn. (44 ch)
Round 2 :
Sc in 2nd ch from hook and across (43 sc). (43 sc)
Round 3 :
Turn, *sc in next st, hdc in next, 3 dc in next, hdc in next, sc in next; rep across. Fasten off leaving long tail for rolling. (petal clusters across 43 sts)
Round 4 :
Roll and sew as for large rose to form medium bloom. Secure and weave ends. Diameter approx 1.75-2.25 inches.
Info :
Make 4 medium roses (mix CC1 and CC2 for color variation if desired). Slightly tighten center for a denser look or loosen for open blossoms.
— Small Rose (Make 8) :
Round 1 :
Ch 28. Turn. (28 ch)
Round 2 :
Sc in 2nd ch from hook and across (27 sc). (27 sc)
Round 3 :
Turn, *sc, 2 dc in next, sc; rep across producing small petal clusters. Fasten off leaving long tail and roll into small rose bud approx 1.0-1.5 inches in diameter. Sew down securely. Make 8 small roses, mix colors for visual interest.
Info :
For tiny buds (optional), ch 14, sc across, 2 dc clusters, roll and sew. These add nice highlights among leaves.
— Leaves (Make 20-24) :
Round 1 :
With LG (leaf green), ch 12. Turn. (12 ch)
Round 2 :
Sc in 2nd ch from hook, hdc in next, dc in next 3, hdc in next, sc in next, sl st in next to form one side; work 3 sc along opposite side of foundation chain to mirror shape, sl st to first sc to close. (approx 22 sts total)
Round 3 :
Ch 1, turn leaf and work along edge: sc in each stitch across working 1 sc in each dc and hdc, add 2 sc in the widest center stitch for a slight point, then decrease back with sc and sl st to create tapered tip. Fasten off and weave in end. Leaf length approx 1.5-2 inches.
Info :
For a more detailed leaf, after Round 2 add an extra row of FLO stitches for a visible vein: ch 1, turn, sc in each st FLO across, then finish. Make 20-24 leaves mixing sizes by varying the starter chain 10-14.
— Long Stem and Vine Construction :
Round 1 :
With LG, ch 40 (or desired length to bridge between flowers). Option A: Use long chain and seam to mesh with invisible stitches through lower loops; Option B: make a crochet i-cord by working 1 sc in back bump repeatedly to create a raised cord.
Round 2 :
To create a raised stem: after ch 40, work 40 sc back along chain (in 2nd ch from hook across), do not fasten off. Fold cord slightly and use tail to whip stitch ends into place. Make as many stem segments as needed to connect blooms along the center axis.
Info :
Alternatively, create stems directly on panel using surface slip stitch: with LG and tapestry needle, use sl st along the mesh to draw a vine shape across the mesh squares. This gives a flatter look and reduces bulk under large roses.
— Assembly Prep :
Info :
Layout all prepared motifs on the blocked mesh panel before sewing. Arrange three large roses spaced approximately 6-8 inches apart along the center axis with medium and small roses filling interstitial spaces. Place leaves around blooms at natural angles and position stems to interconnect clusters. Use pins or safety pins to temporarily hold everything.
Info :
For the sample photo: starting from one short end, place small cluster (1 large rose + 2 medium + 3 small + 6 leaves), then central cluster slightly larger (2 large + 2 medium + 4 small + 8 leaves), repeat inversely toward other end. Adjust spacing to fit your runner length and aesthetics.
— Sewing Motifs to Panel :
Round 1 :
Using a yarn needle and matching color threads, baste each motif to the mesh through the foundation loops only so the stitches on the right side remain neat. For large roses, sew through the base of the spiral every 4-6 stitches around the outermost coil to secure firmly. Hide starting tails under the bloom.
Round 2 :
Sew leaves by stitching across the central vein to the panel and securing the base with a couple of hidden stitches. For stems made with chain, whip stitch the chain underside to the mesh; for surface slip stitch stems, use matching thread and small stitches through mesh bars to anchor.
Info :
When sewing large motifs, make sure to catch several mesh bars under each stitching pass to prevent pulling through. Small, discrete stitches will keep the right-side appearance clean. Trim excess yarn and weave ends into the back of the panel.
— Optional Embroidered Veins and Accents :
Round 1 :
Using a tapestry needle and thin yarn or embroidery floss, embroider leaf veins and tiny french-knot berry accents where desired (e.g., a darker green single straight stitch down the center of each leaf). Use matching or slightly darker shades for subtle depth.
Info :
French knots: wrap the embroidery thread twice around needle for a small knot. Hold base yarn with your finger and insert needle close to origin to secure knot firmly into mesh.
— Final Finishing :
Round 1 :
Once all motifs are sewn and embroideries complete, gently steam-block the entire runner flat on a blocking surface. Pin scallop edges and motif petals to open them slightly as desired. Allow to cool and dry fully to set shape.
Round 2 :
Weave in any remaining loose ends on the back with a yarn needle, trimming close without cutting the foundation threads. Lightly press with a steam iron (cover with cloth) to even out the surface if necessary.
Info :
For long-term durability, consider lining the underside with a lightweight cotton fabric to protect delicate mesh from frequent use; baste around perimeter and hand-stitch the lining in place if desired.
— Variant Notes & Scale Adjustments :
Info :
To make a narrower runner, decrease the foundation chain by multiples of 2 mesh squares (reducing ch by 4 per mesh pair). For a longer runner add mesh rows in multiples of 2 to keep symmetry. Color swap suggestions: soft blush roses, dusty blue accents, or mint leaves for different seasonal looks.
This elegant table runner becomes a cherished heirloom with just a few hours of careful crochet and assembly. The airy mesh balances beautifully with lush layered roses, and the scalloped edge gives a soft, finished look. Every stitch contributes to a piece you will be proud to display—and it makes a wonderful handmade gift. 🧶🌹 Happy stitching and enjoy arranging your bouquet just the way you like it!