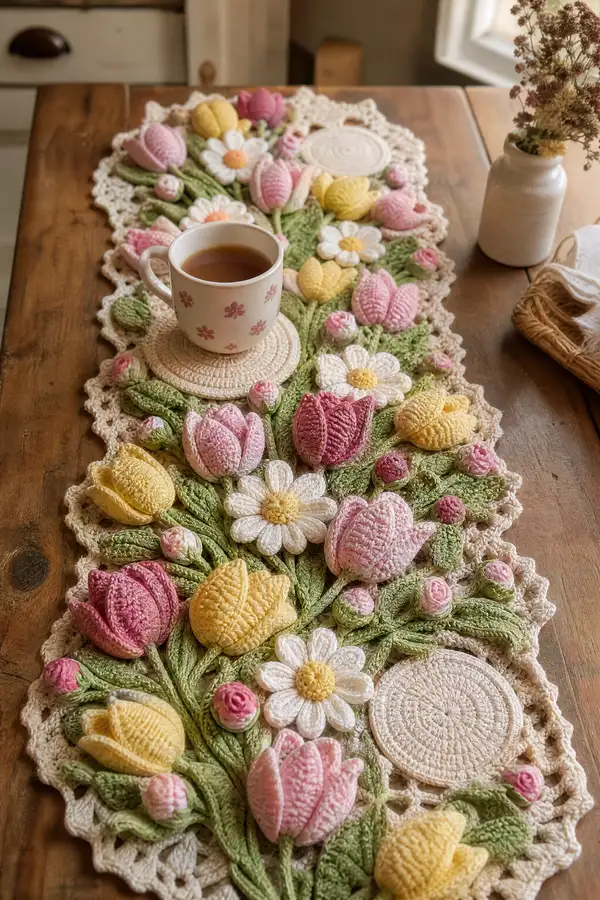
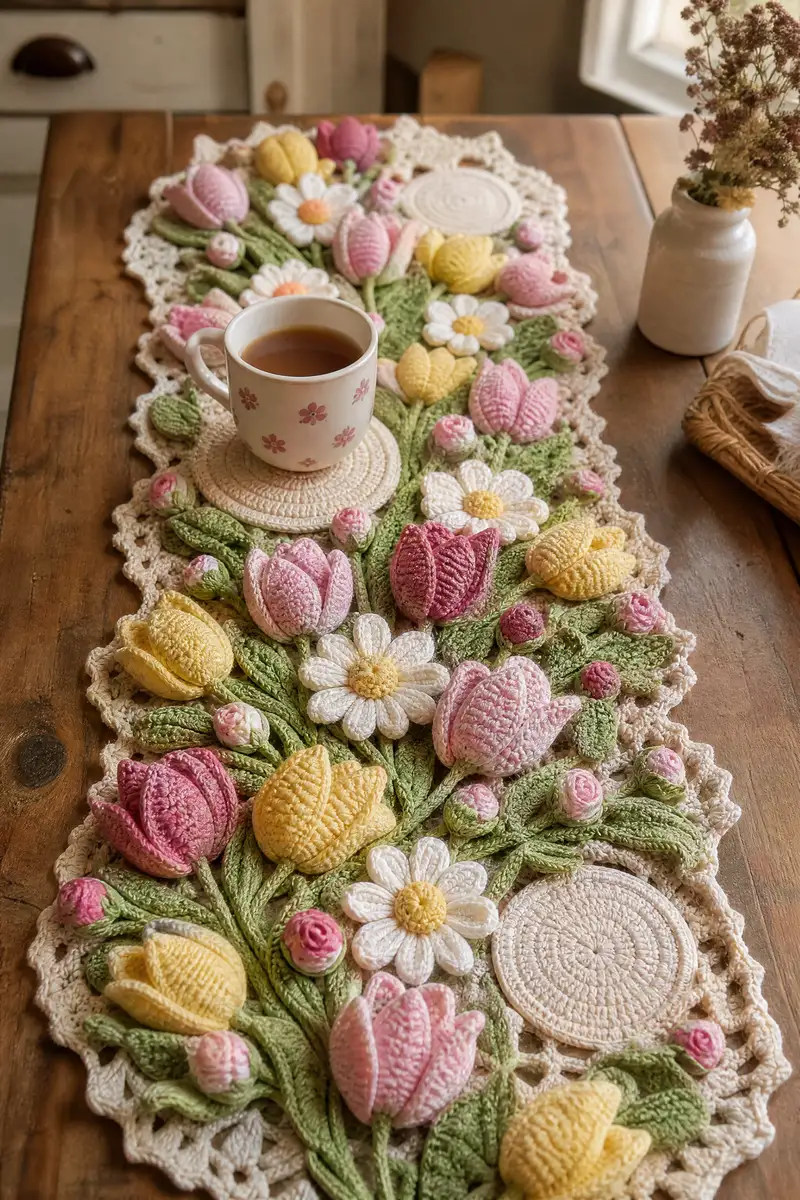
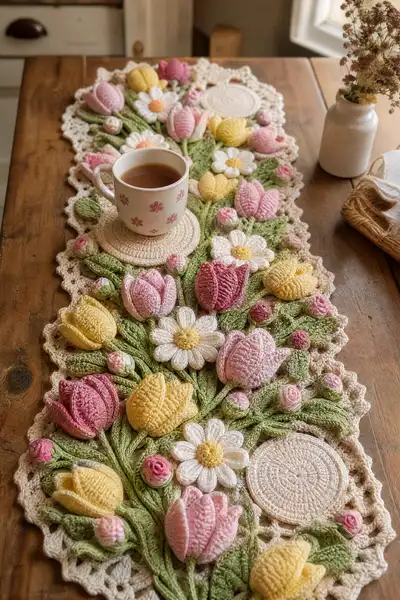
A richly detailed spring table runner featuring 3D tulips, daisies, buds and leafy vines arranged on a lacy oval runner. Pastel pinks, soft yellows and creams sit on a warm green foliage background. Includes textured tulip petals, raised daisy centers and integrated circular coasters for cups. Perfect for a seasonal centerpiece that looks hand-tied and garden-fresh.
Progress Tracker
0% Complete
— Materials & General Notes :
Info :
Use worsted weight yarn and 3.5mm hook unless noted. Work tightly for 3D motifs so stuffing does not show. Use stitch markers to mark round starts. All pieces are worked in continuous rounds unless instructed to join with sl st. Gauge is not critical for overall aesthetic, but consistent tension ensures pieces fit together well.
Info :
Make all motifs flat and block where noted before assembly. For three-dimensional tulips and buds, use small amounts of polyester fiberfill to give a rounded shape; do not overstuff. Leaves are worked flat then shaped using surface stitches and light steam blocking if desired.
— Round Coaster / Small Placemat (Make 3) :
Round 3 :
(1 sc, inc) x 6 (18)
Round 4 :
(2 sc, inc) x 6 (24)
Round 5 :
(3 sc, inc) x 6 (30)
Round 6 :
(4 sc, inc) x 6 (36)
Round 7 :
(5 sc, inc) x 6 (42)
Round 8 :
1 sc in each st (42)
Info :
Switch to BLO for the next two rounds to create a slight ridge that helps the coaster sit flat beneath cups
Round 9 :
1 sc in each st BLO (42)
Round 10 :
1 sc in each st (42)
Round 11 :
1 sc in each st (42)
Round 12 :
Fasten off and weave in ends. Block lightly to flatten and set shape.
Info :
Make 3 coasters. These will be integrated into the runner composition; block them to identical size for an even look. If desired, add a round of sc in contrasting cream for a subtle rim.
— Runner Background Panel :
Round 3 :
(1 sc, inc) x 6 (18)
Round 4 :
(2 sc, inc) x 6 (24)
Round 5 :
(3 sc, inc) x 6 (30)
Round 6 :
(4 sc, inc) x 6 (36)
Round 7 :
(5 sc, inc) x 6 (42)
Round 8 :
1 sc in each st (42)
Round 9 :
(6 sc, inc) x 6 (48)
Round 10 :
1 sc in each st (48)
Round 11 :
(7 sc, inc) x 6 (54)
Round 12 :
1 sc in each st (54)
Info :
We are building a large oval-shaped base by creating a circular center and later elongating it with extended rounds; keep tension consistent to avoid buckling. Place markers at the four points that will become the long/short axes to help with later shaping.
Round 13 :
(8 sc, inc) x 6 (60)
Round 14 :
1 sc in each st (60)
Round 15 :
(9 sc, inc) x 6 (66)
Round 16 :
1 sc in each st (66)
Round 17 :
(10 sc, inc) x 6 (72)
Round 18 :
1 sc in each st (72)
Round 19 :
Start shaping oval by adding additional increases at two opposite segments: in segments 1 and 4, do (10 sc, inc, inc) to elongate (76)
Round 20 :
1 sc in each st (76)
Info :
Continue alternating a full round with occasional added increases on the long-axis segments to form a gentle oval. Work until the panel measures approximately the length you want for the central runner background between the three coasters; usually 14-18 rounds more depending on gauge.
Round 21 :
Even round 1 sc in each st (76)
Round 22 :
Add two increases at long axis points: sk 12 sc, (1 sc, inc, inc), sk 12 sc, 1 sc repeat to distribute (80)
Round 23 :
1 sc each st (80)
Round 24 :
Work 8 rounds of even sc to build height (80)
Round 25 :
Change to cream if you used another color. 1 sc each st (80)
Round 26 :
1 sc each st BLO (80)
Round 27 :
Begin edge shaping: *sk 2, 5 dc in next st, sk 2, sl st in next* repeat across to create base scallops. Adjust repeat to fit 80 sts (result: even scallop rim)
Round 28 :
Finish with sl st seam to round start. Fasten off and block background panel flat and oval.
Info :
If your runner will be longer, add additional even rounds before the scalloped edge and increase at long-axis segments every 4 rounds to elongate gradually. Block to exact length before assembly.
— Large 3D Tulip (Make 8-10; each) :
Info :
Each tulip consists of three main petals joined to form a cup, with a small internal top cap and a stem. Work petals individually and join at their bases. Use slightly tighter hook (3.0mm) if you want extra firmness for petals.
Round 1 :
6 sc in mr (6) — this creates the center of one petal
Round 3 :
(1 sc, inc) x 6 (18)
Round 4 :
(2 sc, inc) x 6 (24)
Round 5 :
1 sc in each st (24)
Round 6 :
1 hdc in each st (24) — this adds height for the petal cup
Round 7 :
Switch to front post dc rows to create ribbing: *fpdc around next st*, rep across (24)
Round 8 :
Work 1 dc in each st (24)
Info :
From round 7 onward, use front post double crochet to create vertical ridges that give petals a stitched, realistic texture. Make 3 identical petals for each tulip.
Round 9 :
(1 sc, dec) x 8 (16) — begin narrowing the petal toward the top
Round 10 :
1 sc each st (16)
Round 11 :
(2 sc, dec) x 4 (12)
Round 12 :
1 sc each st (12)
Round 13 :
Start short rows to shape the upper petal lip: ch2, turn, sc 6 along lip, ch1, fasten off leaving long tail for joining (6)
Info :
Make three petals per tulip. Sew petals together along the ch2 lip area using mattress stitch, forming a three-sided cup. Add a small amount of stuffing into the cup before closing to hold shape.
Round 14 :
Make inner cap: 6 sc in mr (6)
Round 16 :
1 sc each st (12)
Round 17 :
(1 sc, dec) x 4 (8)
Round 18 :
Fasten off leaving tail to sew cap into the tulip cup center and anchor all three petals to cap base
Info :
Sew the cap into the center of the three joined petals to reinforce shape. Add just enough polyester fiberfill to round the cap slightly but not distort petals. Add stem by crocheting a tube (see stem section) and attach securely to base of the 3-petal assembly.
Round 19 :
Stem: ch 20, join to first chain with sl st to form tube base, 1 sc in each ch around both sides to build a tube (approx 38 sc), continue 4 rounds to build stem thickness then fasten off leaving tail for sewing
Round 20 :
Weave stem into petal base and secure with ladder stitches. If adding wire, insert before final stem stuffing, then continue to cover and secure tightly.
Info :
Make 8–10 large tulips in varied pastel shades. For a closed tulip appearance, reduce rounds 9–13 to keep petals tighter. For open tulip, make petals slightly taller before joining.
— Small Tulip Bud (Make 10-12) :
Round 3 :
(1 sc, inc) x6 (18)
Round 4 :
1 sc each st (18)
Round 5 :
fpdc around next 18 sts for ribbing (18)
Round 6 :
1 sc each st (18)
Round 7 :
(2 sc, dec) x 5, sc 1 (13)
Round 8 :
(1 sc, dec) x 4, sc 1 (9)
Round 9 :
6 dec (3) — close opening; fasten off leaving tail for sewing
Info :
Stuff bud lightly to give a rounded but compact shape. Sew a small stem (ch12, sc around both sides) and attach to bud base. Make 10–12 small buds for clusters between tulips.
— Long Leaf (Make 18-24) :
Round 1 :
ch 16, sc in 2nd ch from hook and across to end (15)
Round 2 :
Turn, sc in each st (15)
Round 3 :
Turn, hdc in first 3 sts, fpdc next 9 sts to create a raised vein texture, hdc last 3 sts (15)
Round 4 :
Turn, sc across (15)
Round 5 :
Decrease tips: sl st 2, dec across center to taper end (10)
Round 6 :
Fasten off leaving long tail for sewing, repeat on opposite side to create mirrored leaf edge if desired
Info :
For a fuller look, layer two leaves slightly off-set and sew together along the base to create thicker foliage. Use surface slip stitches to create midrib if you want more definition after blocking.
Round 7 :
Optional: Add stem: ch 18, sc around both sides until 36 sc tube formed; sew stem to leaf base and attach to runner
Info :
Make 18–24 leaves in varied lengths. Use a lighter green for some leaves for depth or carry a secondary moss green for variety.
— Daisy Flower (Make 6-8) :
Round 1 :
6 sc in mr (6) — center
Round 3 :
1 sc each st (12) — fasten off center in yellow
Round 4 :
Attach white to outer edge, ch6, sl st in next st to form petal; rep 12 times for 12 petals
Round 5 :
Work 2nd row of petal: attach at base of each petal and work (sc, hdc, 3 dc, hdc, sc) to broaden petal; fasten off and weave in ends
Info :
Sew daisy centers onto background with yellow centers slightly stuffed for a raised look. Place daisies among tulips and buds for contrast.
— Tiny Rosebud (Make 10-14) :
Round 1 :
ch 6, join to form small ring, work 12 sc into ring (12)
Round 2 :
(1 sc, inc) x4, sc 4 (16)
Round 3 :
1 sc each st (16)
Round 4 :
Roll & shape: fasten off, roll the small circle from one edge tightly to form a rose spiral, sew through base to secure, leaving tail for attaching a short stem
Info :
Rosebuds are constructed by rolling a small disc and sewing through the base. Attach to short crocheted stems and place as clusters to add visual interest between larger flowers.
— Base Joining & Surface Vine Work :
Round 1 :
Layout: Position 3 blocked coasters on the background panel where you want cup areas. Pin in place. Arrange large tulips, small buds, daisies, rosebuds and leaves around the coasters according to the photo reference or your own composition.
Round 2 :
Attach motifs: Use matching yarn and whip stitch to anchor the base of each floral motif to the background panel at the pinned positions. Sew only at base edges so petals remain free and dimensional.
Round 3 :
Surface vines: with green yarn and tapestry needle, use surface slip stitch or surface single crochet to create connecting vine lines between flowers. Reinforce at junctions by stitching through both motif and background.
Info :
Work slowly; frequently step back and view composition from a distance. Adjust placement and unpin if necessary before final sewing. Use small mattress stitches for invisible joins and ensure directionality of petals faces outward for a natural look.
Round 4 :
For stems that require extra stability, insert a short length of floral wire wrapped in yarn into the crocheted stem tube before attaching. Secure wire ends by stitching and covering with yarn tube.
— Scalloped Lace Border :
Round 1 :
Join cream around runner edge with sl st, ch1, sc in each st around to create a uniform edge (work evenly to maintain shape)
Round 2 :
*sk 2, 5 dc in next st, sk 2, sl st in next st* repeat to end to create scallops
Round 3 :
Work picot edging: sl st into center of each scallop, ch3, sl st in top of ch3 to form picot; repeat for every scallop for delicate finish
Round 4 :
Fasten off and weave in all border ends. Block entire runner to set shape and flatten where motifs join background.
Info :
Blocking is essential: pin runner to flat surface and steam lightly or wet-block to set scallops and flatten coaster integration. Allow to dry completely before removing pins.
— Finishing Touches and Assembly Notes :
Round 1 :
Check all join edges and reinforce any motifs that feel loose. Use small stitches to keep joins tidy and hidden beneath petals or leaf layers.
Round 2 :
Add decorative French knots or tiny embroidered veins in darker green for subtle depth and life-like texture on leaves and centers.
Round 3 :
Trim all loose ends and tuck tails into the work using yarn needle. Test stability by gently lifting the runner and pressing petals to ensure they remain attached.
Info :
Optional: Lightly glue coaster centers to background with fabric glue if the runner will see heavy use; for a fully removable setup, leave coasters unattached and arrange them into crocheted recesses instead.
Round 4 :
Final blocking: pin petals into a pleasing, slightly fanned arrangement while still damp to set shape. Let dry overnight before use.
Info :
Store runner flat to keep shape. For washing, hand wash gently in lukewarm water and reshape while damp; avoid heavy agitation to preserve three-dimensional details.
This spring tulip runner brings garden charm and delicate texture to your table, piece by piece. Each petal, bud and leaf is made with care and assembled to create a lush, layered centerpiece. I hope making it gives you the same calm joy I felt stitching every petal. Display it proudly and enjoy the warmth of handmade details this season. 🌸🌼