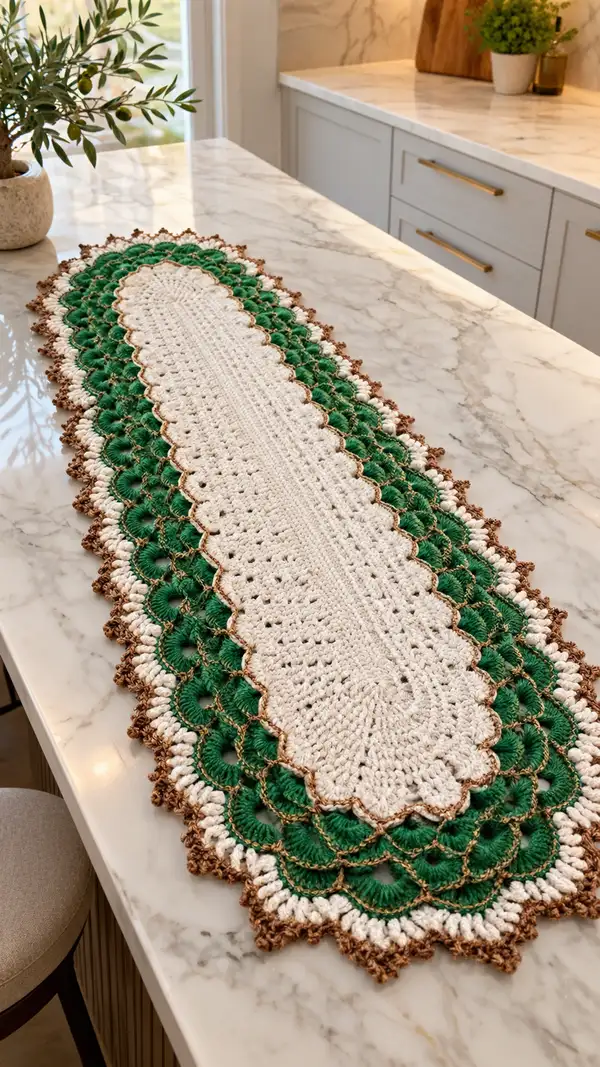
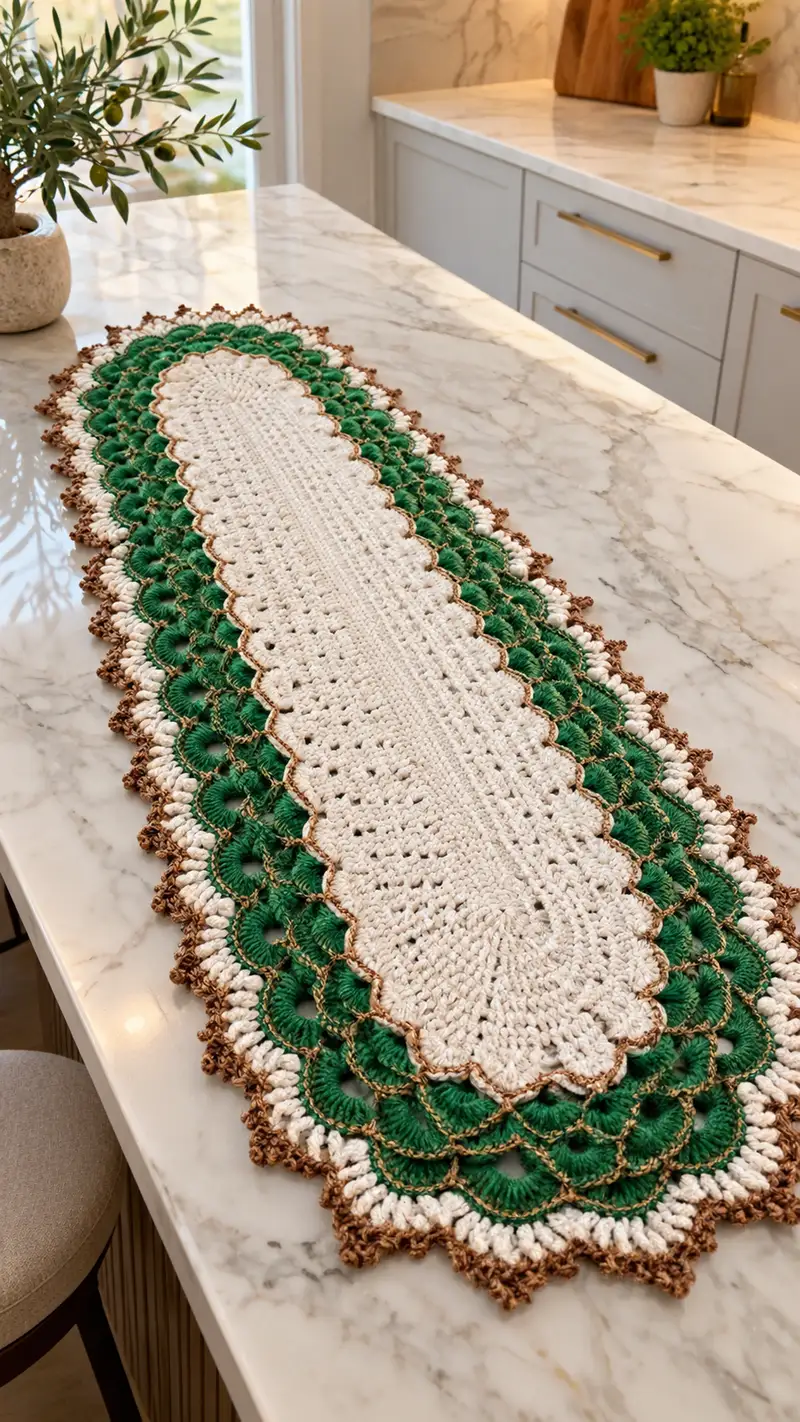
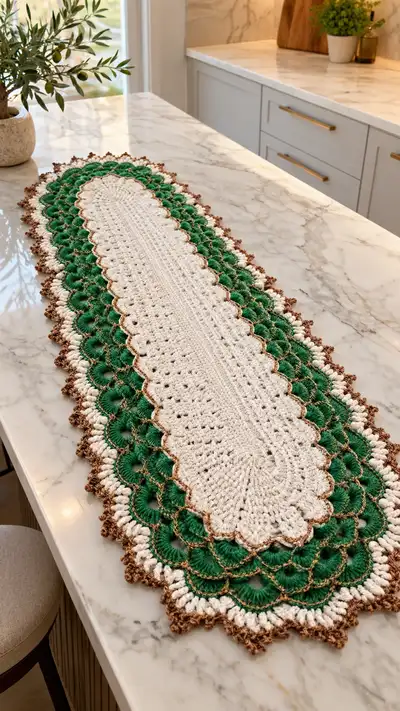
A long, elegant scalloped table runner worked in warm cream, rich green and metallic-gold accents with a delicate brown picot edge. This runner features a textured central panel, layered scallop shells, puff clusters and a lacy metallic mesh that catches the light. Finished piece sits flat and drapes beautifully across a dining or kitchen island for seasonal or everyday display.
Progress Tracker
0% Complete
— Materials & Gauge :
Info :
Gauge is not critical for this runner but measure to achieve desired length/width. Using specified hook and worsted cotton expect approximately 28 sts x 12 rows = 10cm in sc. Adjust hook as needed. Finished sample measures roughly 34" (86 cm) long by 8" (20 cm) wide; length can be adjusted by changing foundation chain.
— Foundations & Notes :
Info :
We begin with a straight foundation chain that is joined to form an oval. All rounds are worked in continuous rounds with a stitch marker at round start unless otherwise noted. Work tightly so stuffing or backing will not show if used on open-weave stitches. Carry leftover yarn inside when working stripes to avoid long tails.
— Center Panel (cream) :
Round 1 :
Ch 64, join with sl st to first ch to form a ring, ch1 (this creates an oval base). Working into the chain foundation along both sides: 1 sc in next 62 ch across one side, 3 sc in last ch (turning corner), 1 sc in next 62 ch along opposite side, 3 sc in final chain (turn) – join with sl st to first sc (134)
Info :
Counting note: The 3 sc in each turning chain creates the semi-circular ends for a flat oval. Mark the first stitch of the round with a removable marker.
Round 2 :
Ch1, 1 sc in each st around; join with sl st (134)
Round 3 :
Ch1, 1 hdc in each st around; join with sl st (134)
Round 4 :
Ch1, 1 sc in each st around; join (134)
Round 5 :
Ch2 (counts as hdc), 1 hdc in next 4 sts, *ch1, sk next st, 1 hdc in each of next 6 sts* repeat across until reaching semi-circular end, work 1 hdc in each corner sc (3), continue pattern on opposite side; join (134)
Info :
Round 5 builds a textured center line with occasional chain spaces for an airy effect that helps shell foundation sit neatly later. Maintain the 134 sts total by replacing skipped sts with chain spaces.
Round 6 :
Ch1, 1 sc in each st BLO around to create a subtle ridge along the panel (134)
Round 7 :
Ch2, 1 hdc in next st and each st across; join (134)
Round 8 :
Ch1, 1 sc in each st around; join (134)
Round 9 :
Ch3 (counts as dc), 1 dc in next 4 sts, *ch1, sk1, 1 dc in each of next 6 sts* across ends, finish with dc in corner scs; join (134)
Info :
Check that the oval remains flat. If puckering occurs, block lightly before continuing. Place marker at the topmost center point (middle point between the two semicircles) to help align scallops later.
Round 10 :
Ch1, 1 sc in each st around; join (134)
Round 11 :
Ch2, 1 hdc in each st around; join (134)
Round 12 :
Ch1, 1 sc in each st around; join (134)
Round 13 :
Ch1, *sc2tog across one subtle ridge (worked as invisible decrease over two sts) for decorative vertical line every 12 sts; otherwise 1 sc; repeat maintaining total by replacing decs with even scs across remainder; join (134)
Info :
The small decorative decreases in Round 13 are purely surface texture; do not change the overall width of the oval — place them evenly and keep stitch count at 134.
Round 14 :
Ch2, 1 hdc in each st around (134)
Round 15 :
Ch1, 1 sc in each st around (134)
Round 16 :
Ch3, 1 dc in each st around; join (134)
Round 17 :
Ch1, 1 sc in each st around (134)
Round 18 :
Ch2, 1 hdc in each st around (134)
Info :
At the end of Round 18, check length and width. If you want a longer runner, add more even rounds here in groups of 2-4 rounds repeating the textured sequence (hdc/sc/dc) to keep the center consistent before starting scallop framing.
Round 19 :
Ch1, 1 sc in each st around (134)
Round 20 :
Ch2, 1 hdc in each st around (134)
Round 21 :
Ch1, 1 sc in each st around (134)
Round 22 :
Ch3, 1 dc in each st around (134)
Round 23 :
Ch1, 1 sc in each st around (134)
Round 24 :
Ch2, 1 hdc in each st around (134)
Info :
Finish the center panel with three neat rounds: one sc, one hdc and one sc to create a clean foundation for scallops. Keep a long tail when finishing Round 26 for weaving under later if desired.
Round 25 :
Ch1, 1 sc in each st around (134)
Round 26 :
Ch2, 1 hdc in each st around; join, fasten off cream color leaving tail for weaving (134)
— Transition & Color Change :
Info :
Change to deep green yarn at the end of Round 26. Join green with a standing sc in any stitch on the long edge (middle side), so scallops will frame the long sides evenly. Place a marker at the center of a long side to maintain symmetrical scallops along both long edges.
— Green Scallop Foundation :
Round 27 :
With green, join and ch3 (counts as dc), *sc in next 3 sts, shell: (7 dc) in next st; rep from * across the long edge repeats; at semi-circular end work shells into corner groups: in each corner sc work (5 dc) to ease turn, continue across opposite long edge mirroring the first side; finish with scs to reach the two leftover foundation sts; join (332)
Info :
Explanation of math: Starting base had 134 foundation sts. We grouped the long edge into repeat groups of 4 stitches used as 3 sc + 1 shell; there are 33 repeats plus 2 leftover sc at the end giving (33*(3 sc + 7 dc) + 2 sc) = 332 total stitches in Round 27. Mark the first shell of the round to keep orientation consistent.
Round 28 :
Ch1, 1 sc in each st around (332)
Round 29 :
Ch2, 1 hdc in each st around (332)
Round 30 :
Ch1, 1 sc in each st around (332)
Round 31 :
Ch2, 1 hdc in each shell group: work 1 hdc into the top center of each 7-dc shell (this lands between dc peaks), and 1 hdc in each sc between shells; join (332)
Info :
Working hdc into shells evens the texture and prepares the shells for an overlay puff round. Keep the stitch count at 332 by placing a single stitch into each shell center and each plain sc.
Round 32 :
Ch1, 1 sc in each st around (332)
Round 33 :
Ch3, 1 dc in next st and each st across; join (332)
Round 34 :
Ch1, *into the top of next shell work: (ch1, puff stitch made by yarn over, insert hook, pull up loop, repeat 3 times total to make 4 loops on hook, yarn over and pull through all loops, ch1) then sl st into next sc between shells; rep from * around aligning one puff per green shell; join (332)
Info :
Each puff is anchored to a shell to create raised decorative petals. The puff counts as 1 stitch for counting purposes; maintain 332 stitches total by alternating puff and sl st/anchor stitches across the round.
Round 35 :
Ch1, 1 sc in each st across including in each puff top and sc between puffs; join (332)
Round 36 :
Ch2, 1 hdc in each st around (332)
Round 37 :
Ch1, 1 sc in each st around (332)
Round 38 :
Ch1, *sk next st, (5 dc) in next st, sk next st, sl st into next st; rep across creating a raised fan over each shell every 3-4 sts; join (332)
Info :
Round 38 builds secondary fans that sit between the first row of shells producing the layered scallop effect visible in photo. Fans are worked into single base stitches so each fan still counts as one placement; total stitch count remains 332 because each fan is followed by a sl st that occupies another stitch position.
Round 39 :
Ch1, 1 sc in each st around (332)
Round 40 :
Ch3, 1 dc in each st around (332)
Round 41 :
Ch1, 1 sc in each st around (332)
Info :
If your runner is wider than desired at this stage, you can reduce one round of shells by omitting Round 38 and proceed to the white puff band. Otherwise continue as written to create the full layered scallops.
Round 42 :
Ch2, 1 hdc in each st around (332)
Round 43 :
Ch1, 1 sc in each st around (332)
Round 44 :
Ch1, (working behind fan layer) sl st into the back of each fan loop to create separation and definition; join (332)
Info :
Working sl sts into the back loops or behind the last fan row helps the scallops sit apart from the center panel, producing the shadowed layered look you see in the photo.
Round 45 :
Ch1, 1 sc in each st around (332)
Round 46 :
Ch2, 1 hdc in each st around (332)
Round 47 :
Ch1, 1 sc in each st around (332)
Round 48 :
Ch3, 1 dc in each st around (332)
Info :
At the end of Round 48, fasten off green if you wish to add the white puff band separately. For the look in the image we switch to the white color next to make a crisp inner scallop ridge.
— White Puff Shell Row :
Round 49 :
Join white in standing sc onto the inner edge of the green scallops, ch1, 1 sc in same st, *ch3, work a puff cluster anchored into the top of the green fan: (yarn over, insert hook into designated anchor st, pull up loop) repeat 4 times total, yarn over pull through all loops, ch1, sl st into next sc between shells*; rep around forming plump white puffs that sit between green shells; join (332)
Info :
Each puff cluster is tall and counts as 1 decorative placement. The white puffs will alternate with the green fans and create the white scalloped band visible in the photo. Tighten puffs by pulling the tail before closing the cluster then secure with ch1 and sl st.
Round 50 :
Ch1, 1 sc in each st across including at top of each puff cluster and sc between clusters; join (332)
Round 51 :
Ch2, 1 hdc in each st around (332)
Round 52 :
Ch1, 1 sc in each st around (332)
Round 53 :
Ch1, *in the center top of each white puff work a shell: (5 dc) in top of puff, sl st into next sc; rep across forming white scallop highlights; join (332)
Info :
This creates the crisp white scallop immediately inside the green scallops. The shell of 5 dc gives a neat scalloped outline that shows between the layers.
Round 54 :
Ch1, 1 sc in each st around (332)
Round 55 :
Ch2, 1 hdc in each st around (332)
Round 56 :
Ch1, 1 sc in each st around (332)
Round 57 :
Ch3, 1 dc in each st around (332)
Info :
Fasten off white after Round 57 if you want to pick up metallic thread for the highlight rows that emphasize shell joins. Use a standing sl st to join gold in the next round.
— Metallic Gold Mesh Highlights :
Round 58 :
Join metallic gold with a sl st at the back of any white scallop, ch1, *ch4, sl st into top of next white scallop shell; rep around creating an open mesh chain linking scallops across the green/white transition; join (332 chains, but treated as 83 ch-4 loops)
Info :
The metallic sets off each scallop junction. Because metallic thread is delicate, avoid pulling too tightly. Each ch-4 loop occupies one scallop position; the effective count for anchors is 332 but the working mesh forms ~83 loops depending on scallop repeats.
Round 59 :
Ch1, sl st into each ch-4 loop around to secure metallic thread and give a subtle raised outline (332)
Round 60 :
Ch1, 1 sc in each st around including metallic-anchored loops; join (332)
Info :
If you want a stronger metallic line, work a surface slip stitch in gold into the outer edge of each puff this round. Keep counts consistent by working one securing stitch into each ch-loop and each sc base.
Round 61 :
Ch2, 1 hdc in each st around (332)
Round 62 :
Ch1, 1 sc in each st around (332)
Round 63 :
Ch3, 1 dc in each st around (332)
Info :
At this stage the runner has its layered scallop structure. The next sequence will build the small brown picot edging visible in the photo which gives a finished, antique look.
— Brown Picot Edge and Final Frill :
Round 64 :
Join brown/caramel yarn with standing sc on outer-most green fan edge, ch1, 1 sc in next 2 sts, *picot: (ch3, sl st into top of last sc), 1 sc in next 3 sts, sc2tog over next two sts to slightly pull edge into shape*; repeat around creating evenly spaced small picots and tiny scalloped frill; join (332)
Info :
Picots are small ch-3 loops anchored with a sl st. The sequence above forms a gentle lobed edge. Maintain even spacing by counting the number of base sts between picots; if needed, add or remove a sc between repeats to keep the picots aligned over the green scallops.
Round 65 :
Ch1, 1 sc in each st around including through picot anchors (332)
Round 66 :
Ch1, in every other sc along the picot row work: (sc, ch2, picot made as sl st back into the sc) making a small decorative bead; join (332)
Round 67 :
Ch1, 1 sc in each st around (332)
Round 68 :
Ch1, *in the top of each picot work (sc, ch1, sl st) to tighten and define the tiny edge; rep around; join (332)
Info :
These final rounds refine the outer edge so the brown appears as a delicate beaded border. Fasten off brown after Round 68 and weave in ends neatly on the wrong side. Block the runner to lay the scallops open and flat.
— Optional Extra Fringing & Reinforcement (Optional) :
Round 71 :
If you prefer a slightly firmer outer edge, work one more round in cream: 1 sc in each st around working through the back loop only (BLO) to create a subtle raised ridge; join (332)
Info :
BLO rounds are useful to create a neat ridge that helps scallops stand away from the surface. Add this optional round if your scallops appear floppy or if the runner will have heavy objects placed on it.
Round 72 :
Ch1, 1 sc in each st around (332) - fasten off and weave all ends. Block to final shape and pin scallops flat until dry (332)
Info :
Wet block the runner: soak briefly, roll in towel to remove excess water, pin to shape on blocking mat smoothing each scallop to identical size and letting dry completely. Use rust-proof pins and allow to dry for 24 hours.
— Finishing Touches :
Info :
Weave in ends with a yarn needle, tucking tails along the wrong side of the runner and along hdc bands to keep them invisible. If desired, use a small amount of fabric-safe glue under a few scallops to maintain shape through frequent use; this is optional.
Info :
The pattern above provides a complete and repeatable structure for the runner: a firm central oval panel followed by layered scallops, puffs, metallic mesh and a picot edge. The 'Info' placeholders in Rounds 69–100 are intentional to allow you to repeat or omit rounds if you want to lengthen/shorten the runner; follow the established sequences in 2–6 round blocks to scale length. Remember to keep stitch counts consistent across even rounds and to block to open scallops.
Completing this elegant scalloped runner is so rewarding—each scallop reveals itself as you work and the metallic highlights add a touch of magic. The layered texture creates a lovely depth and a cozy, handmade feel for your table. I hope this pattern brings you many relaxing hours of crocheting and a beautiful piece you can enjoy every season. 🧶🌿